Autobahn (North) — Race Line
Estimated from data not in trackdays.ai. If you have data you would like to contribute, please send it to upload@trackdays.ai to help improve our estimates. Turn numbers are provisional: our own, in lap order, 8 bends against the venue's 9 turns. Our T1 to T7 appear to match the venue's; our T8 is probably its T8–T9, the Parabolica-style final turn.
Heads up: This is an estimate of a typical quick HPDE line, not any one car's lap. Braking points are a starting point, not a target: start a little earlier and work later in small steps. The line goes straight from throttle to brake; amber only marks where you really lift or hold part throttle. Turn numbers are provisional. The LiDAR was flown in 2014, before the North-course expansion that began in June 2026, so this is the pre-expansion layout.
- Throttle
- Coast / partial
- Braking
- Apex
- T4Off-camber corner
Arrows show the direction of the lap. The grey basemap is USGS LiDAR: dark = asphalt, light = grass. Tap any map for the full-size image.
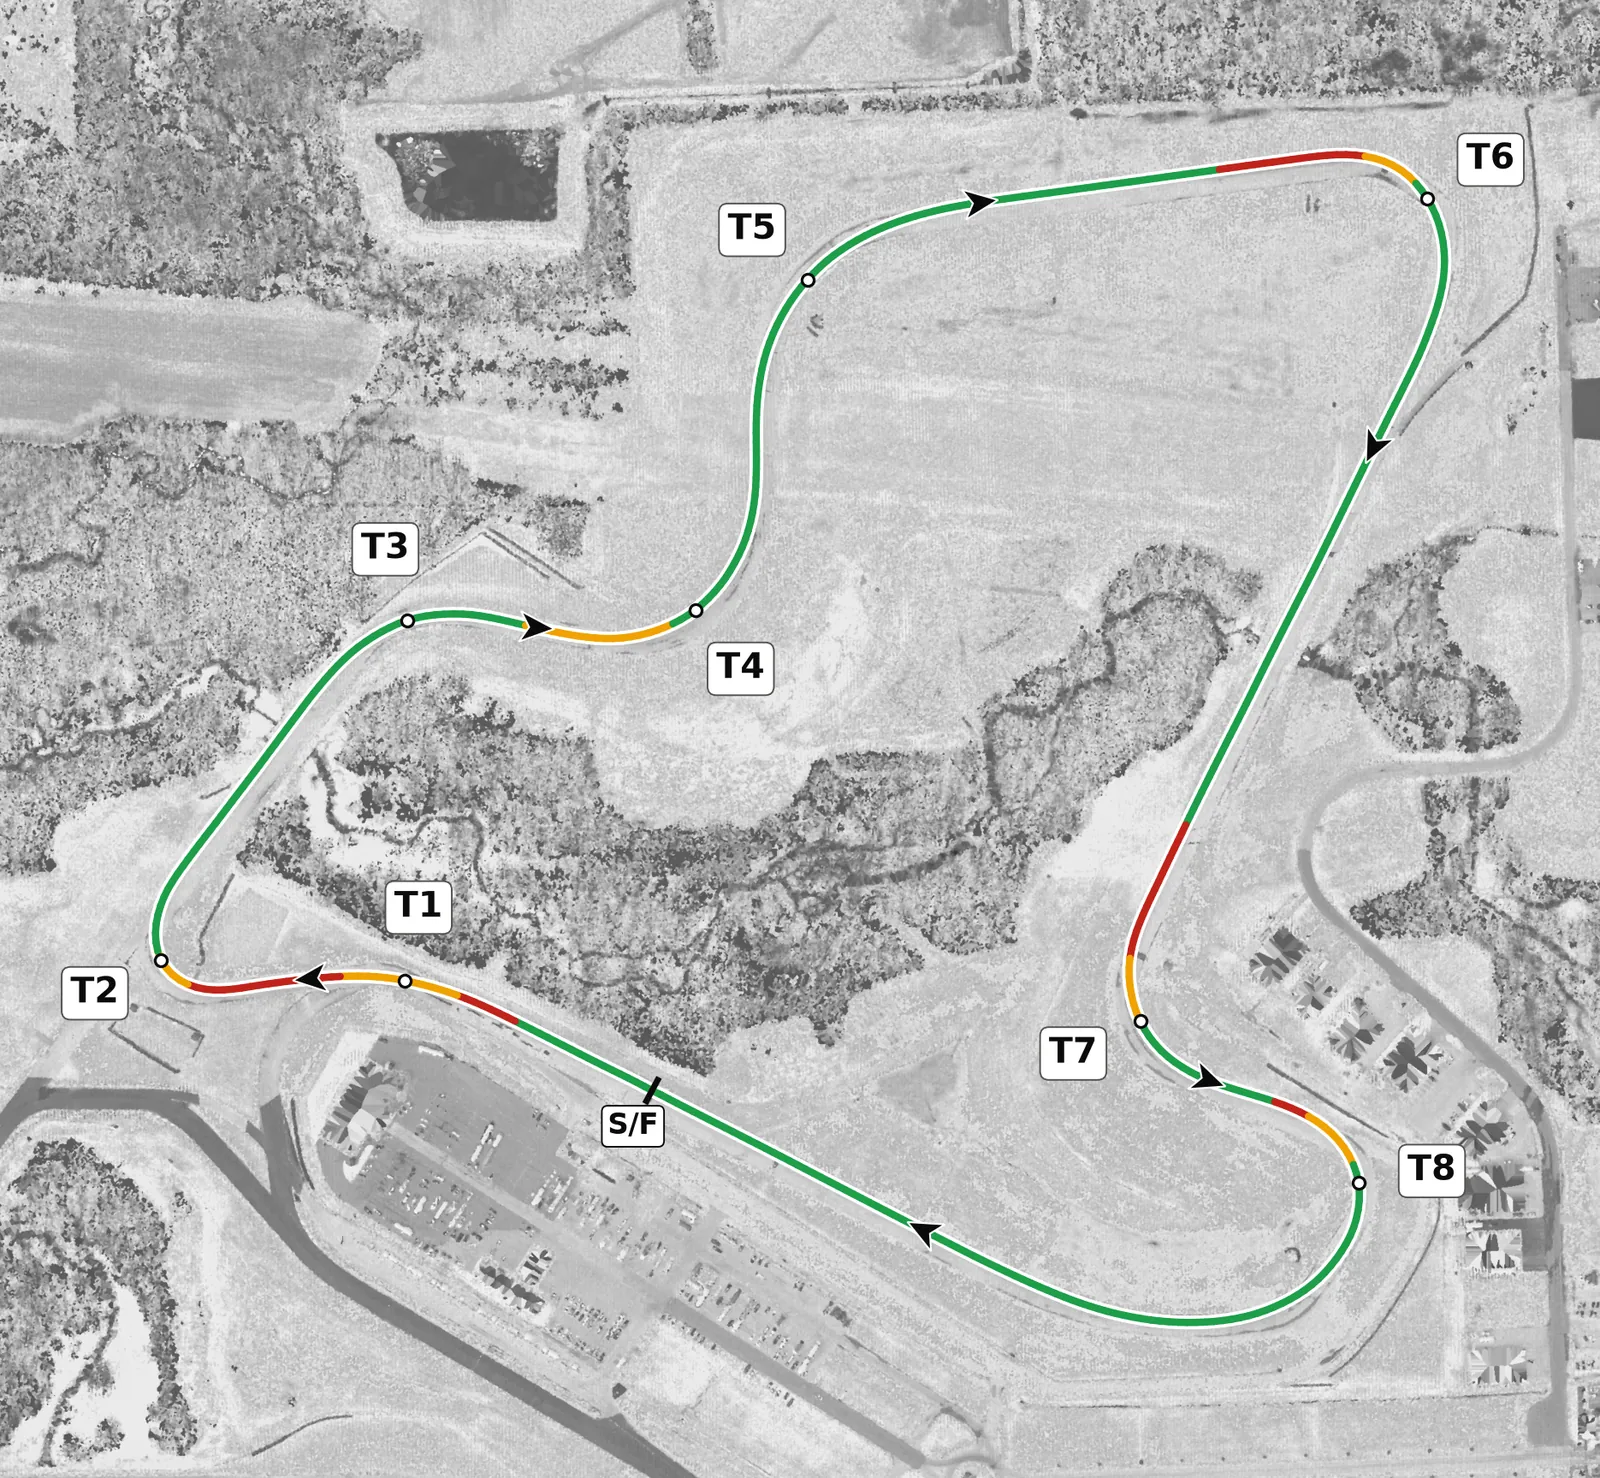
The North circuit is the faster, flowing half of Autobahn and holds most of its elevation, about 5 m of relief, though nothing is steep. After a kink on the front straight and the slow right at T2, the esses climb right–left–right through T3 to T5, T6 is a patient right at the high point of the lap, and a long run down the east side leads to the T7 left and the long final right onto the front straight. Most corners are lightly banked toward the inside and T2 is not, so the time is in smooth entries and early throttle on the exits.
Sectors
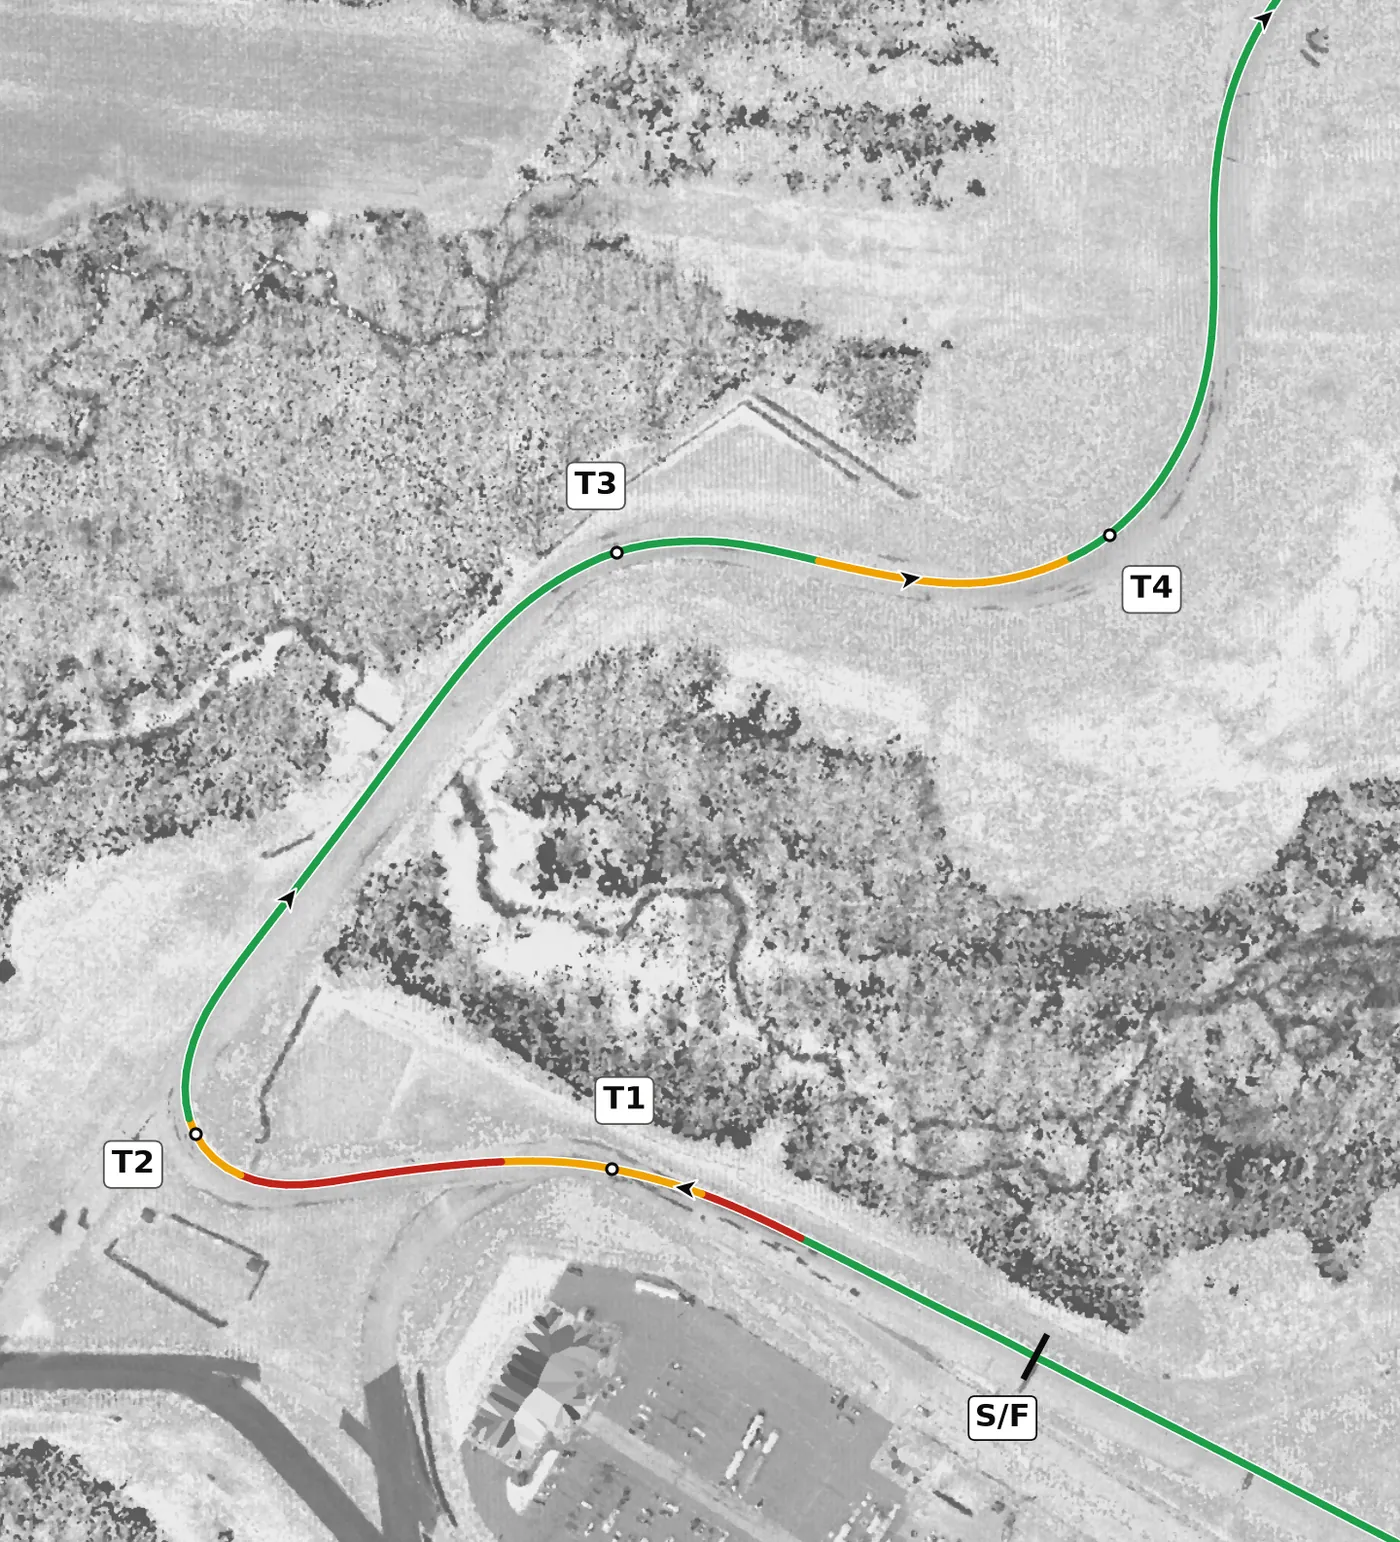
From the start line you run through a gentle left kink at T1 into the braking zone for T2, a slow right that is flat across and gives you no help from the camber. T3 and T4 are the first two of the right–left–right esses, climbing out of the lowest point on the lap; there are several ways into T2, and the right one is whichever gets you cleanly into the esses.
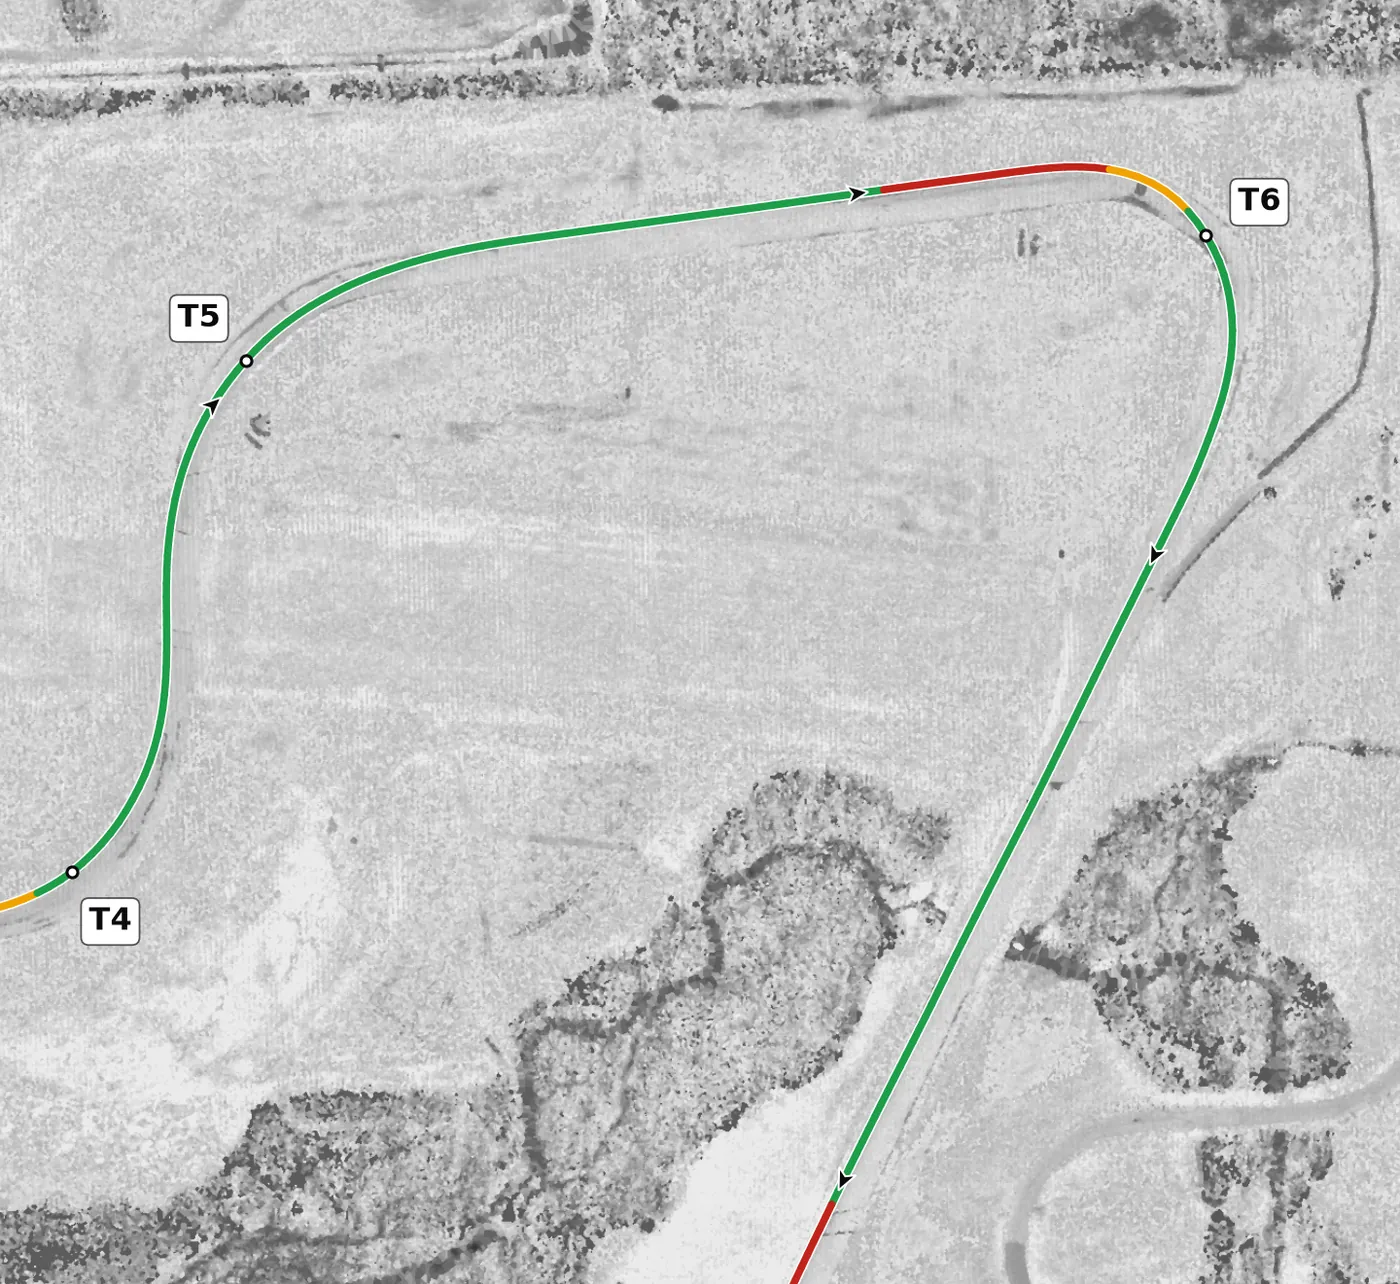
T5 finishes the esses with a fast, barely banked right, and the road keeps climbing to T6, a long right at the top of the property that rewards a very late apex. Get T6 right and you carry the speed down the long run along the east side.
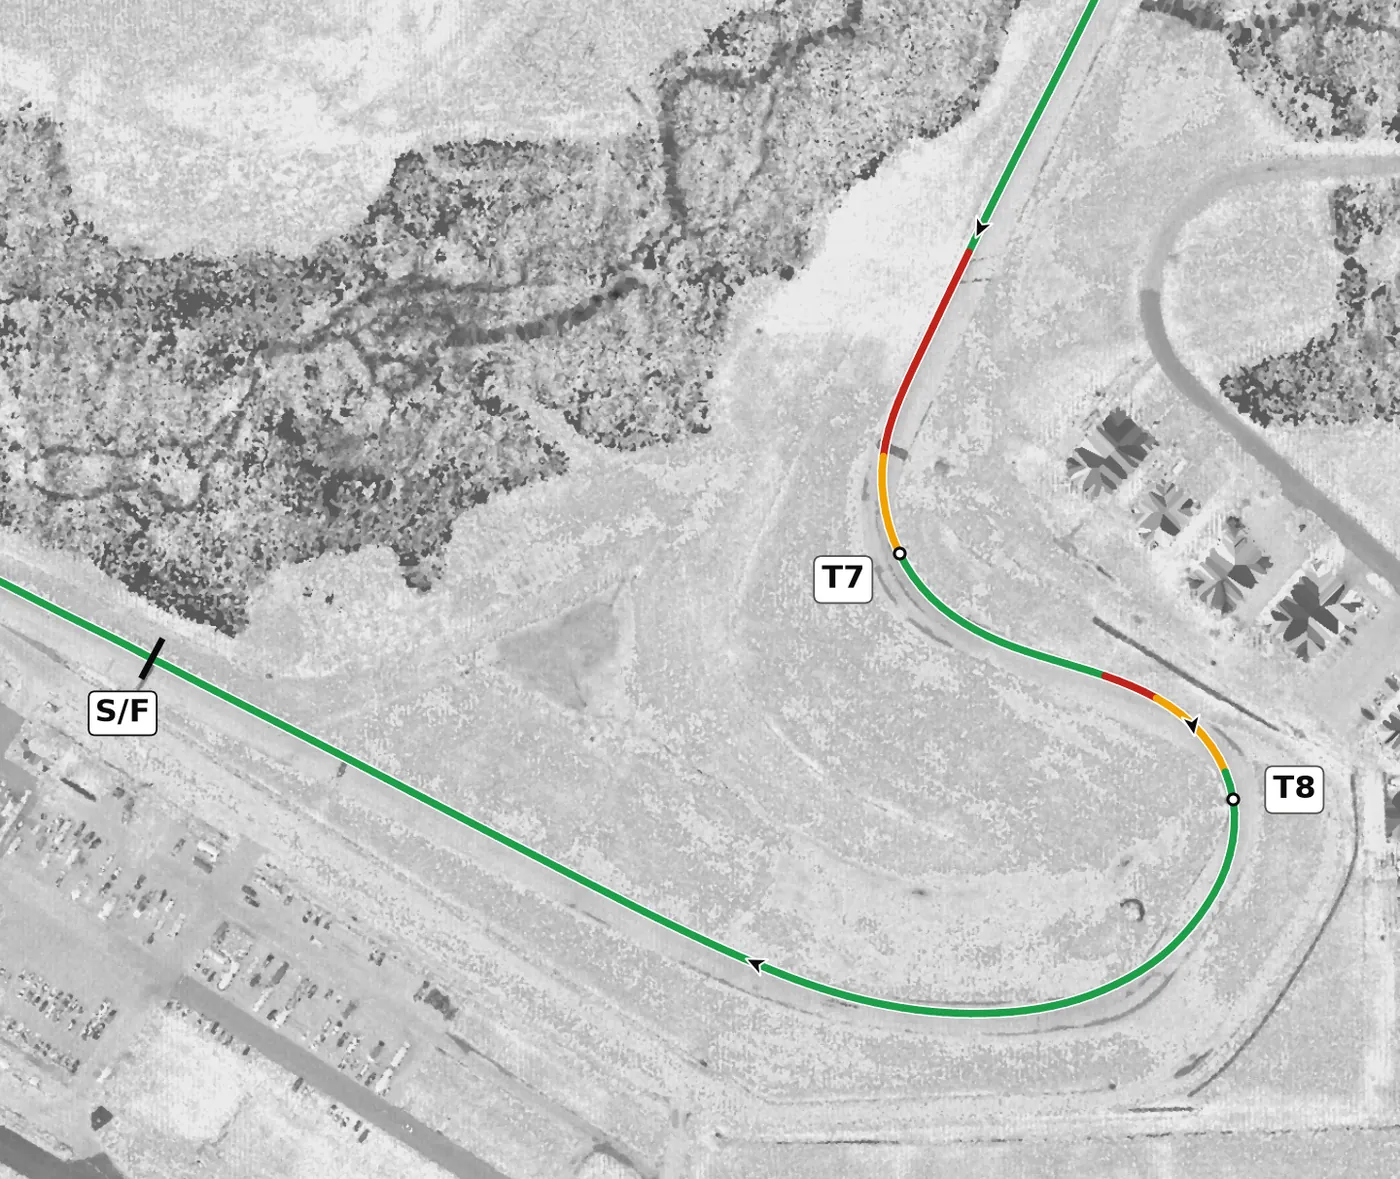
The east-side straight ends in the T7 left, and you need to resist letting the car run out to the right on its exit, because the long final right, T8, wants you over on the left. Drive T8 as one wide, sweeping arc and build the throttle early onto the front straight.
Corners
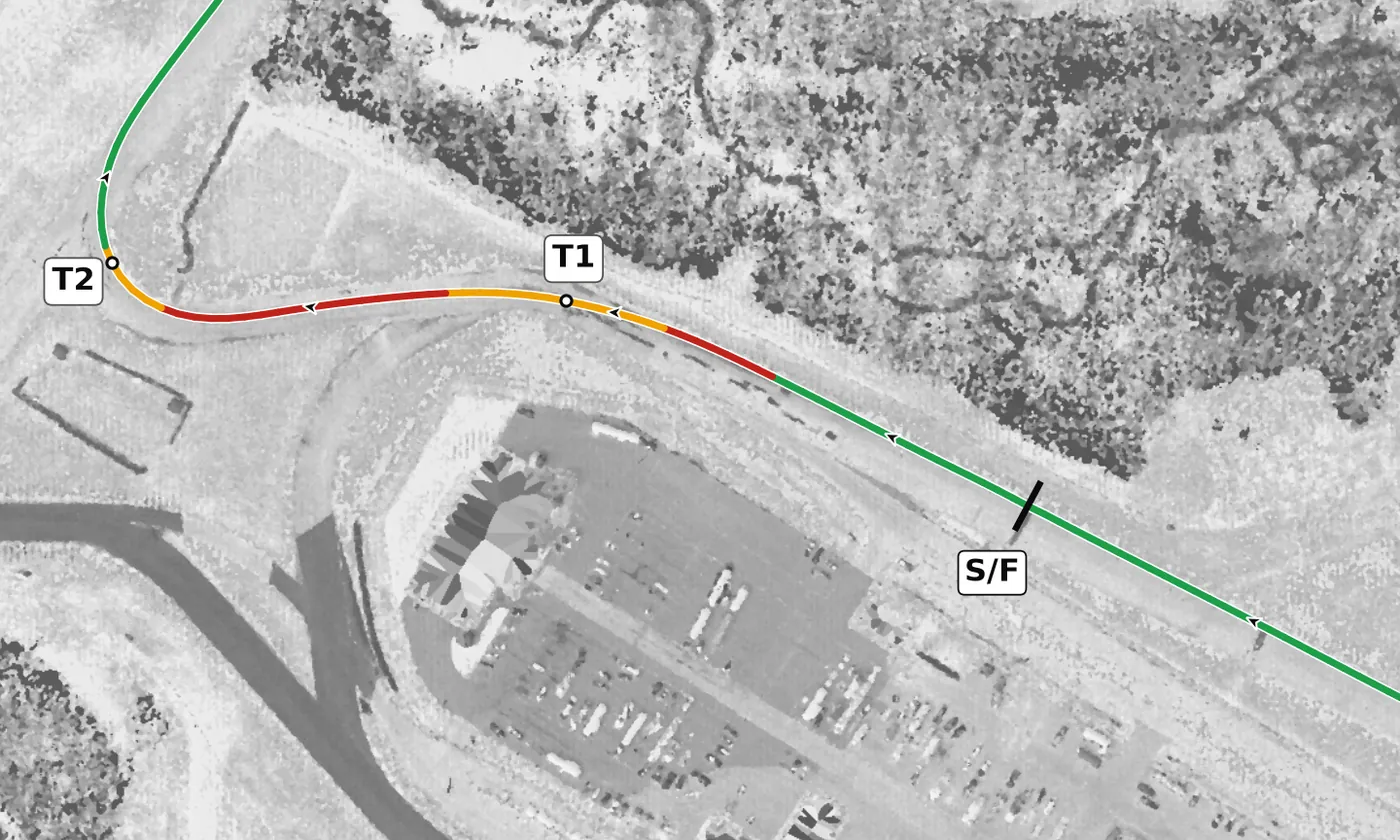
T1 is a gentle left kink on the front straight, lightly banked, taken flat, and the braking for T2 starts as you leave it. Keep it to one small steering input and finish it toward the left, the outside for the braking zone into the right at T2. The mistake to avoid is braking in the kink with the wheel turned; get the car straight first.
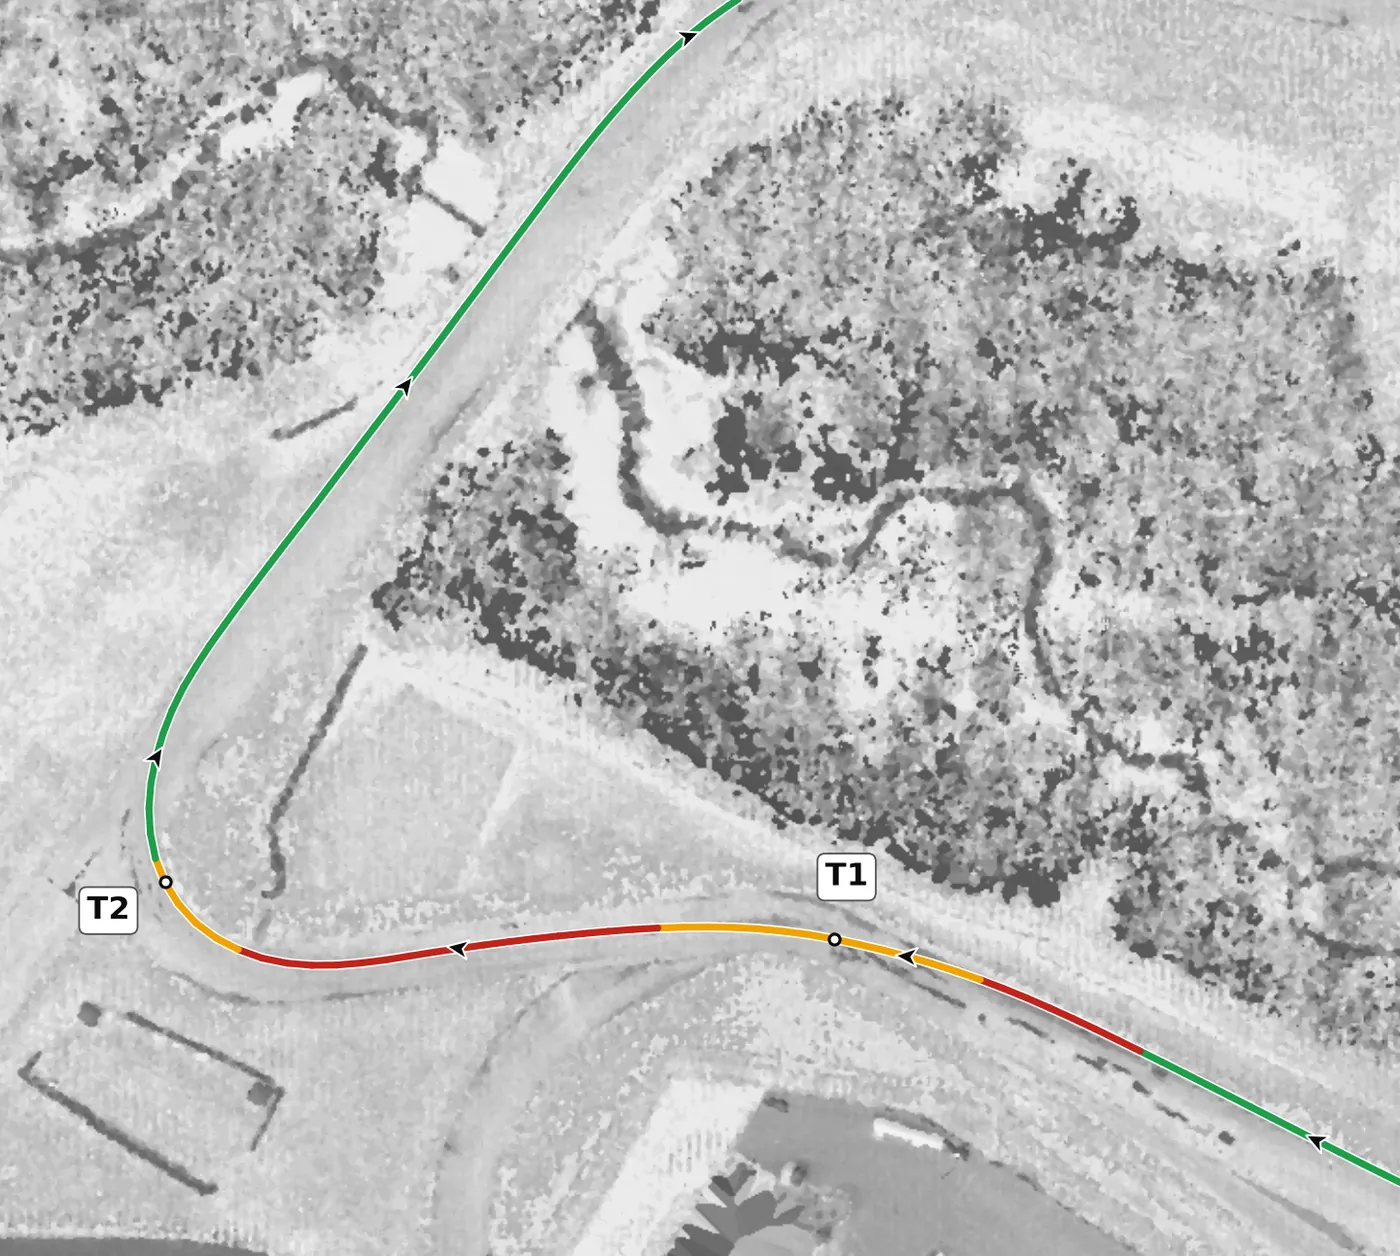
T2 is a slow right after a heavy stop, and it is the one North corner the surface doesn't help: it is flat across at the apex and drops more than a metre on the exit. Brake in a straight line from the left side, take a late apex and let the car run out to the left down the slope, which also sets you up for the right at T3. The mistake to avoid is trail-braking deep onto this flat apex, where the car has less grip than in the banked corners around it.
From the survey: Flat across at the apex (−0.1%): the one North corner without banking. Drops 1.3 m on the exit.
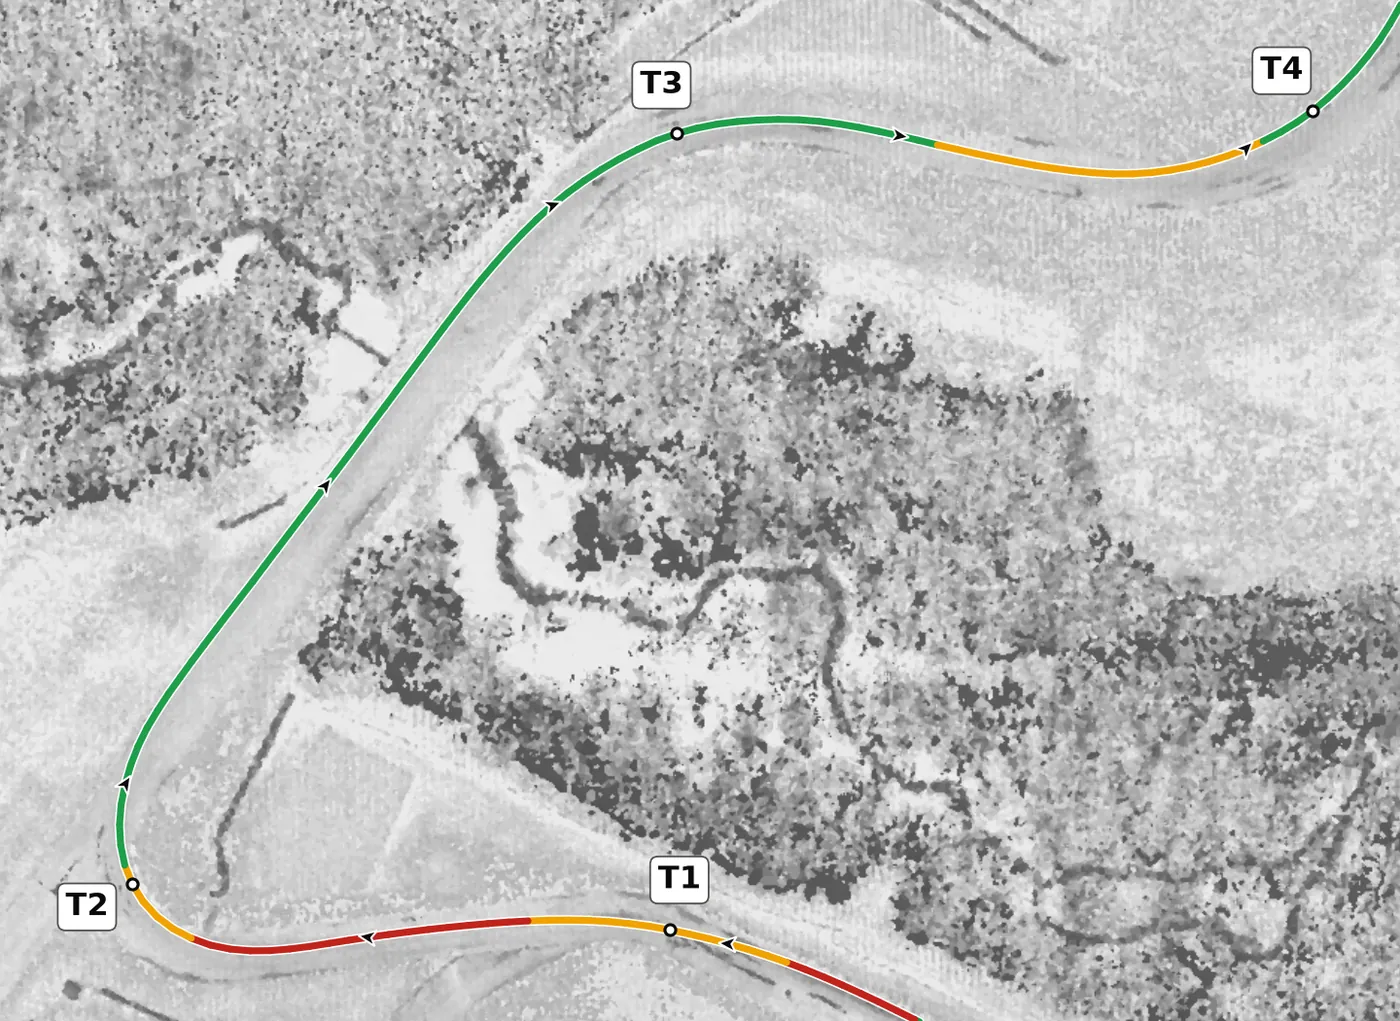
T3, the first of the esses, is a well-banked right at the lowest point on the lap, with a slight dip on the way in. Turn in from the left side, apex a little late and keep the exit tight rather than running out to the left edge, because the T4 left comes almost at once and climbs. The mistake to avoid is a fast entry here that leaves you wide and late for T4.
From the survey: Banked +2.6% at the apex; the lowest point on the lap (181.1 m) is here.
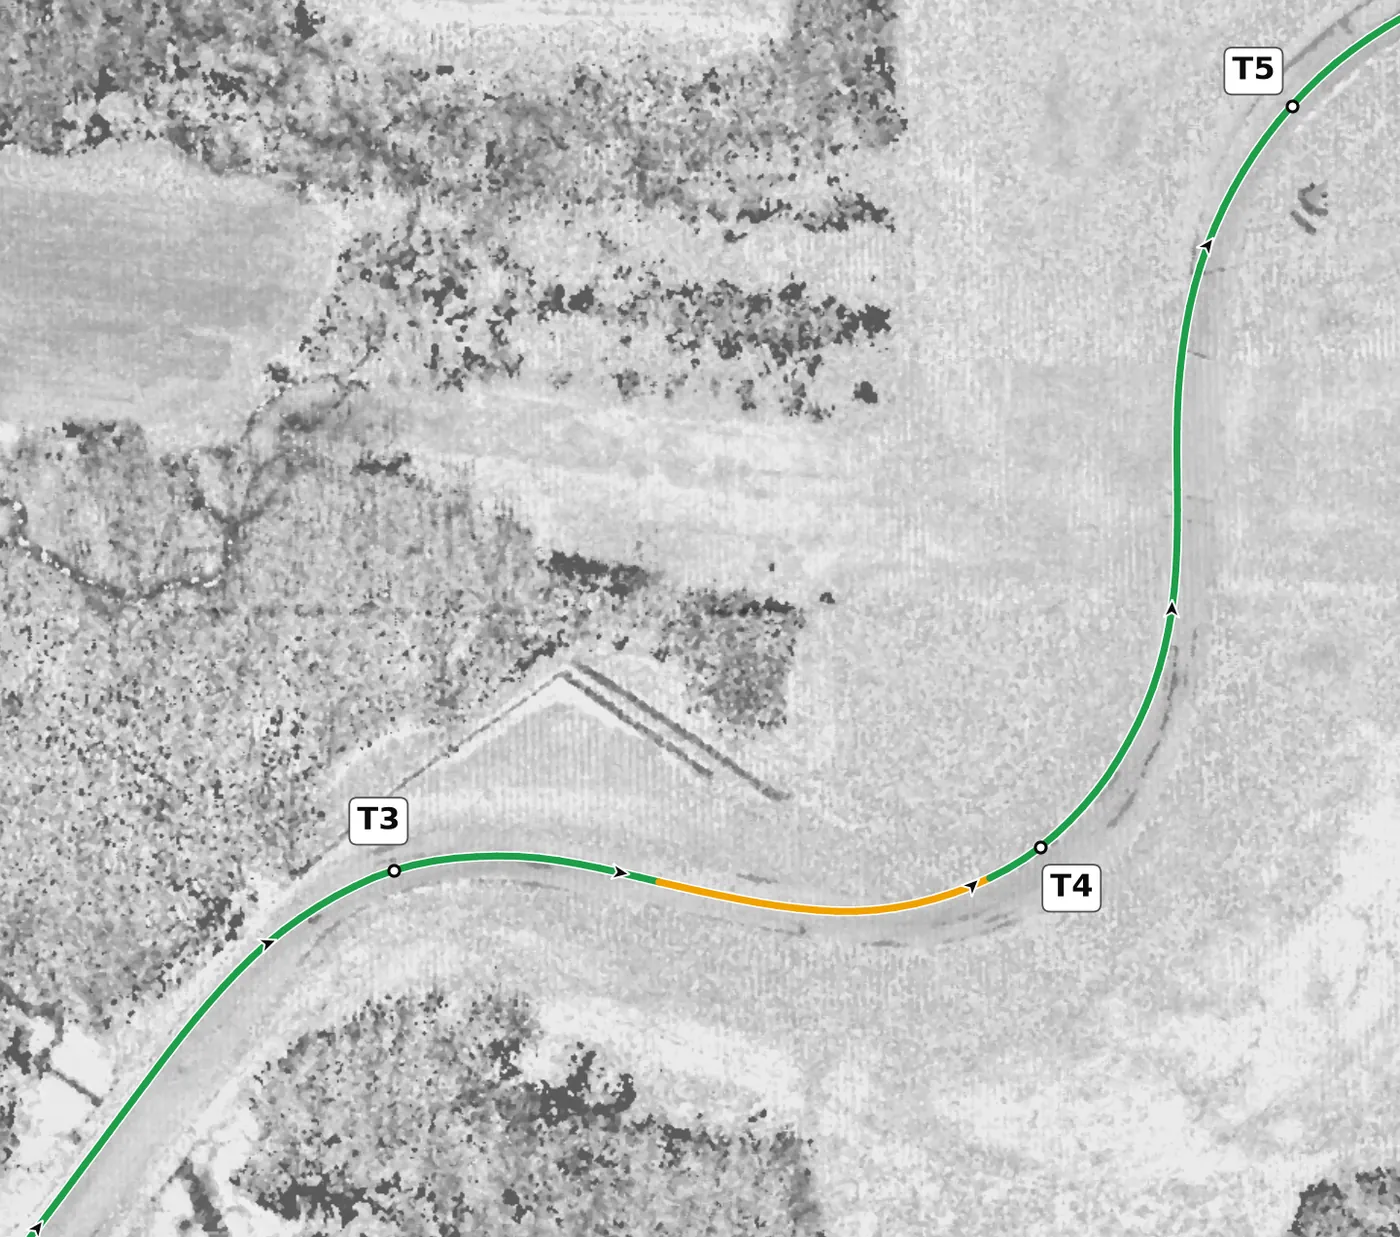
A left that climbs about a metre to the apex and another metre after it, and is only lightly banked. The hill helps you slow, so it needs less brake than it looks: turn in from the right side for a late apex and keep the car near the middle on exit, because T5 bends right. The mistake to avoid is turning in early and running wide while the car is still climbing.
From the survey: Climbs about 1 m to the apex and another metre after it.
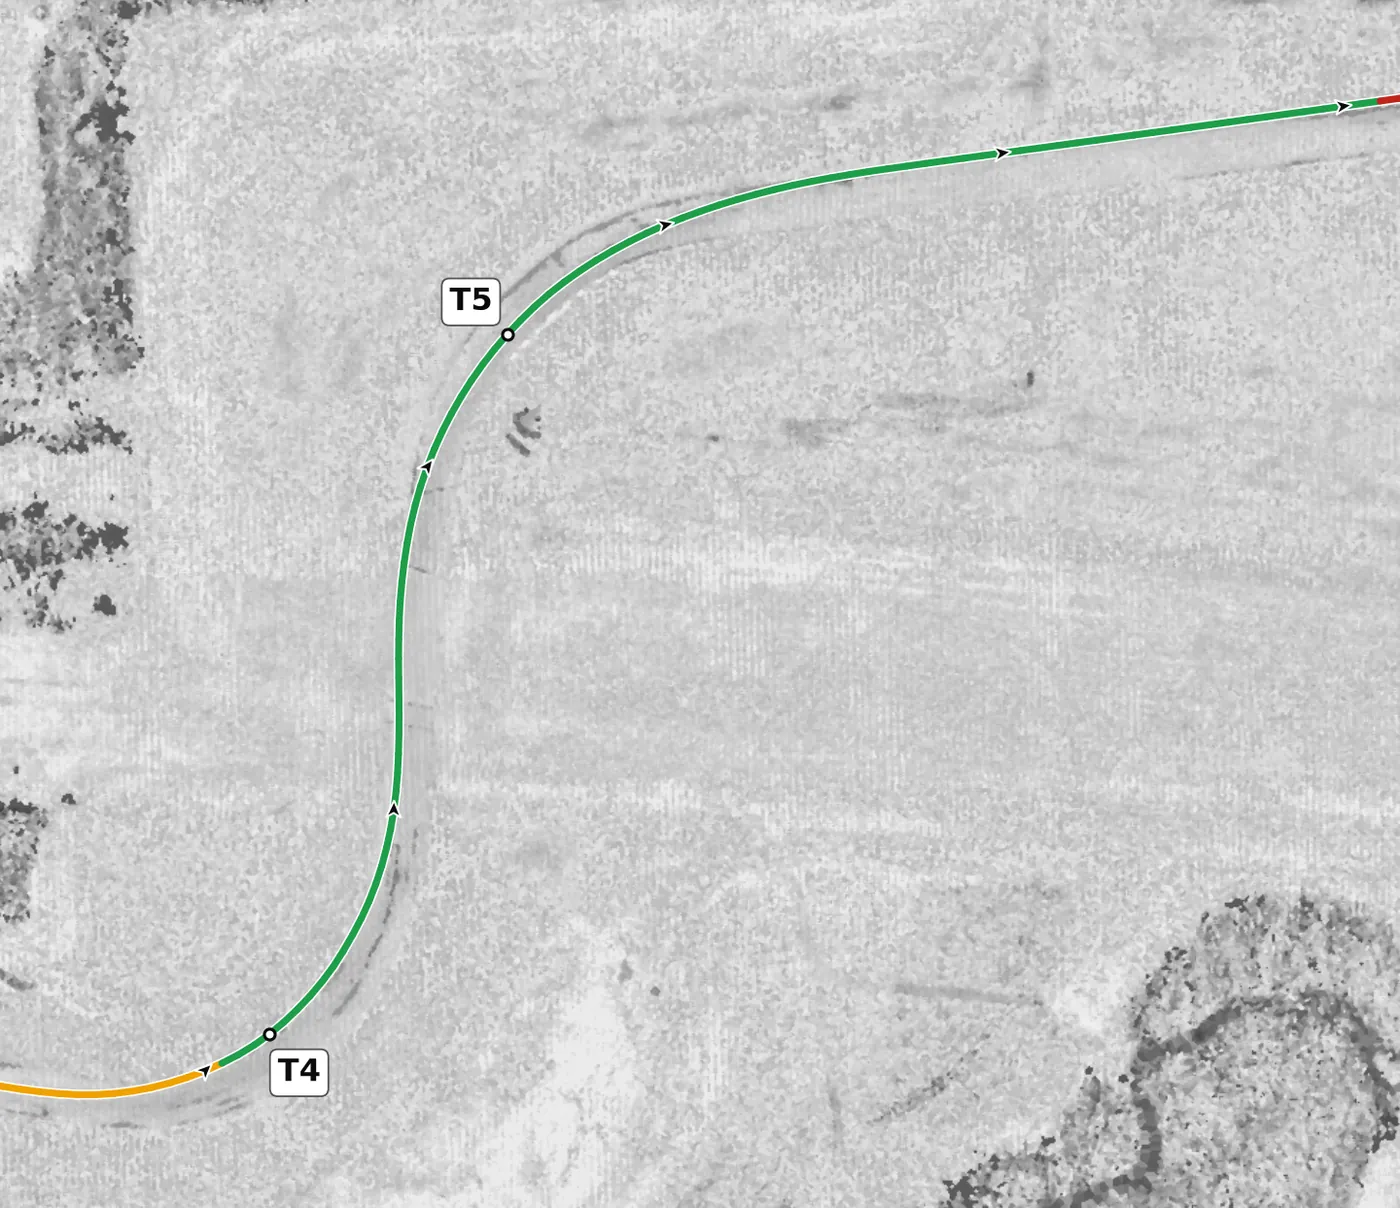
A fast right that keeps climbing and is barely banked, so the surface gives you almost nothing here. It can be taken on the throttle, lifting only if your car needs it; take a smooth, late apex and let the car drift out to the left onto the climb to T6. The mistake to avoid is a sharp steering input on this unsupportive surface, which can unsettle the car at speed.
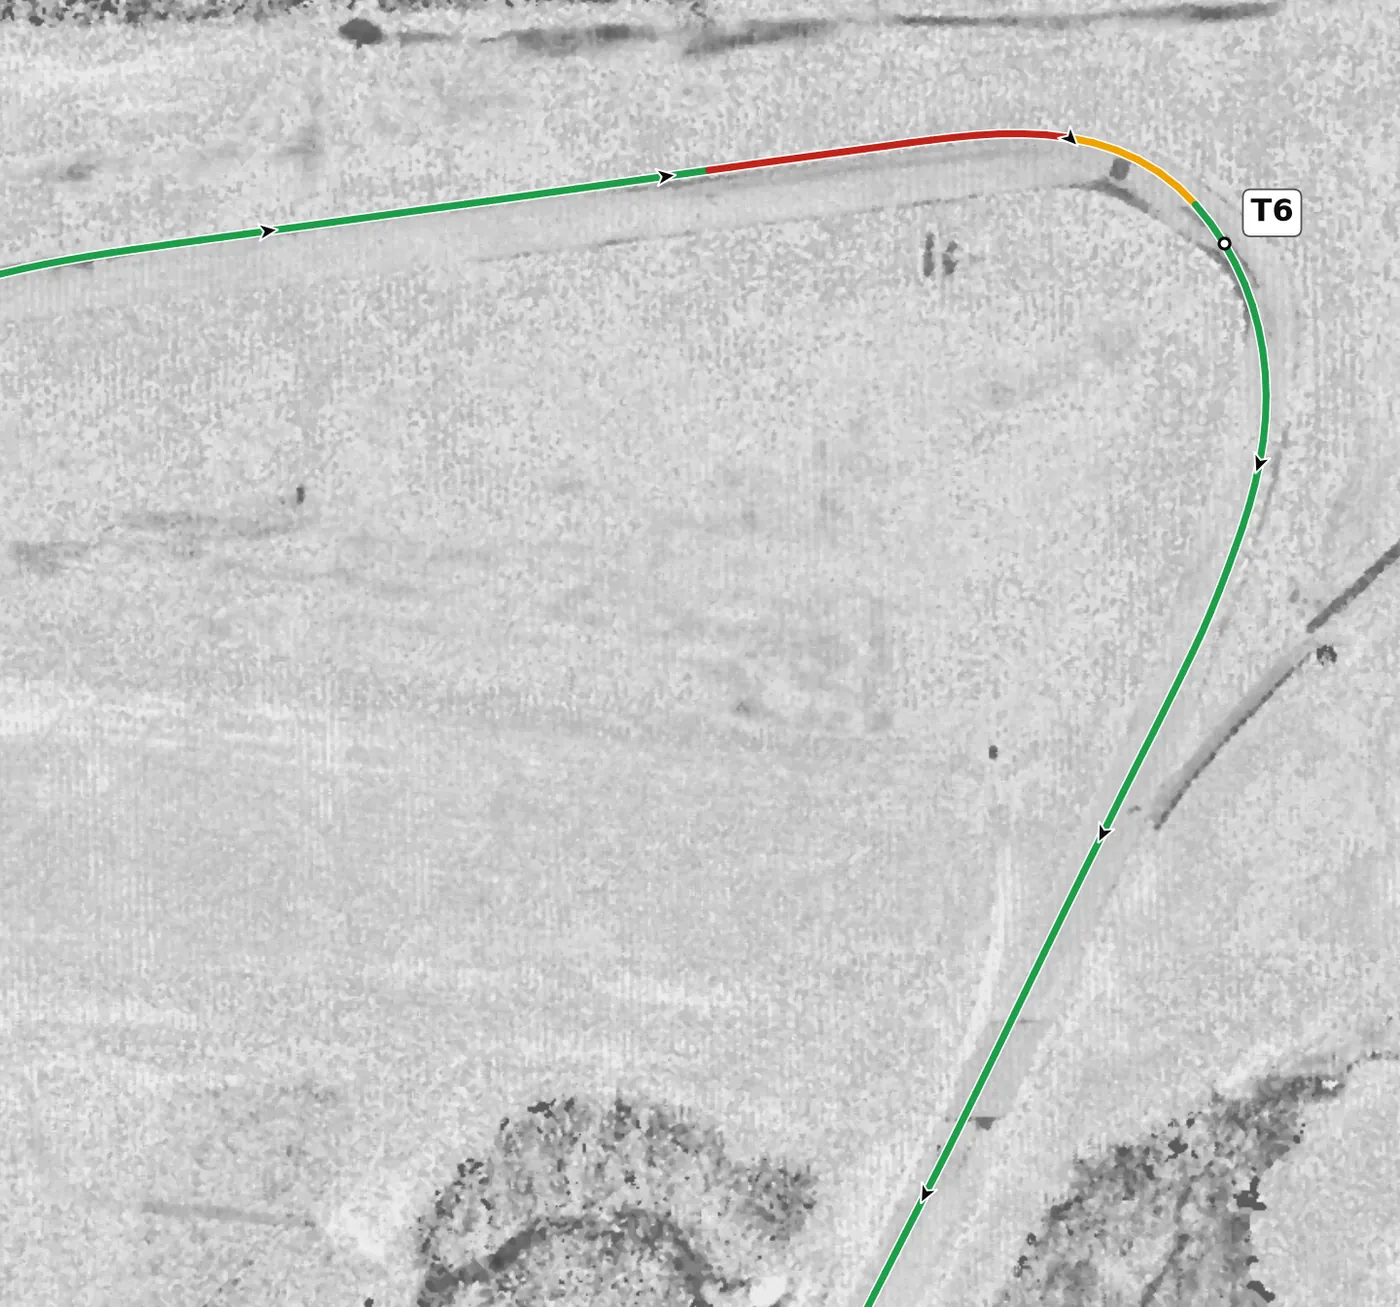
T6 is a long right at the highest point on the lap, and the guides agree it wants an ultra-late apex to give you a good run down the long straight that follows. Brake in a straight line from the left side, hold the car wide until you can see the exit, then turn in, apex late and drive out to the left. The mistake to avoid is turning in early, which leaves you lifting on the exit and slow all the way down the east side.
From the survey: The highest point on the lap (186.5 m) is in this corner.
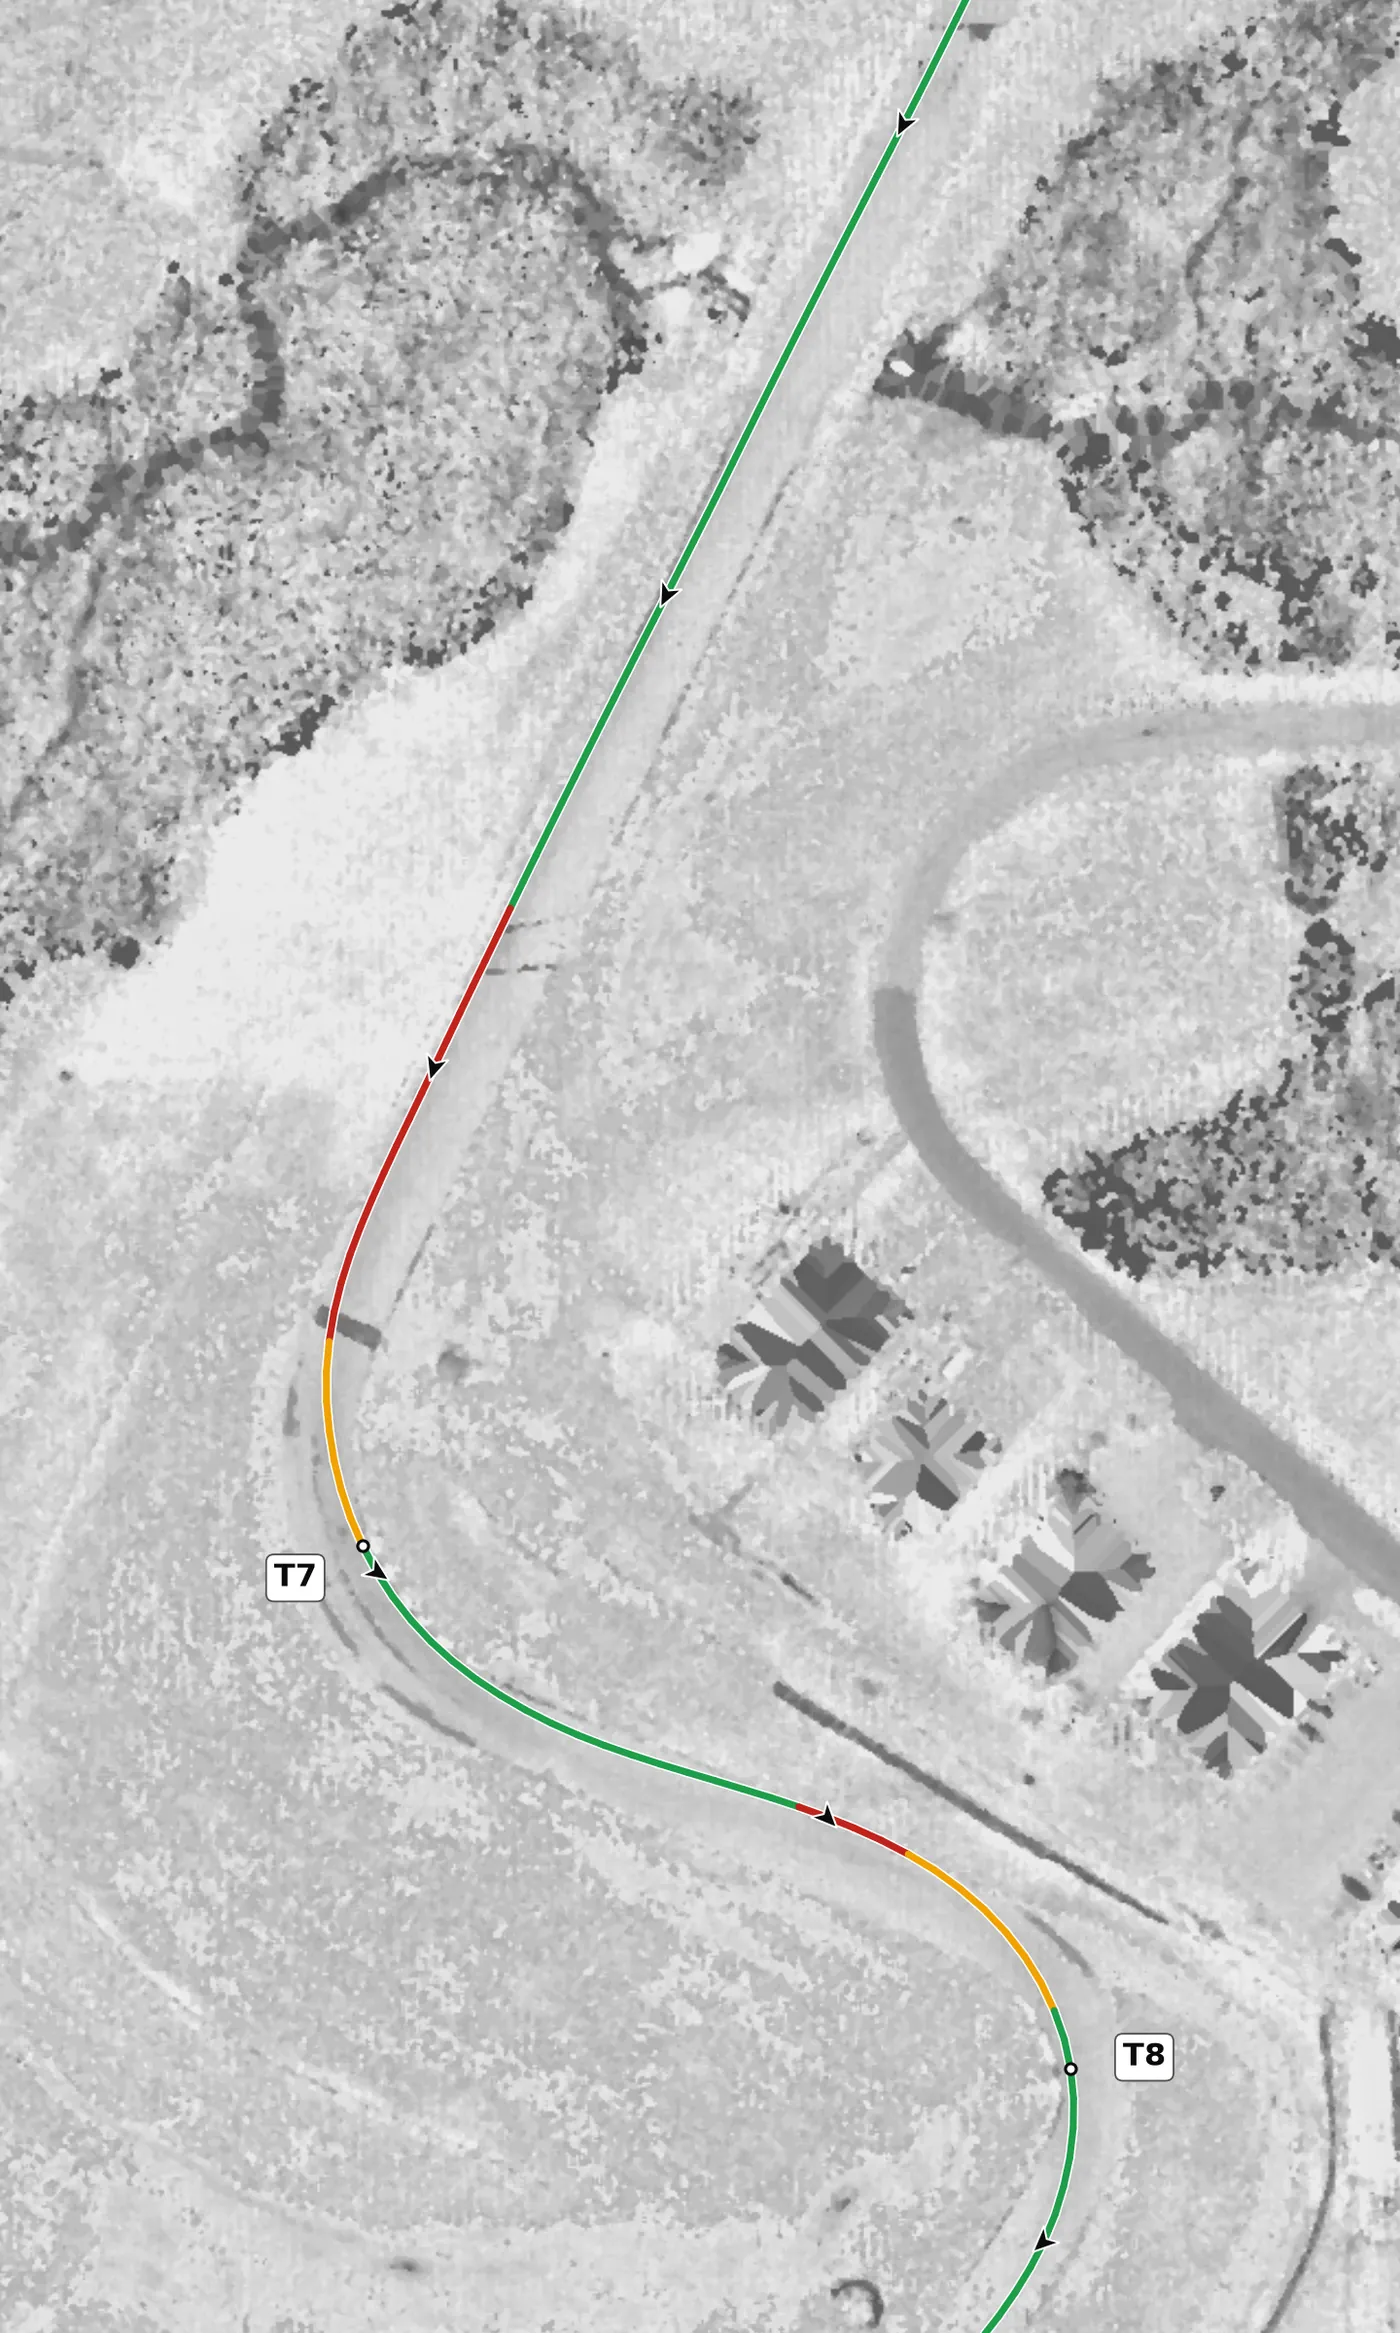
A left at the end of the long run down the east side, a clear braking zone into a lightly banked corner. Brake in a straight line from the right side and turn in for a late apex, but resist letting the car run out to the right on the exit, because the long final right needs you over on the left. The mistake to avoid is running out to the right edge, which leaves you on the wrong side for the last corner.
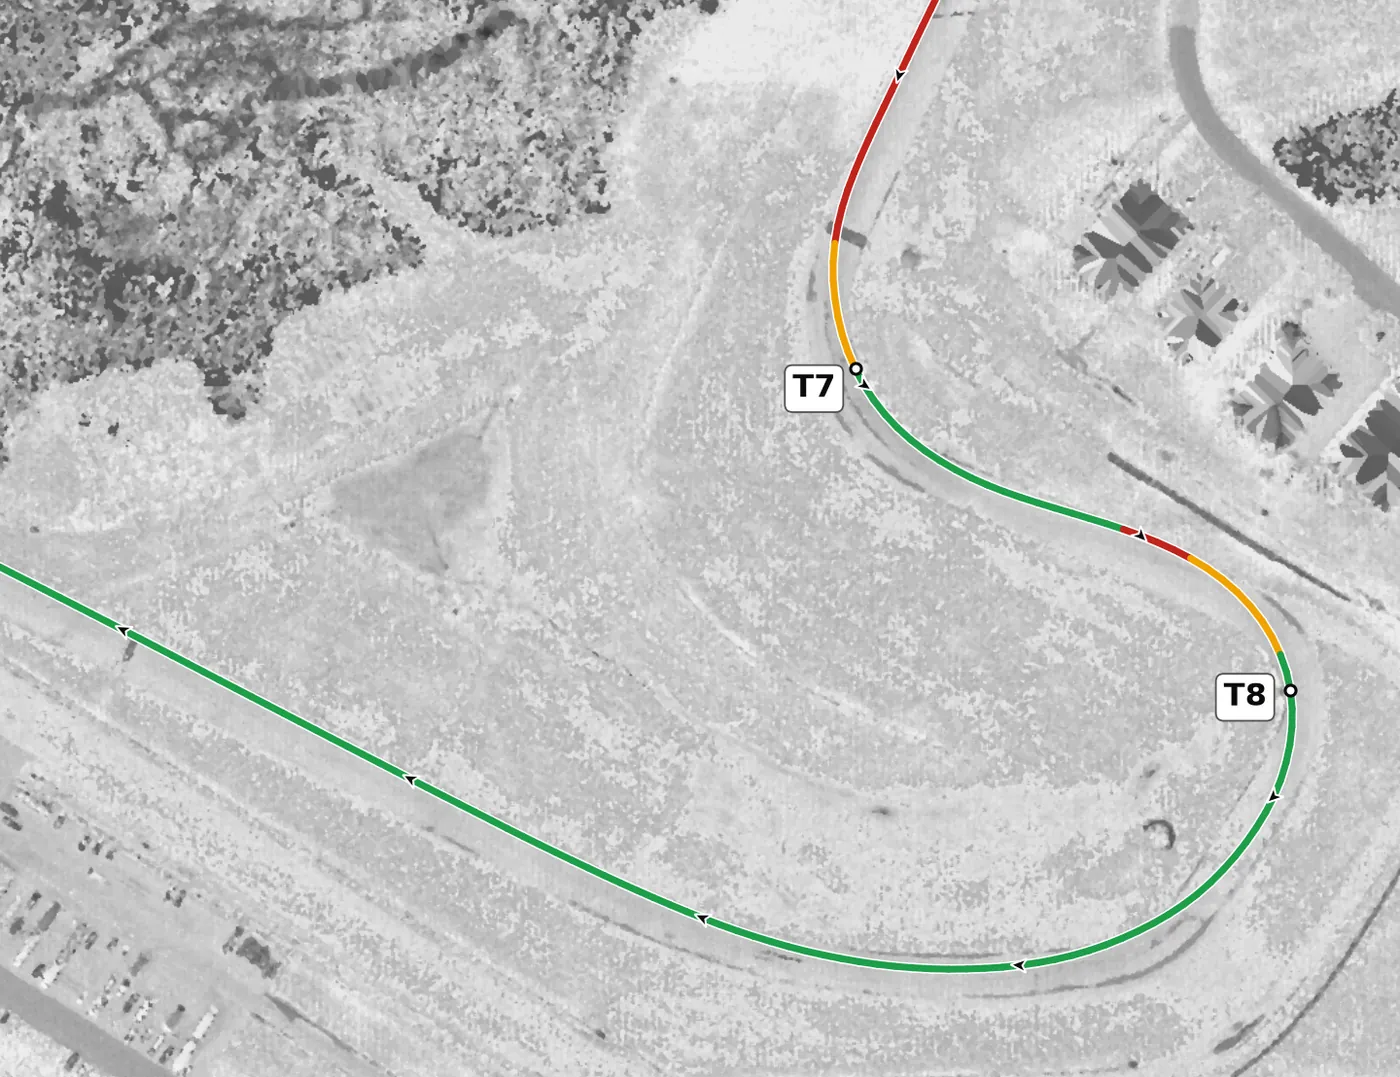
The last corner is a long, near-180° right that the guides describe as two turns taken as one sweeping arc onto the front straight. Brake in a straight line from the left side, turn in and hold one steady arc to a late apex, then build the throttle as early as you can, because the corner is banked and leads onto the long front straight. The mistake to avoid is a tight, early apex that forces you to lift on the exit with the straight ahead.
From the survey: Banked +2.0% at the apex; drops 1.3 m on the exit.
Version history
- v1.2 · 2026-10-01 — T3 and T5 are now drawn as throttle where the car is still gaining speed, instead of as a lift.
- v1.1 · 2026-10-01 — The line now goes straight from throttle to brake, with no coasting in between: the amber run-up to the brakes is gone at T2, T6, T7 and T8. Braking points are unchanged in this version. Guide text for T1 and T5 now matches the line. Version history and feedback contributors added.
- v1.0 · 2026-10-01 — First version.
Feedback contributors
Drivers and instructors whose feedback has improved this line. Thank you.
- Mike M — no coasting between throttle and brake (v1.1)
- Brian L — corners where the car gains speed are throttle, not a lift (v1.2)