Barber — Race Line
Bill's own lap: '23 BMW M440i, 1:45.99, May 31 2026, 25 Hz GPS (about a metre). Turn numbers are JTI's; Chin's numbering differs around Charlotte's Web.
- Throttle
- Coast / partial
- Braking
- Apex
- T4Off-camber corner
Arrows show the direction of the lap. The grey basemap is USGS LiDAR: dark = asphalt, light = grass. Tap any map for the full-size image.
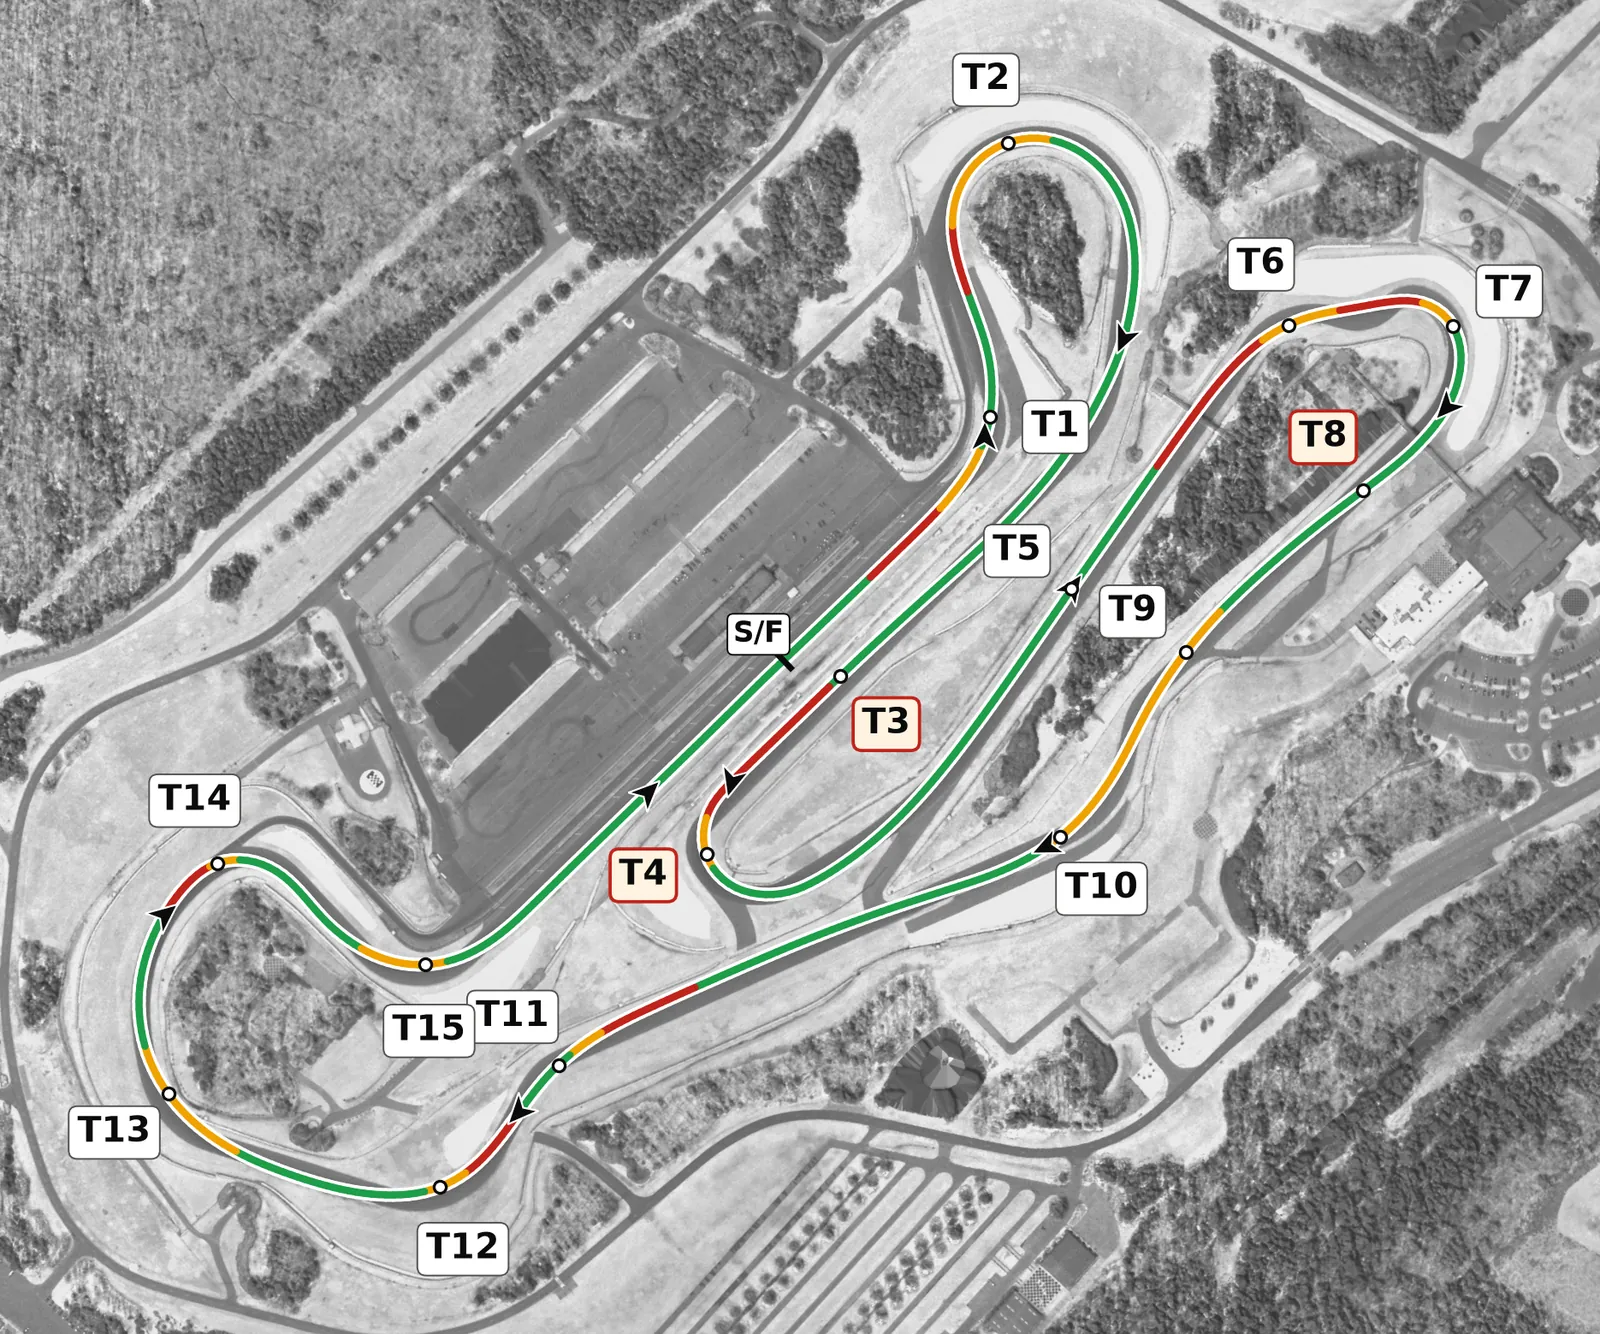
Barber is a flowing, hilly circuit with about 22 m of elevation and its hardest stop at Charlotte's Web (T4 on this map, which uses JTI's numbering; many club guides call it T5 and number later corners one or two higher). Several corners crest or drop away as you turn, so brake in a straight line, keep your steering smooth when the car goes light, and look well ahead for apexes that appear late. Most of the lap time comes from carrying speed smoothly and from clean exits out of T4, T10 and the final left onto the front straight.
Sectors
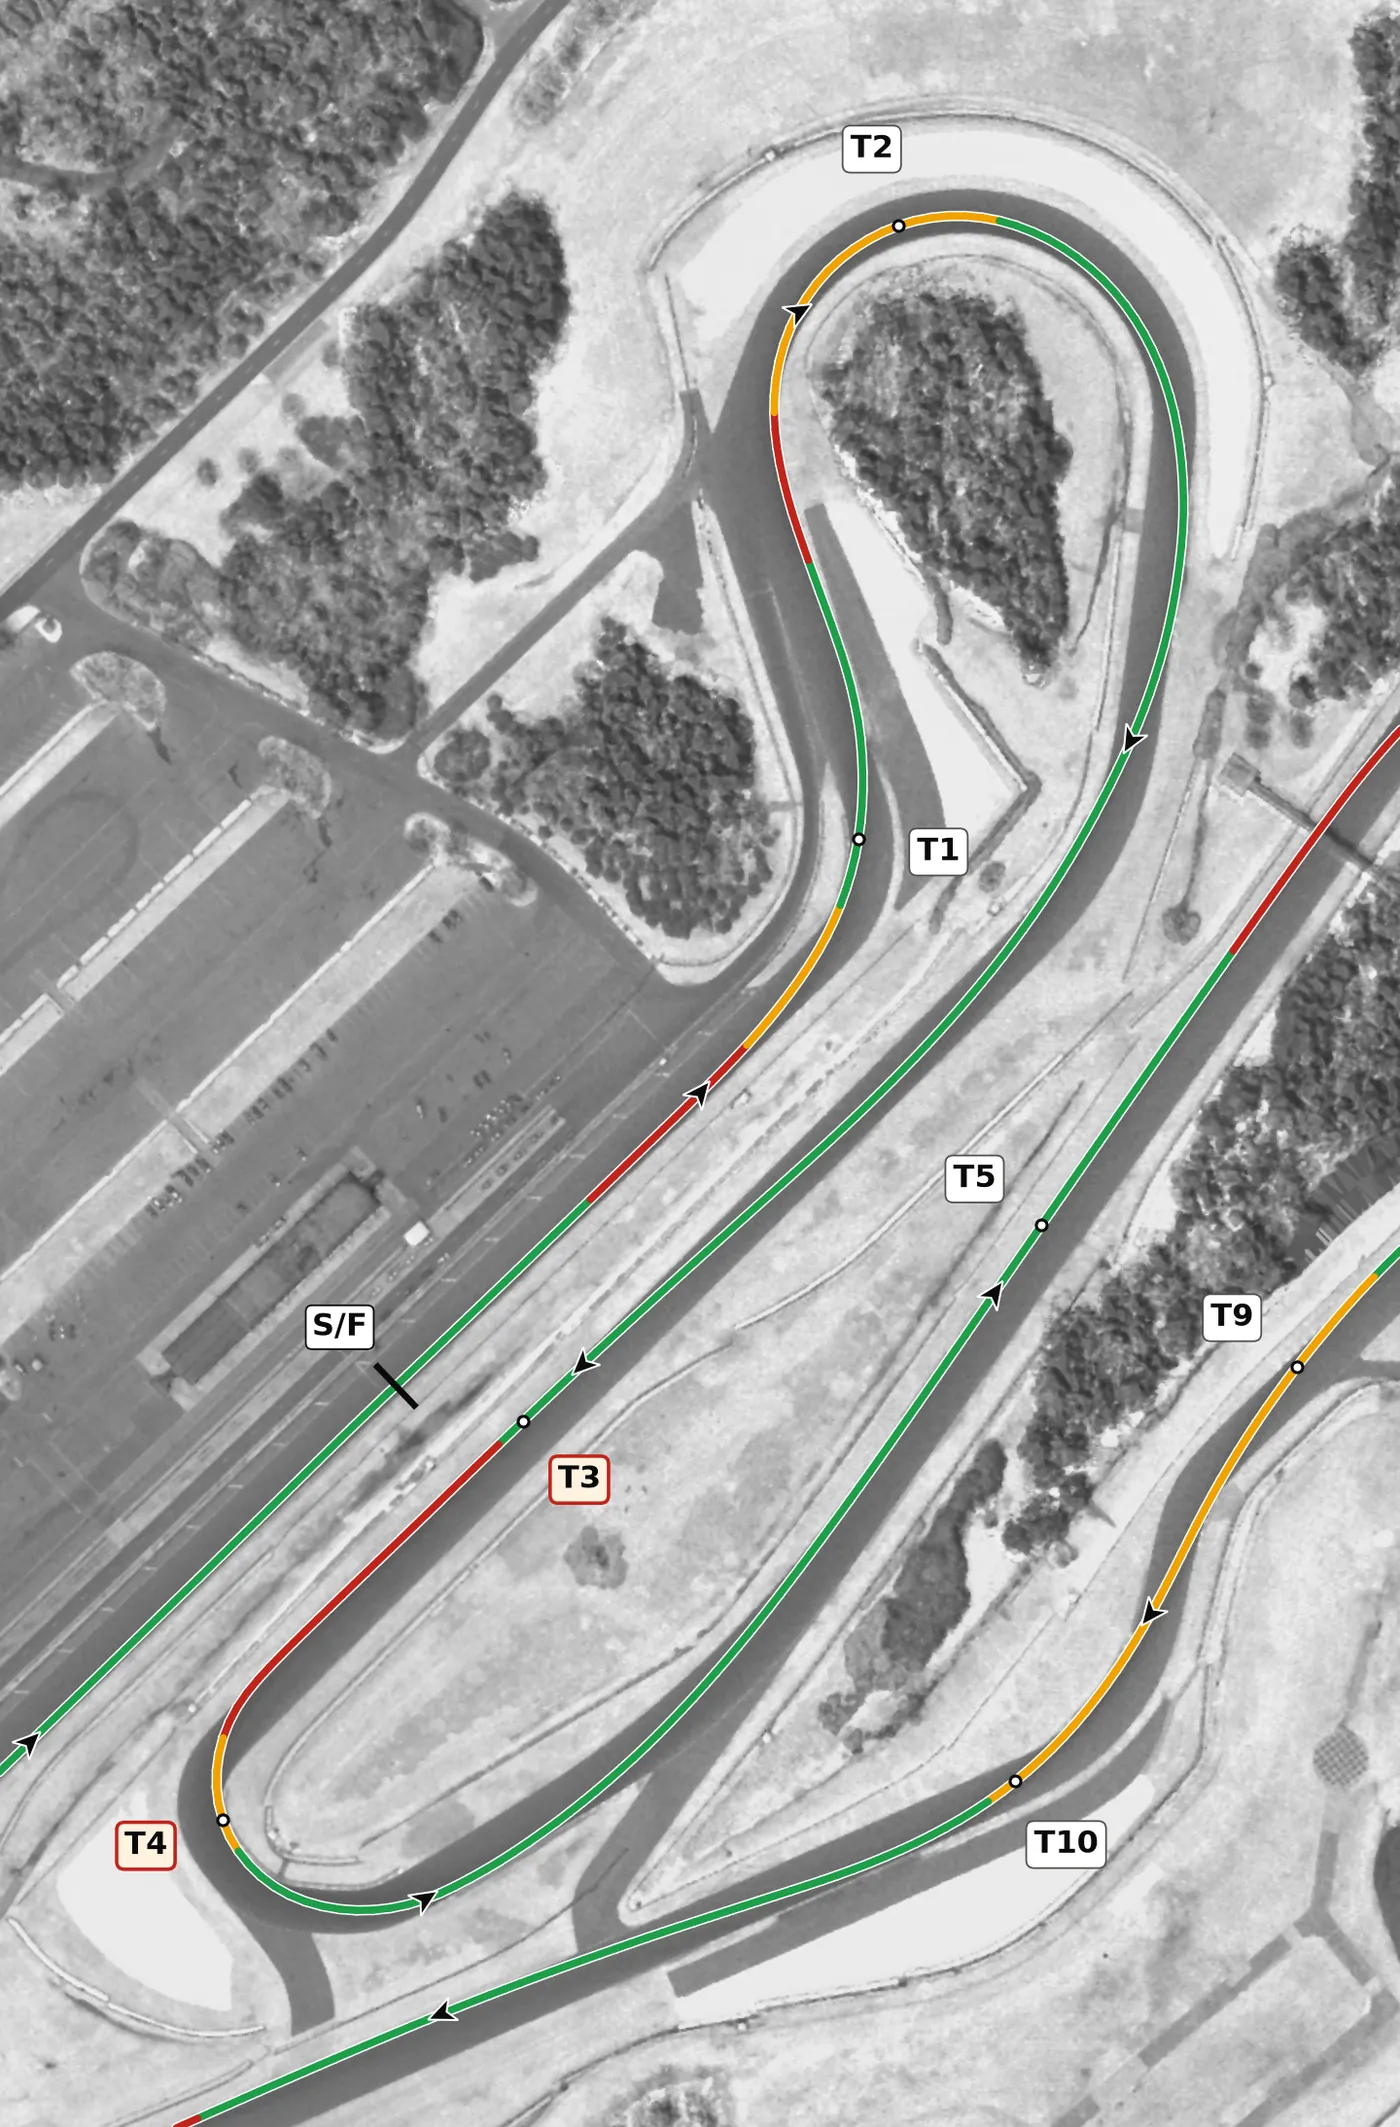
The lap opens with a downhill brake into the banked T1 left, then a climb into the long, banked T2 right, which drops away after its apex before the road climbs again over a crest to the gentle T3 kink. On that climb and over T3 the car goes light, so keep the wheel nearly straight and let the car drift out where the road takes it. The sector ends with the hardest stop of the lap into Charlotte's Web (T4), a tight, off-camber left on a brake zone that falls away beneath you.
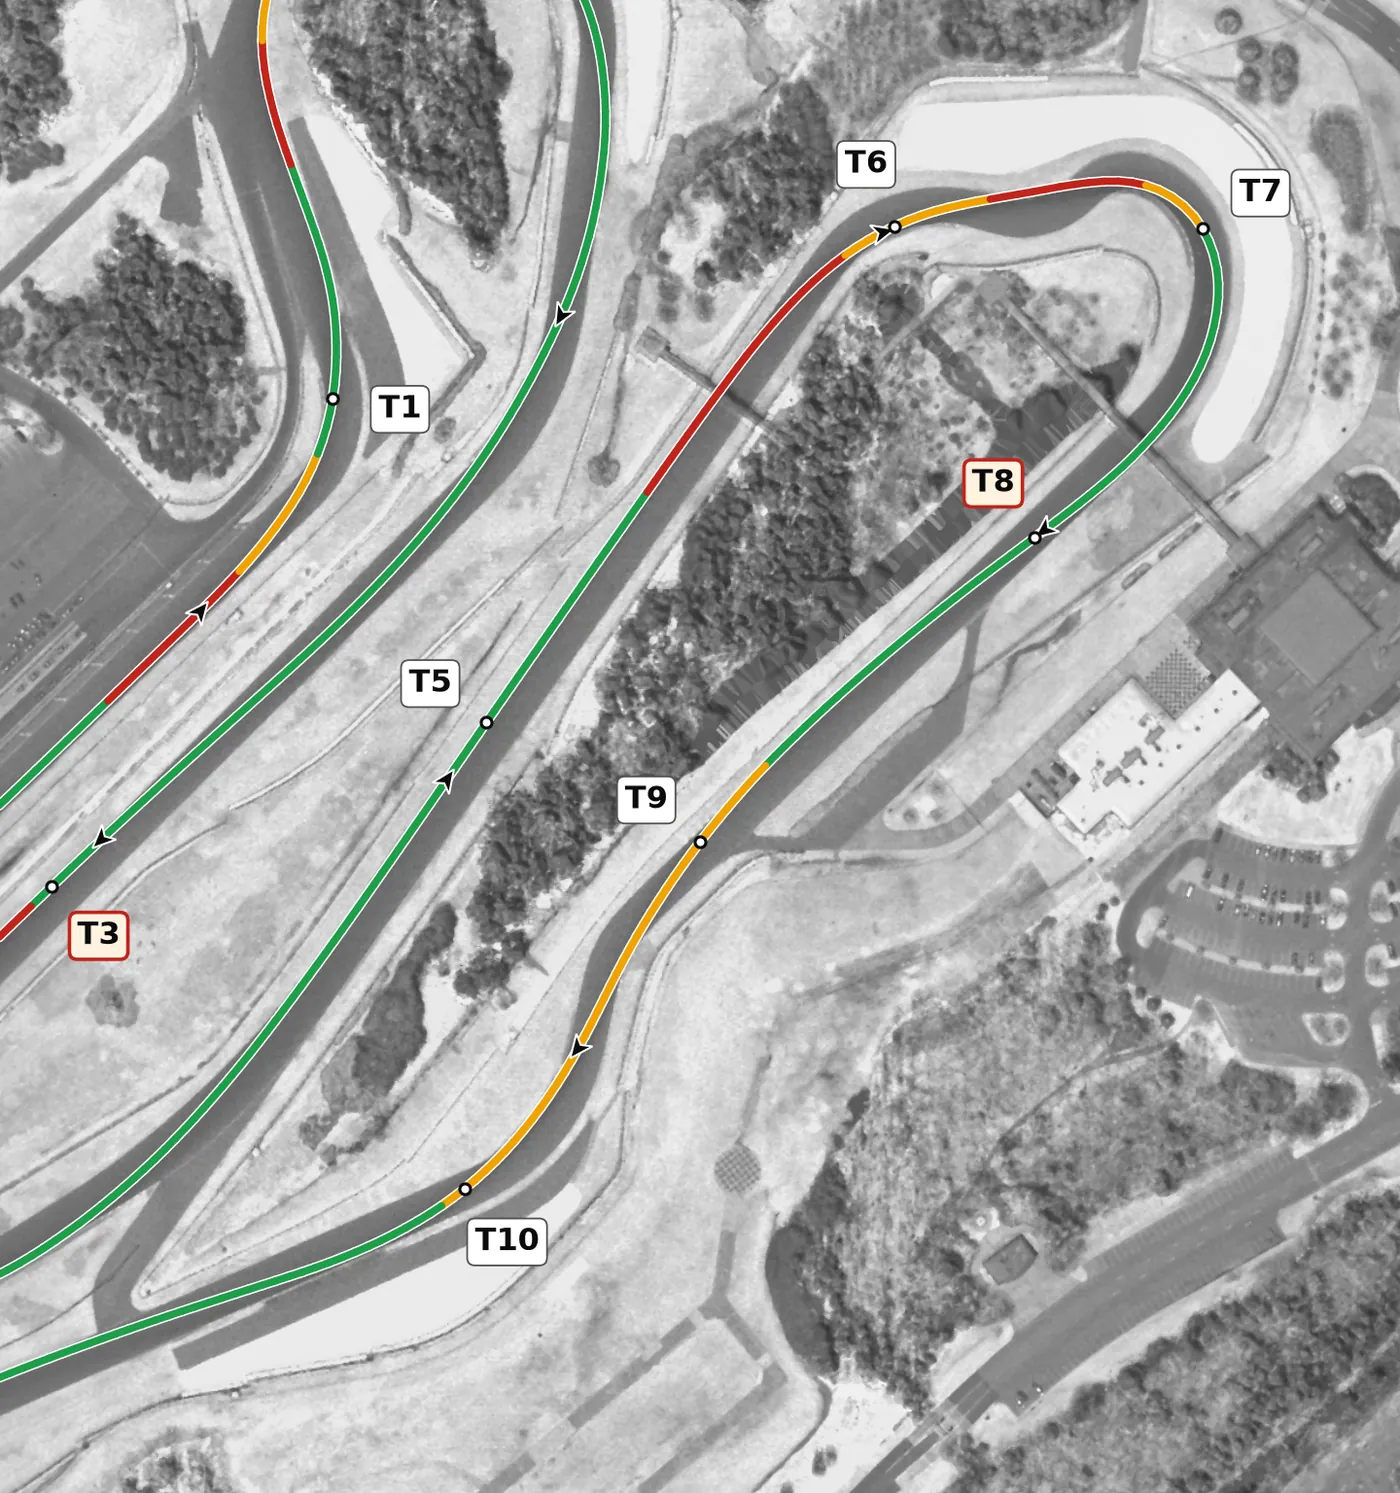
After Charlotte's Web, T5 is a fast right that rewards entry speed rather than braking; then brake firmly in a straight line for T6, which crests just before the road drops through the heavily banked T7 right toward the museum. The bottom of the hill at T8 is the lowest and most off-camber point on the lap, so be gentle turning into that left, then T9 and T10 climb as a left-right that sets you up for the back straight.
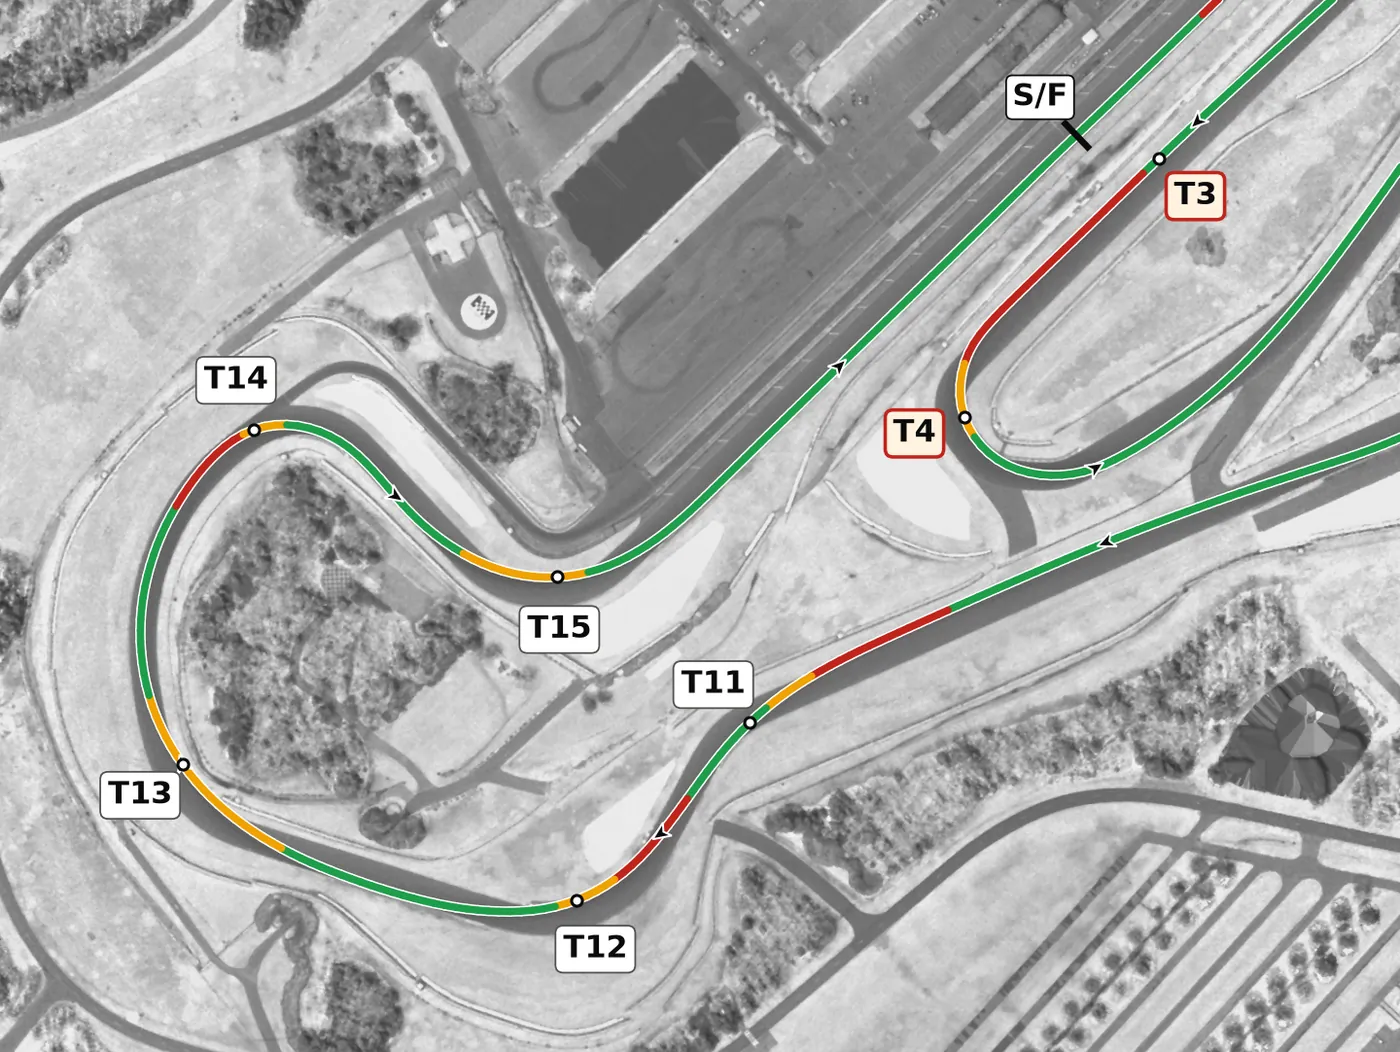
At the end of the back straight, brake in a straight line for the T11 left and the T12 right, which bottoms out in a compression and then climbs. The road crests and falls into T13, compresses again and climbs hard to the banked T14 right at the top of the hill, and T15 drops away to the left onto the front straight. Give up a little at T14 to be on the right for T15, because the T15 exit sets your speed all the way down the front straight.
Corners
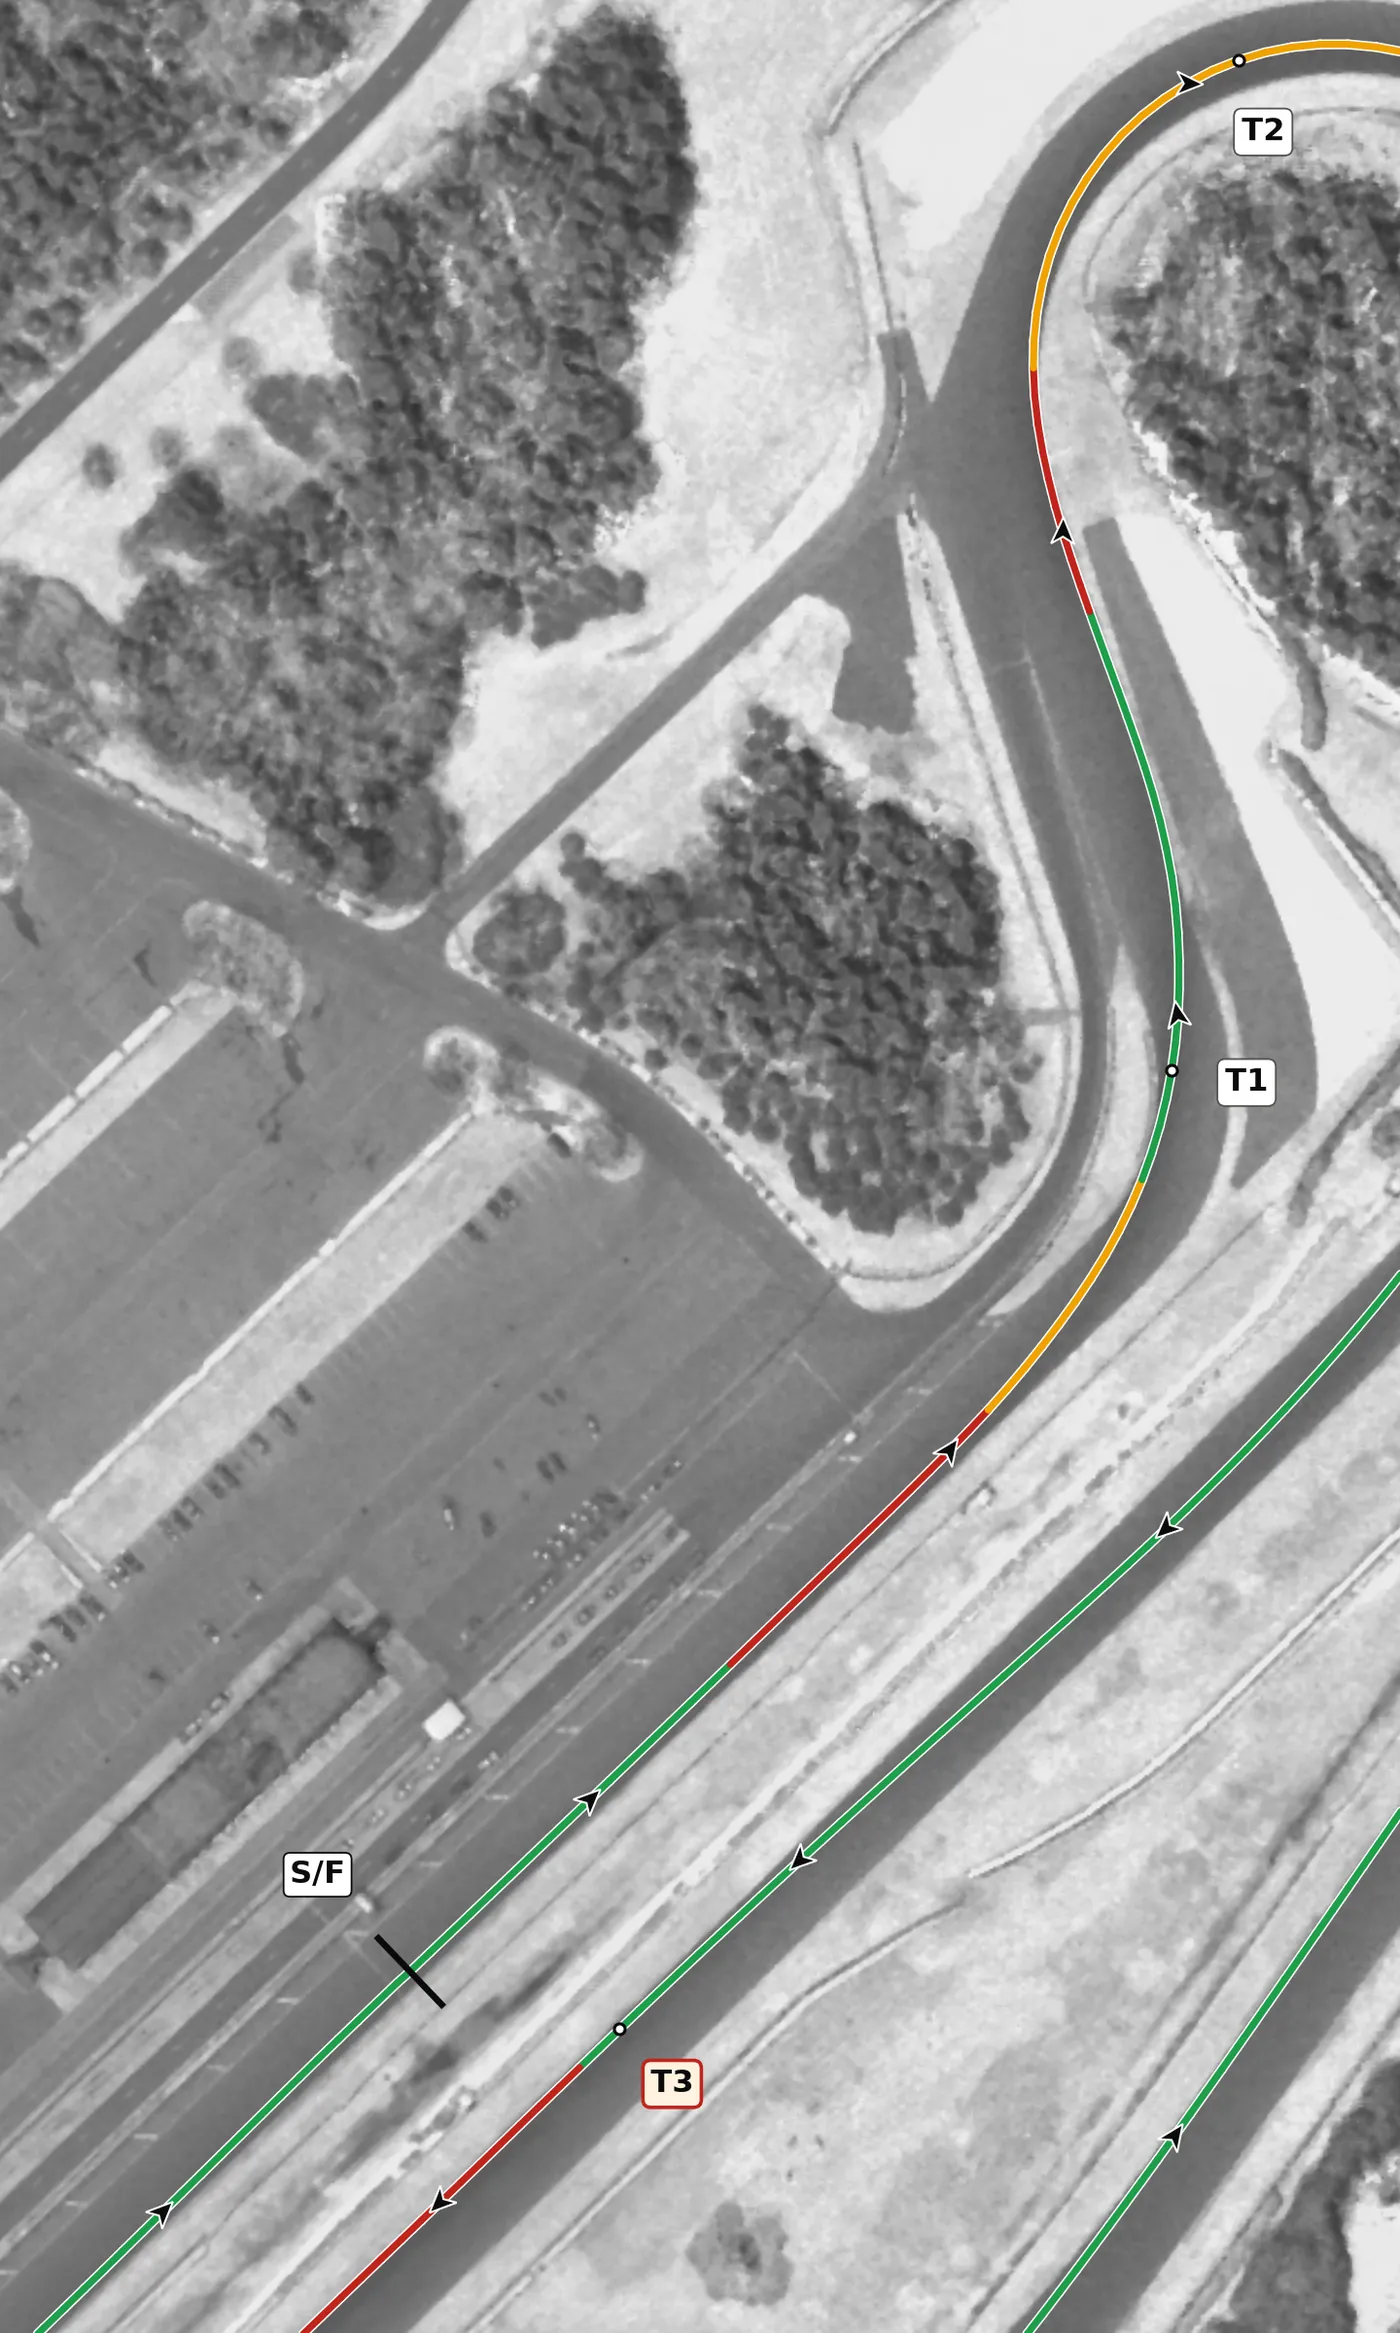
Brake hard in a straight line coming down the hill, then ease off the pressure as you turn in and trail the brake toward the apex of this banked left. The compression at the bottom gives plenty of grip, so roll back to the throttle and track out to the right as the road starts to climb toward T2. The mistake to avoid is turning in while still braking hard over the top of the hill, before the car has settled.
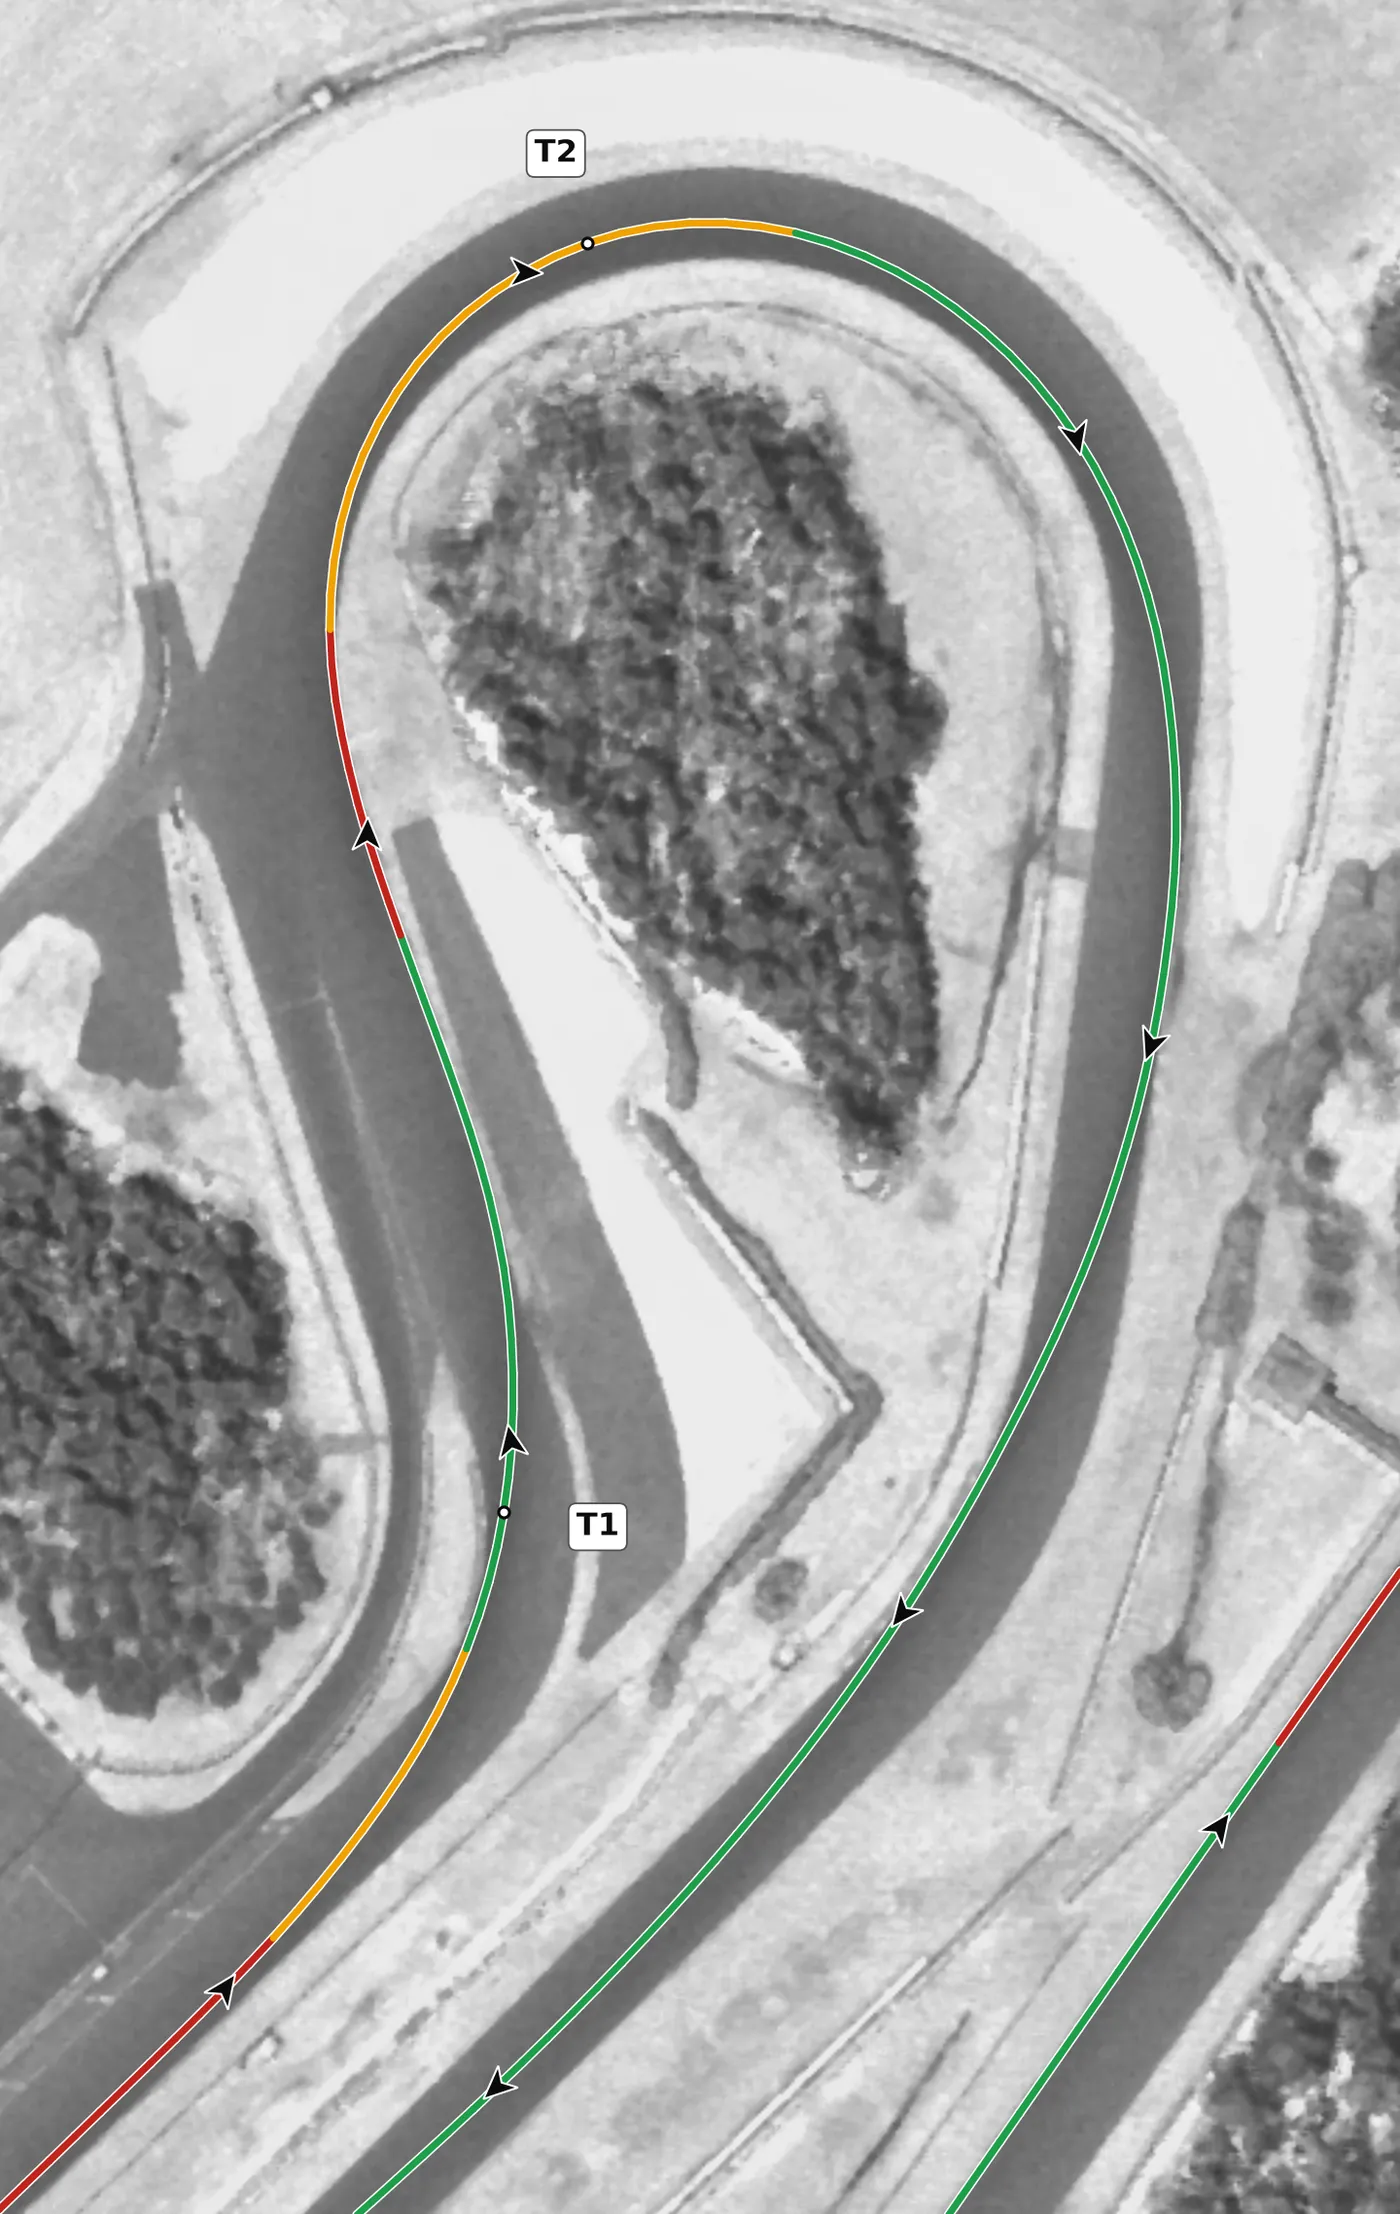
Brake firmly for this uphill, heavily banked right and release quickly, then turn in and be patient, holding the car balanced on a neutral throttle until the apex comes into view. Add throttle once you see the apex, as the road drops away and compresses beyond it. The mistake to avoid is accelerating too early, which runs you wide for the long climb to T3.
From the survey: Banked about 9% at the apex.
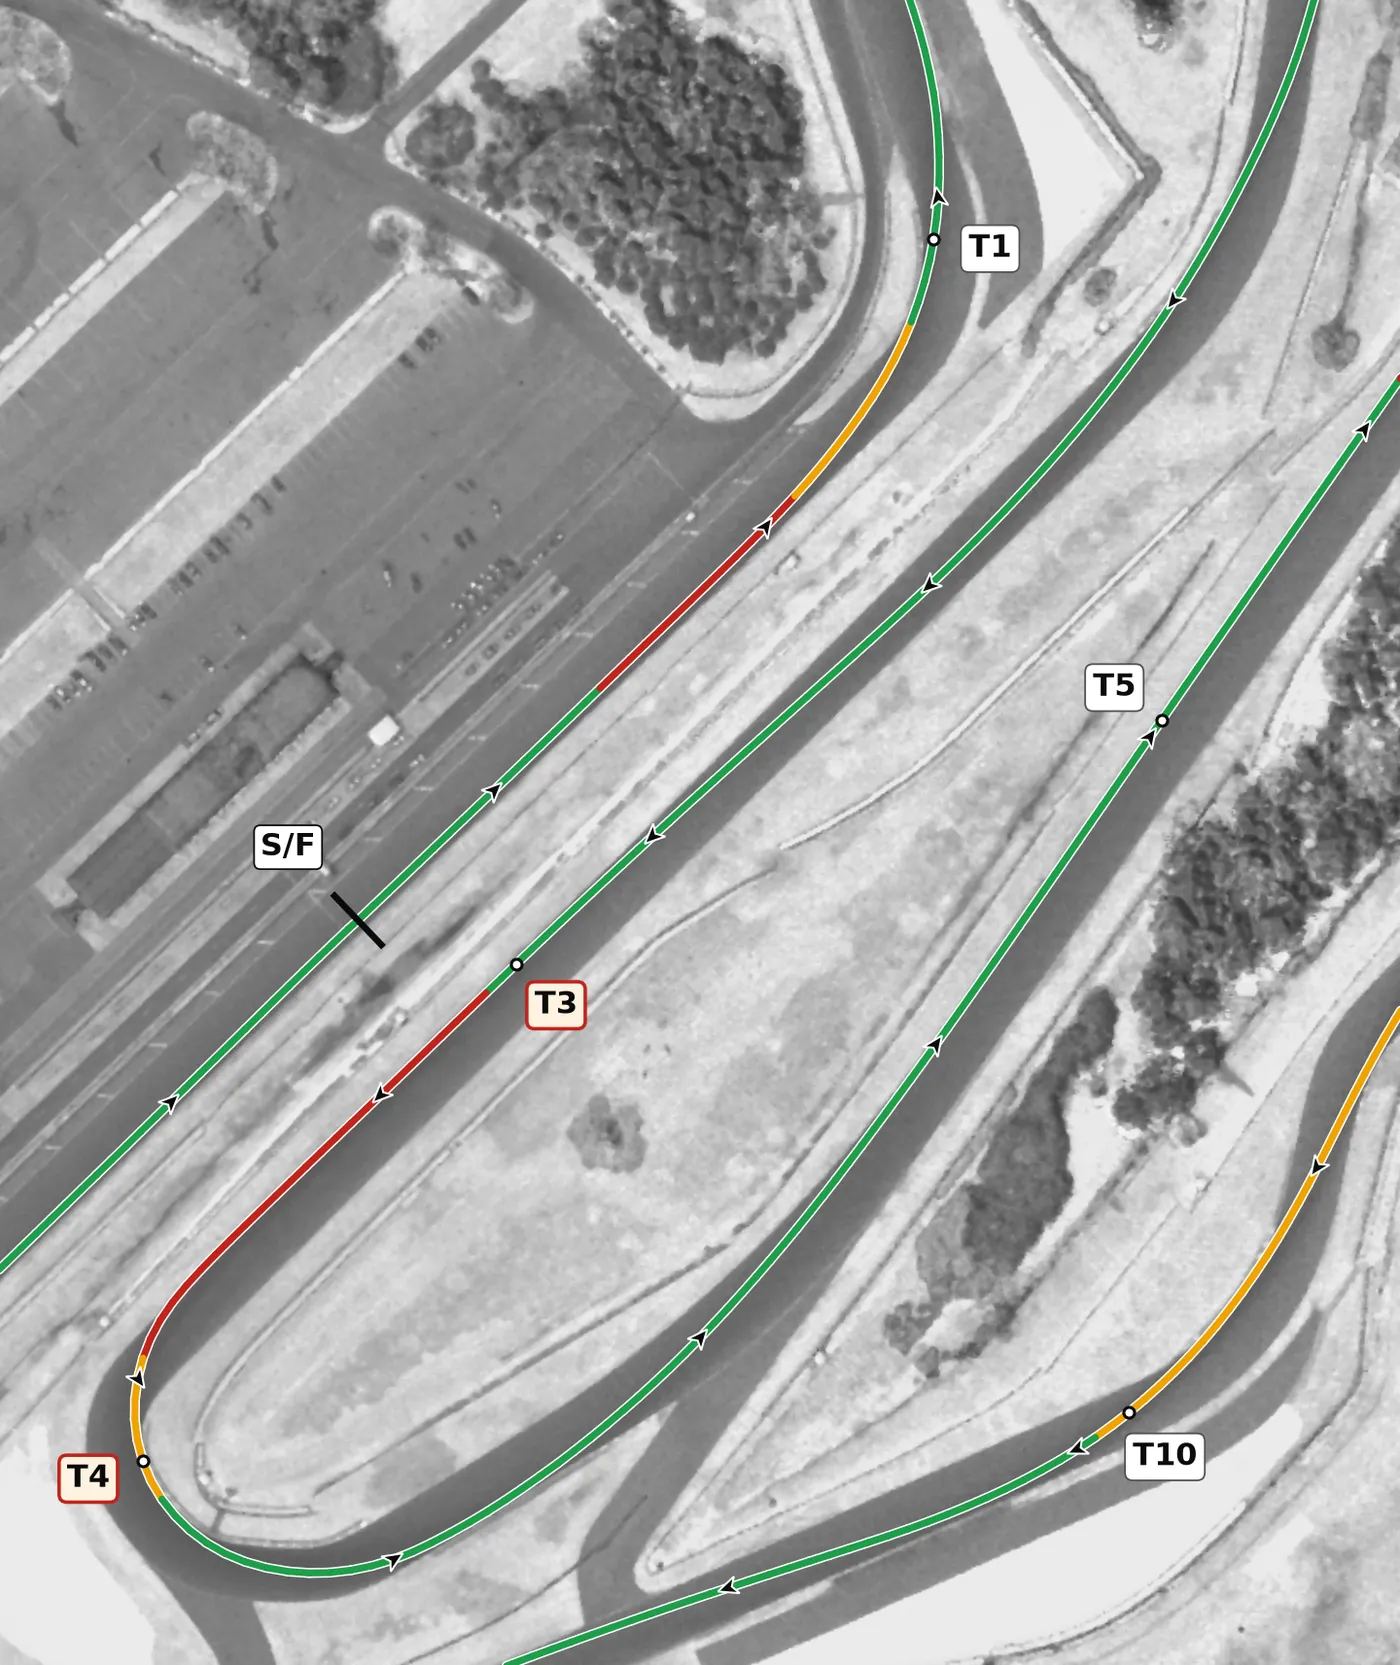
T3 is barely a corner: a gentle right at the top of a long climb where the car goes light, and the climb before it unloads the car more than anywhere else on the lap. Open the steering and crest with the wheel nearly straight, let the car track out to the left, then move across to the right for the brake zone into T4. The mistake to avoid is holding steering lock over the top, which can make the light rear of the car step out.
From the survey: Off camber, and the crest before it unloads the car (−0.16 g).
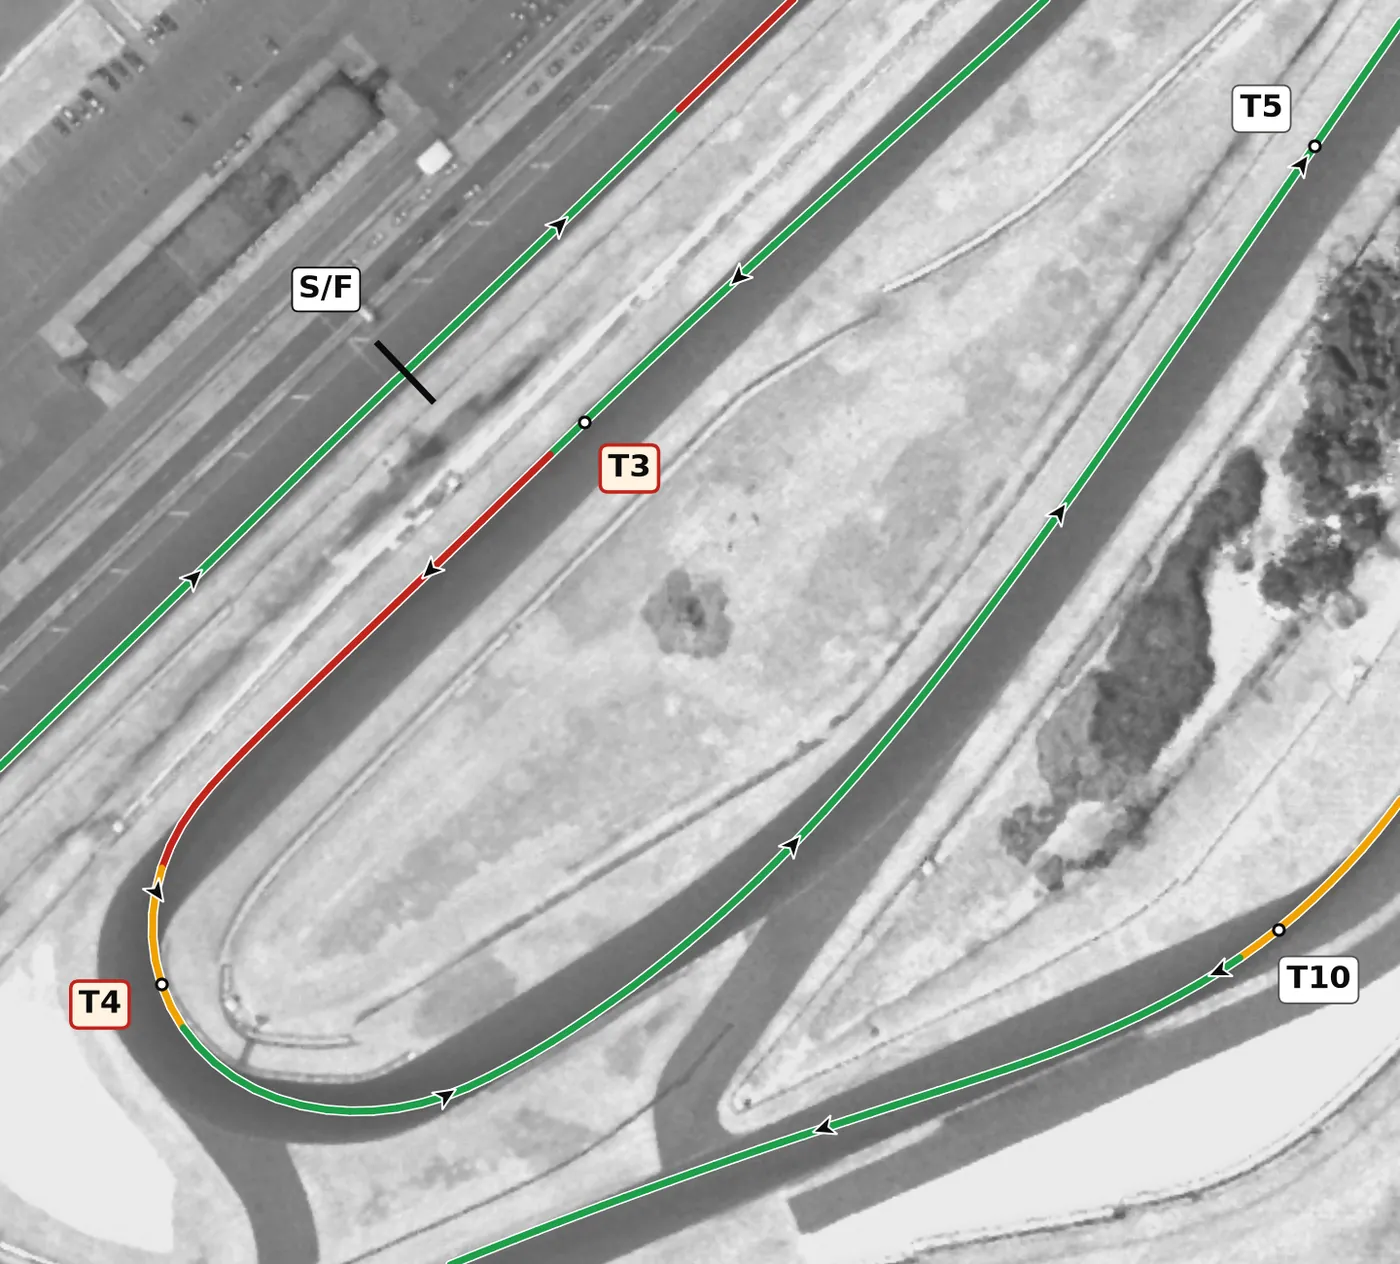
This is the hardest brake zone at Barber: start braking firmly in a straight line from the right side of the track, and expect the road to drop away beneath you as you slow. Turn in late and trail the brake toward the first apex, then arc to a second apex where you squeeze on the power while unwinding the wheel. The corner is tight and off camber, so the mistake to avoid is braking too late; a slow entry and a clean exit beats a heroic one.
From the survey: Charlotte's Web: tight and off camber. Chin calls this T5.
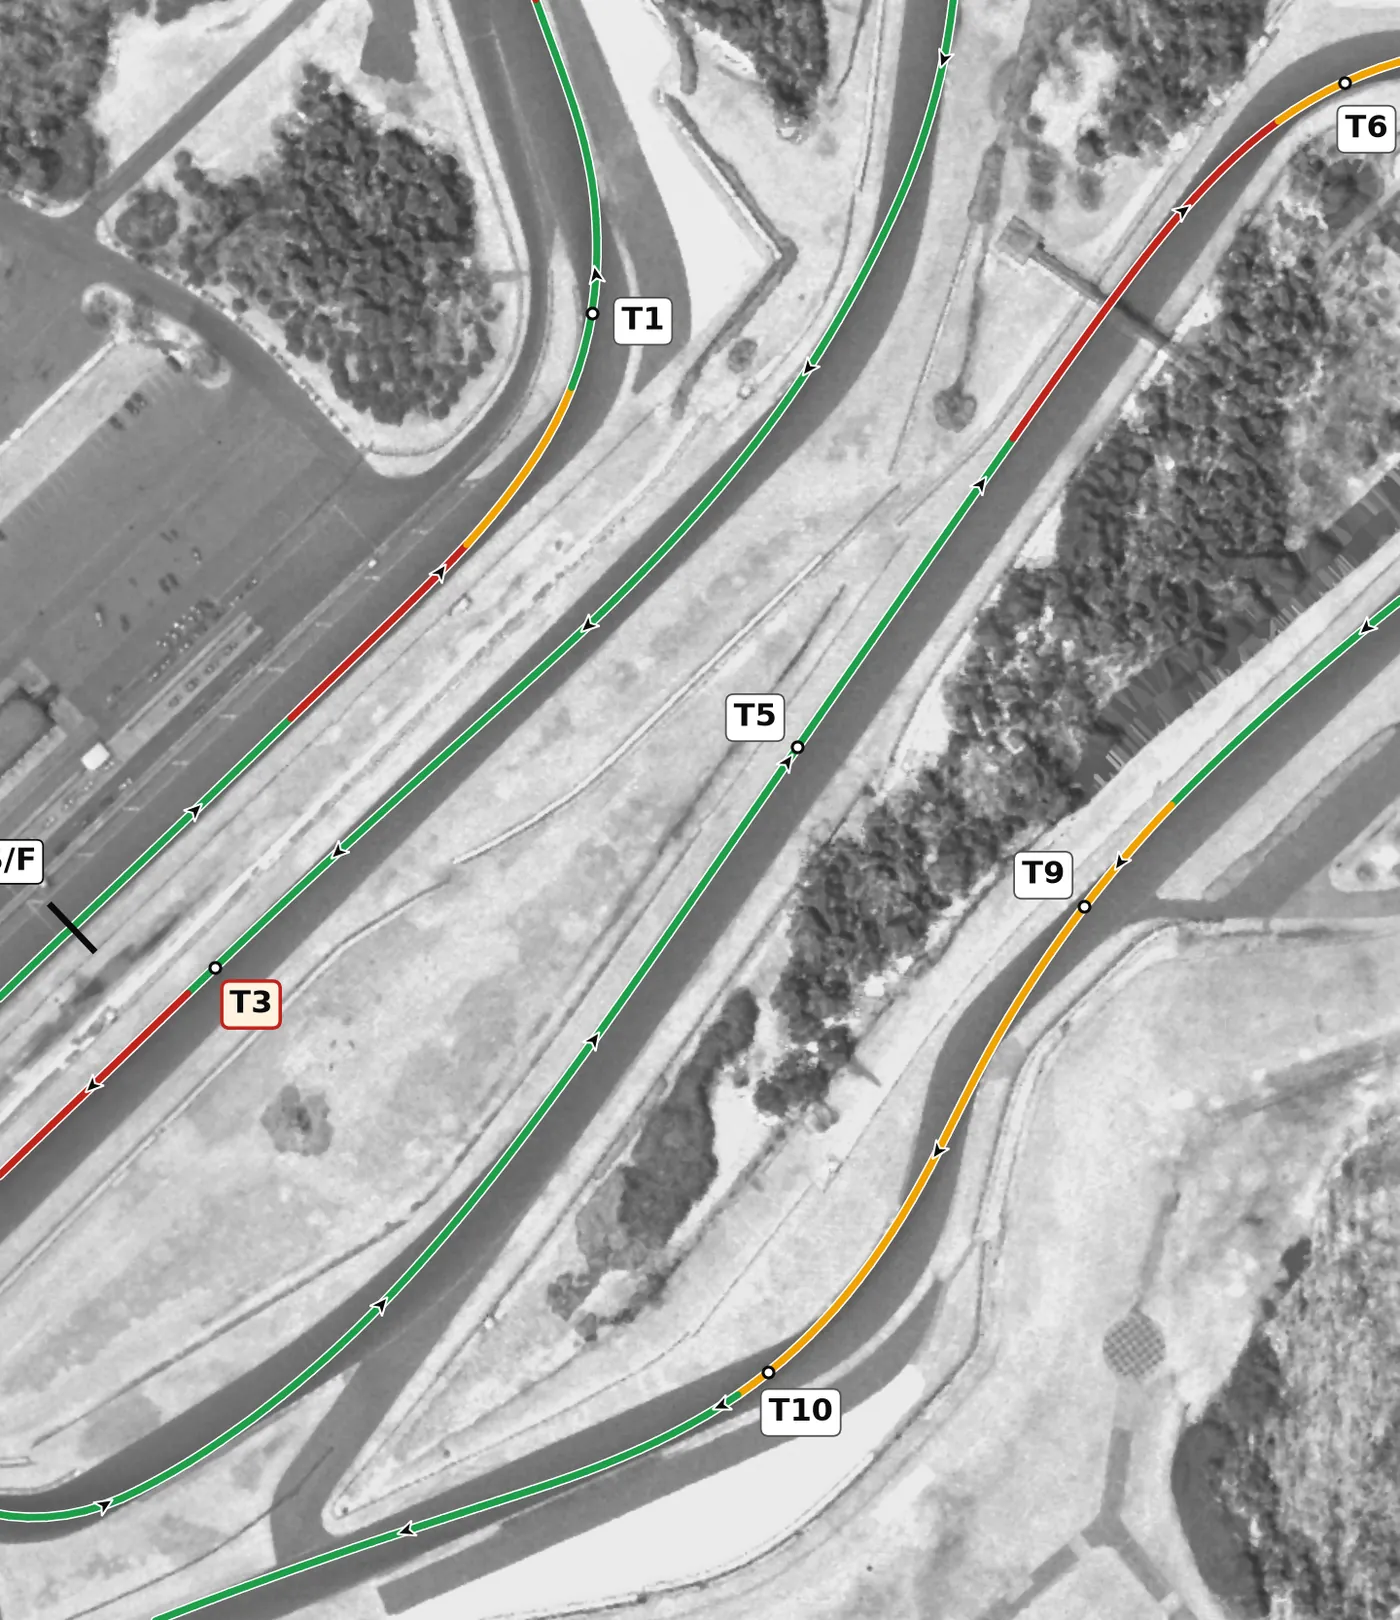
T5 is a fast right after Charlotte's Web whose entry is easy to over-slow, so brake lightly, if at all, and come off the pedal early. Keep one smooth arc and let the car run out to set up for T6. The mistake to avoid is a big brake application that kills your speed for the rest of the sequence.
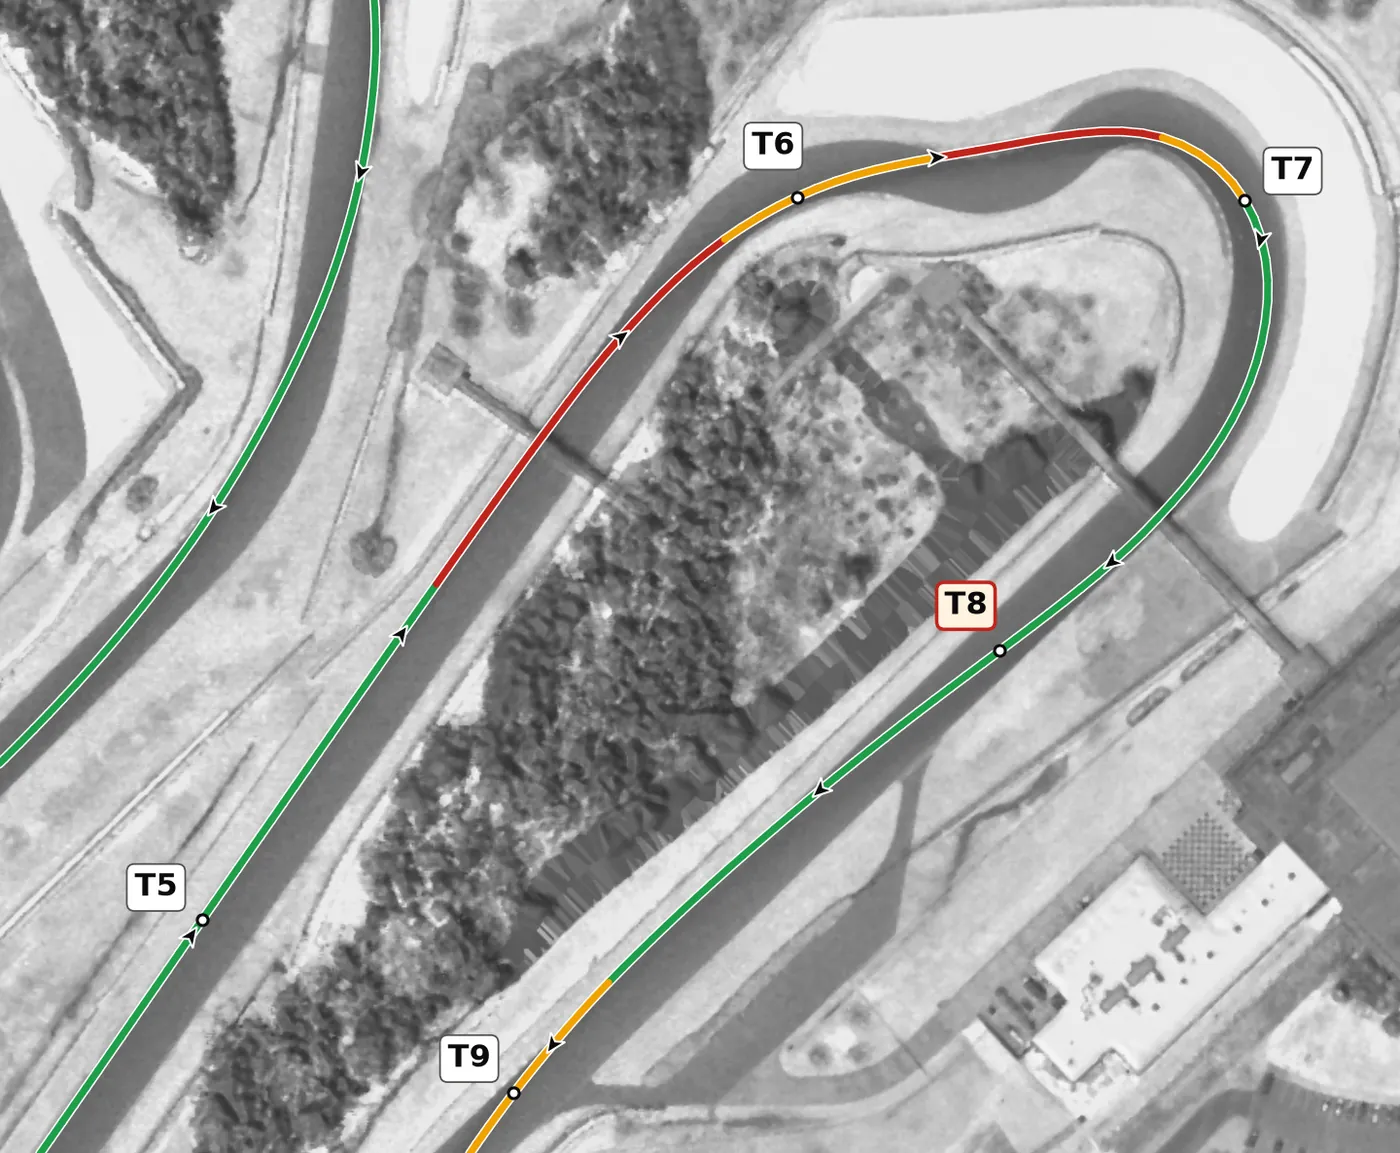
T6 is a fast right that crests as you go through it and leads straight into the drop to T7, so this is where you do most of the slowing for the pair: brake firmly in a straight line before the crest, ease off as you turn in, and keep the car stable over the top. Then position it for the turn-in to T7, where a second, lighter brake finishes the job. The mistake to avoid is braking or turning hard over the crest itself.
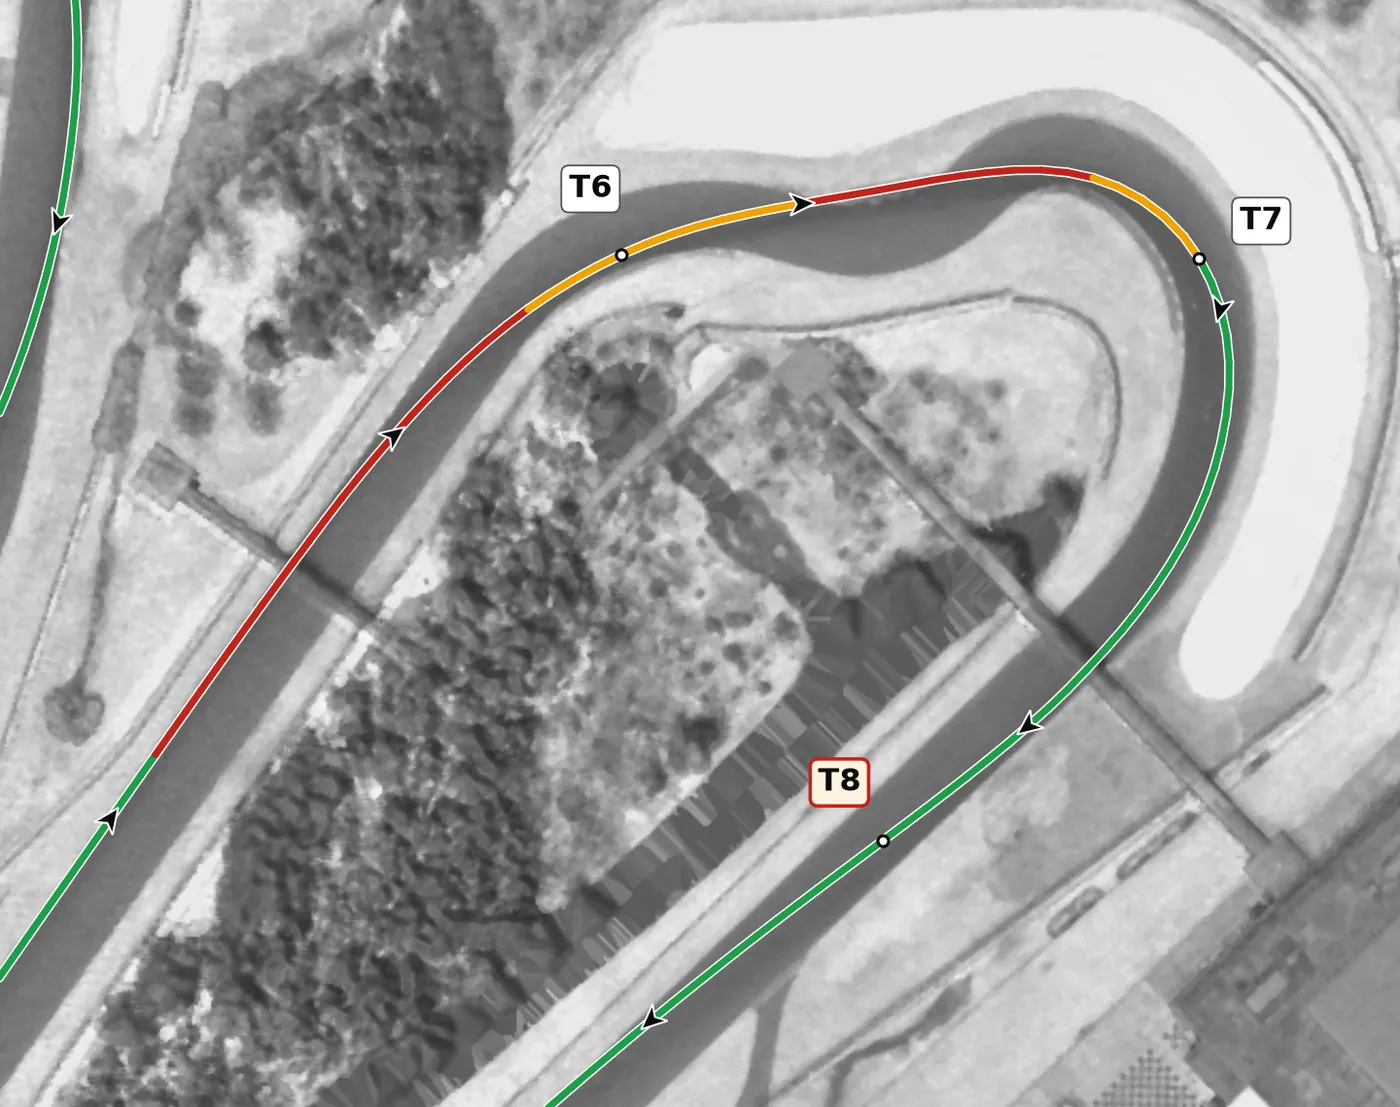
The road drops away into this heavily banked right, so do your braking in a straight line before the drop and keep a little pressure on as you go downhill, then trust the banking at the apex. Feel the car settle at the bottom before you build the throttle, and use the exit to line up for the left at T8. The mistake to avoid is braking or turning hard while the car is light over the top of the entry.
From the survey: Banked about 9% at the apex.
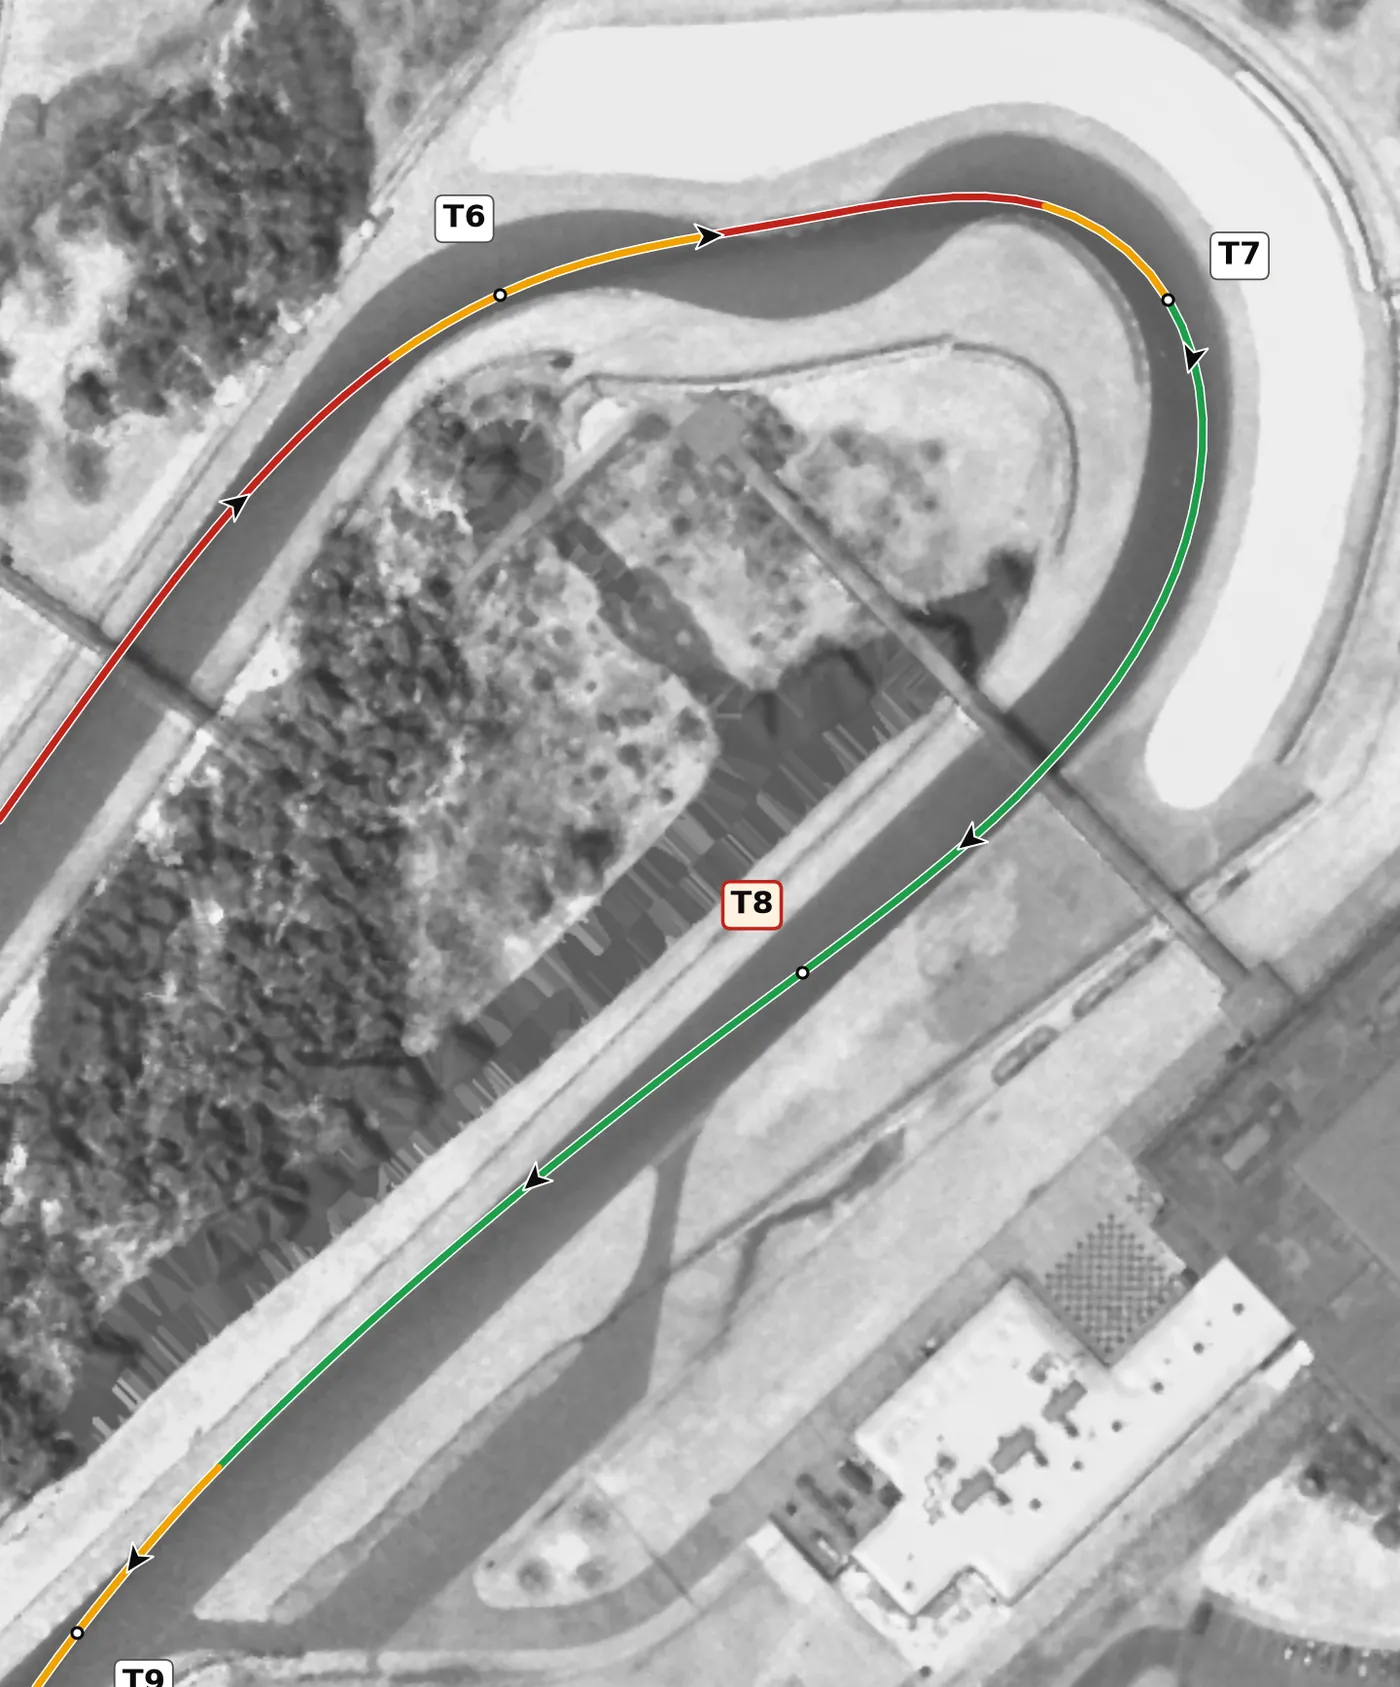
T8 is a left at the lowest point of the track, and it is off camber, most sharply on the entry where you arrive from T7. Turn in gently once the car is settled, keep the steering smooth, and wait for the car to grip before adding power. The mistake to avoid is carrying T7's speed and turning in hard on the off-camber entry, which slides the car wide.
From the survey: Off camber.
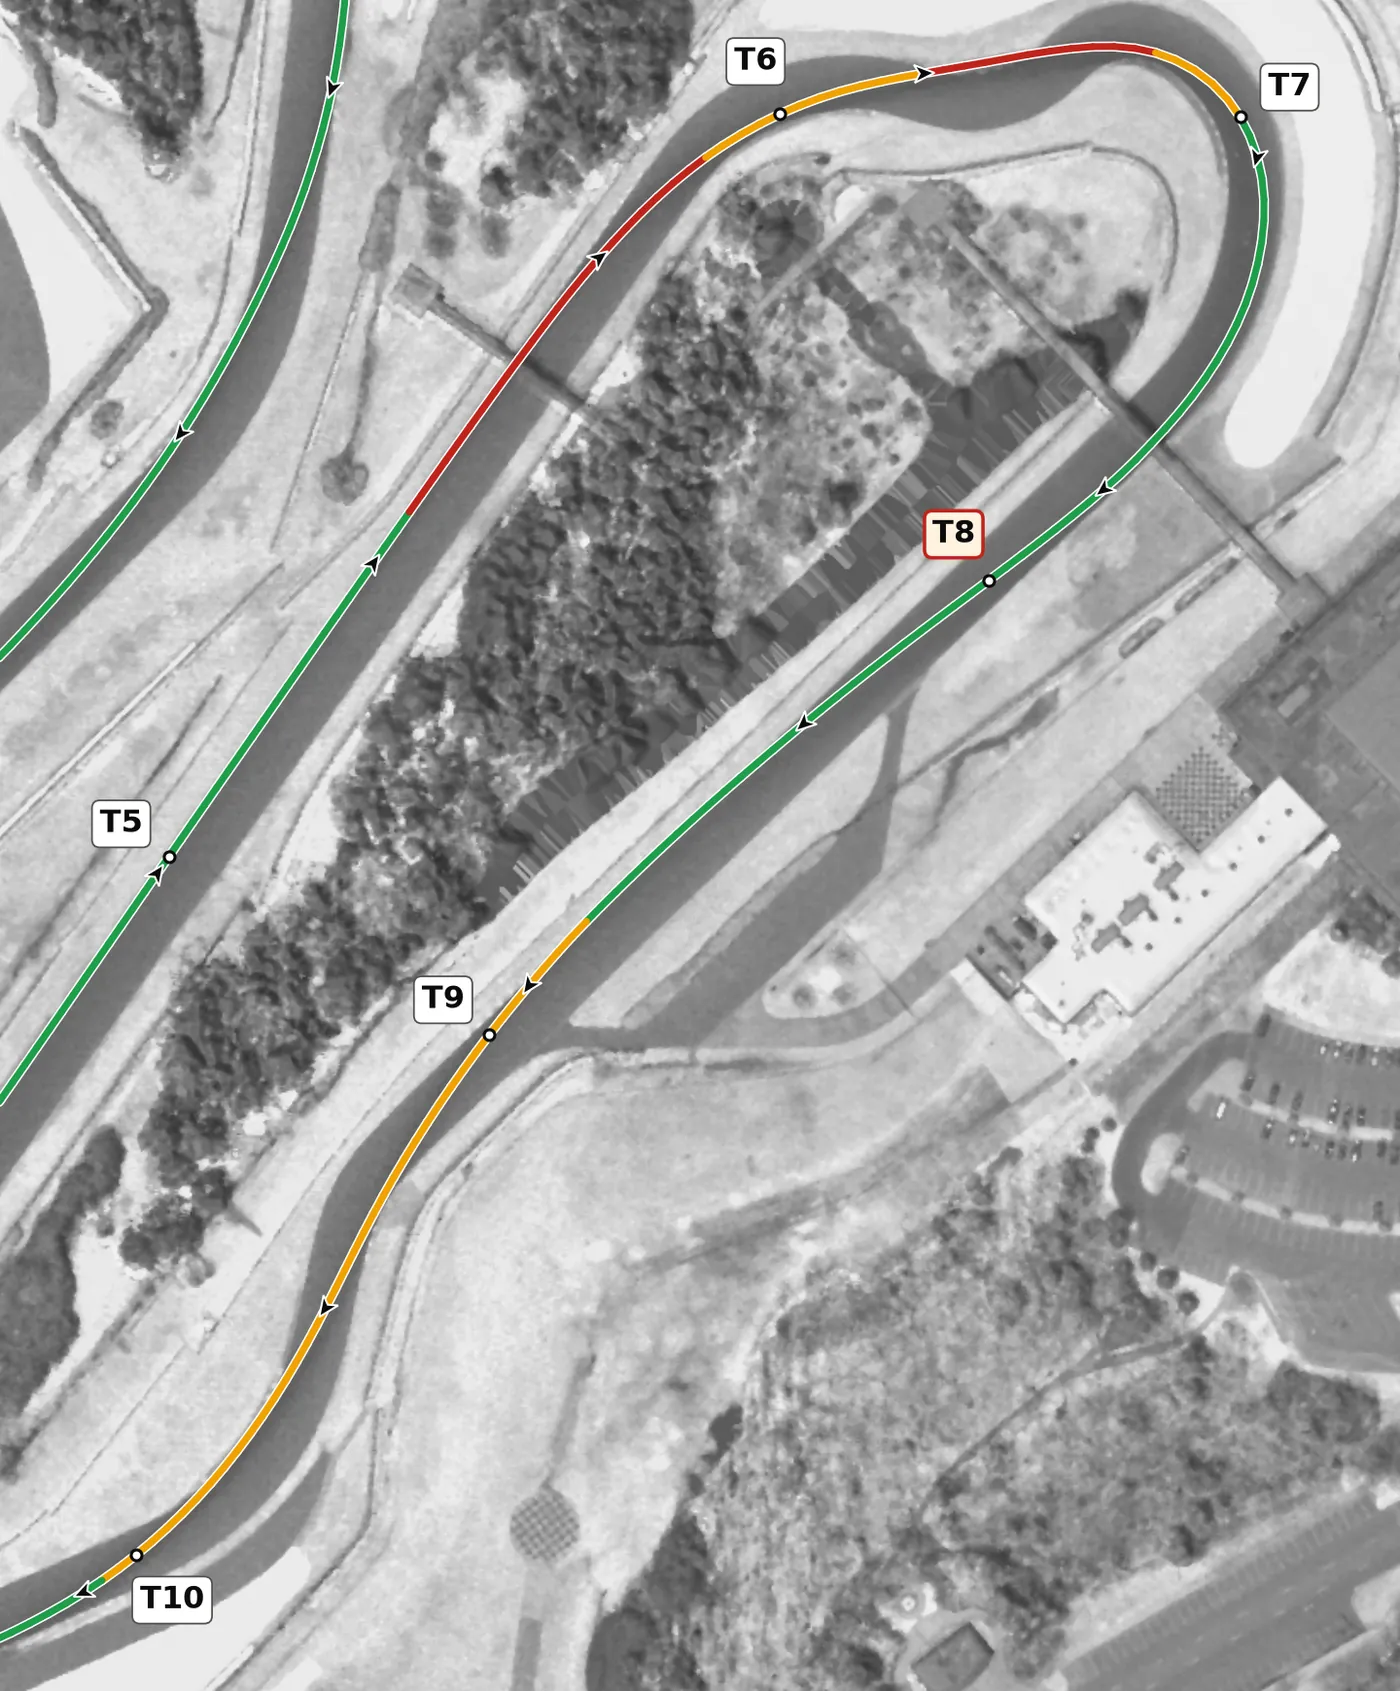
T9 is a left that climbs out of the low point, and together with T10 it forms a left-right that leads onto the back straight. Take a smooth line on a balanced throttle and give up a little here so the car is well placed for T10. The mistake to avoid is running wide in T9 and arriving at T10 on the wrong side of the road.
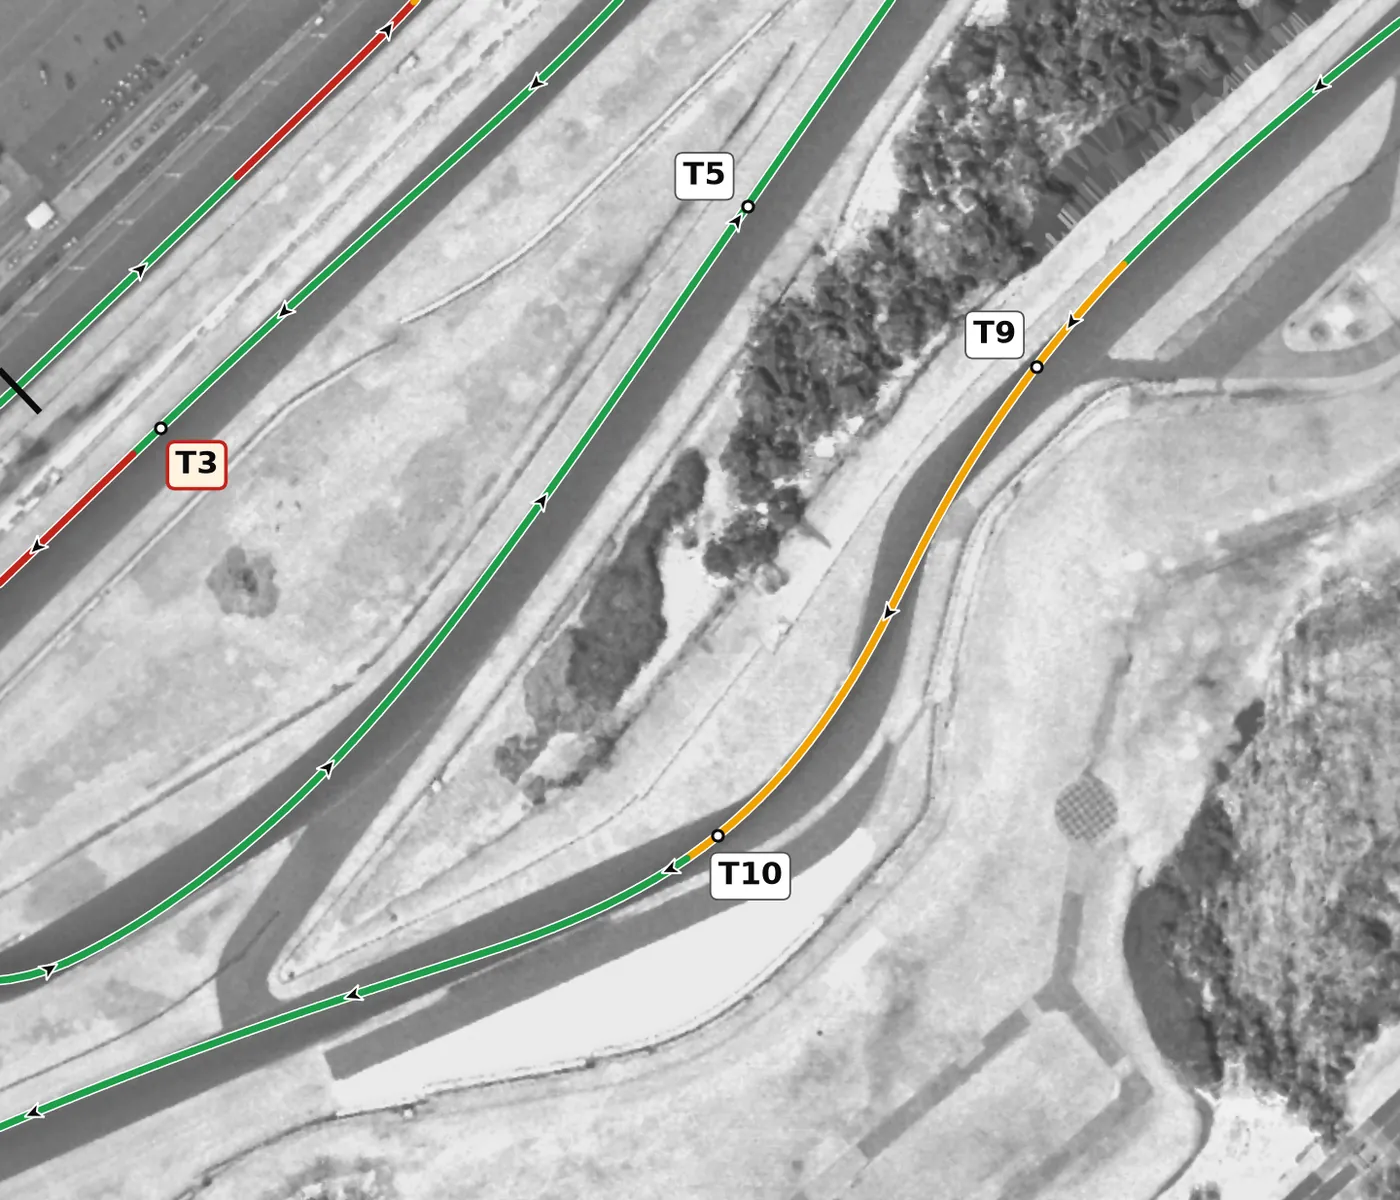
T10 is the climbing right that opens the back straight, so its exit matters more than its entry. Turn in from the left, aim for a late apex, and unwind the steering as you build to full throttle, using the road on the left at the exit. The mistake to avoid is an early apex that forces a lift or a correction on the way out.
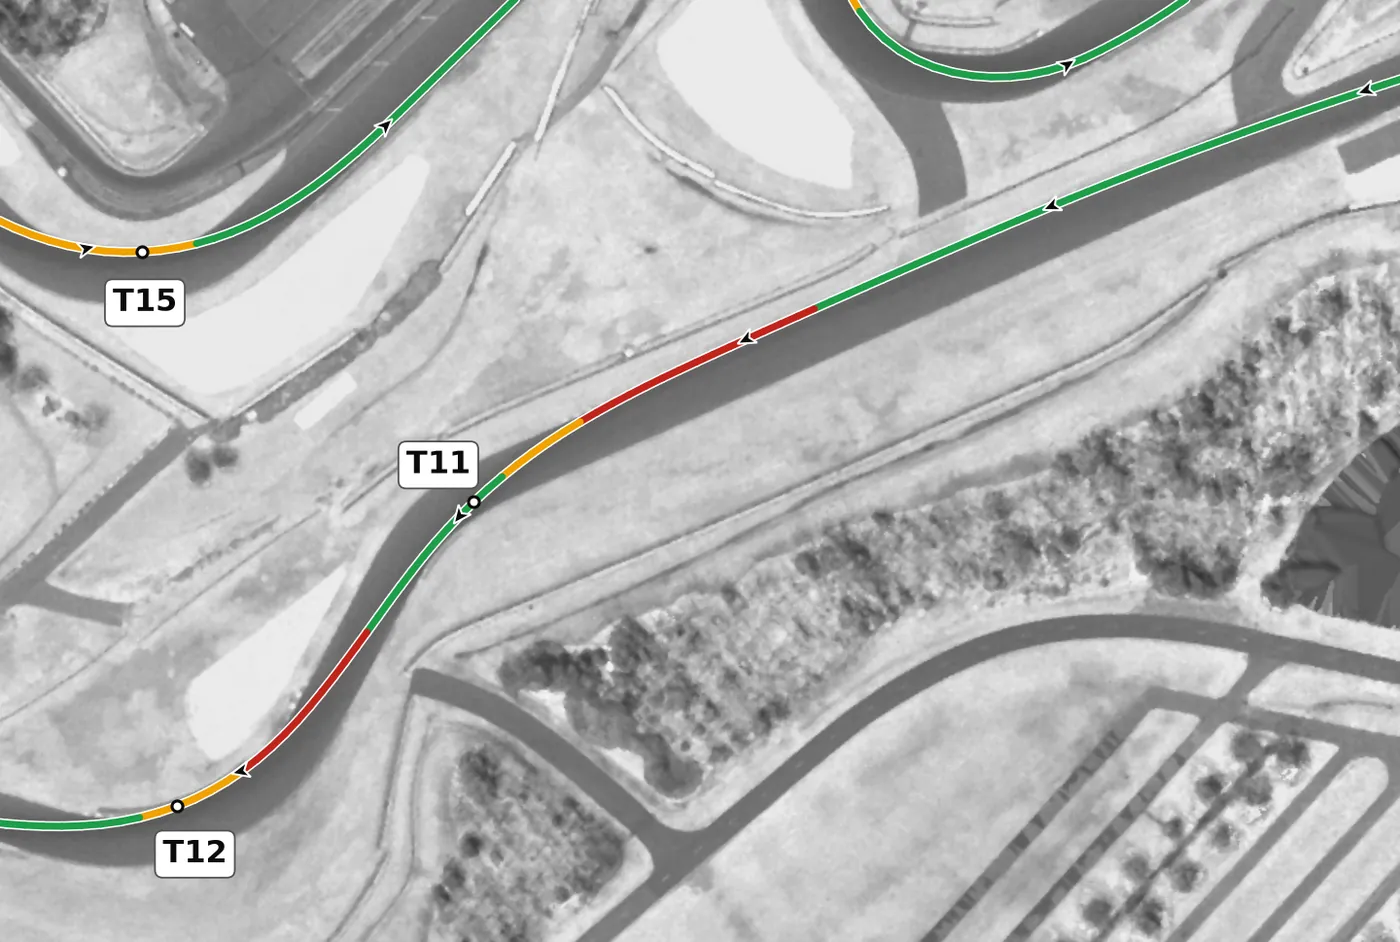
Brake in a straight line at the end of the back straight and turn into this left, treating it and T12 as a pair in which the T12 exit is what counts. Take a slightly later apex here so the car is placed for T12 rather than running wide. The mistake to avoid is braking late and arriving too fast, which ruins both corners.
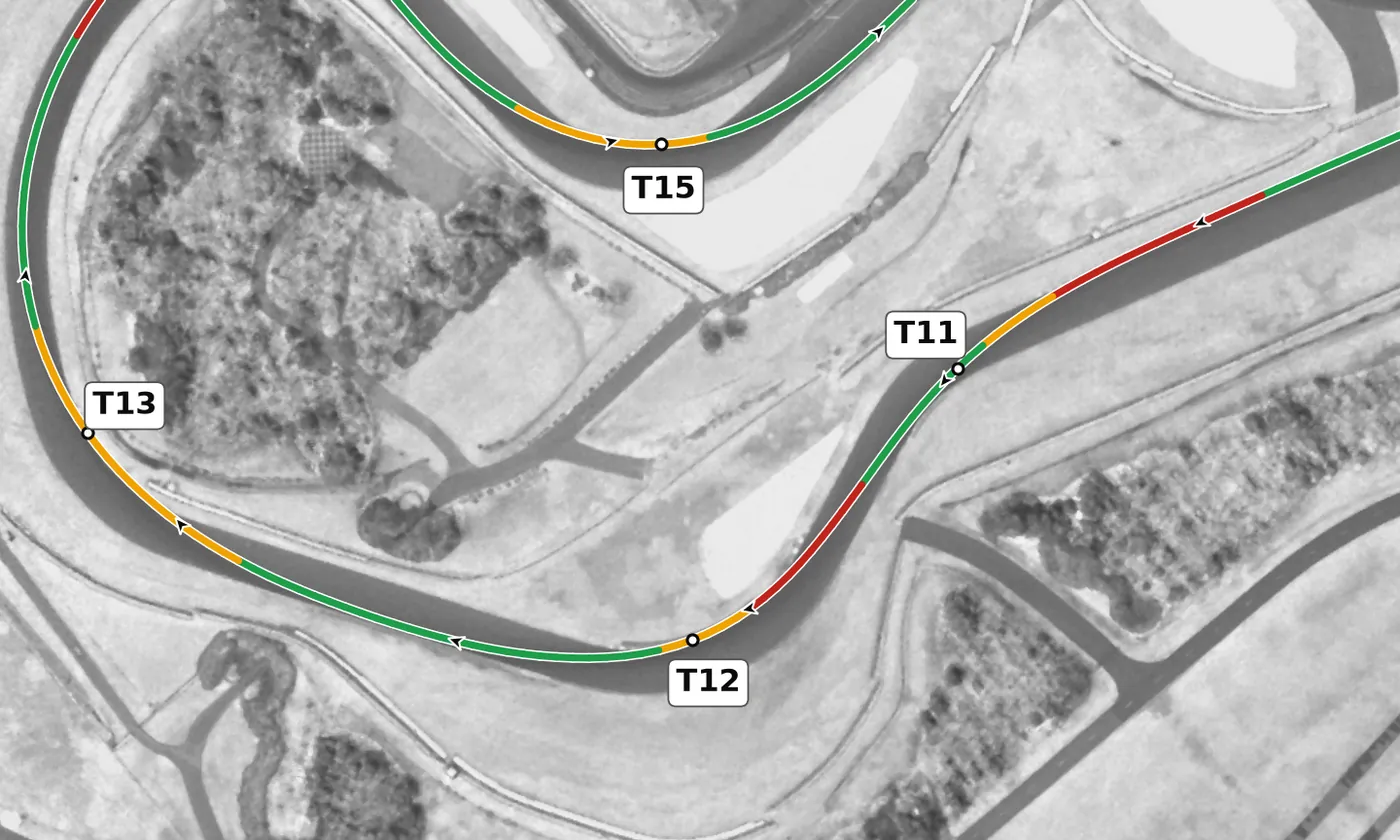
T12 is a right that bottoms out in a compression at one of the lowest points on the track and then climbs. Let the compression plant the car and pick up the throttle as the road starts to rise, but expect the car to go light over the crest beyond it on the way to T13. The mistake to avoid is aggressive steering or throttle as the car goes over that crest.
From the survey: The lowest point on the track: a compression (+0.27 g).
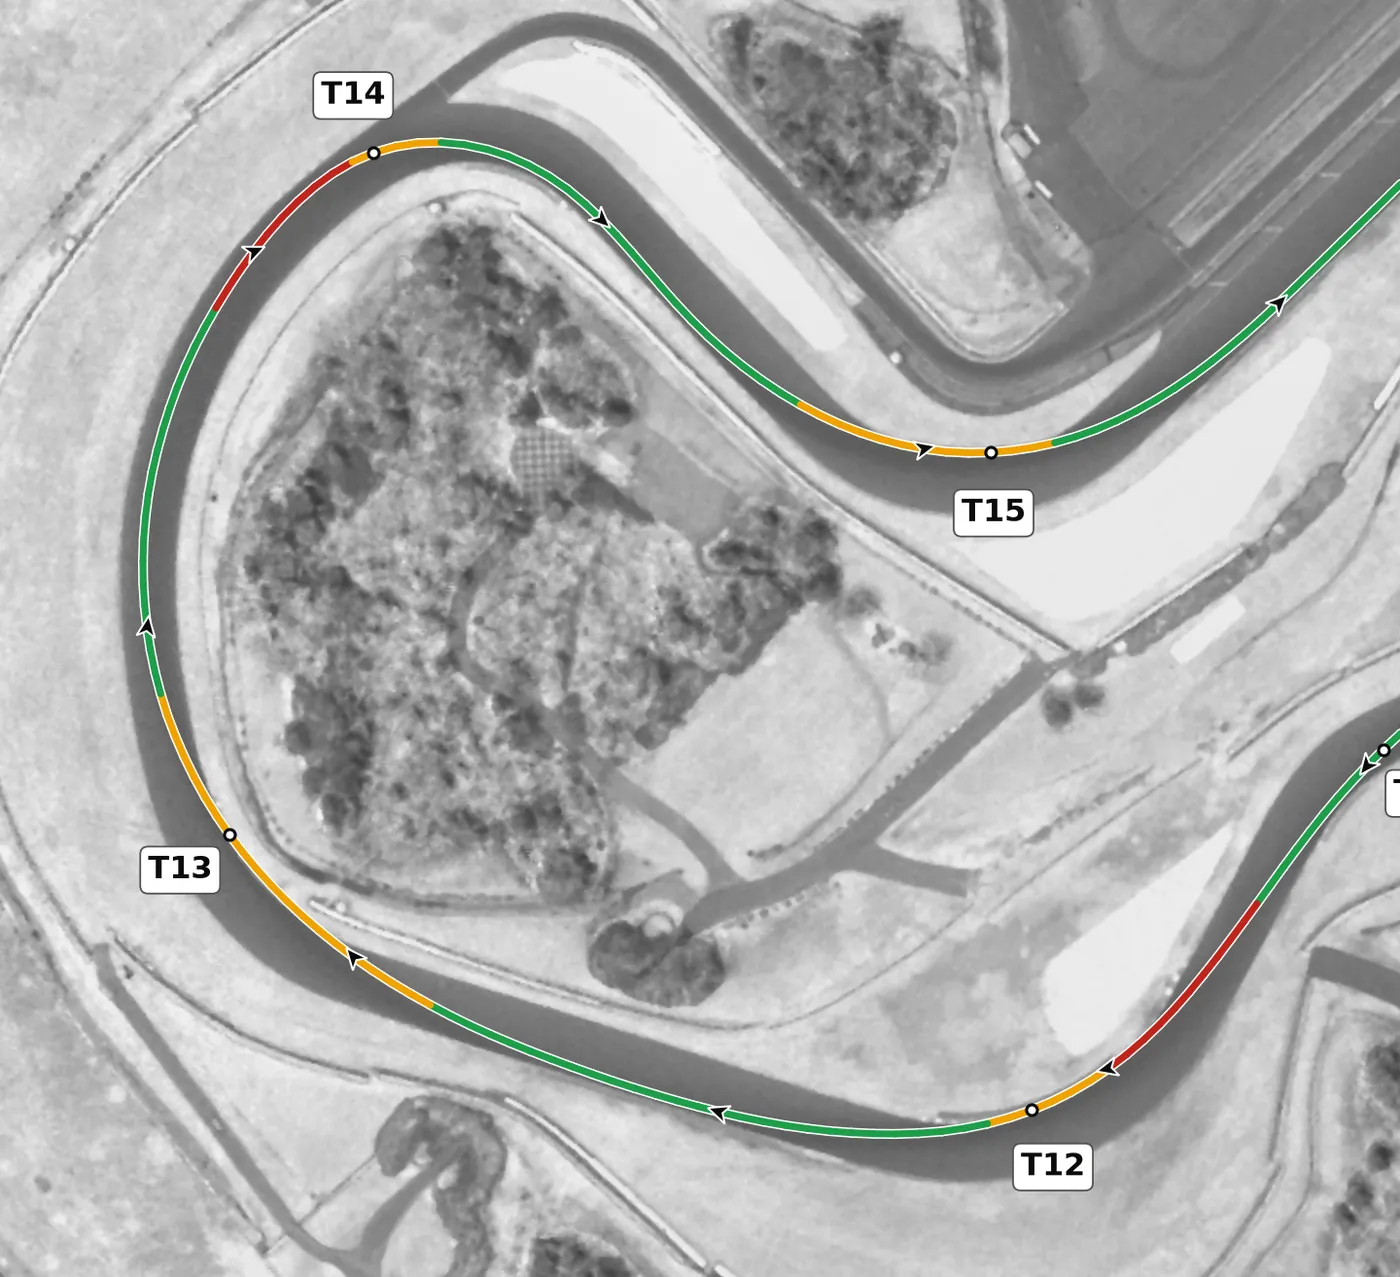
The road crests and falls into T13, a right that bottoms out in a compression and then climbs steeply toward T14. Turn in smoothly once the car settles, use the grip from the compression at the bottom, and drive up the hill on a steady throttle. The mistake to avoid is turning in hard while the car is still light from the crest.
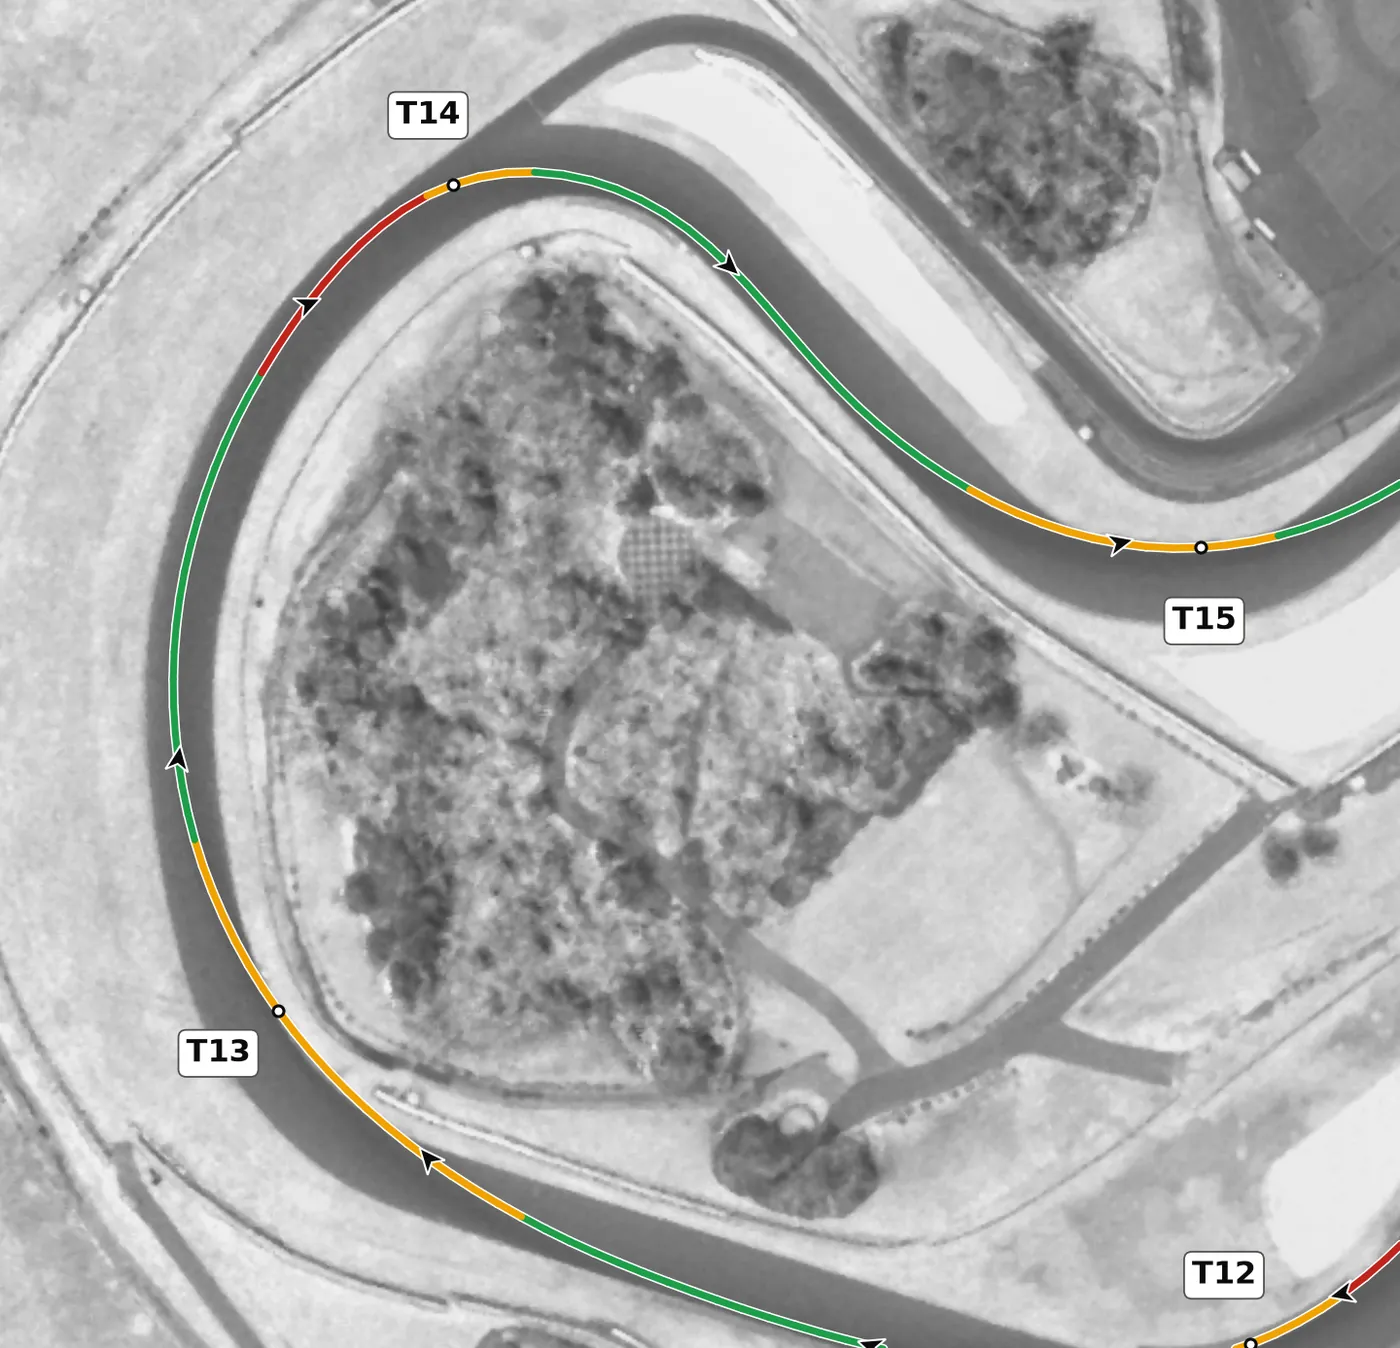
T14 is a heavily banked right at the top of the hill, with the road dropping away after it. Brake briefly in a straight line at the top of the climb, then treat it as a compromise: hold a steady speed through the apex but do not run all the way out to the left, so you can get to the right side for the final left. The mistake to avoid is a full track-out here, which leaves you on the wrong side for T15.
From the survey: Banked about 7.5% at the apex.
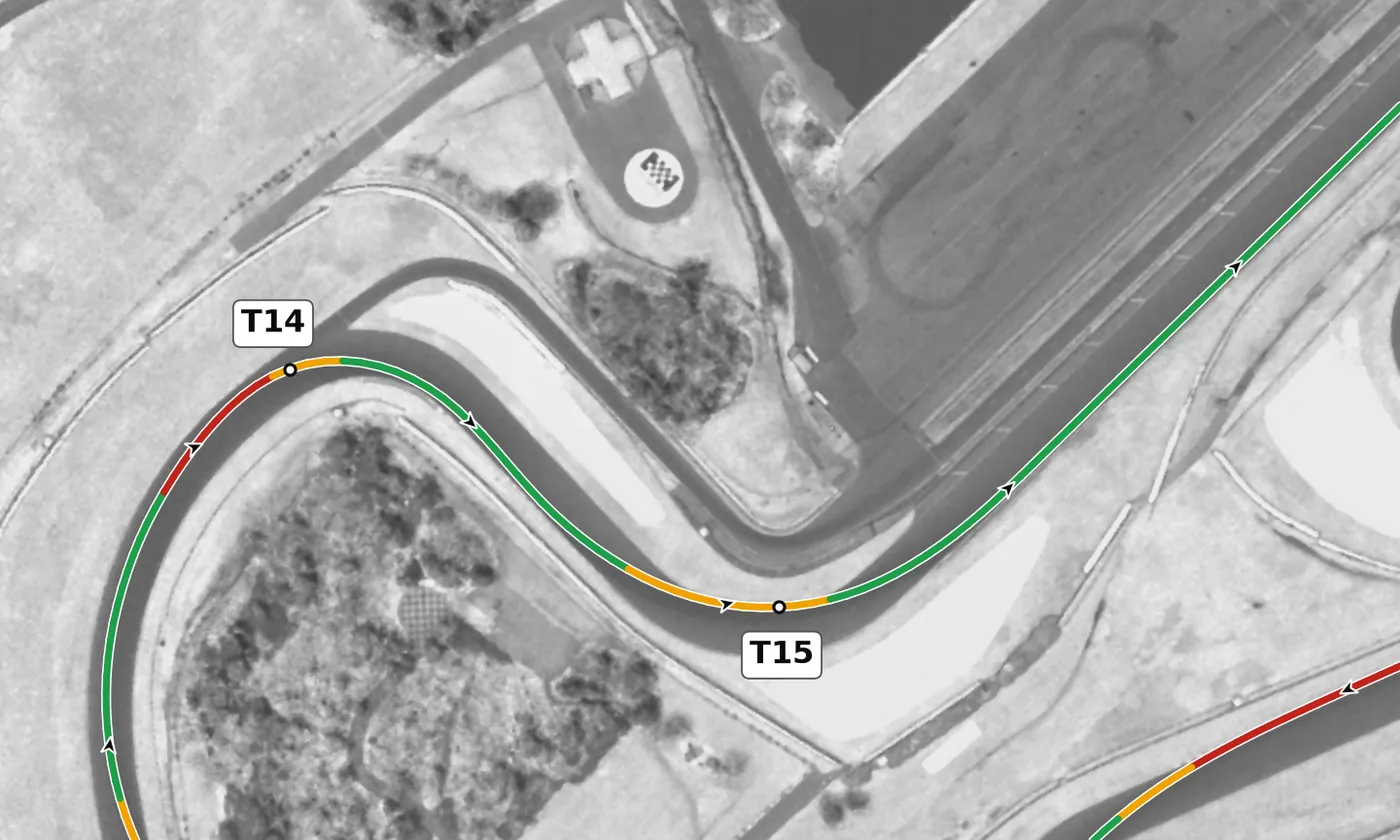
Come in from the right, ease off the throttle to settle weight on the nose, and turn into this downhill left that leads onto the front straight. The road falls away as you go through it, so add power carefully and build to full throttle as you unwind the wheel after the apex. The mistake to avoid is too much throttle too early, which pushes you wide on the downhill exit.
Version history
- v1.1 · 2026-10-01 — The line now goes straight from throttle to brake: the coasting drawn before each brake zone (up to 45 m, at T1 and T14) is gone. The braking points are my own and stay where they were. Notes for T6 and T14 now say they need real braking, and T15 stays a deliberate lift.
- v1.0 · 2026-10-01 — First version: my own M440i lap (25 Hz).
Feedback contributors
Drivers and instructors whose feedback has improved this line. Thank you.
- Mike M — no coasting between throttle and brake; braking points (v1.1)