CMP — Race Line
Estimated from data not in trackdays.ai. The line, speeds and braking points come from cars lapping at a typical quick HPDE pace, cross-checked against published brake markers. If you have data you would like to contribute, please send it to upload@trackdays.ai to help improve our estimates. Turn numbers are a proposed match to the 14-turn track map; T5–T7, the Carousel, is one arc.
Heads up: This is an estimate of a typical quick HPDE line, not any one car's lap. Braking points are a starting point, not a target: start a little earlier and work later in small steps. The line goes straight from throttle to brake; amber only marks where you really lift or hold part throttle. The LiDAR was flown in January 2020, before CMP's August 2020 repave: camber and grade carry over, bumps don't.
- Throttle
- Coast / partial
- Braking
- Apex
- T4Off-camber corner
Arrows show the direction of the lap. The grey basemap is USGS LiDAR: dark = asphalt, light = grass. Tap any map for the full-size image.
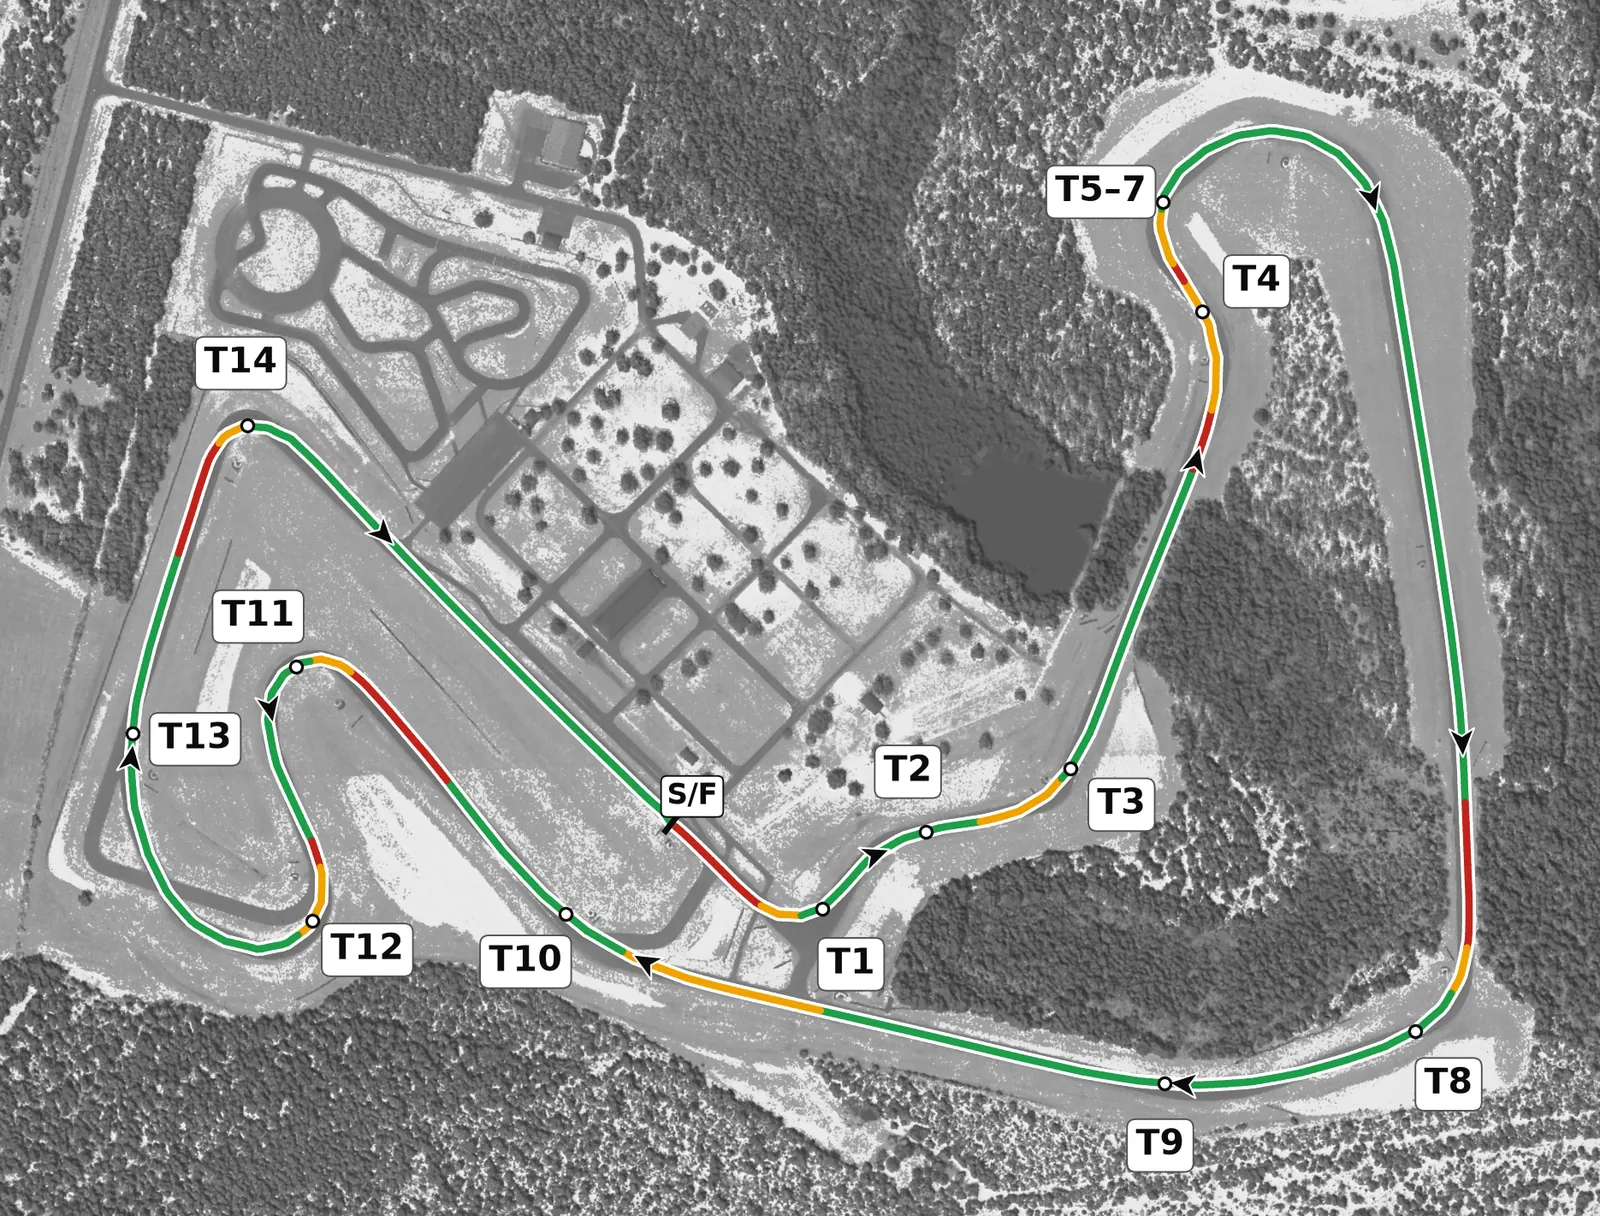
CMP is a flowing, clockwise circuit with modest elevation, where the Carousel and the two tight corners at T11 and T14 decide most of the lap, so think about exits rather than late braking. Sector 2 is fast and banked and rewards commitment that you build up gradually, while sector 3 is slower and more technical, and how you take each corner there sets up the next. The circuit was repaved in 2020, so bumps described in older guides may no longer be there; learn the current surface and keep your lines smooth and patient through the Carousel and onto the front straight.
Sectors
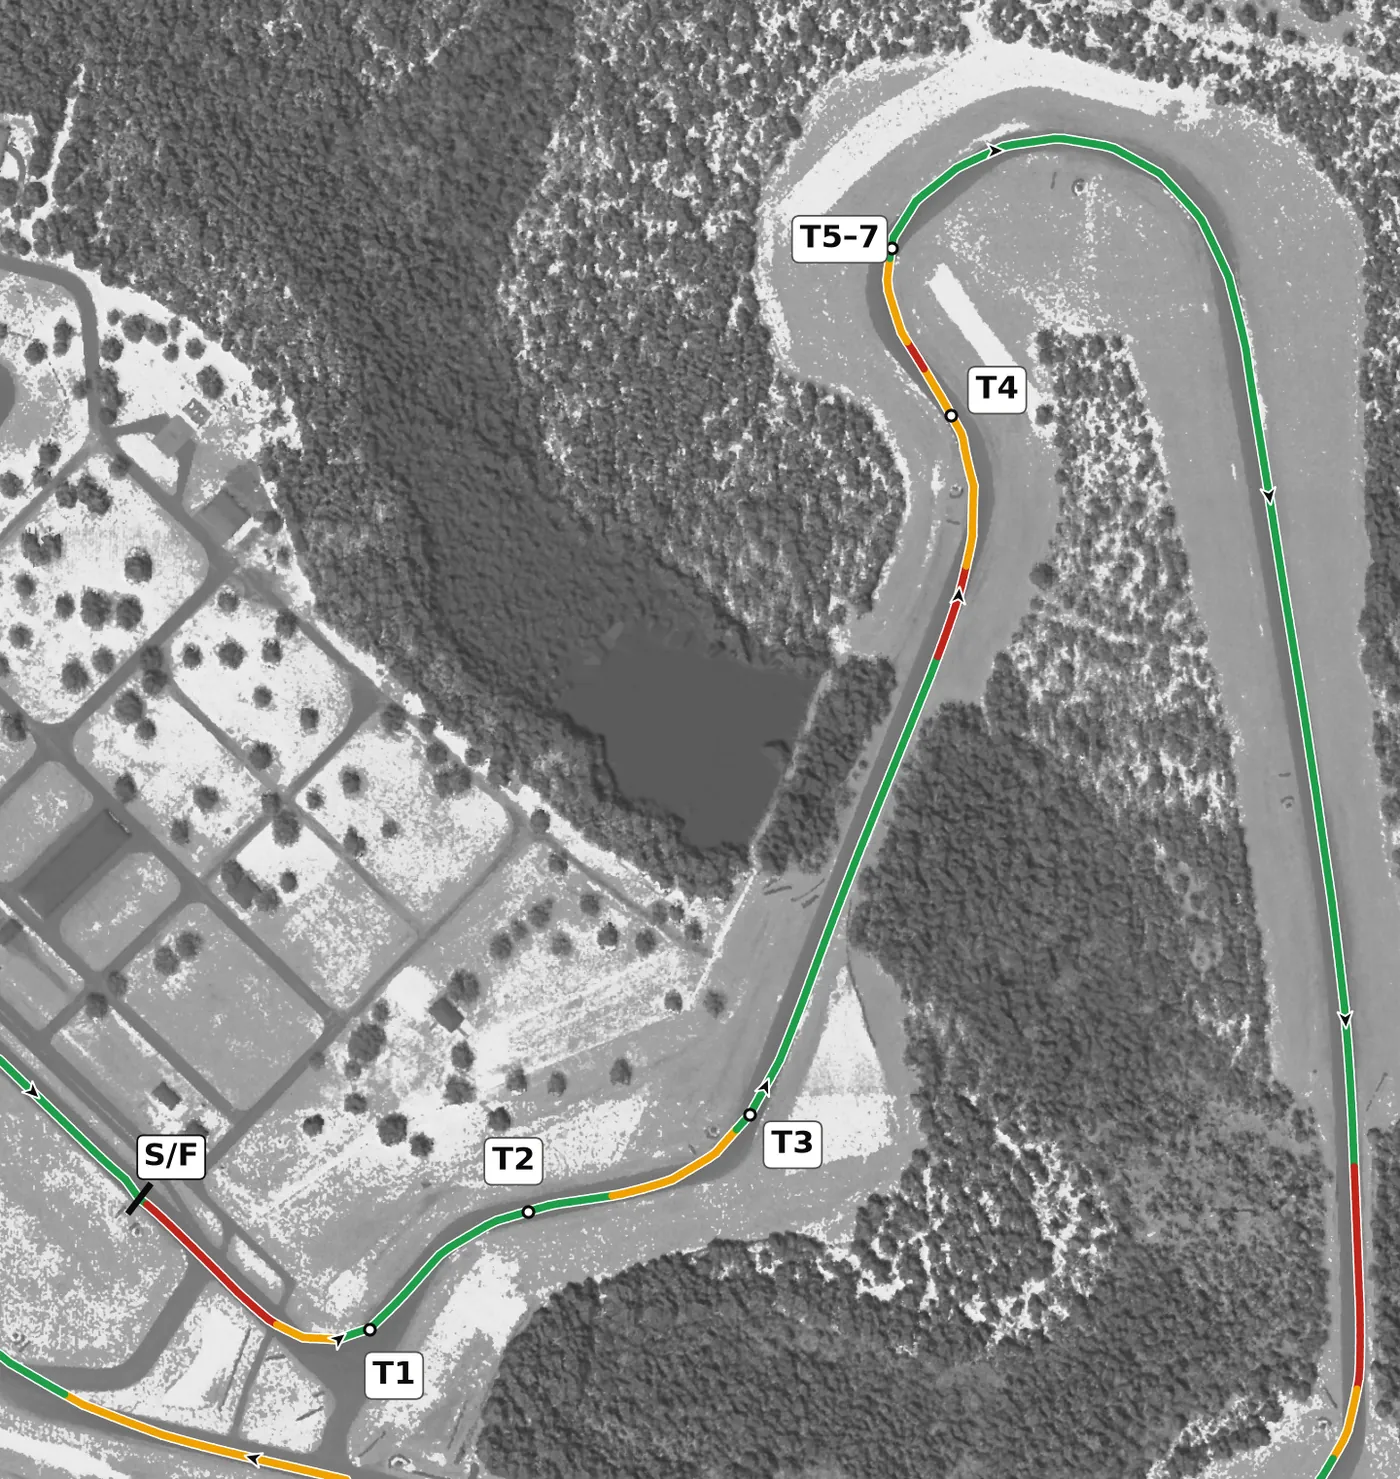
The lap opens with a hard stop into the 90-degree left at T1, then the T2–T3 esses, which flow best when T1 is taken a little late so you are already in position for them. T4 is a fast uphill left that is quicker than it looks and leads straight into the Carousel, the long 180-degree right of T5–T7, where trail braking and patience earn you a strong run down to T8.
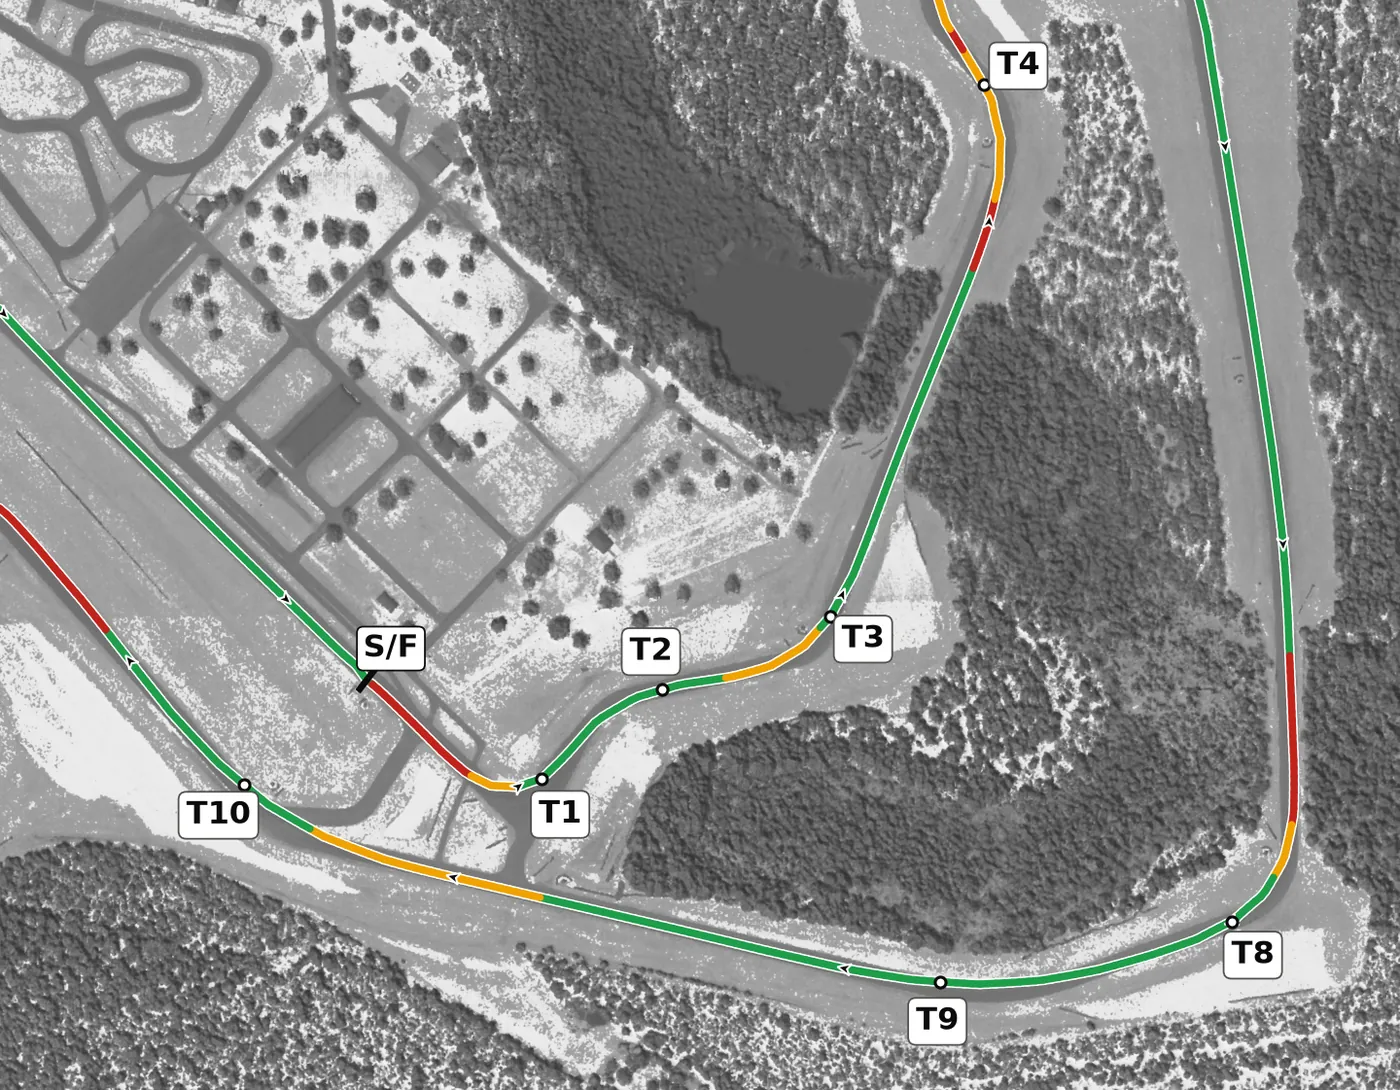
This is the fast part of the lap: T8 is a banked right climbing out of the lowest point on the circuit, T9 is the most banked apex on the lap, and T10, the Kink, carries the highest minimum speed. Let the banking hold the car rather than braking hard, keep your steering smooth, and build your speed through here over several laps.
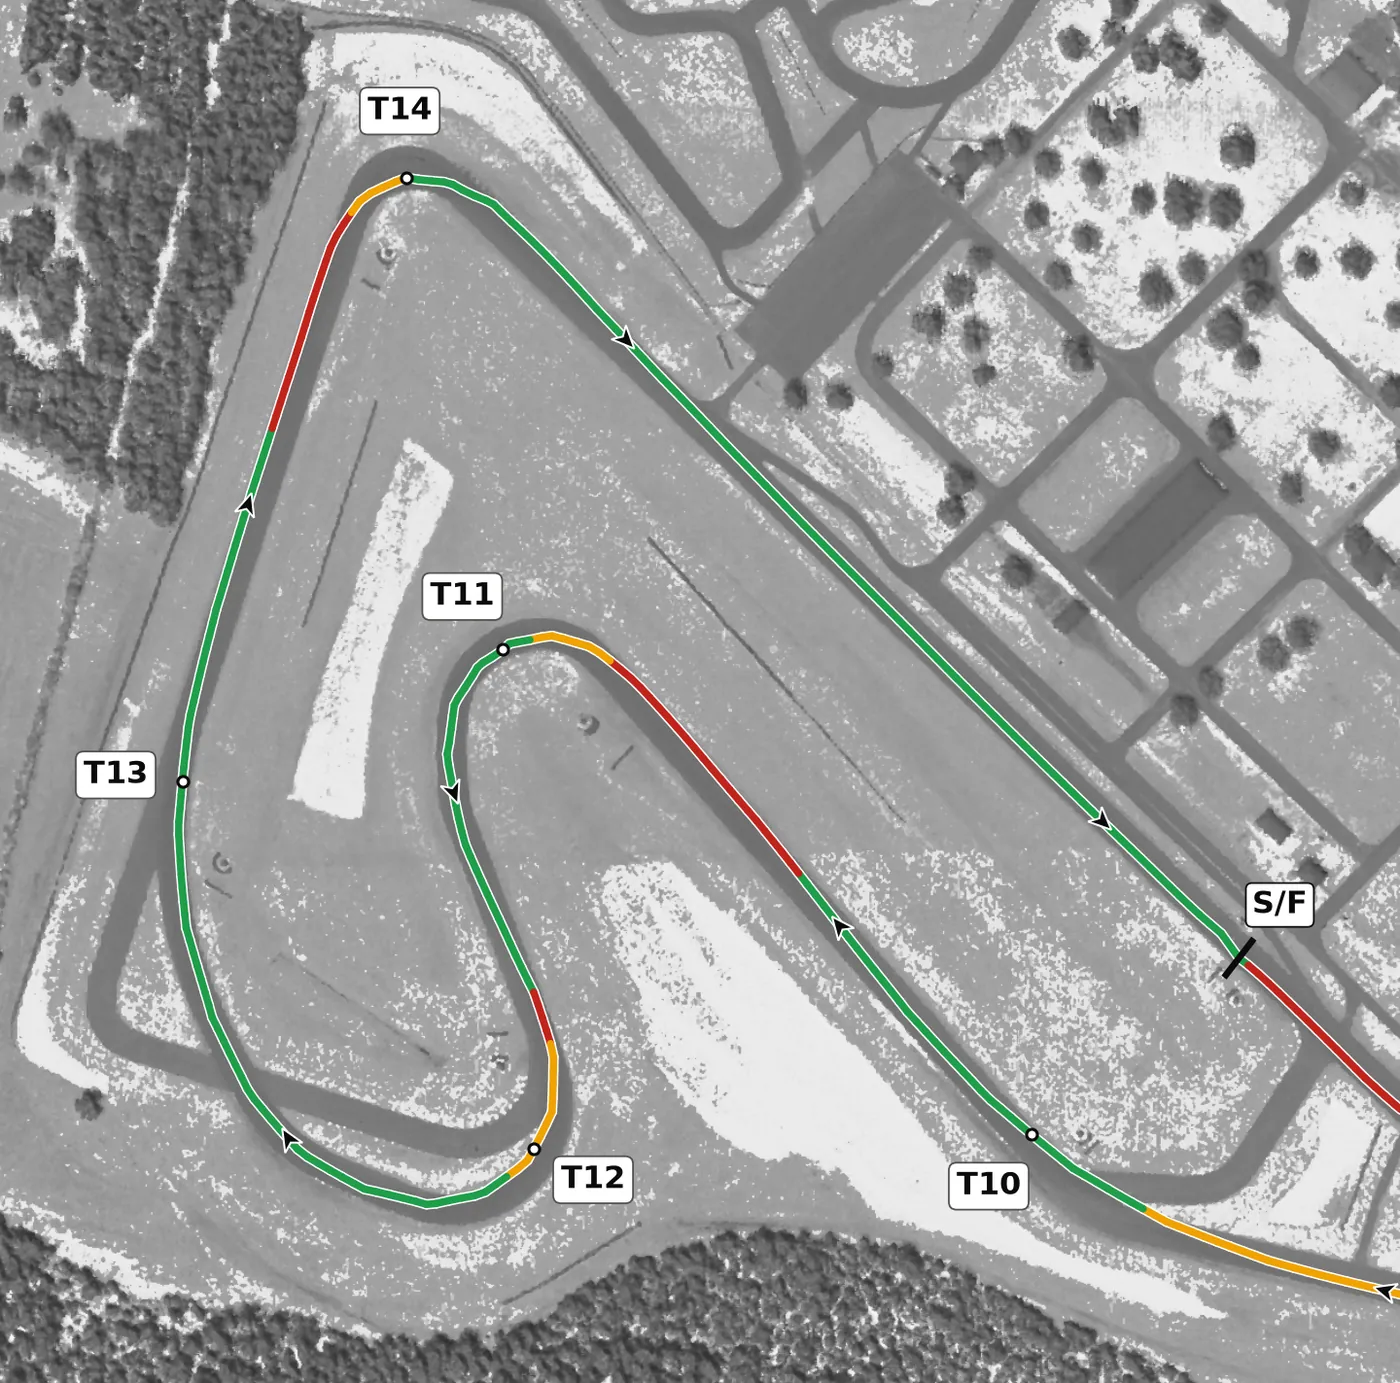
The last sector starts with T11, the tightest left on the lap and the highest point on the circuit, then the 90-degree right at T12, which decides how much of a corner T13 becomes. T14 is the tight right onto the front straight, so it is a classic slow-in, fast-out corner where a late apex pays off all the way to T1.
Corners
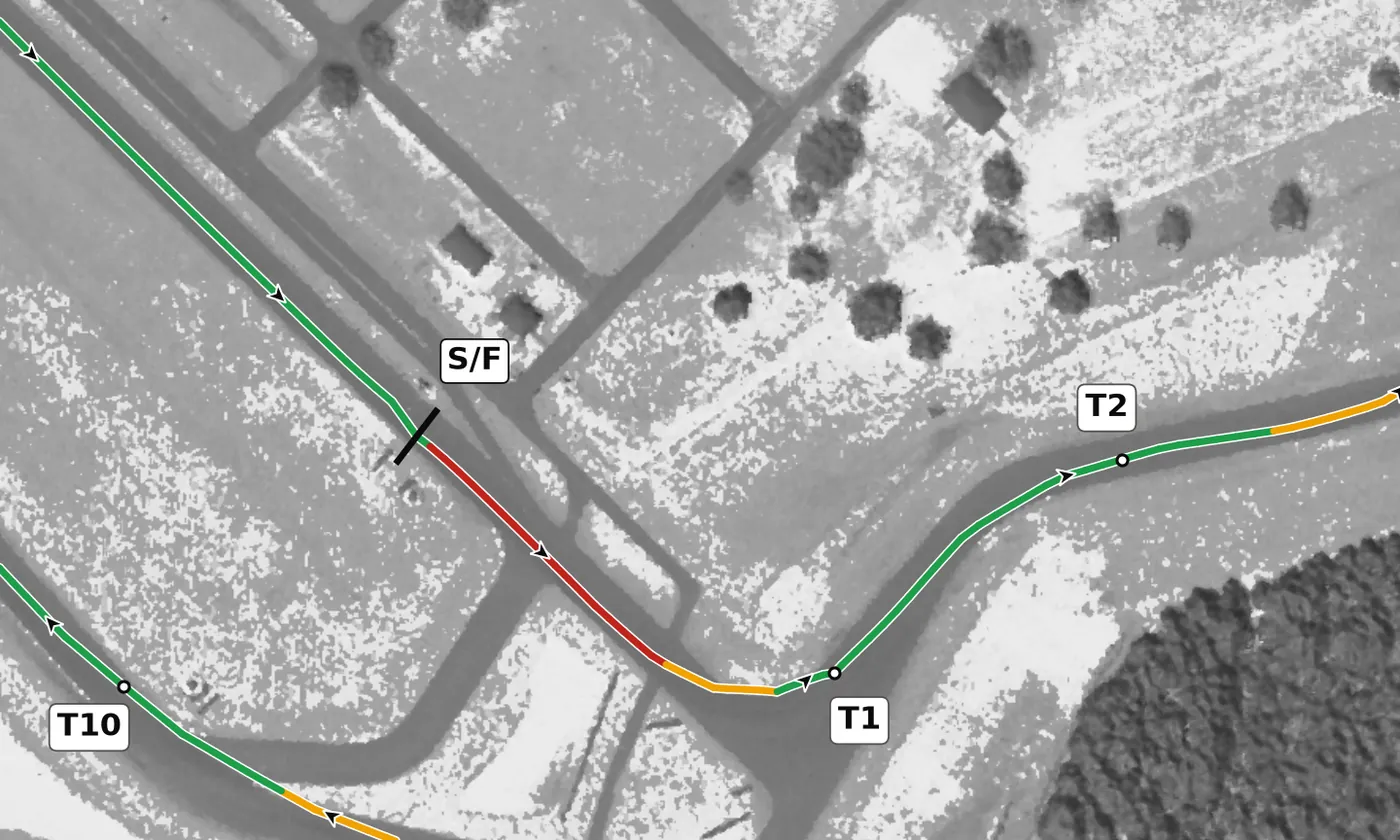
Brake hard and straight from the front straight, turn the car in decisively, and aim for a late apex at the inside rumble strips without climbing on the curb. Track out only to about the middle of the road so you are already set up for the T2–T3 esses. The mistake to avoid is an early apex that runs you wide on exit and spoils the esses.
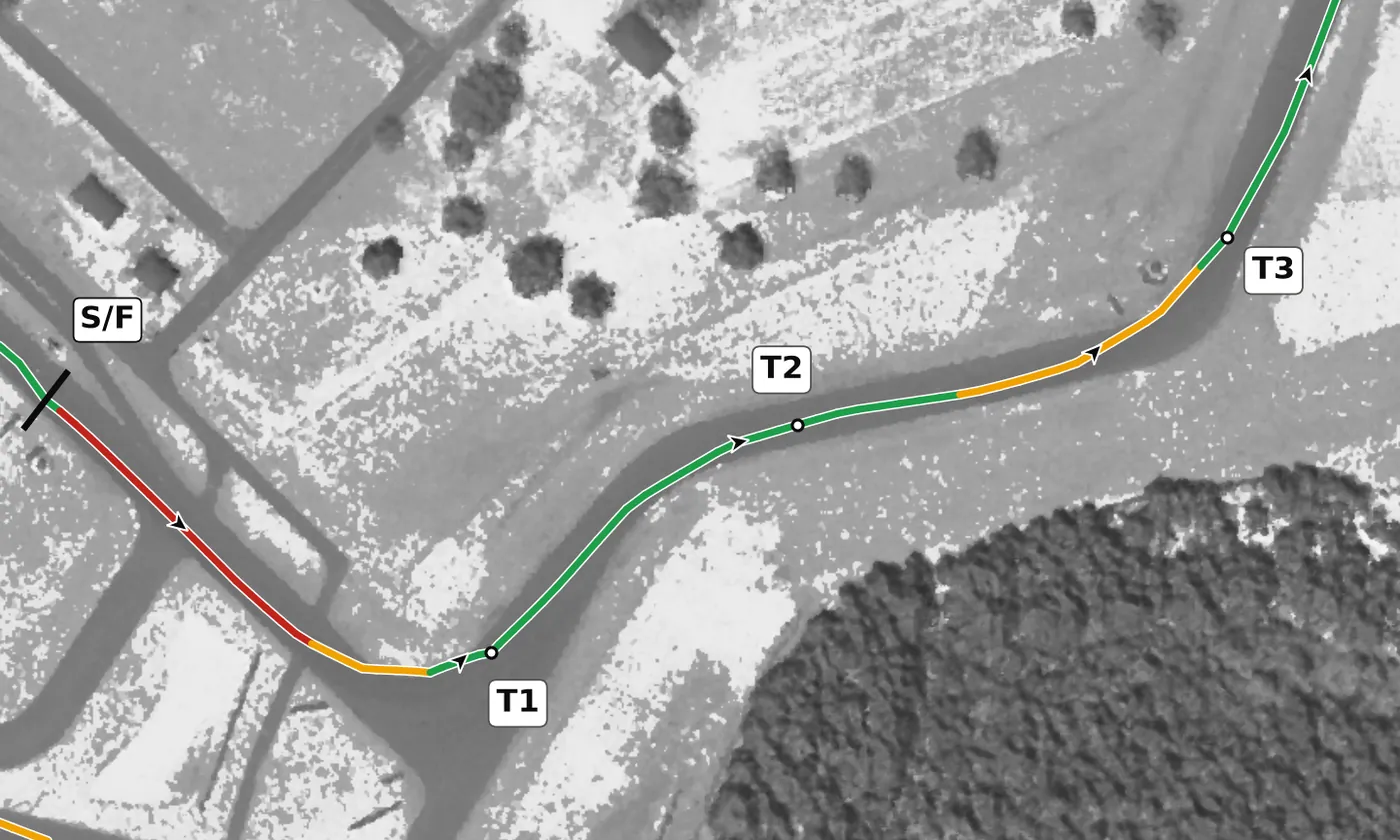
This right is the first half of the esses, a fast sweeper on a gentle rise that needs little or no braking. Use the width of the track at turn-in, but don't track all the way out, because your real priority is the position for T3. The mistake to avoid is treating T2 as its own corner and ending up on the wrong side of the road for the faster left that follows.
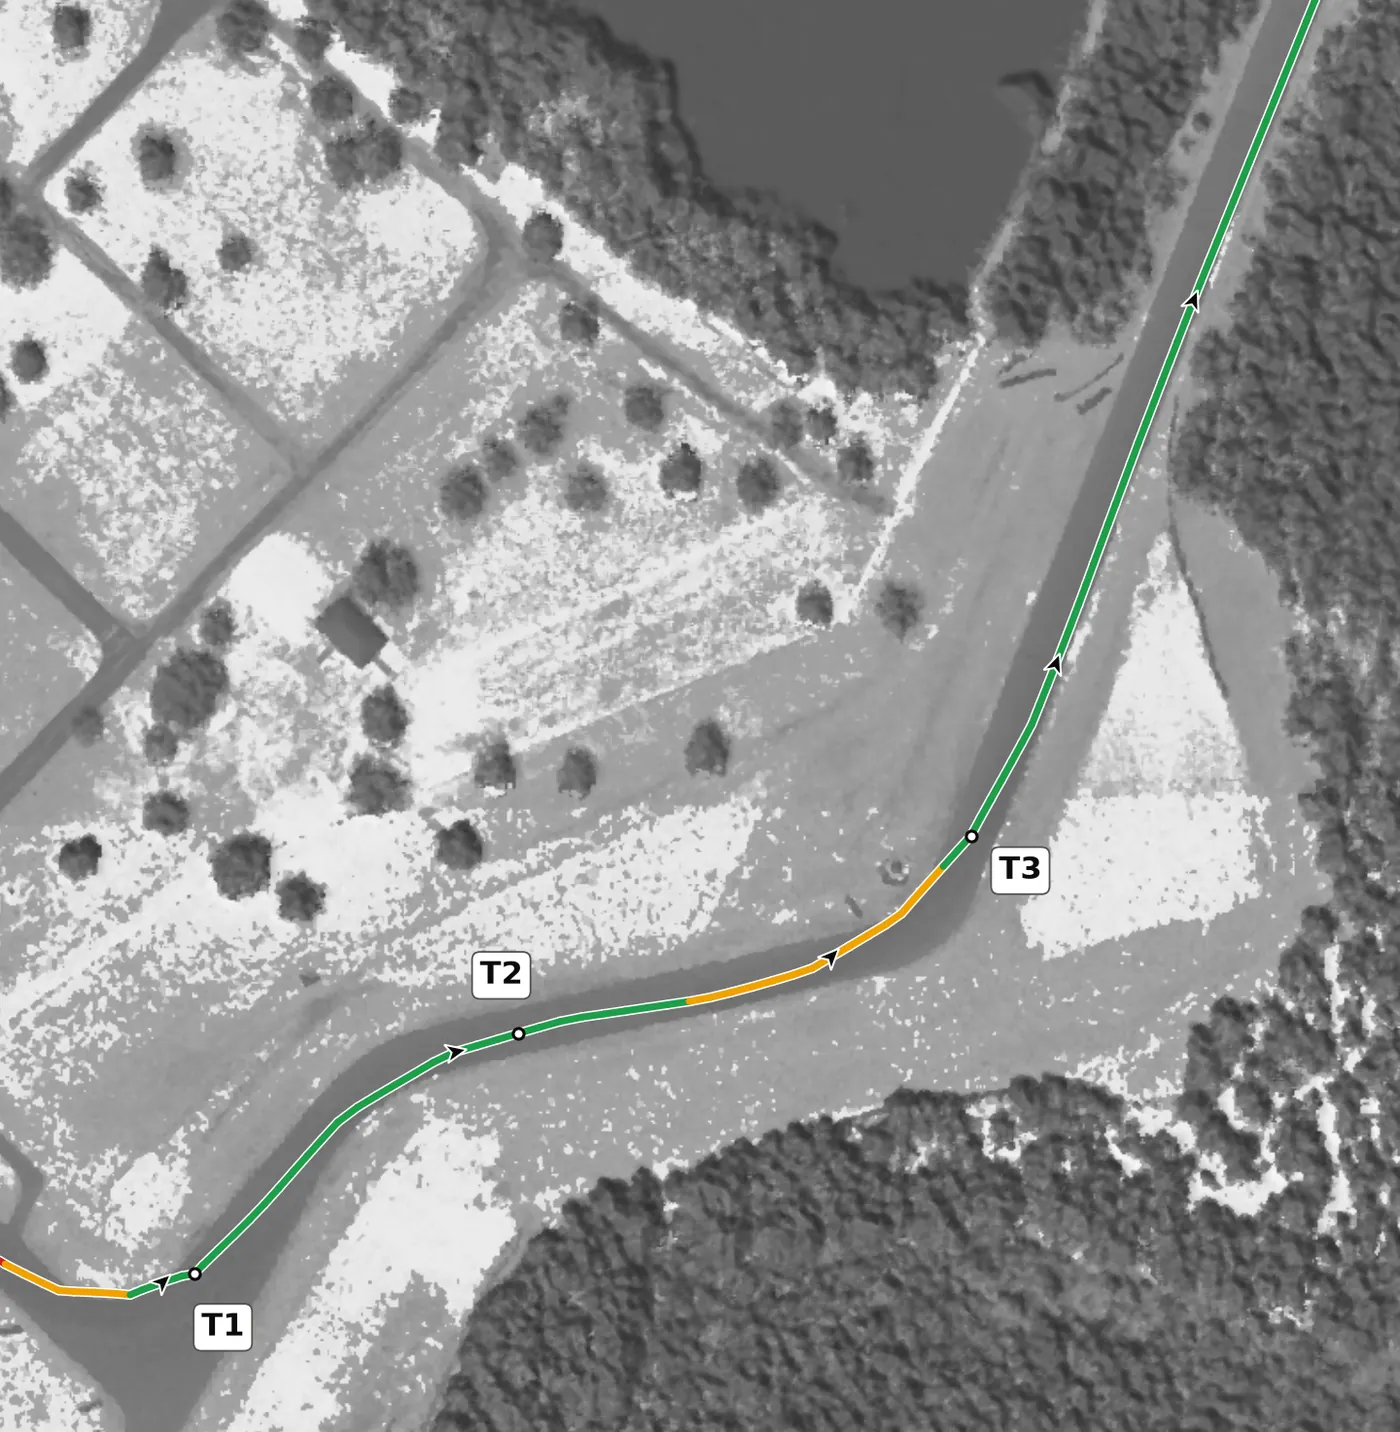
This left is faster than T2, and the road begins to fall away after the apex, so a brush of the brakes or a brief lift and a slightly late turn-in are all you need. Clip the apex smoothly and use the whole track on exit as you head toward T4. The mistake to avoid is a ragged exit from T2 that forces you to brake hard here and lose the momentum for the climb.
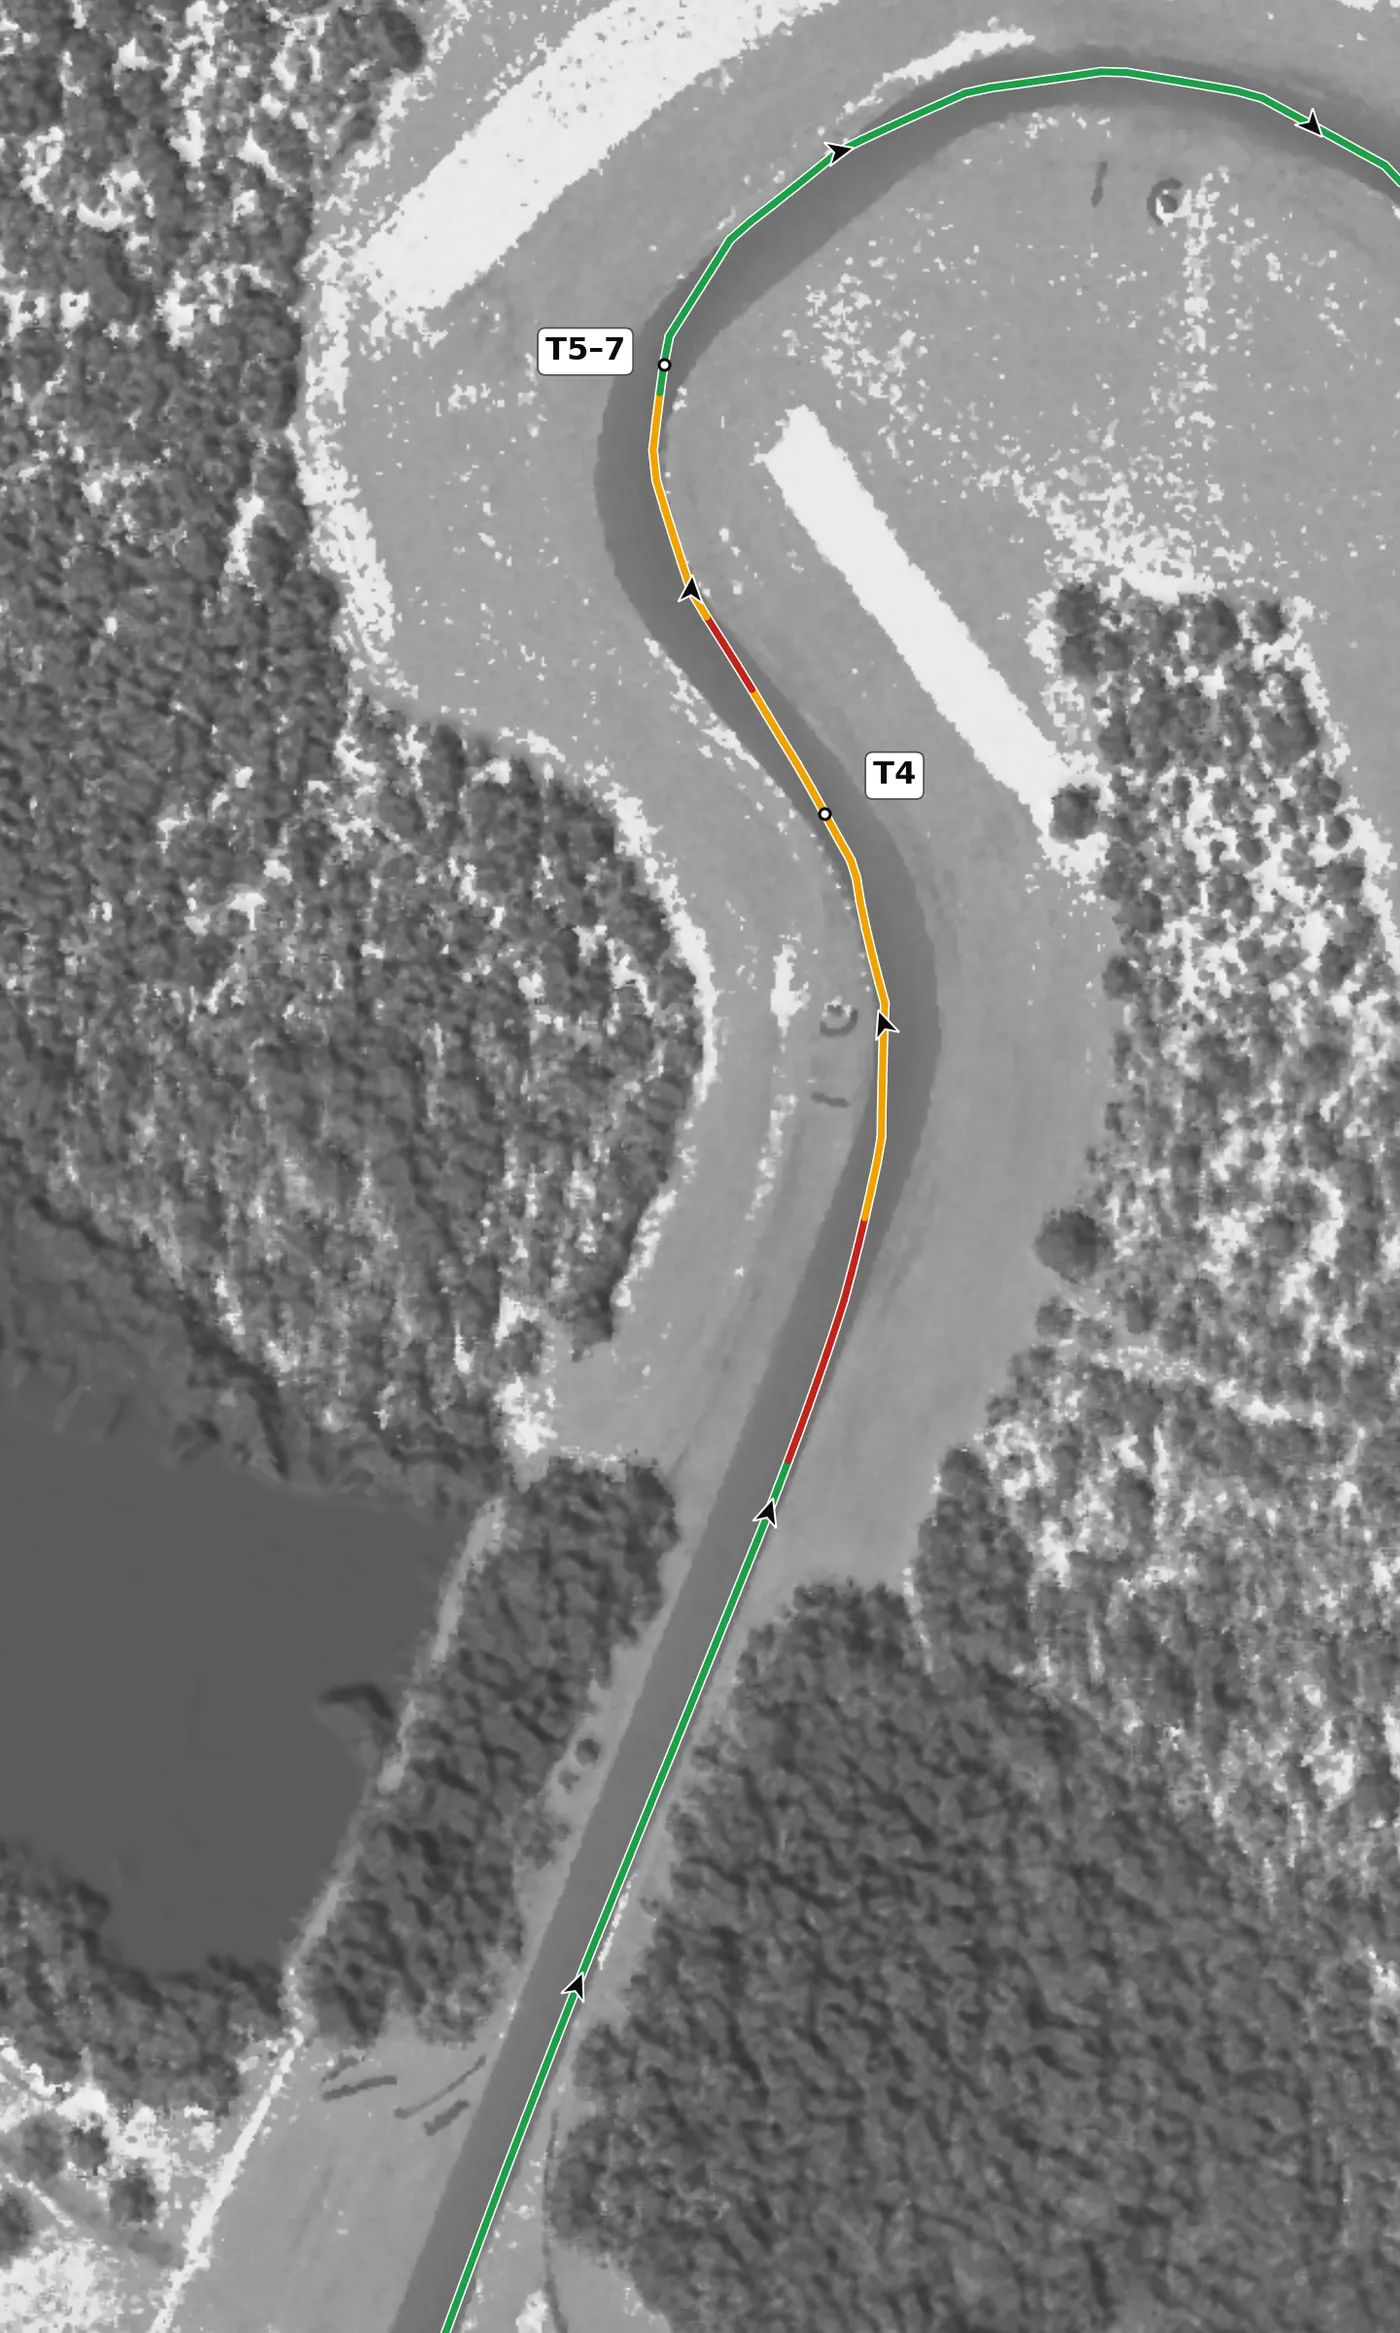
T4 is a fast left that climbs steeply through the apex, and it is quicker than it looks, with a short braking zone. Use only a light brake or a lift, take a slightly late apex, and accept a compromised exit so you can get the car positioned for the long right of the Carousel. The mistake to avoid is overslowing on entry: the uphill grade scrubs speed for you.
From the survey: The climb starts here: +4.0% at the apex, 2.9 m up from entry to apex.
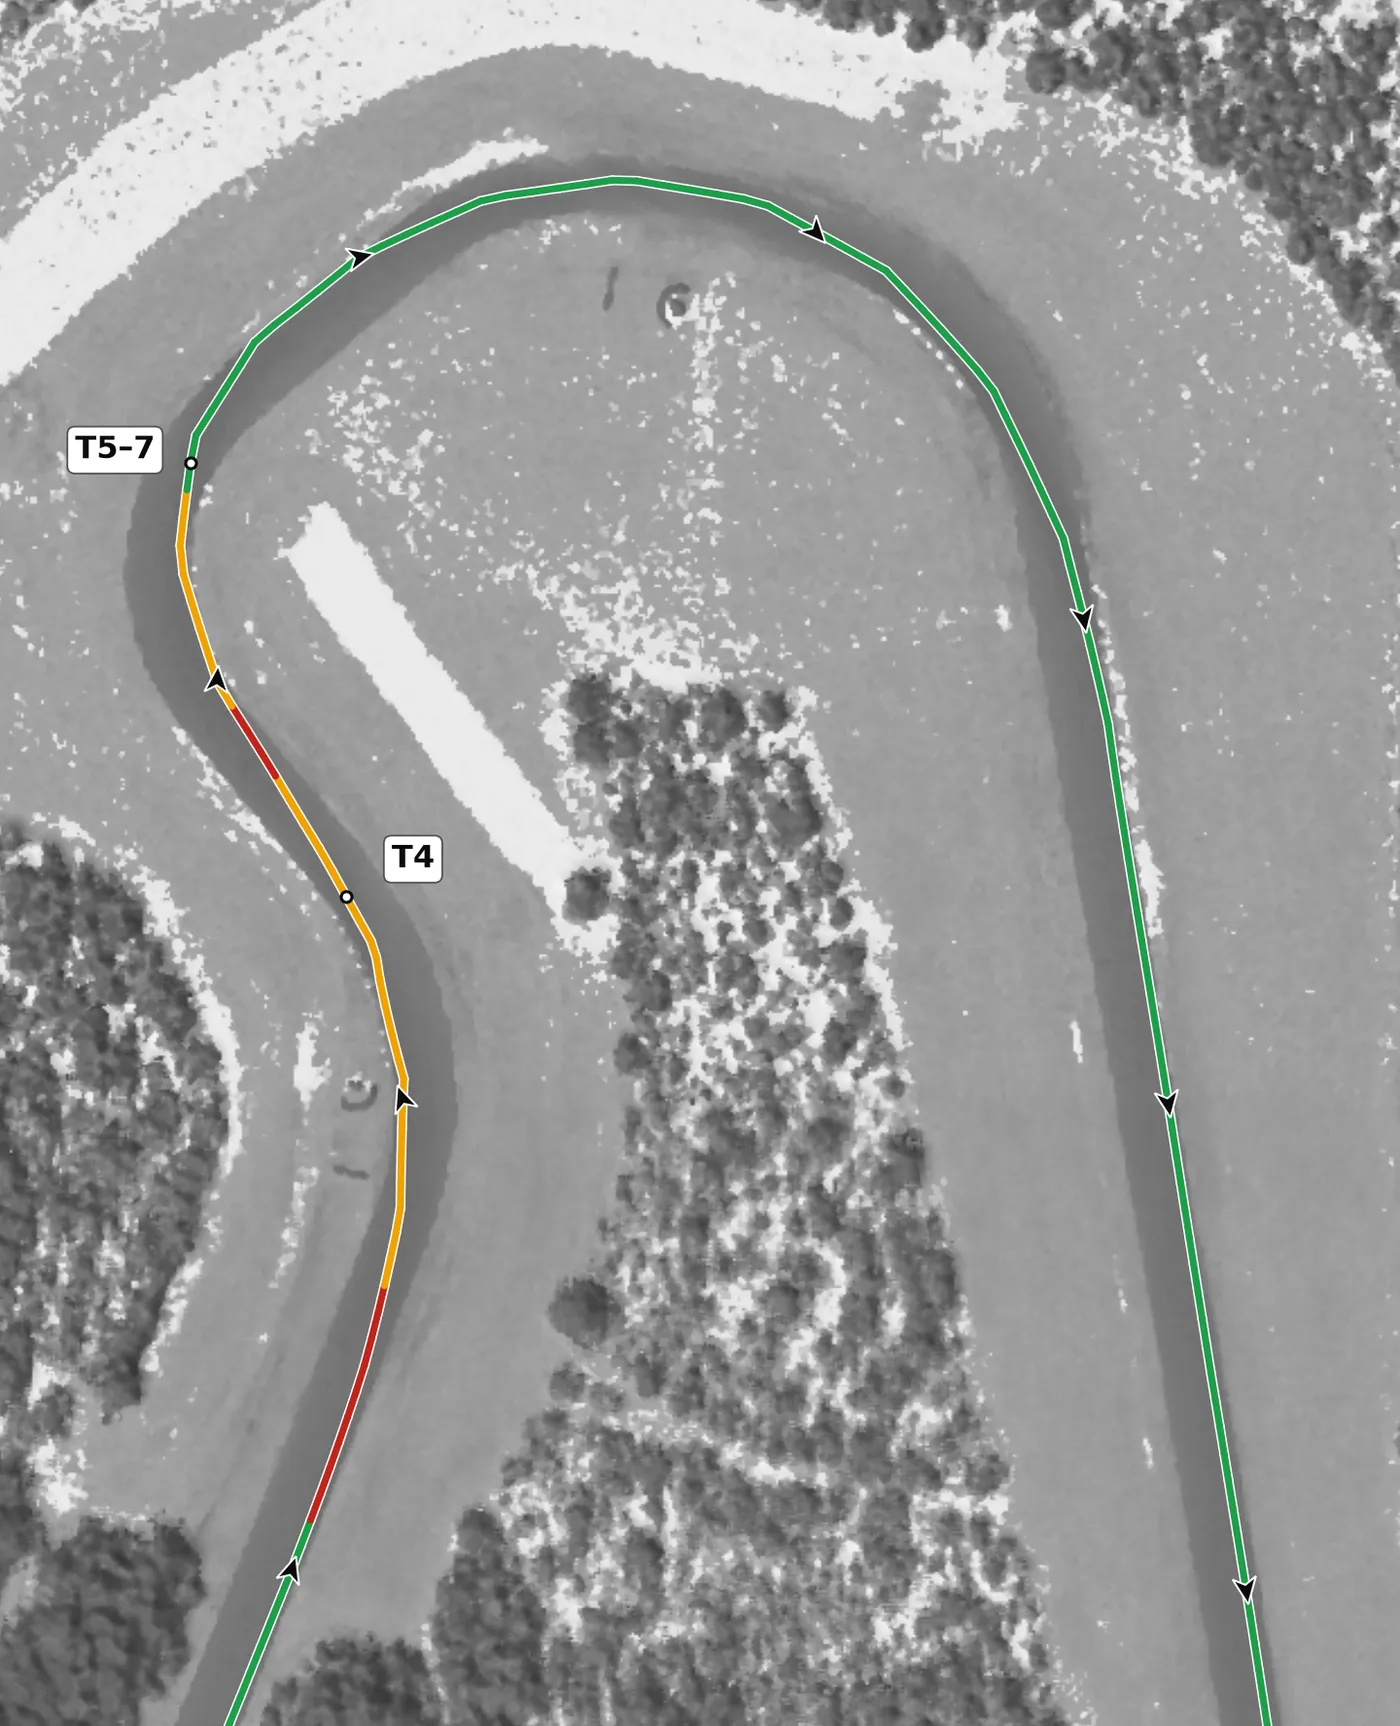
The Carousel is one long right-hand arc of nearly 200 degrees with three turn numbers and changing radius, on camber at the apex. Brake in a straight line, then trail off gently to rotate the car through the arc, hold a steady line and pick a late final apex so you can unwind the wheel and accelerate onto the long run to T8. The mistake to avoid is early throttle that pushes you wide in the middle, which costs speed all the way down the back of the circuit.
From the survey: One 197° right-hand arc carrying three turn numbers, on camber (+1.4%) at the apex.
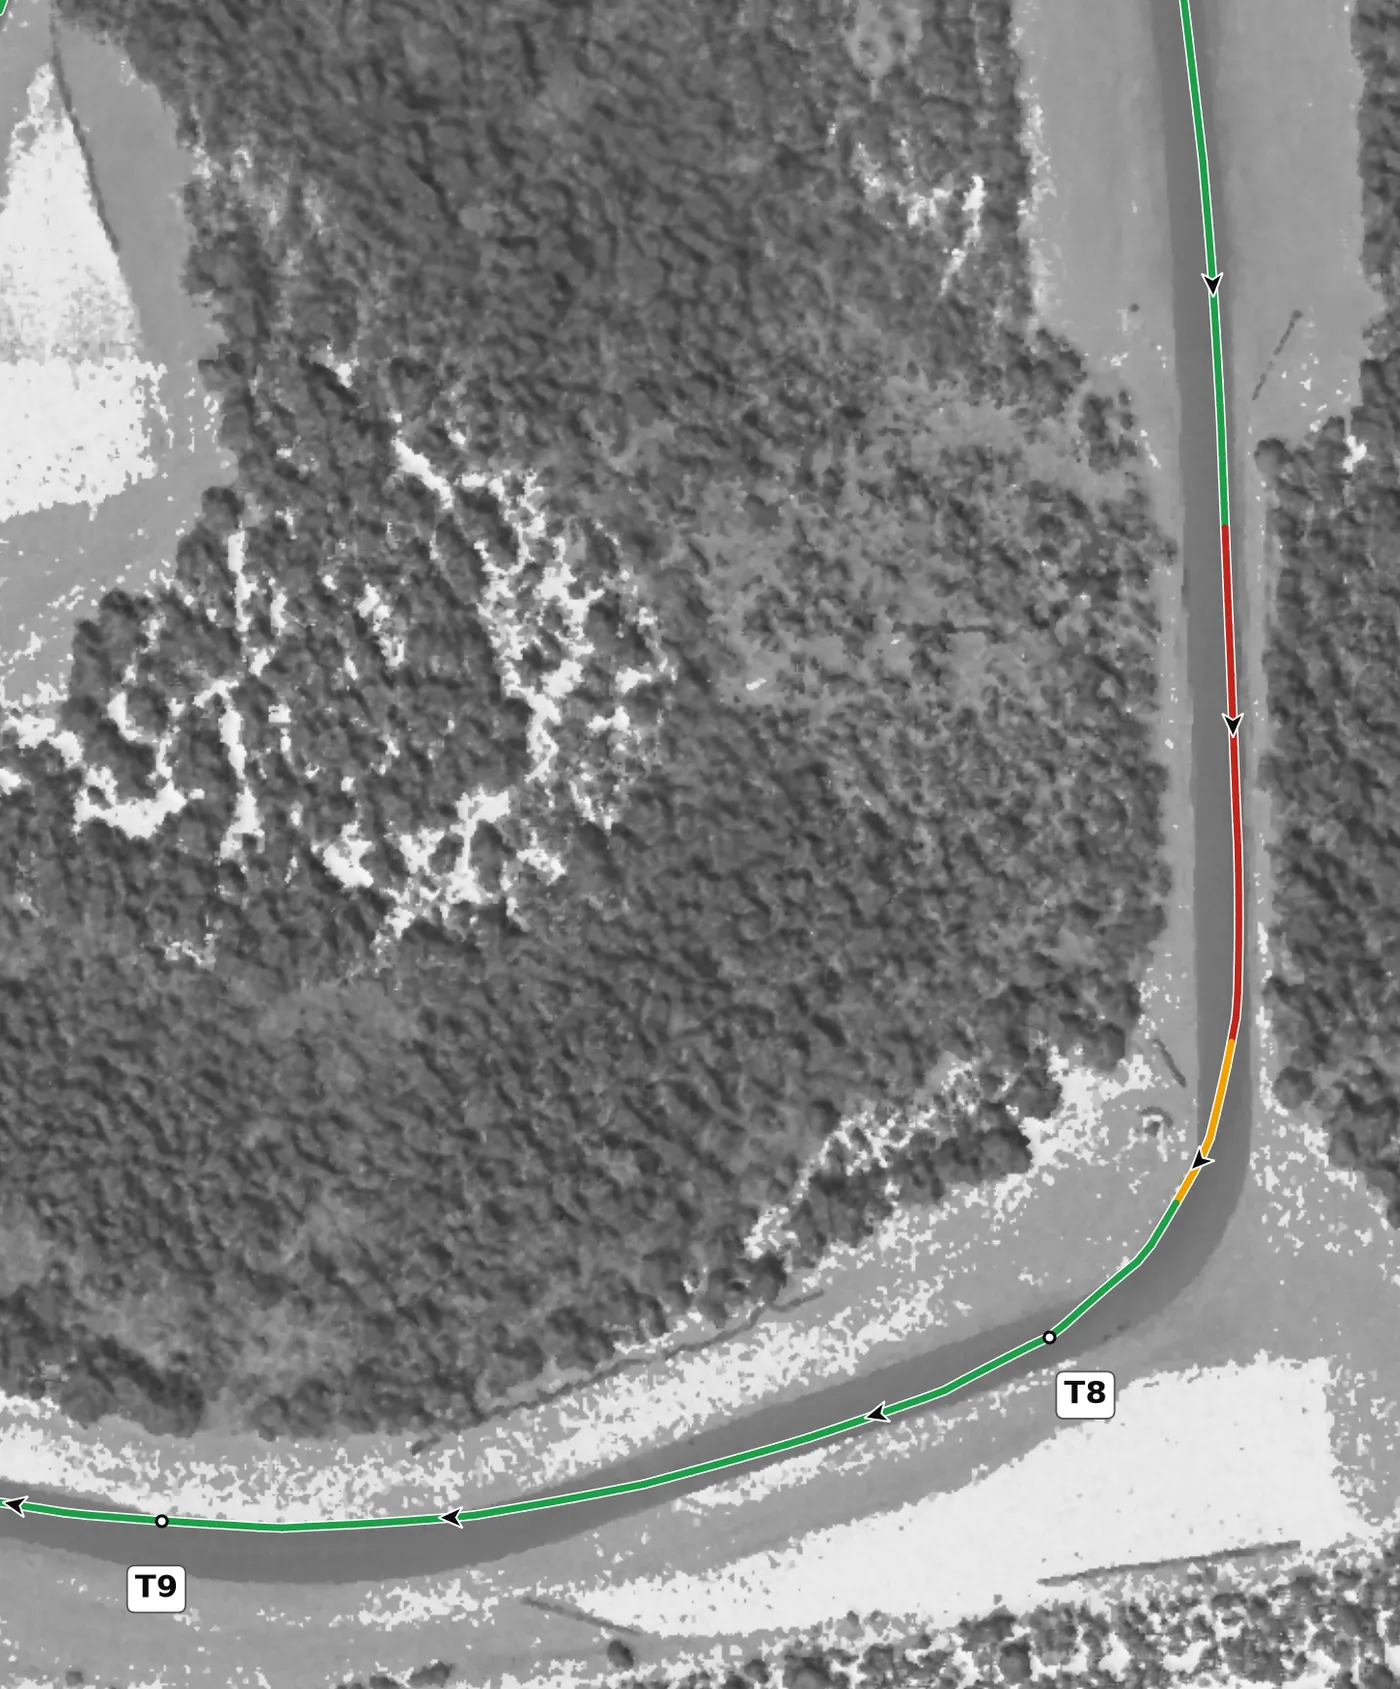
This fast right is banked and climbs out of the lowest point on the lap, so brake a little earlier than feels natural and get back to the throttle sooner than feels comfortable, letting the banking hold the car. Take a smooth arc and stay off the apex curbing, which is too aggressive. The mistake to avoid is overbraking on entry and then rushing the turn-in, which unsettles the car on the climb.
From the survey: Banked, up to +6.3% through the corner, and climbing (+2.6%) out of the lowest point on the lap.
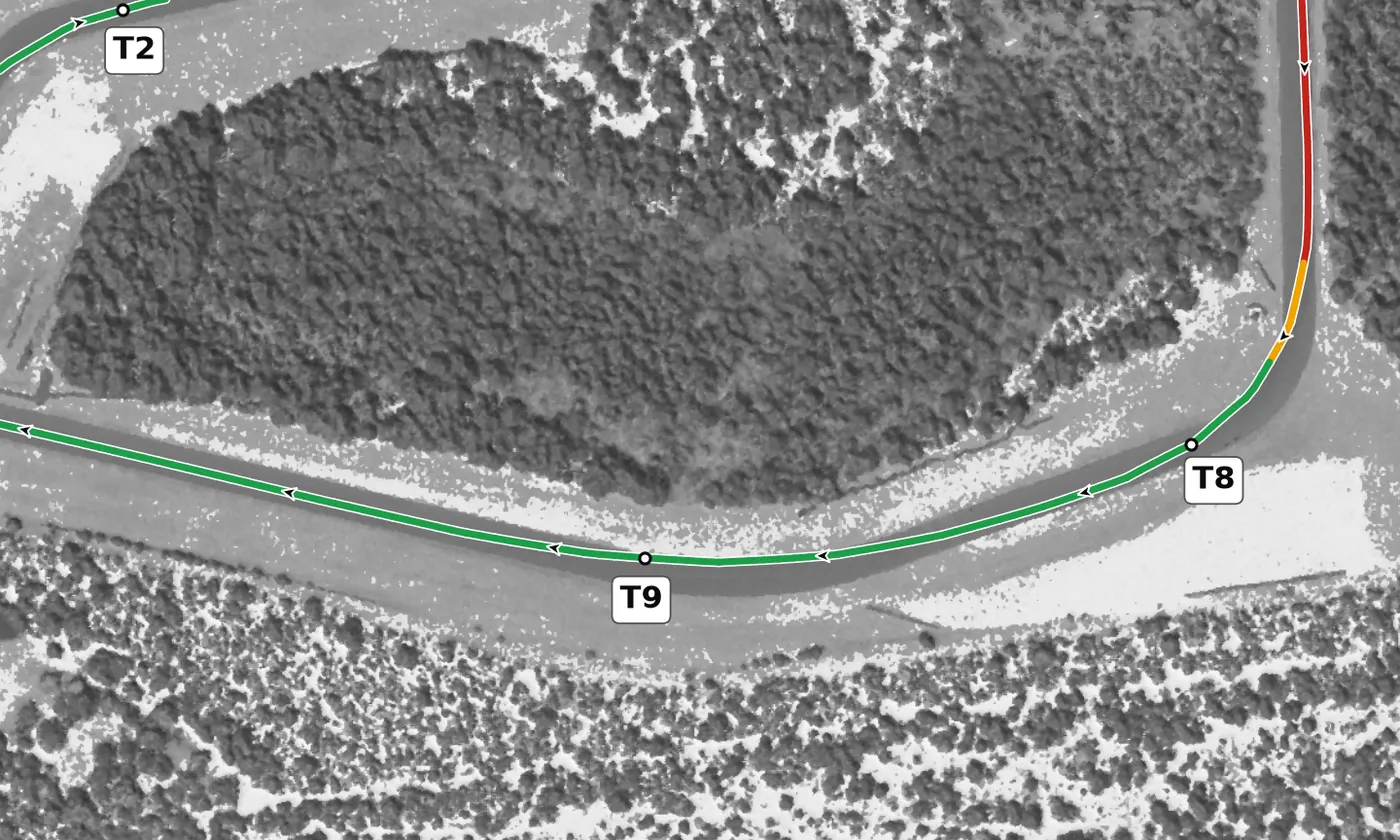
This right is the most banked apex on the lap, so it supports much more speed than it looks like it should. Flow through it on a smooth, steady throttle with a single steering input, using the shortest line toward T10. The mistake to avoid is sudden steering or throttle changes at speed, which upset the car even on a well-supported surface.
From the survey: The most banked apex on the lap: +4.8%, up to +7.1%.
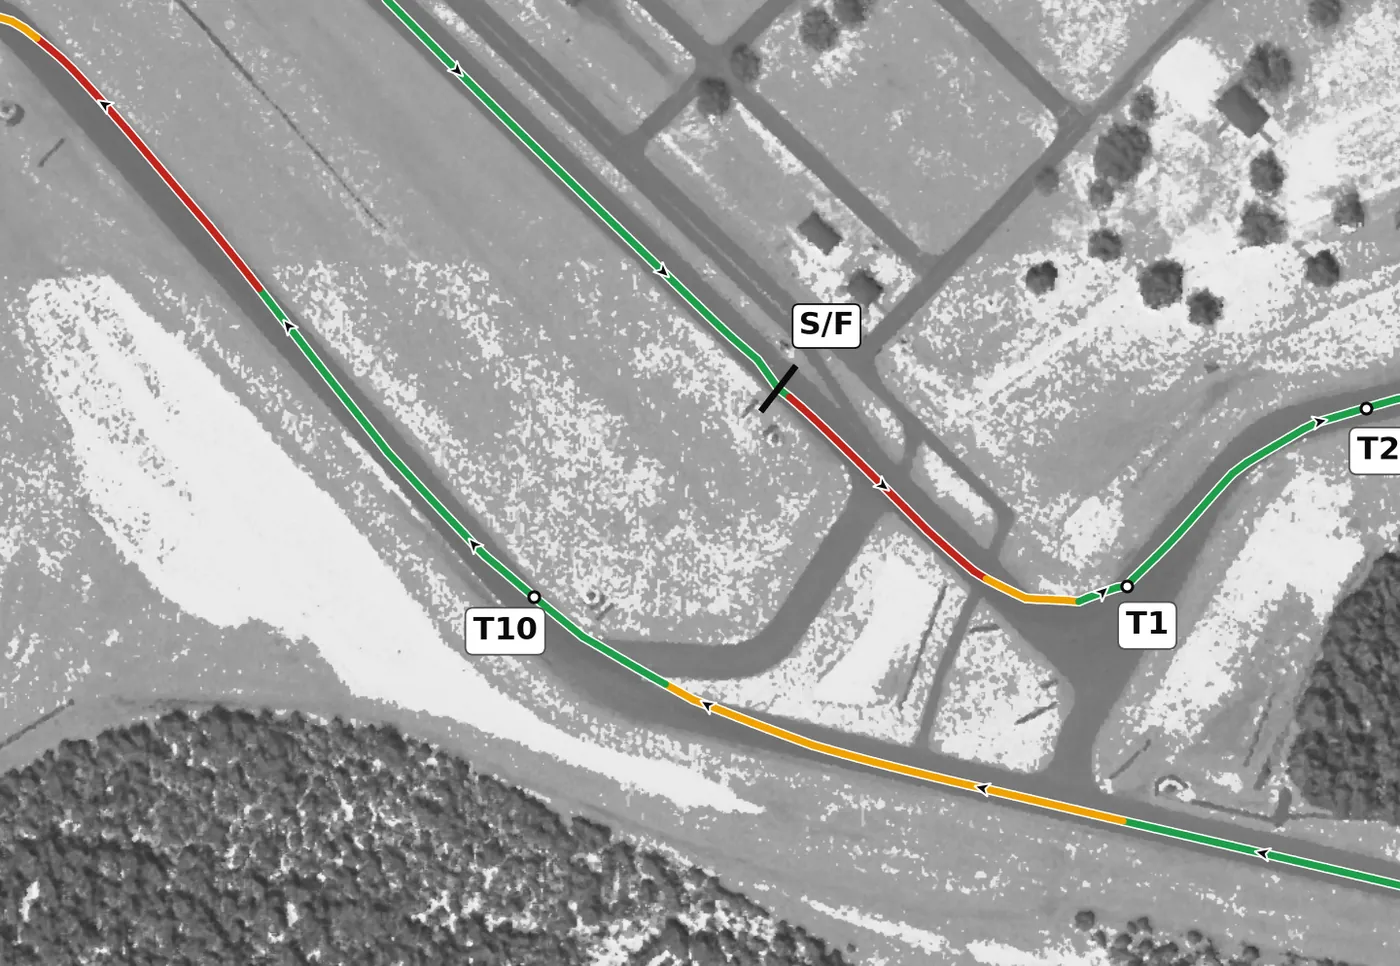
The Kink is a fast right with almost no camber, and it carries the highest minimum speed on the lap. At HPDE pace it is a lift, not a brake: ease off on the approach, then get back to the throttle once the car takes a set. Turn in patiently, because an early turn-in puts you onto the curbing and cut-through at the apex, which can upset the car at high speed. The mistake to avoid is turning in too early and clipping the inside, then having to correct mid-corner.
From the survey: The Kink: almost flat across (+0.2% at the apex) at the highest minimum speed on the lap.
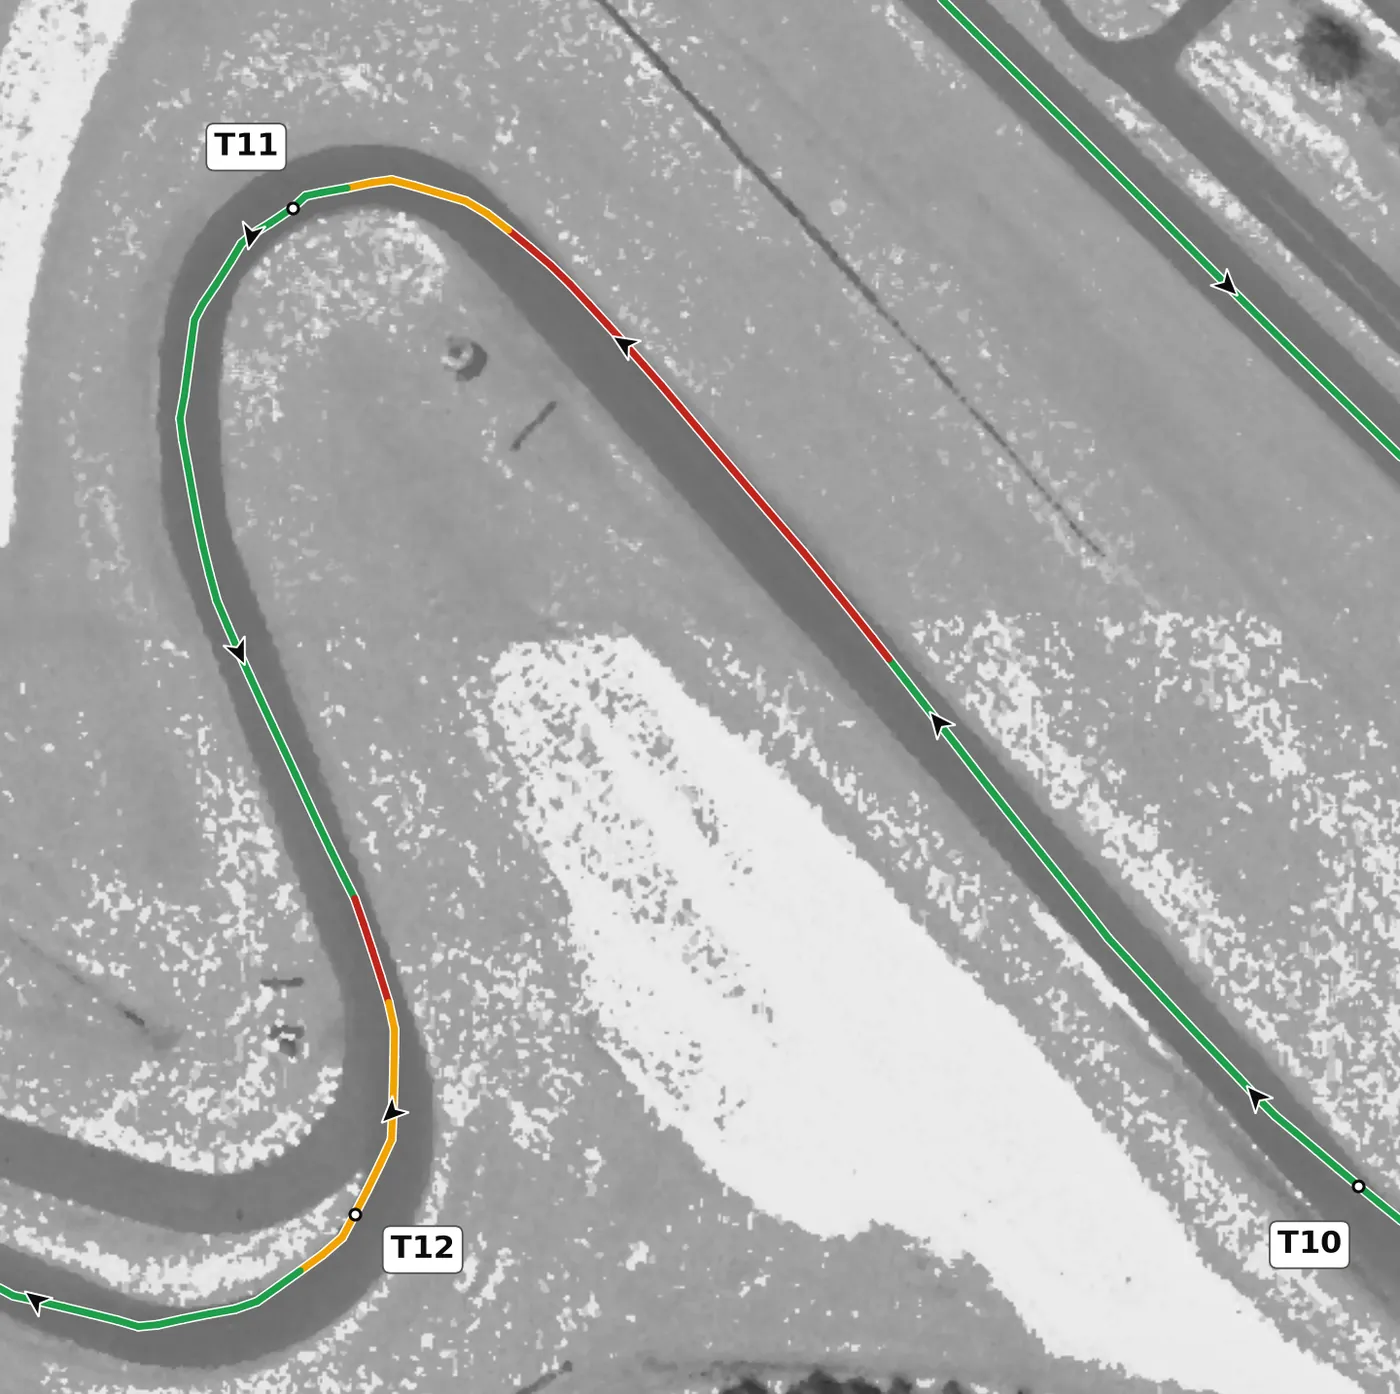
T11 is a tight left at the highest point on the circuit, so brake firmly and in a straight line, turn in late and aim for an apex at the second inside curb. There is good grip here, so be smooth but progressive with the throttle, and bring the car back across to the left in time for T12. The mistake to avoid is an early turn-in that runs you wide on exit and out of position for the next right.
From the survey: The highest point on the lap (147.1 m), and one of the two tightest corners (about 39 m radius).
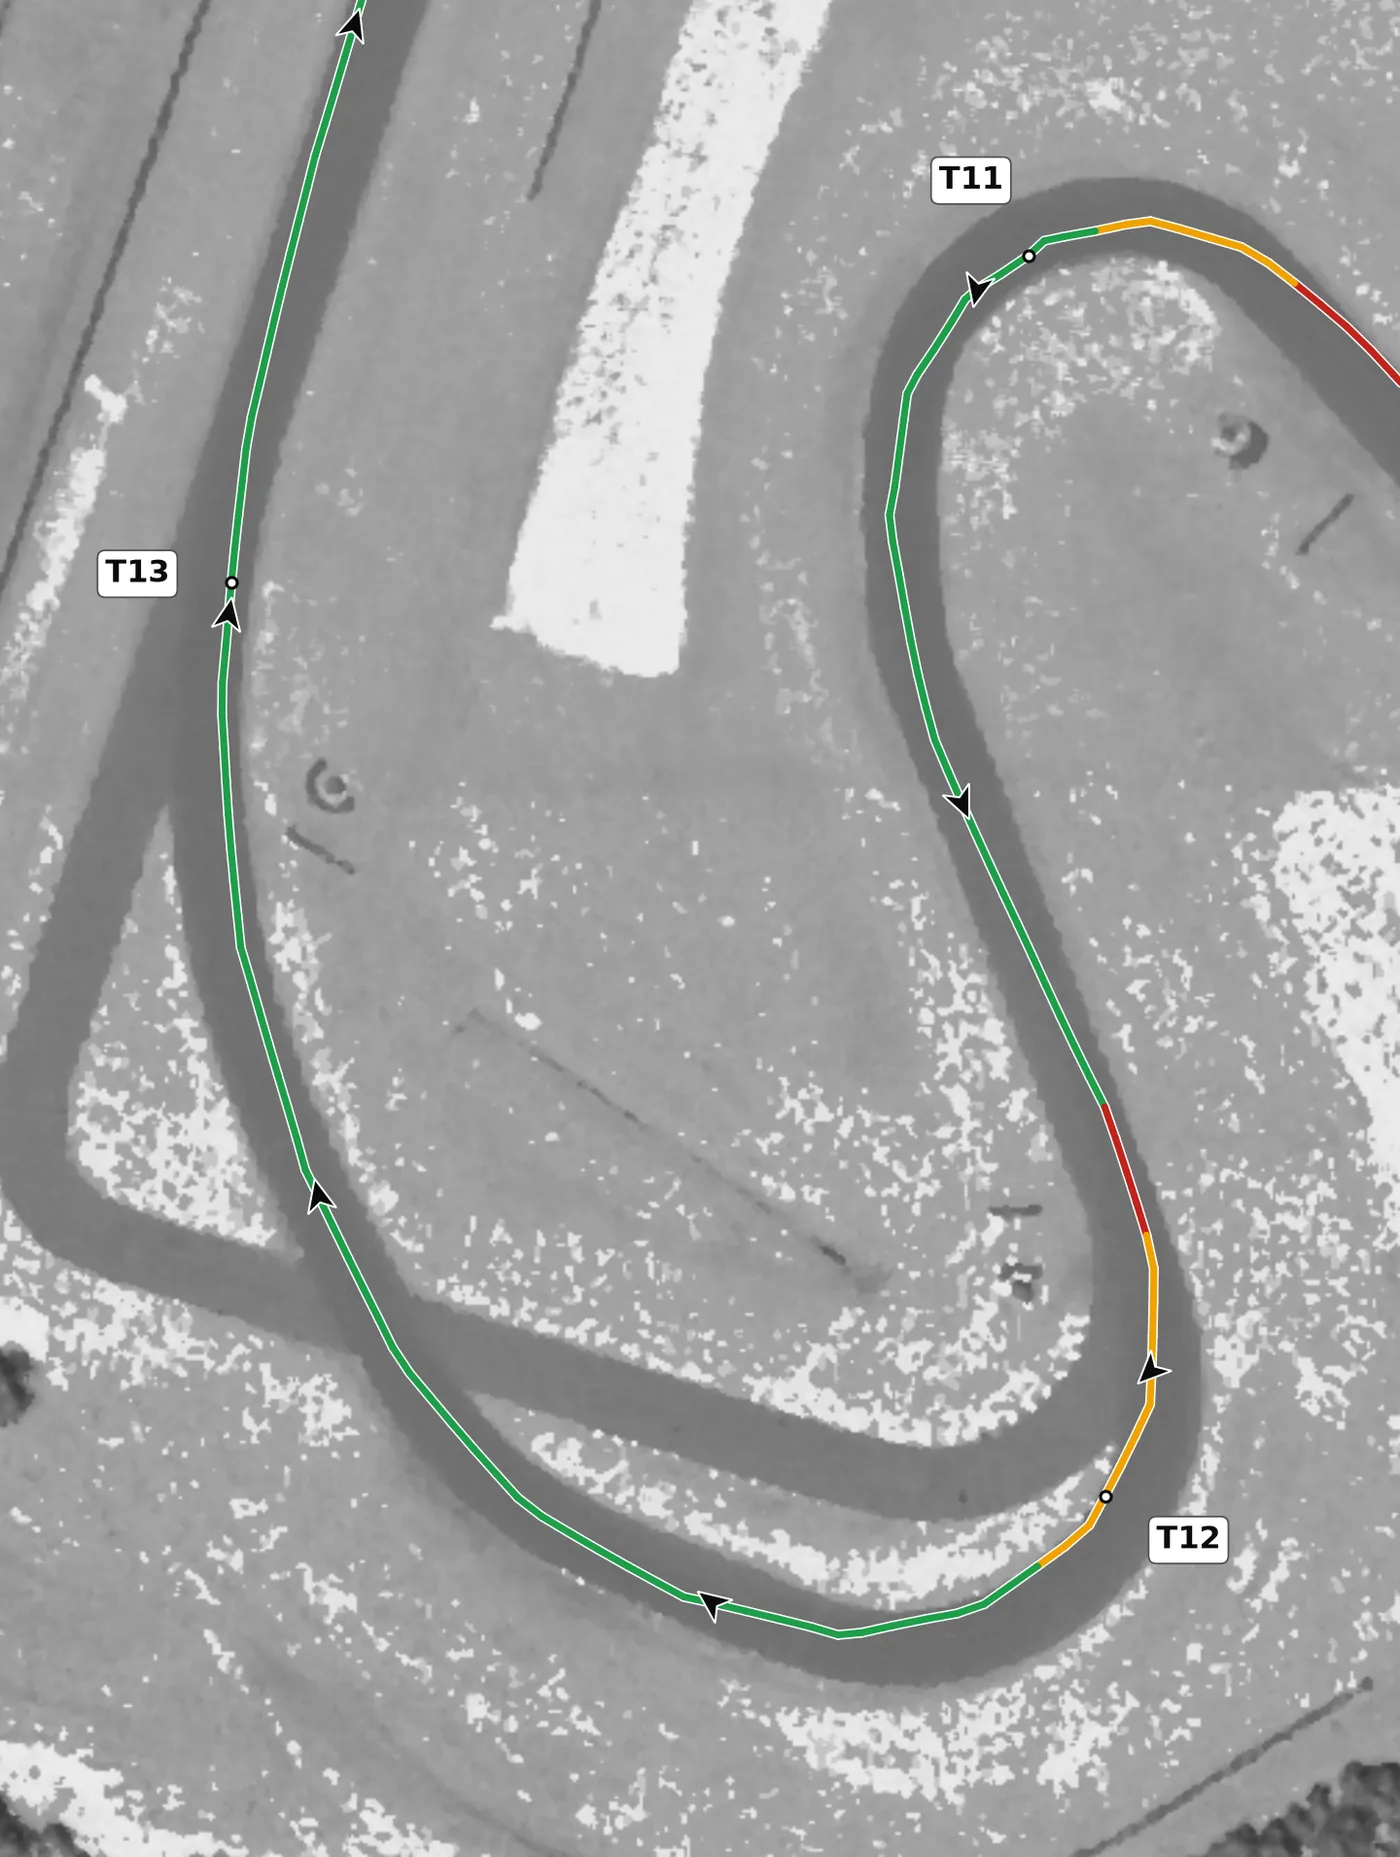
This is a 90-degree right that needs moderate braking from a short straight, with little camber to help. Brake in a straight line, take a late apex and think about T13 as you exit, because your line here decides whether T13 is a real corner. The mistake to avoid is a fast entry and an early apex that leaves you running wide and braking again for T13.
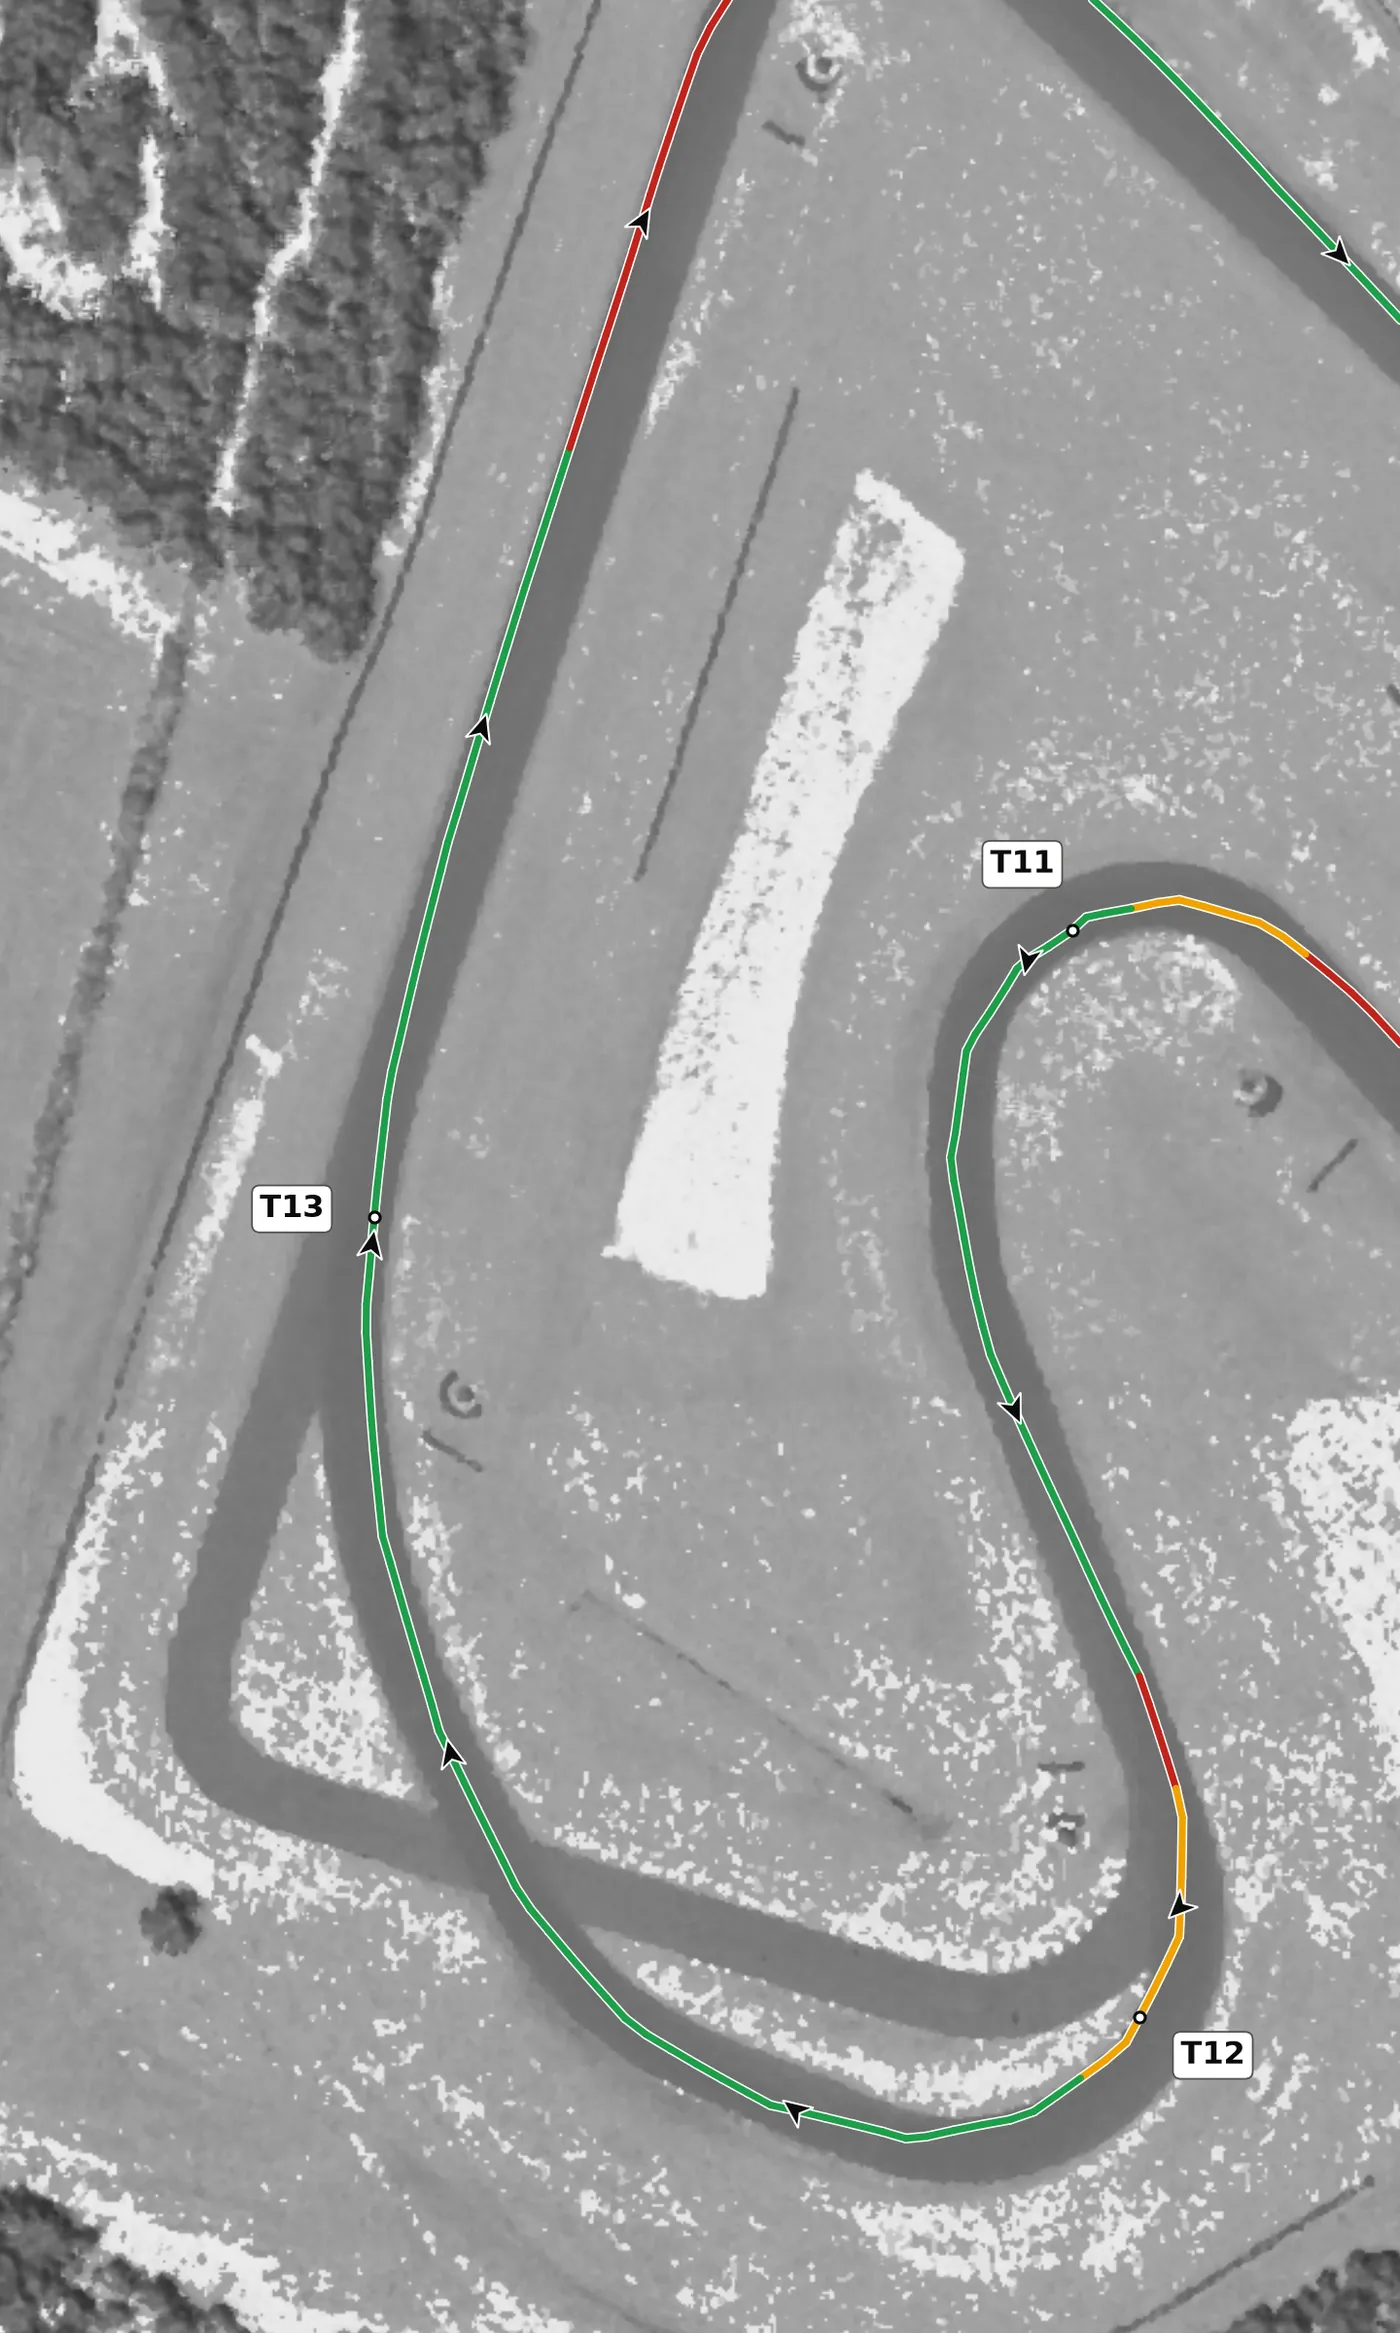
If T12 is right, T13 is barely a corner: a gentle right that you take on a steady throttle while you position for the hairpin at T14. Keep the car on a smooth arc and move to the left side of the track before braking for T14. The mistake to avoid is turning T13 into a separate event with its own brake and lift, which wastes the exit from T12.
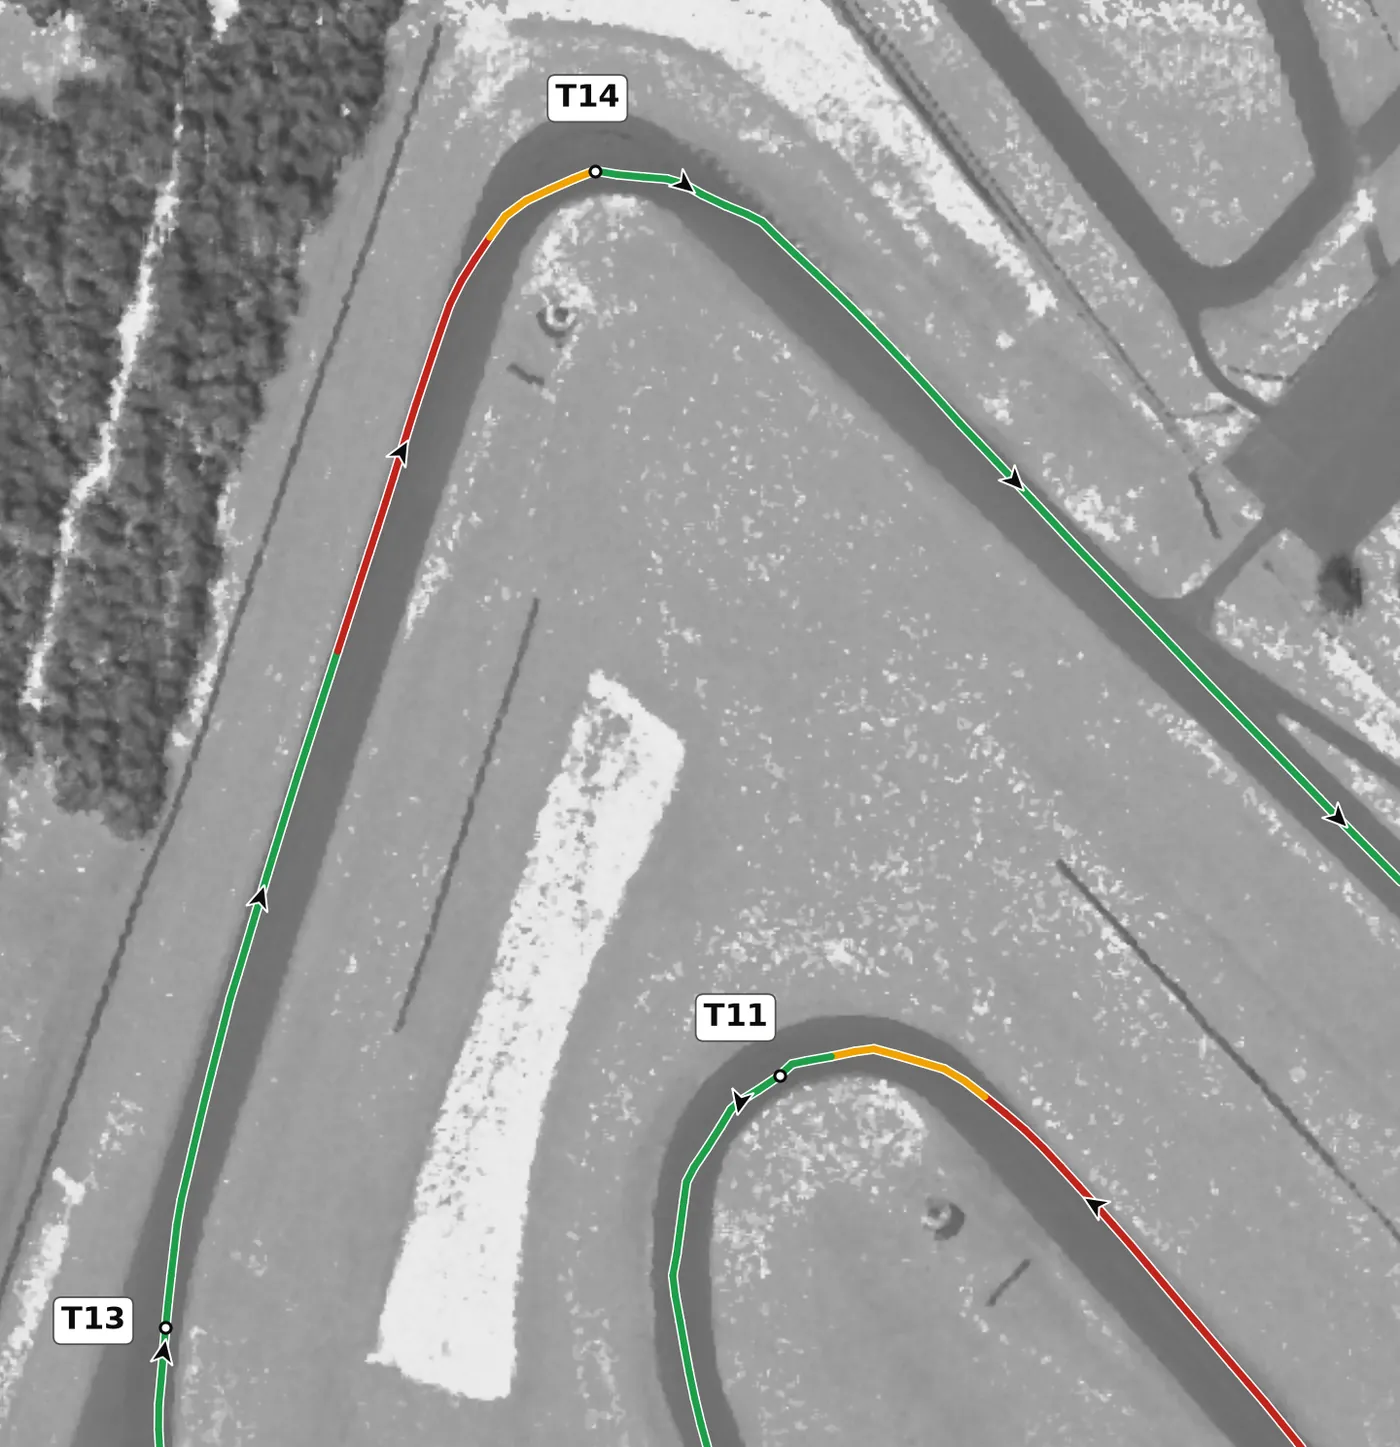
This tight right onto the front straight is on camber, and it is a classic slow-in, fast-out corner. Brake in a straight line, turn in late, use the inside curb if you need to help the car rotate, and stay off the outside curbs on exit. The mistake to avoid is braking late and missing the apex, because a poor exit here costs you speed all the way down the front straight.
From the survey: The other tight hairpin (about 39 m radius), on camber (+1.8%) onto the front straight.
Version history
- v1.2 · 2026-10-01 — The exit of T11 is now drawn as throttle where the car is already gaining speed, instead of as a lift.
- v1.1 · 2026-10-01 — Speeds and braking points rebuilt at a typical quick HPDE pace and checked against published brake markers: braking starts about 30 m later at T1, 20 m later at T8 and T14 and 10 m later at T4 and 5 m later at T12, and the Kink (T10) is now a lift rather than a brake. The line now goes straight from throttle to brake, with no coasting in between. Version history and feedback contributors added.
- v1.0 · 2026-10-01 — First version.
Feedback contributors
Drivers and instructors whose feedback has improved this line. Thank you.
- Mike M — no coasting between throttle and brake; braking points (v1.1)
- Brian L — corners where the car gains speed are throttle, not a lift (v1.2)