COTA — Race Line
Bill's '19 BMW M5: the median line of his 6 fastest laps (2:41–2:43), April 29–30 2023, 1 Hz GPS smoothed between fixes (about ±5 m). The laps are lined up on a reference path and corner positions built from Formula 1's 2025 US Grand Prix position data; the line, speeds and braking zones are all the M5's. An HPDE car at HPDE pace, not an F1 car.
Heads up: 1 Hz GPS: trust the shape and the braking zones, not the exact metre. Your own 25 Hz lap will be sharper.
- Throttle
- Coast / partial
- Braking
- Apex
- T4Off-camber corner
Arrows show the direction of the lap. The grey basemap is USGS LiDAR: dark = asphalt, light = grass. Tap any map for the full-size image.
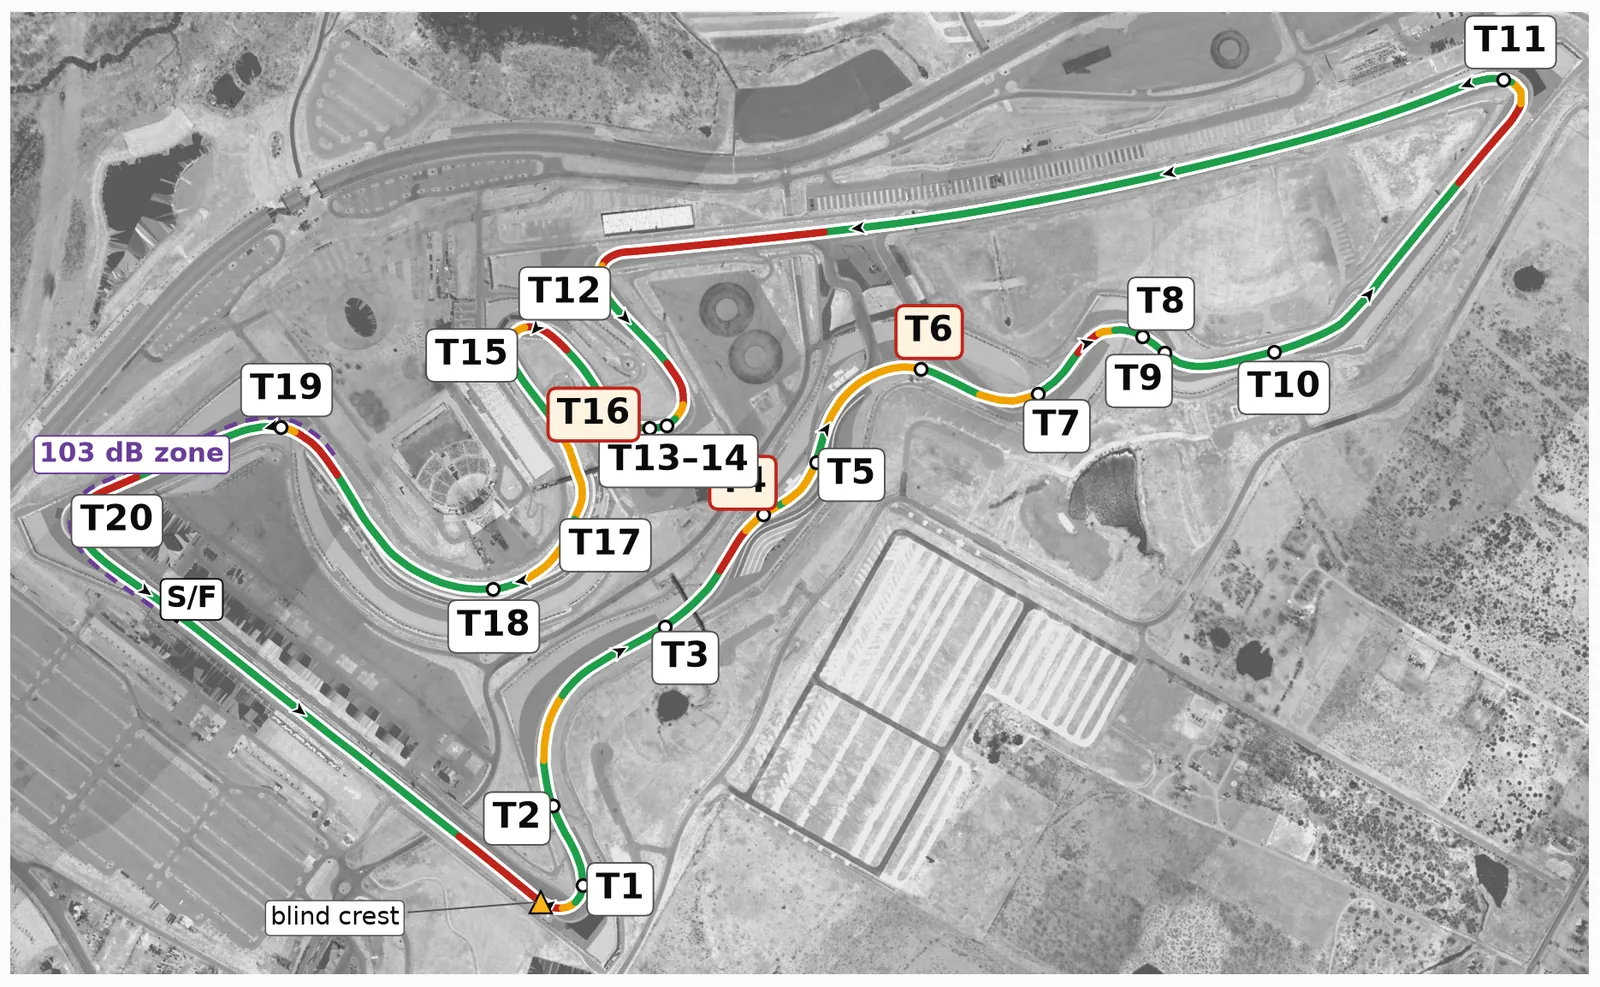
COTA alternates very slow hairpins with long straights and a fast flowing middle, so most of your lap time comes from clean exits onto the straights after T1, T11, T12 and T20, not from late braking. Brakes take a beating here, especially in a heavy car, so manage brake temperature, brake in a straight line where you can, and treat the blind crests at T1 and T10 with respect. Think of the esses and the T16–T18 sweep as rhythm sections: a smooth, committed line through them earns more than any single heroic corner.
Sectors
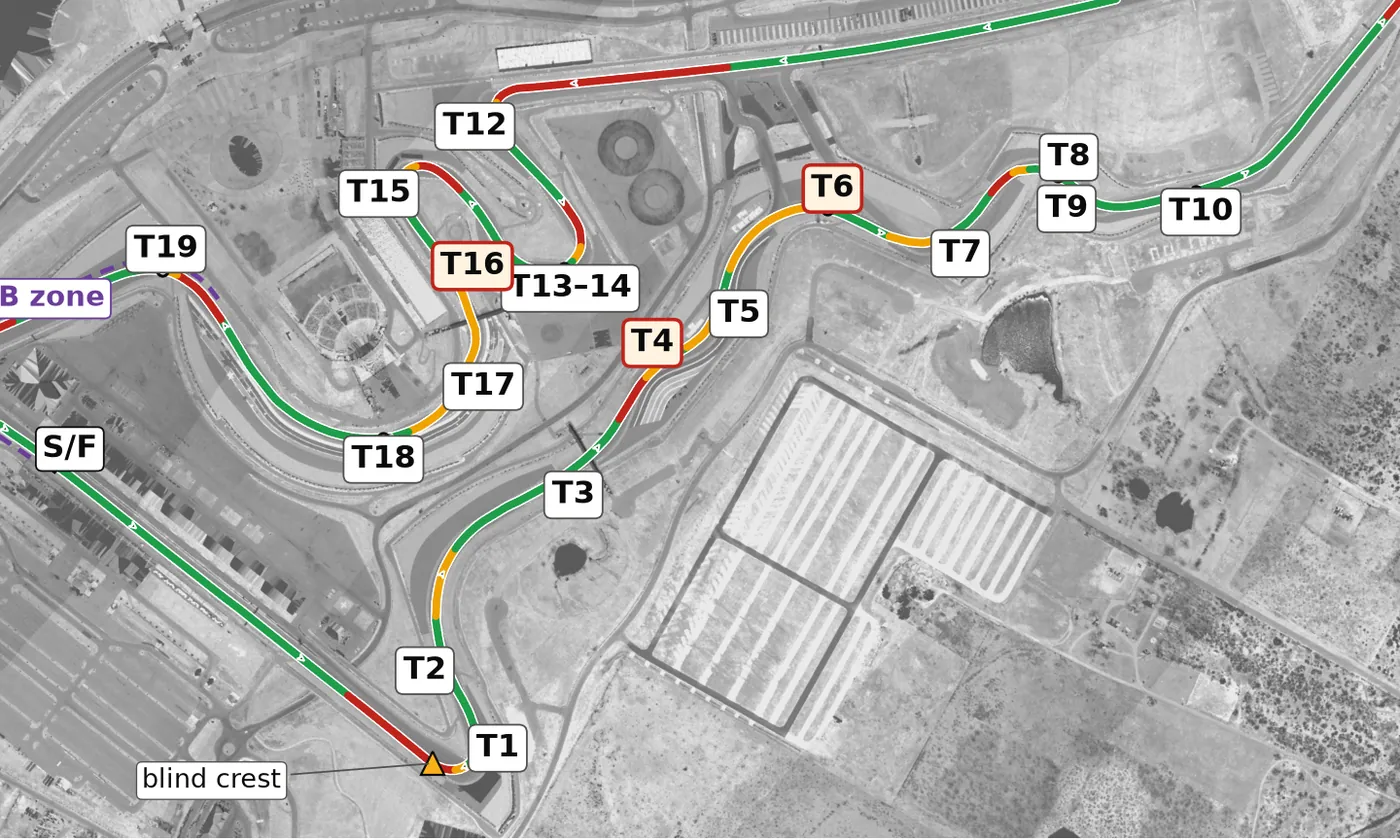
The lap opens with a steep uphill brake into the blind T1 hairpin, then drops downhill through T2 into the T3–T6 esses, where each corner sets up the next and a tidy T3 is what makes T4–T6 work. T7–T9 climb back uphill as a slower left-right-left that rewards patience, and T10 is a fast blind kink over a crest, flat in most cars: build up to it over several laps rather than taking it flat on lap one.
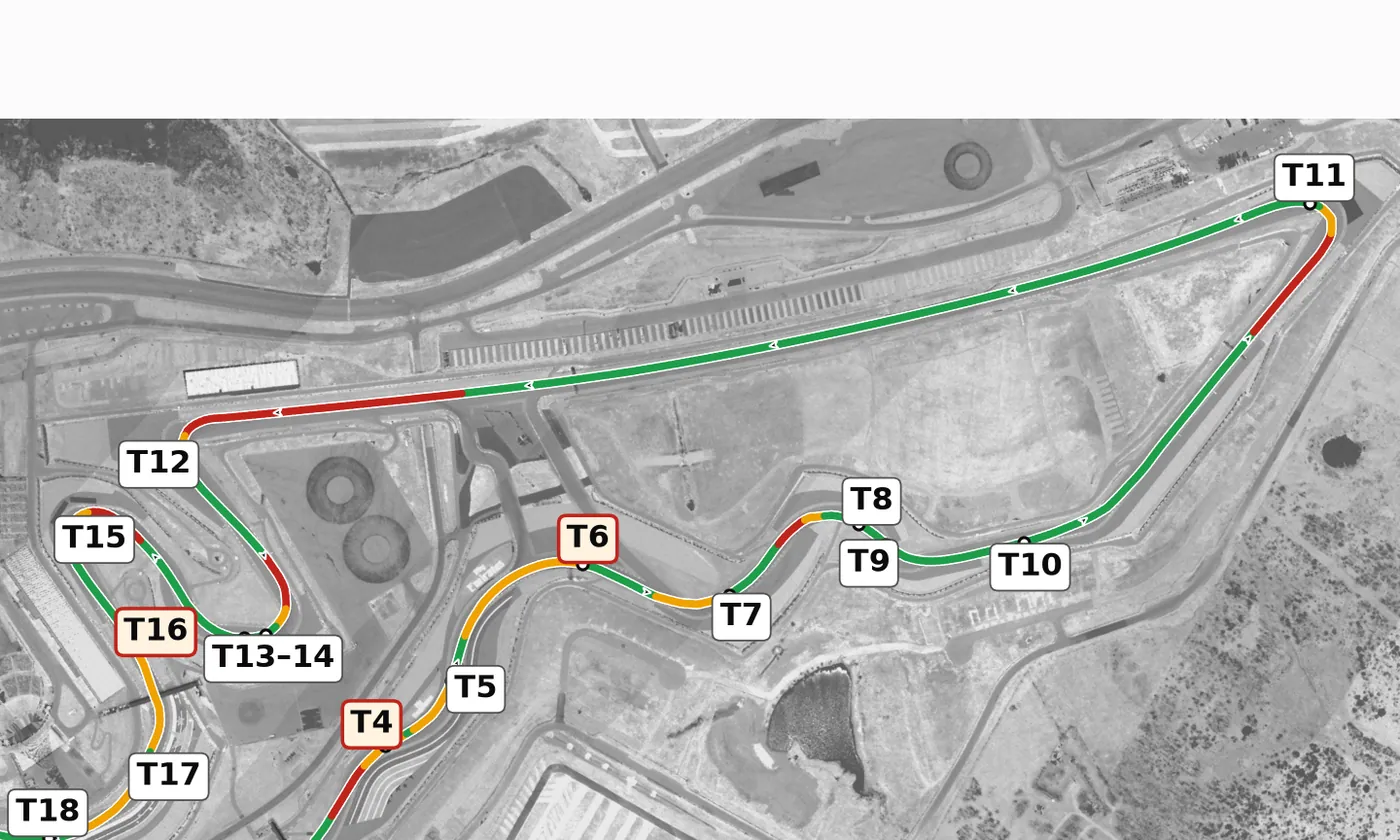
T11 is the most important exit on the track because it feeds the longest straight, so give up entry speed for an early, straight-line throttle application. T12 is the biggest stop of the lap; brake early and in a straight line, then use a late apex so the stadium section that follows (T13–T14 as one right, then the tight T15 left) flows instead of becoming a series of stops and starts.
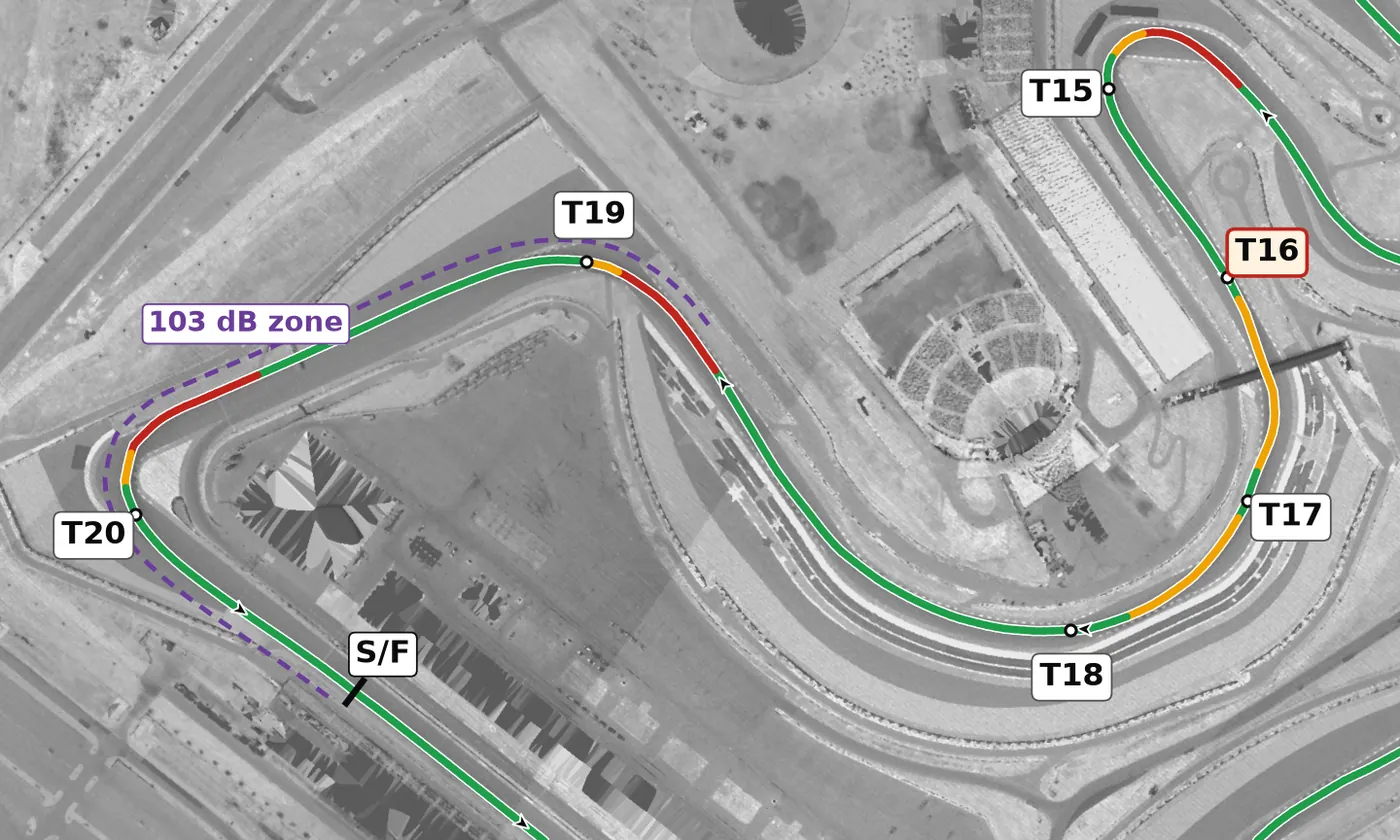
T16–T18 is one long multi-apex right where steady throttle and minimal steering corrections matter more than speed at the first apex. T19 opens up and can carry more speed than it looks, and T20 is a slow, patient left onto the front straight; from T19 to the start/finish line COTA enforces a 103 dB sound limit, so keep revs moderate and short-shift through this section.
Corners
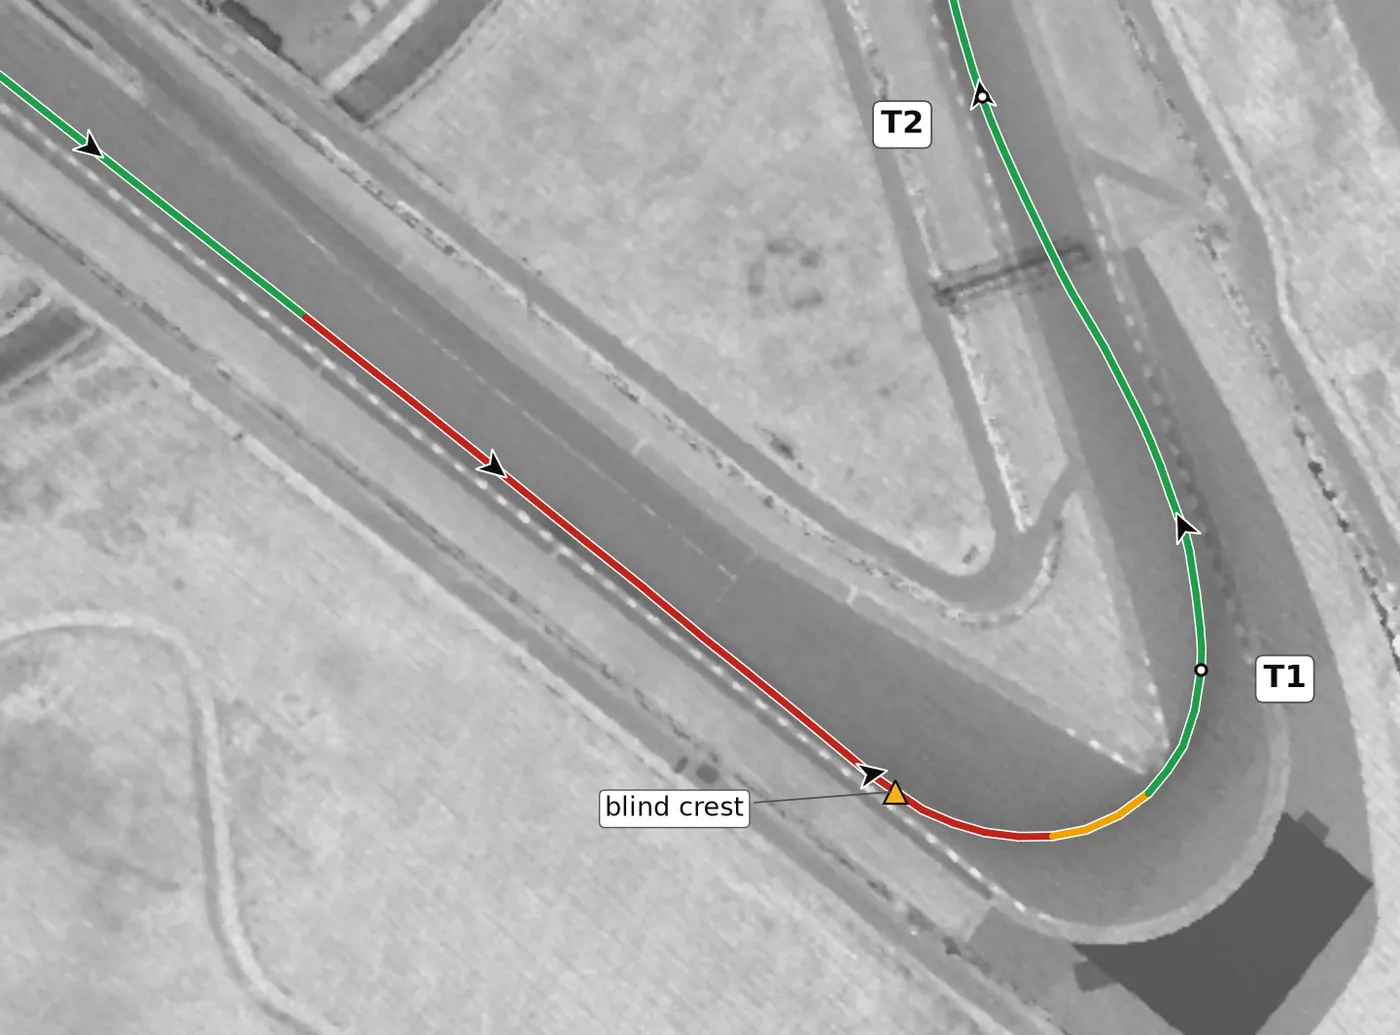
Set up on the right and brake hard and straight up the hill, finishing most of your braking before the crest, because the car goes light just before the apex and any heavy braking or steering there can lock a wheel or slide the car. The brake boards on the right are in feet: a pro in a GT race car brakes around the 200 ft board, so in a road car start well before it and move toward it in small steps. You don't need the far-right edge; creep a car width or two left while braking, turn in a bit earlier than feels natural and aim for a late apex, because the exit down the hill matters more than the entry.
From the survey: Brake uphill over a blind crest.
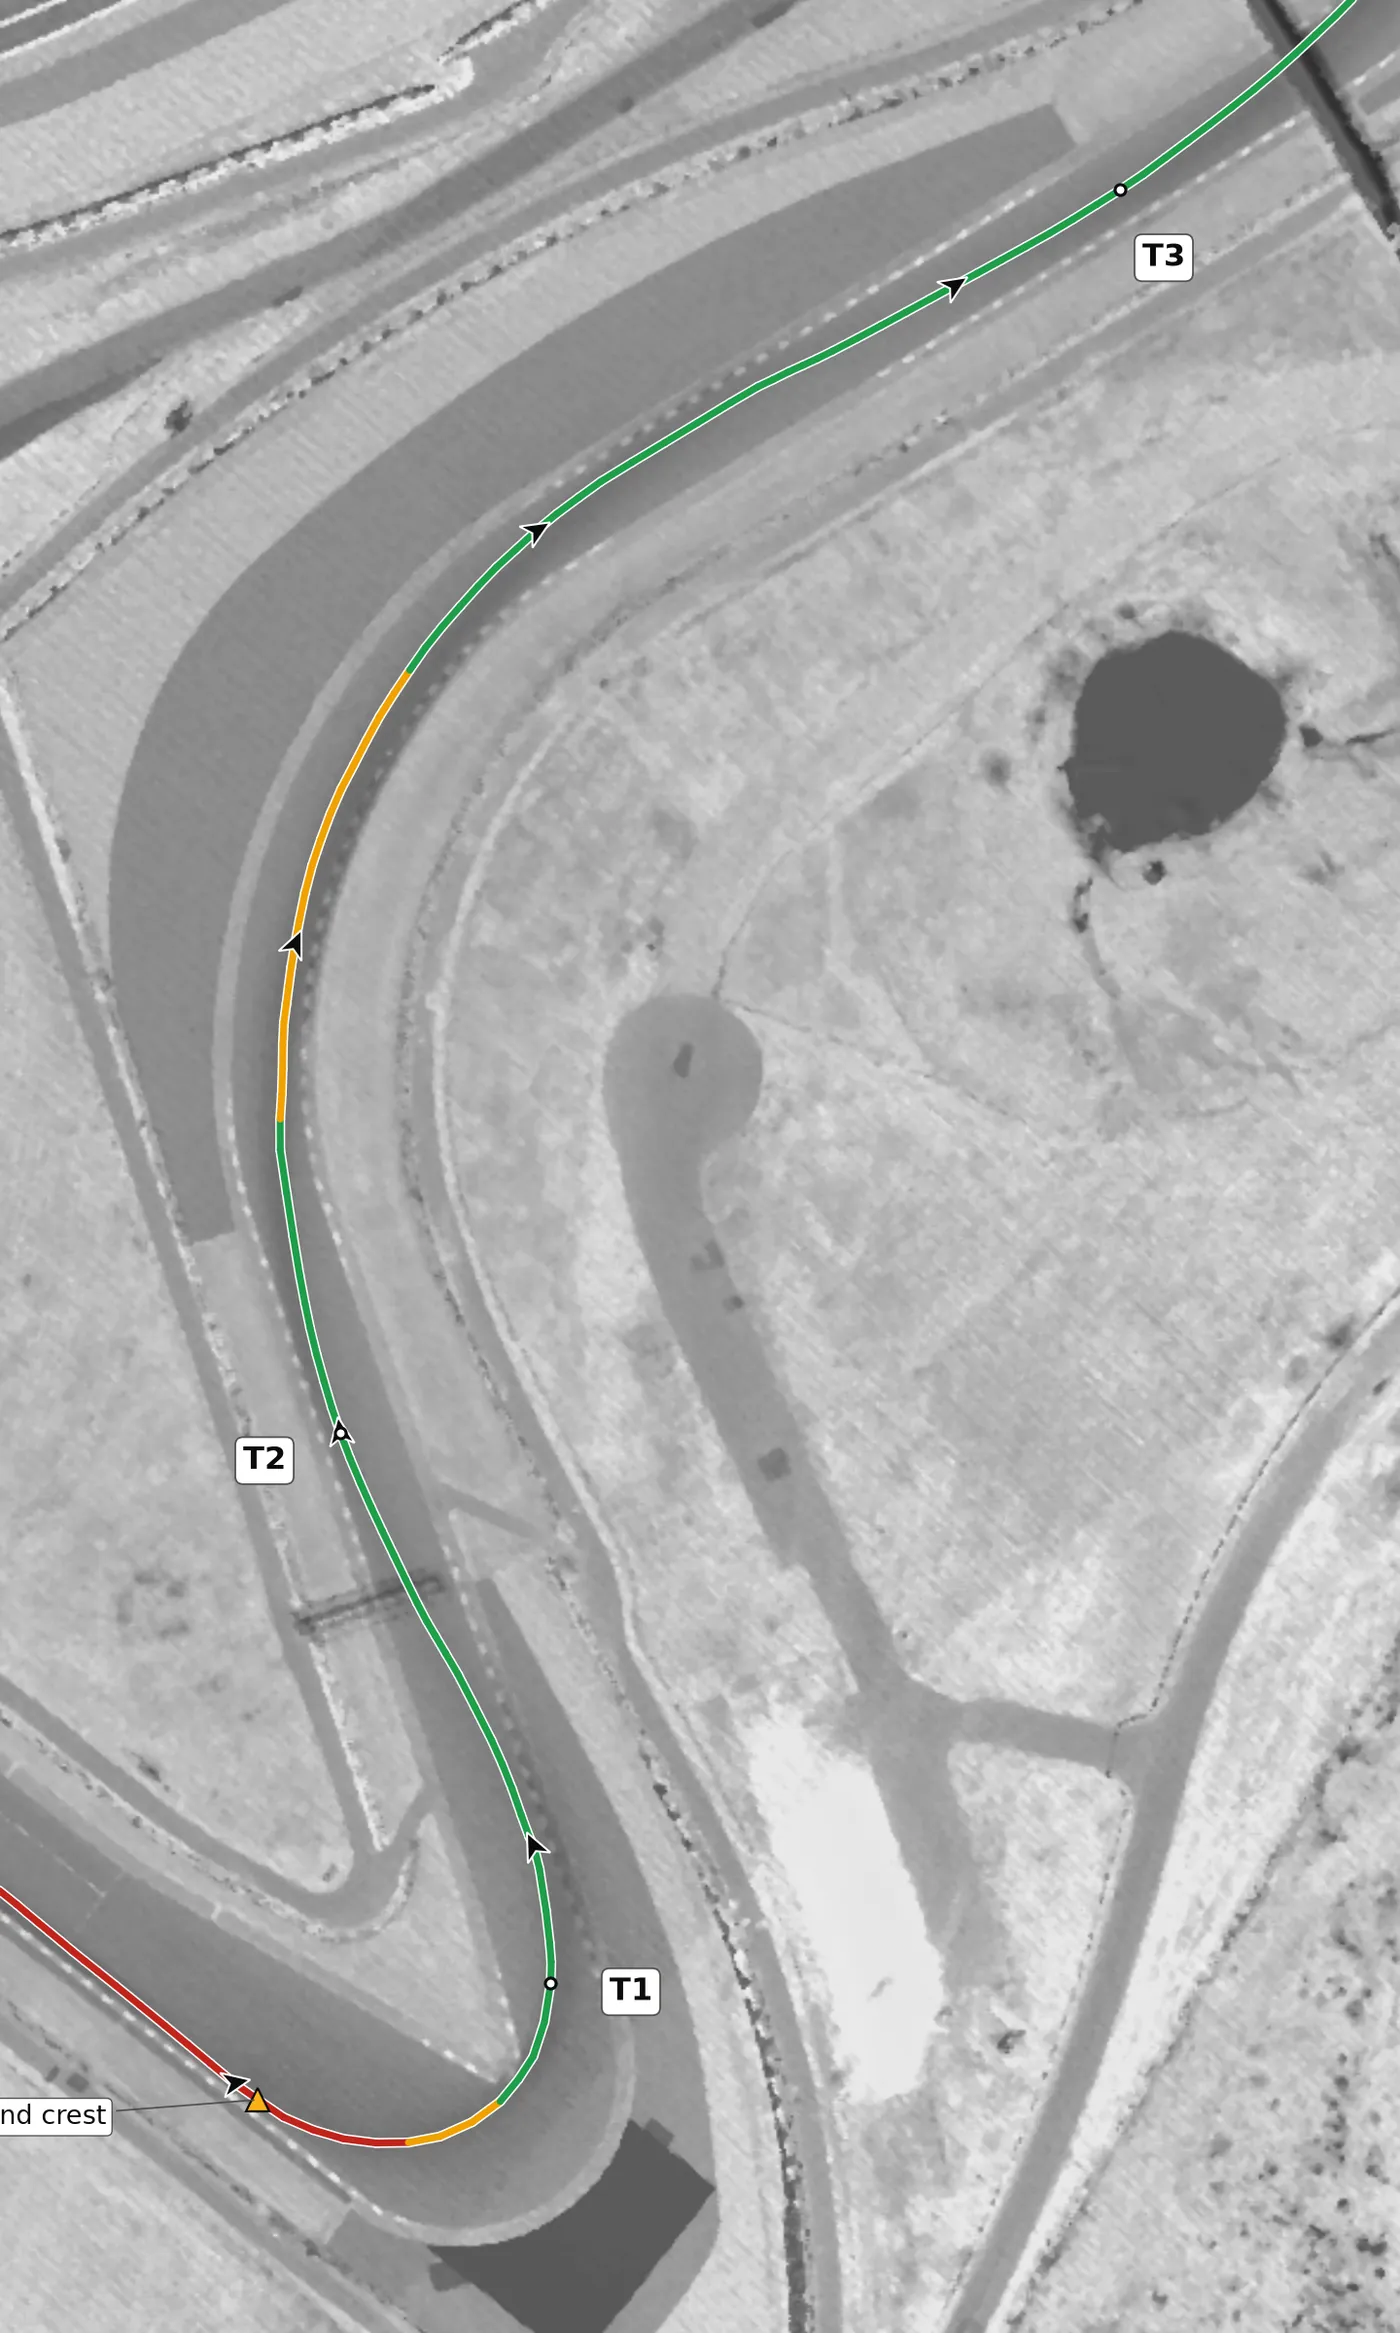
Let the car drift out from T1 and stay smooth as the road drops away downhill into this fast right. Keep steering inputs gentle while the car is light over the descent and place the car to set up T3. The mistake to avoid is a wide, ragged T1 exit, which leaves you late on the throttle and out of position for the esses.
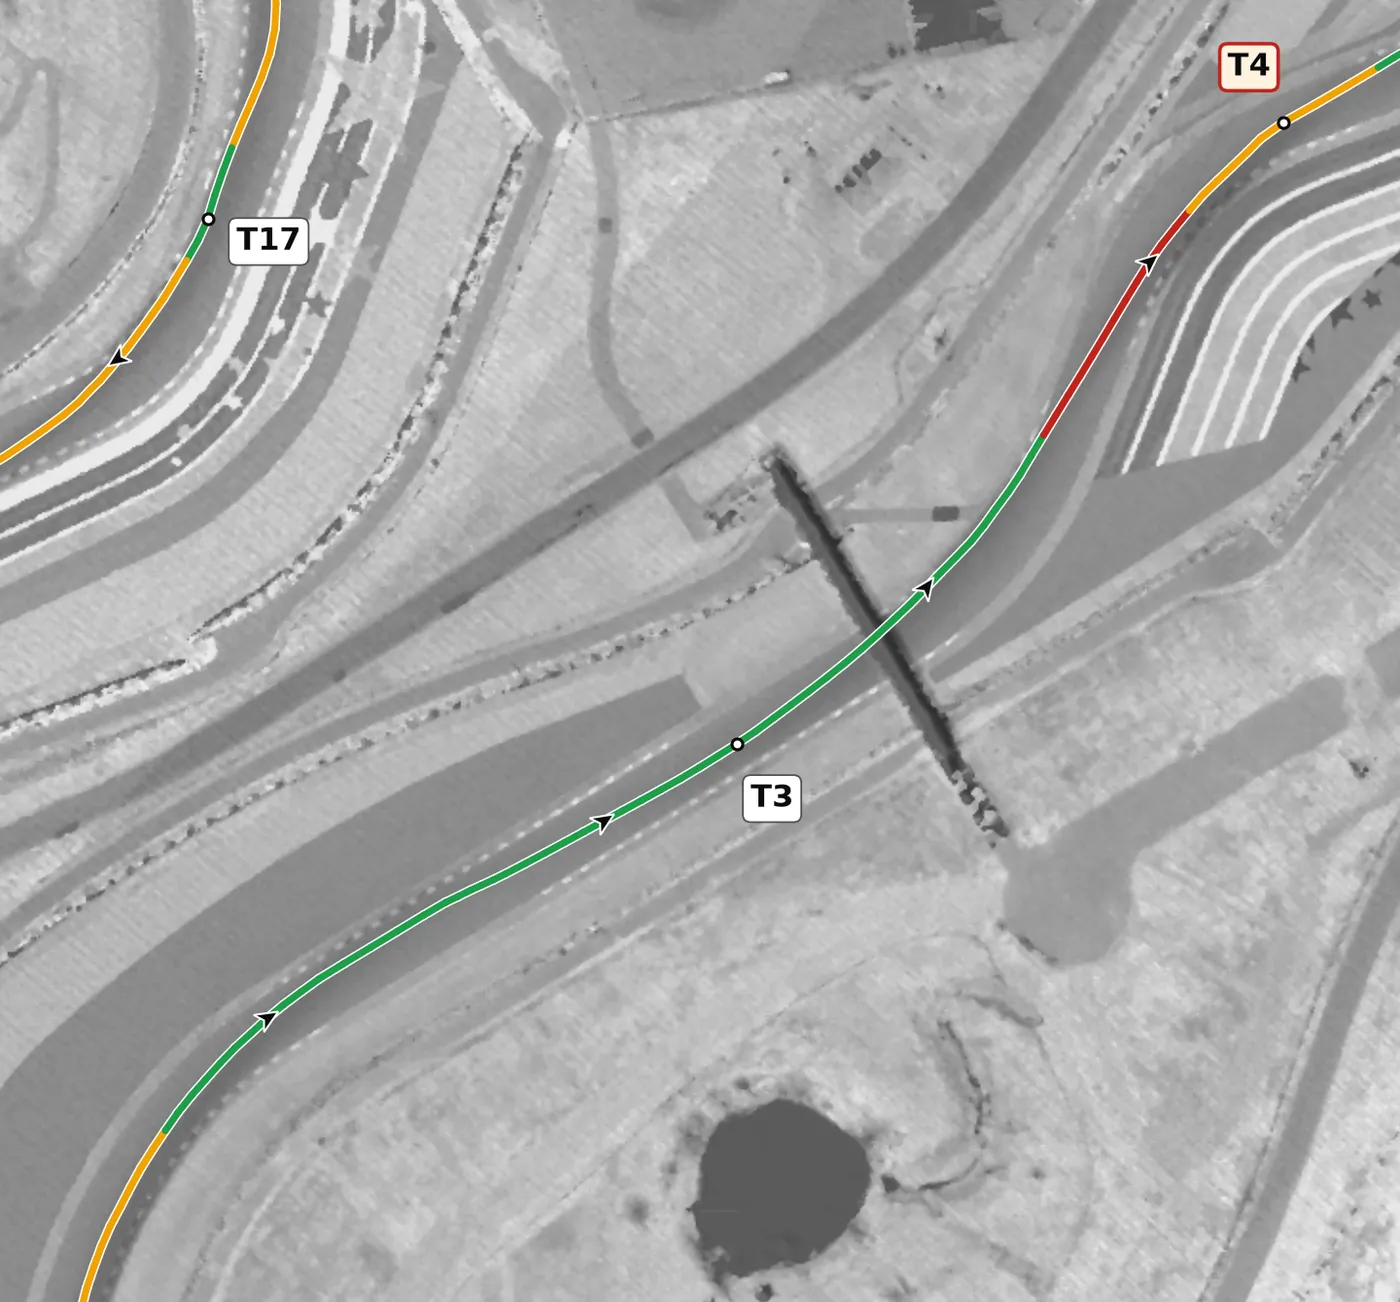
Take a short apex at this on-camber left with a light lift or a brush of the brakes. Its only job is to put the car in the right place for T4, so sacrifice a little here rather than running wide. If you miss T3, you will be off line through the rest of the esses.
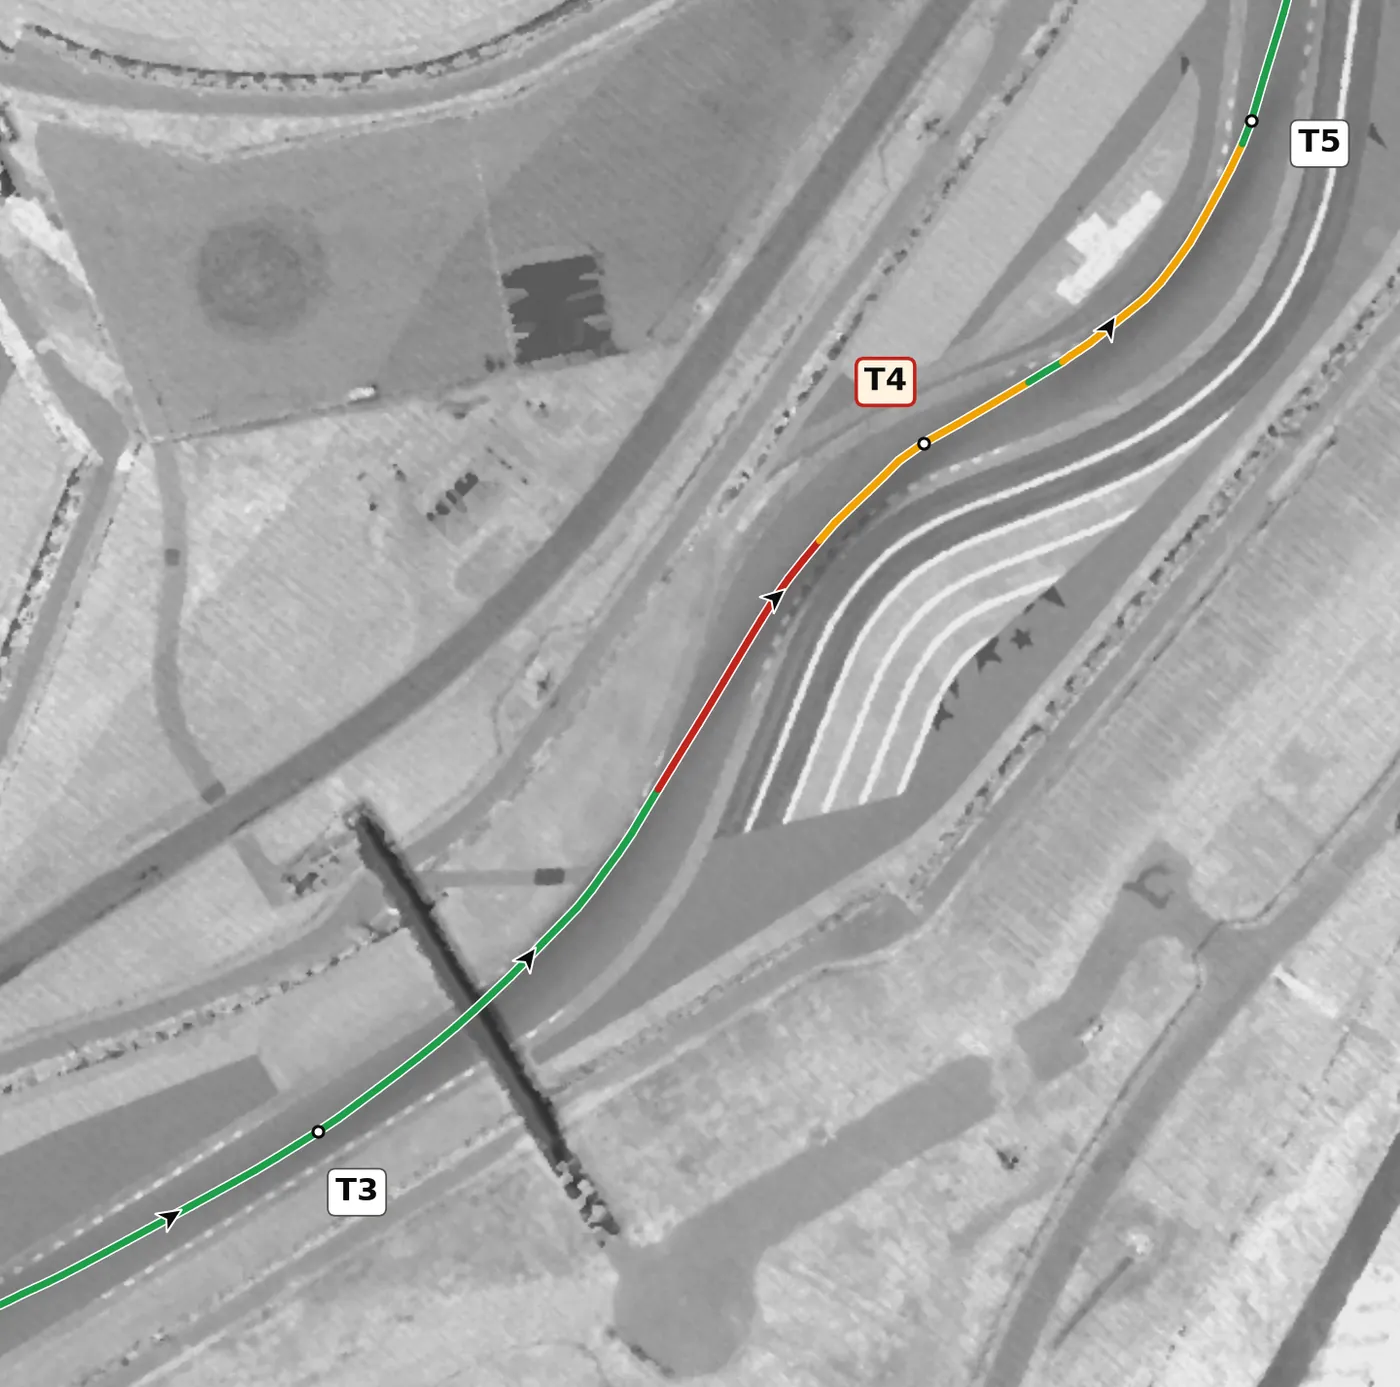
This right sits on a hillside that tilts away from you, so the car has less grip than you expect; keep the car settled and avoid adding steering abruptly. Aim for a slightly later apex and finish in position for T5 rather than using all the road on exit. The mistake to avoid is carrying T3 speed into T4 and getting pushed wide on the off-camber surface.
From the survey: Off-camber right on a left-tilting hillside.
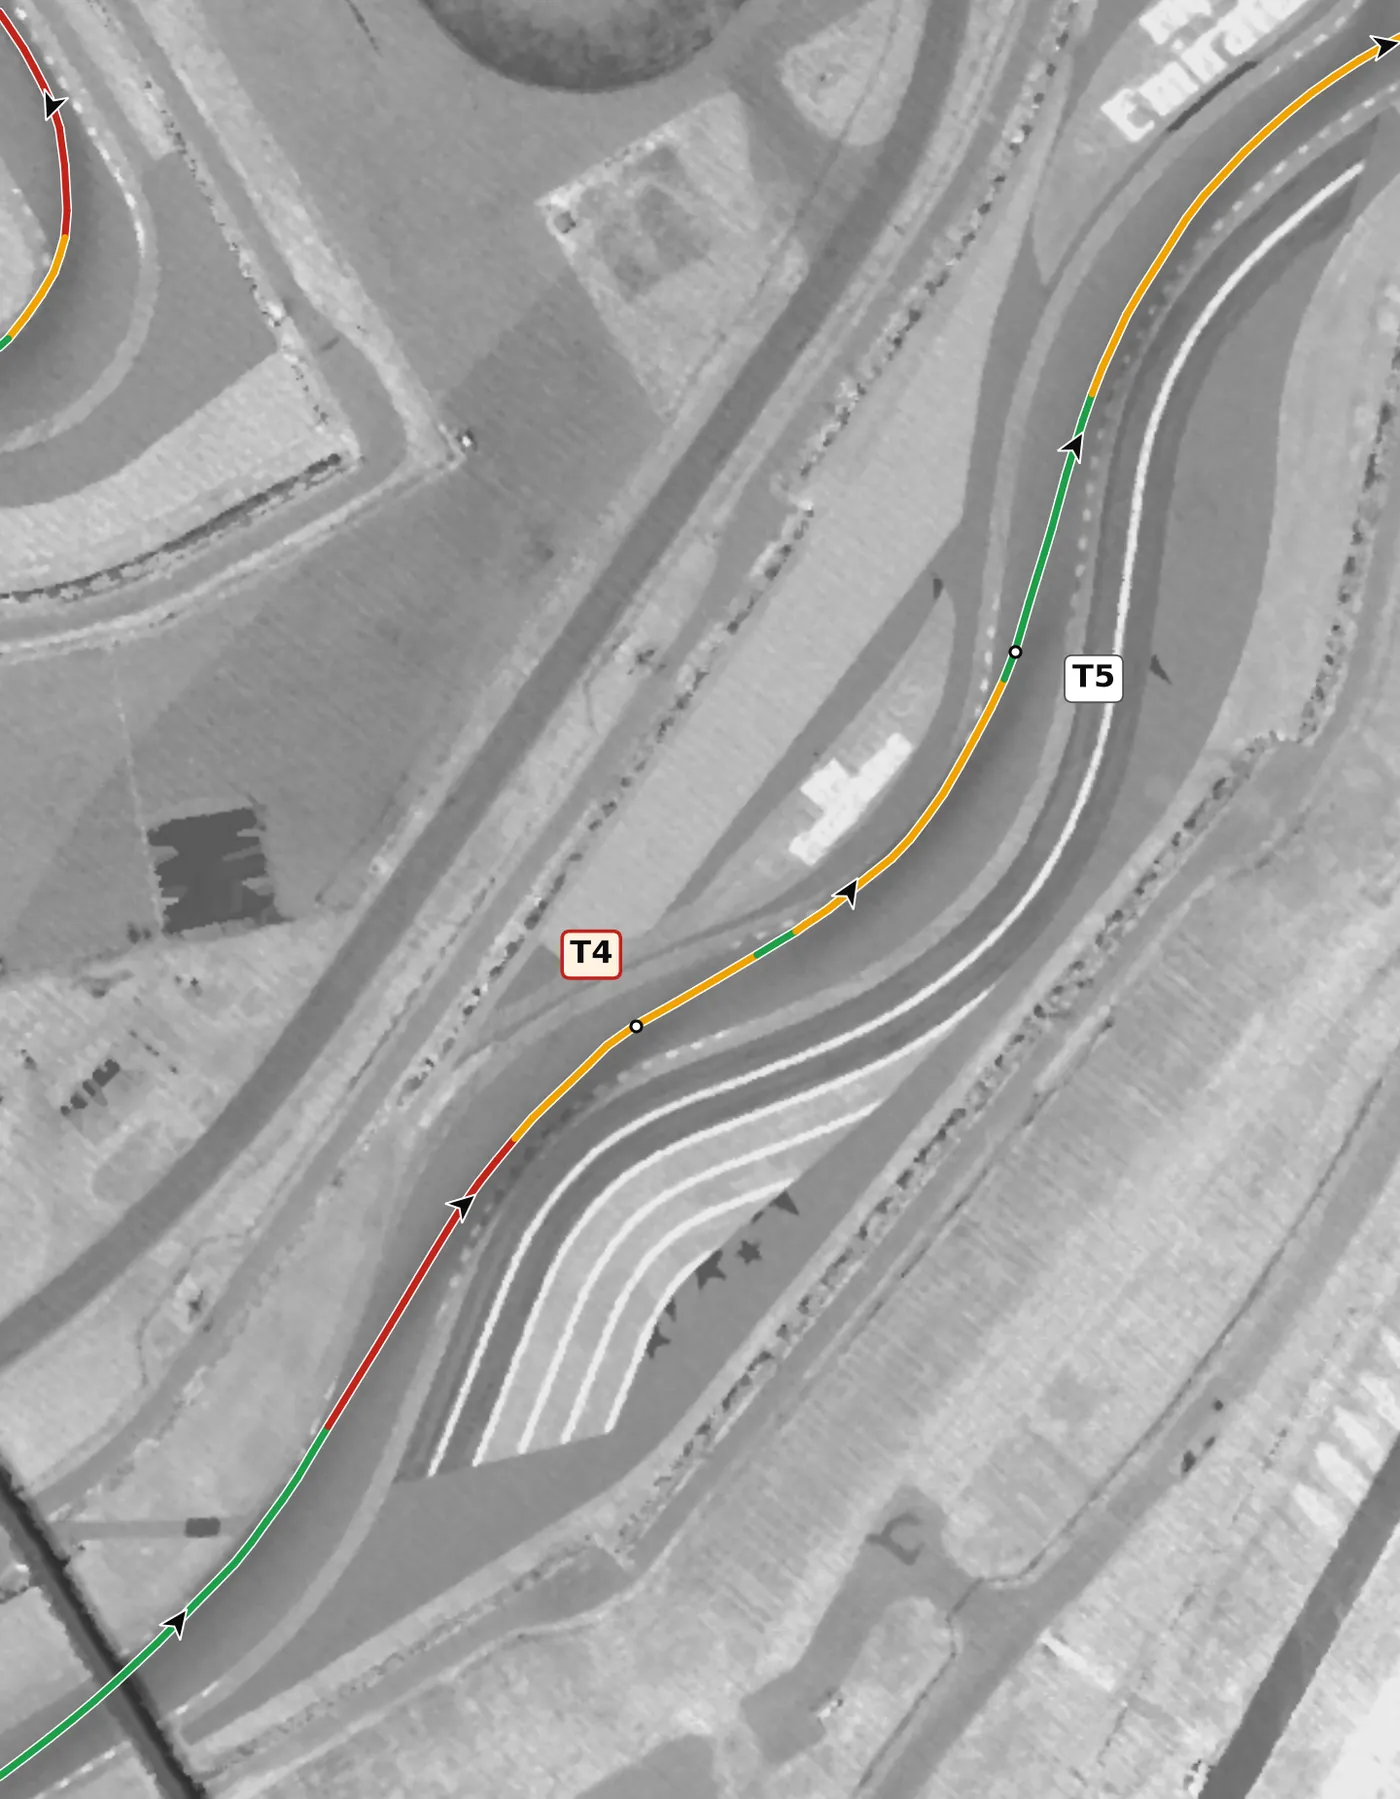
T5 is on camber, so the car grips well; use it to make a quick, clean change of direction and set the car up for T6. A small lift is usually enough, so keep the car balanced and keep your eyes on the next apex. Don't over-commit here, because a wide exit from T5 ruins the off-camber T6.
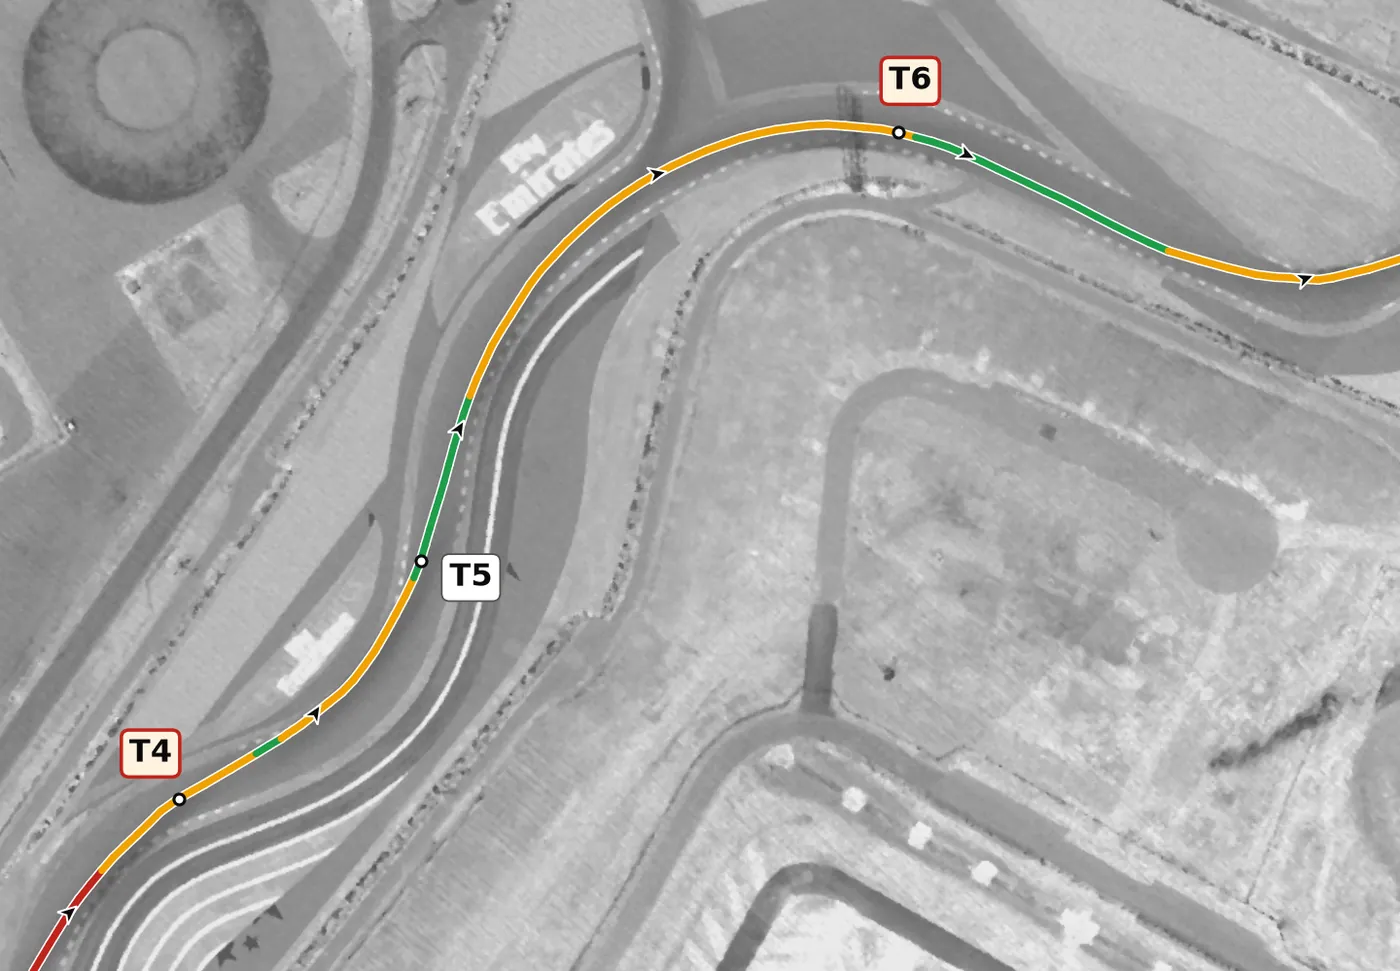
This is the tightest of the esses and off camber, so slow the car a touch more than your instincts say before turning in. Use a later apex and be patient with the throttle until the car is pointing toward T7. The mistake to avoid is turning in early and fast, which slides you toward the outside and into a shortcut or a gravel visit.
From the survey: Off camber.
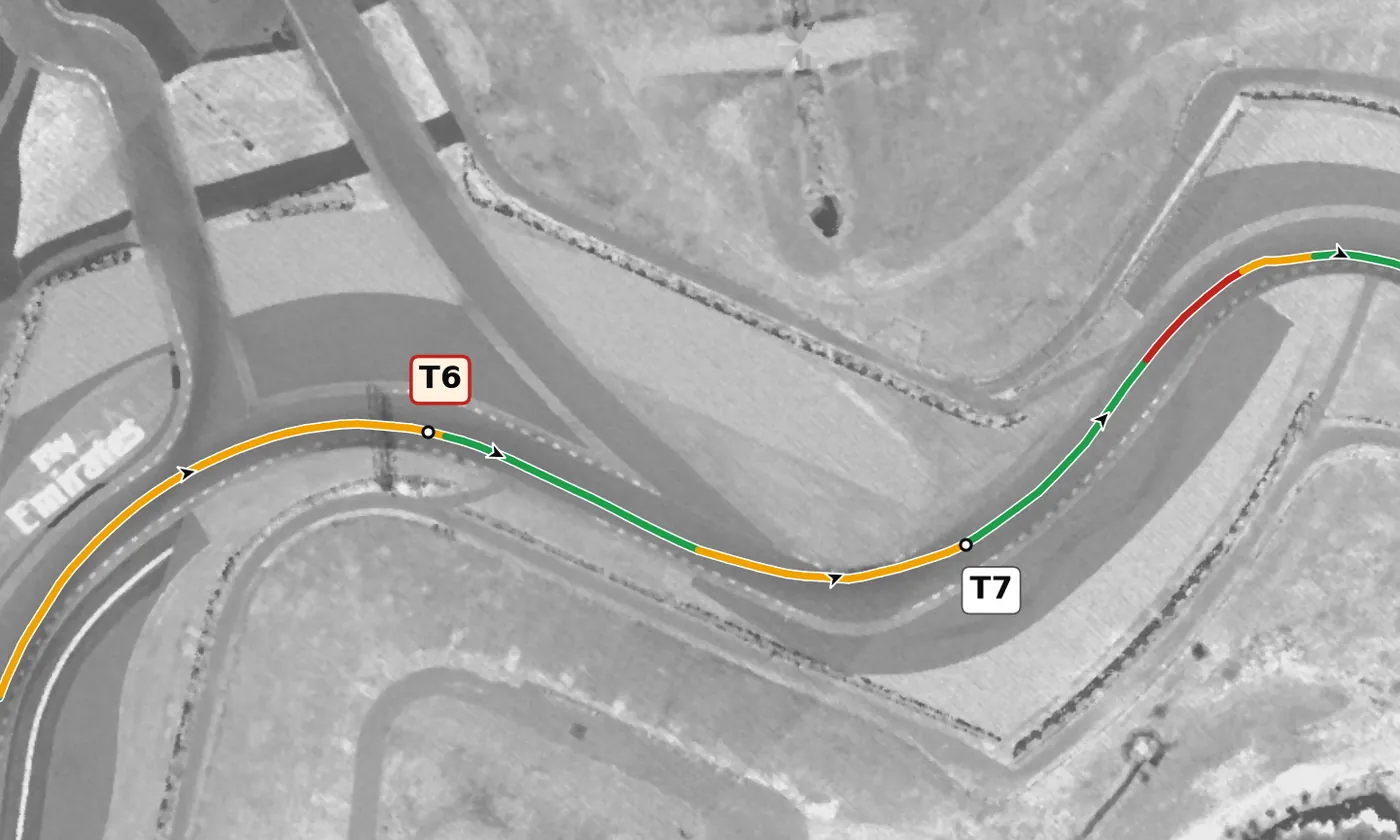
T7 is an uphill left that you set up while still exiting the esses; the entry tilts downhill and the car can feel loose on turn-in before it settles. Brake briefly in a straight line, turn in smoothly and let the car run out only as far as you need to set up T8. Avoid carrying too much speed in, because it makes the quick T8–T9 direction change impossible.
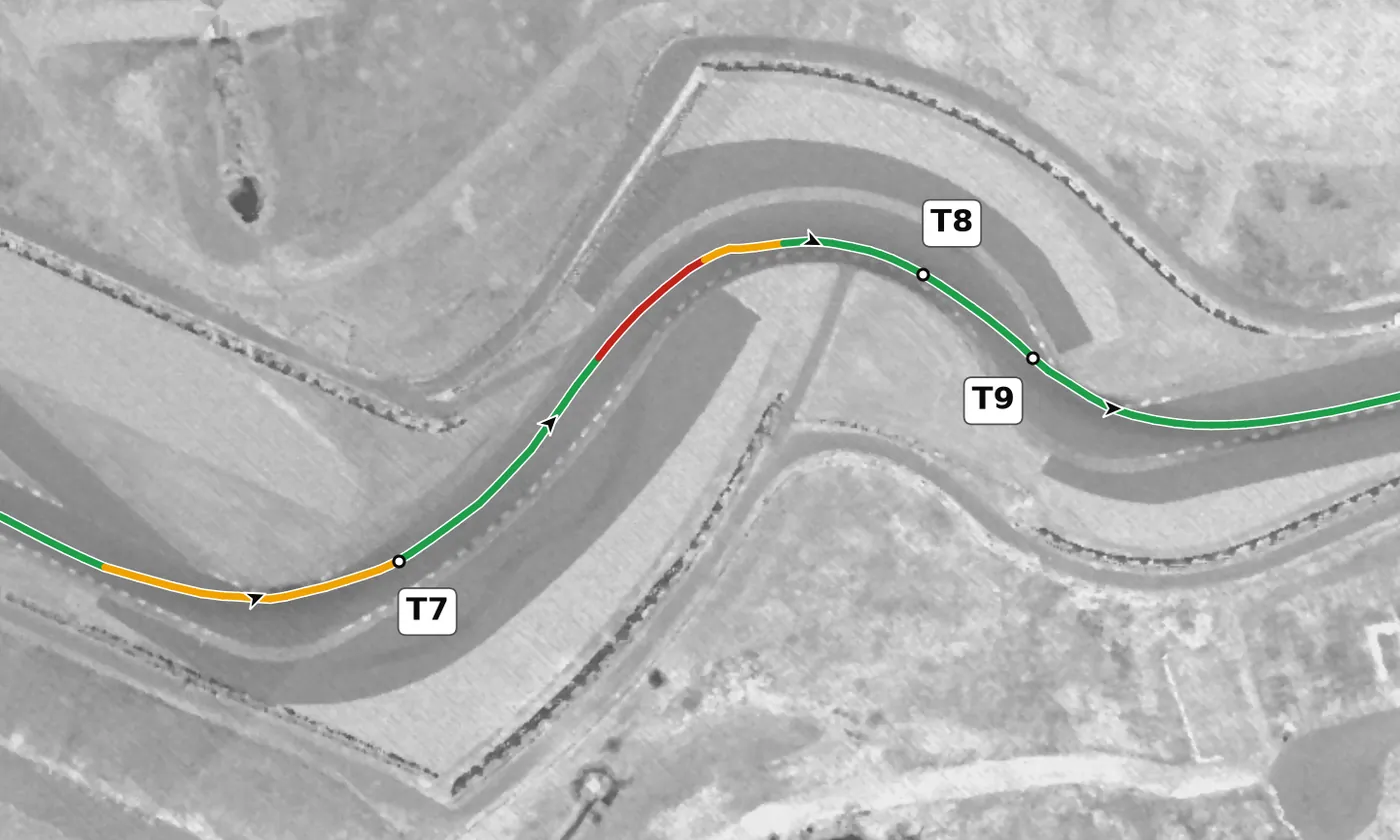
T8 is a short uphill right that leads straight into the T9 left, so treat the pair as one slow, patient sequence. Keep the car tight to the right-hand apex and finish on the right so you are lined up for T9. The mistake to avoid is getting greedy here; you lose more time running wide than by slowing a little extra.
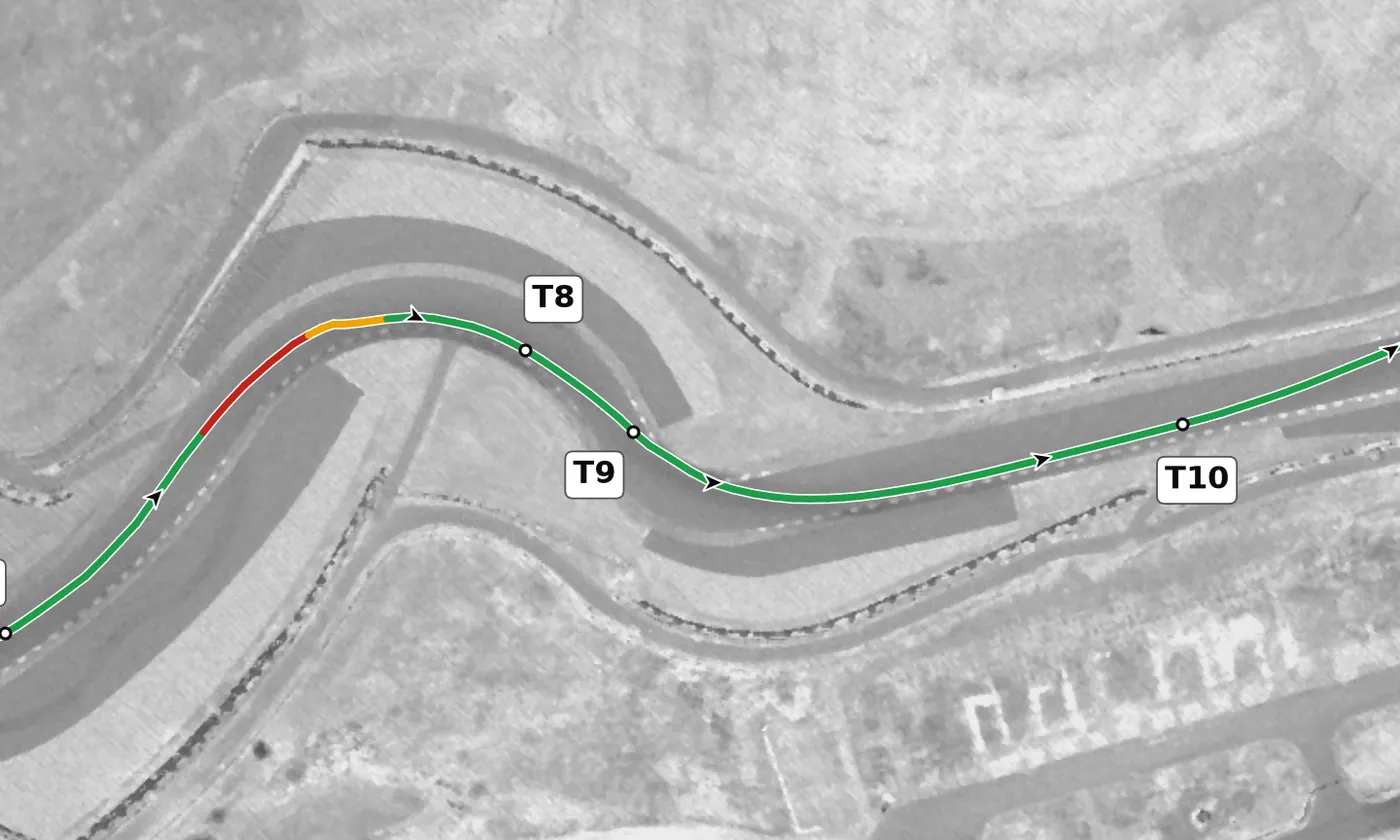
Slow the car more than feels necessary for this left at the top of the hill, because the track crests and it is easy to run wide over the exit. Use a later apex and unwind the steering as you add throttle toward T10. Watch track limits on the exit and avoid locking the front tires on the brief brake.
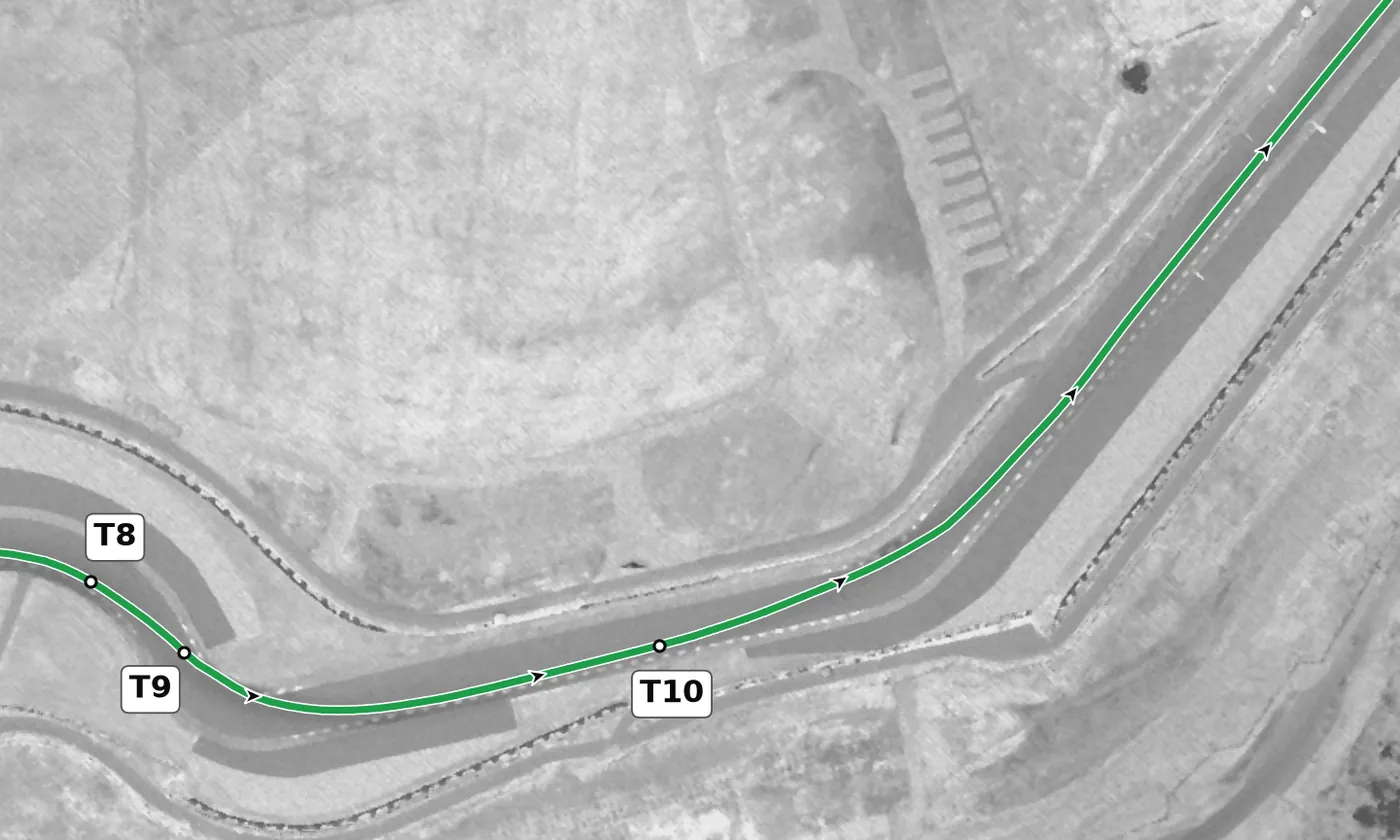
A fast left kink to a blind crest, after which the road falls away downhill into the T11 brake zone. You have to commit to a turn-in point before you can see the apex: the guard rail on the left and the grey concrete strip on the right are the usual cues. It is flat, or just barely flat, in most cars on the right line, but not if you miss the apex; if you cannot stay on the throttle, fix your exit from T9 rather than lifting. Build up over several laps, keep the steering still as the car goes light, and never brake or turn hard over the crest.
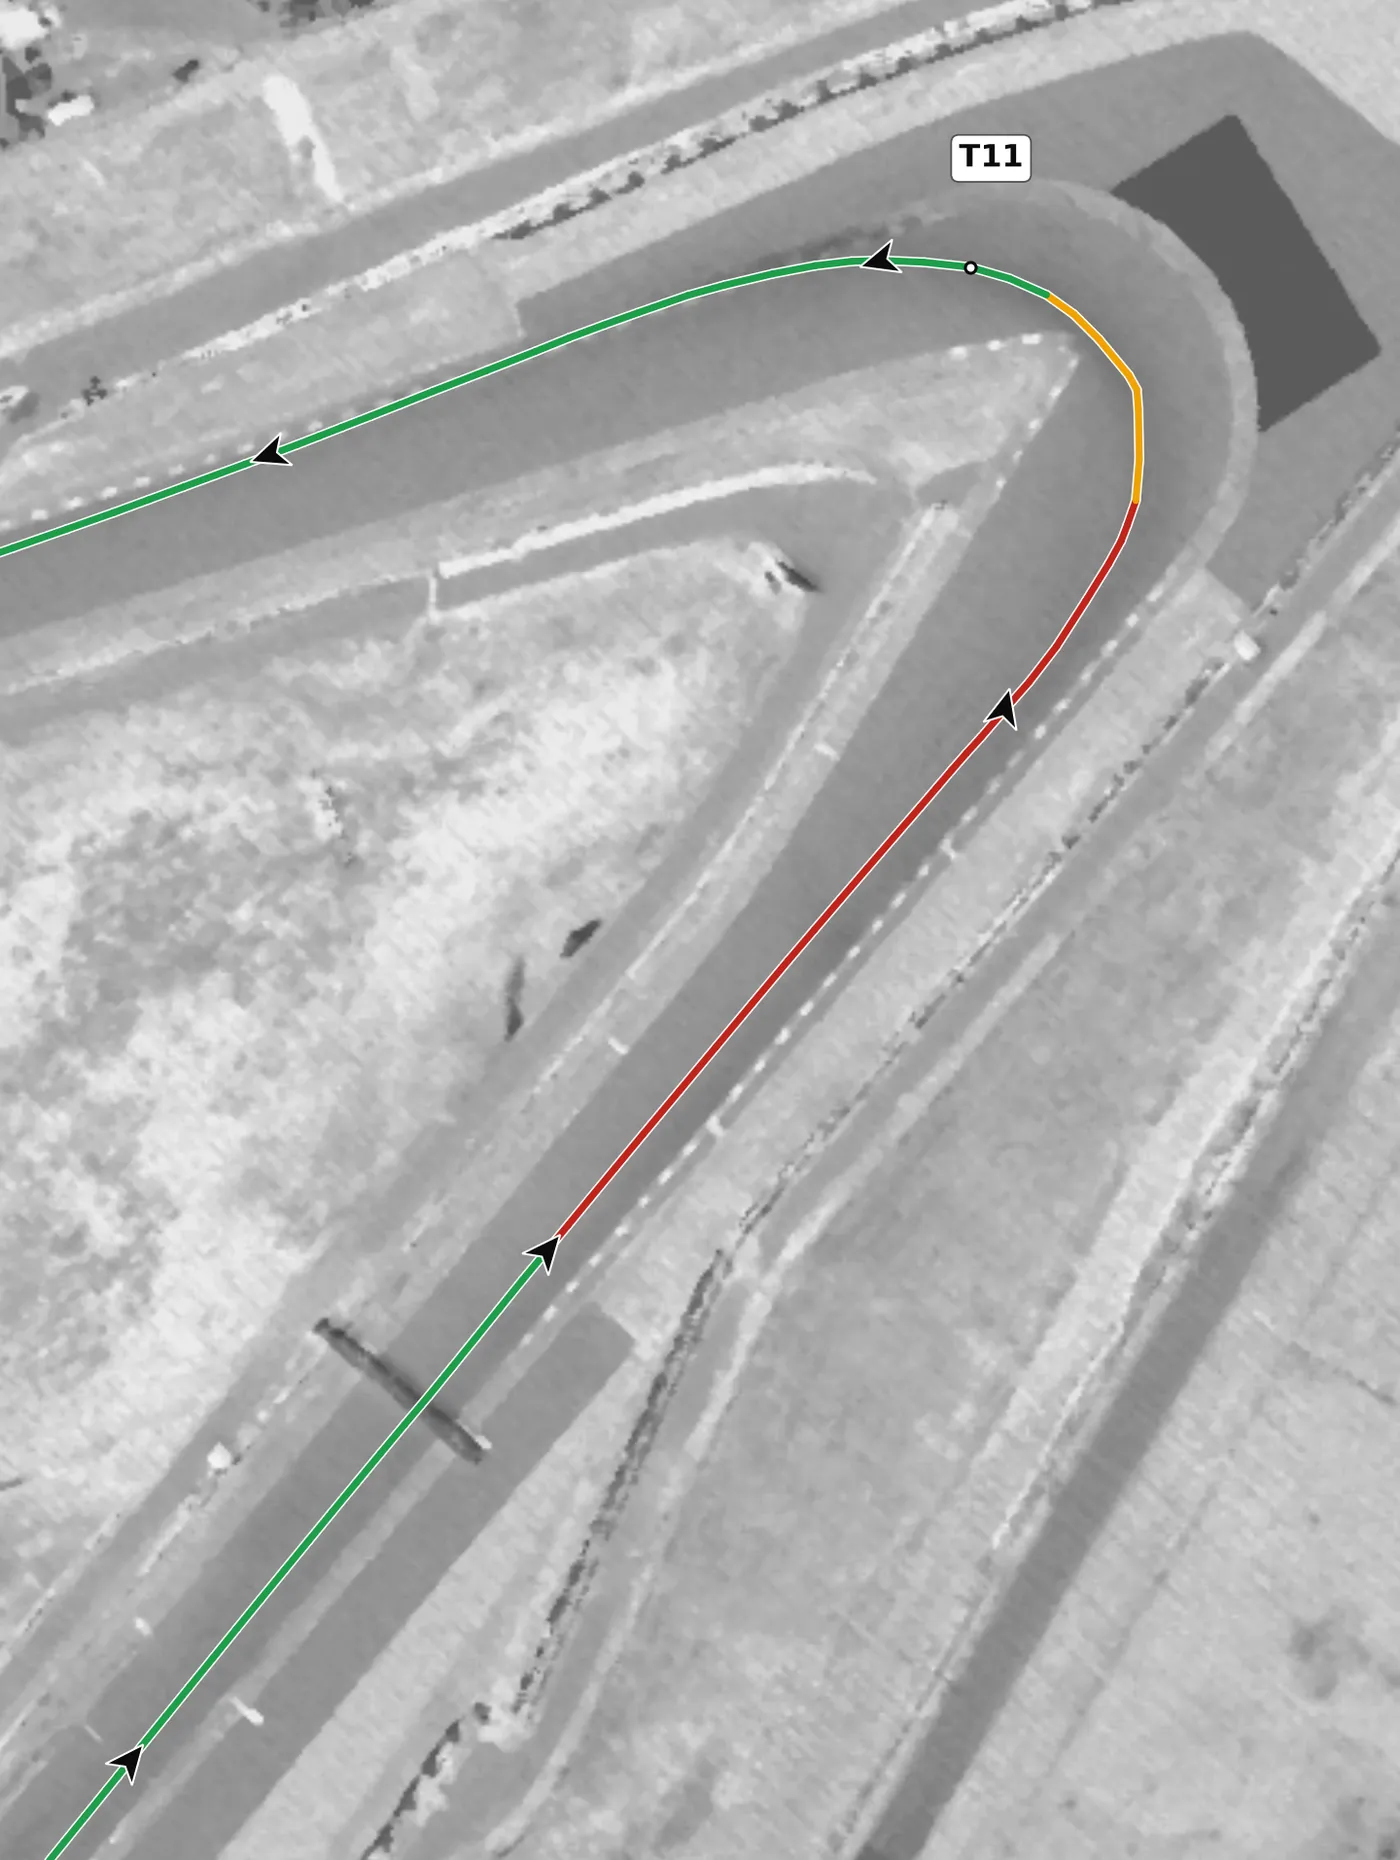
Approach from the right and brake hard and straight; the red-and-white turn-in kerb on the right is a good brake reference. You don't need to turn in from the very edge of the road, because the track widens toward the apex. Aim for a late apex so you can straighten the wheel early and get to full throttle sooner, because this exit leads onto the longest straight on the lap. The mistake to avoid is an early apex that forces you to lift or run wide on the exit.
From the survey: Opens the longest straight on the lap, so the exit is everything.
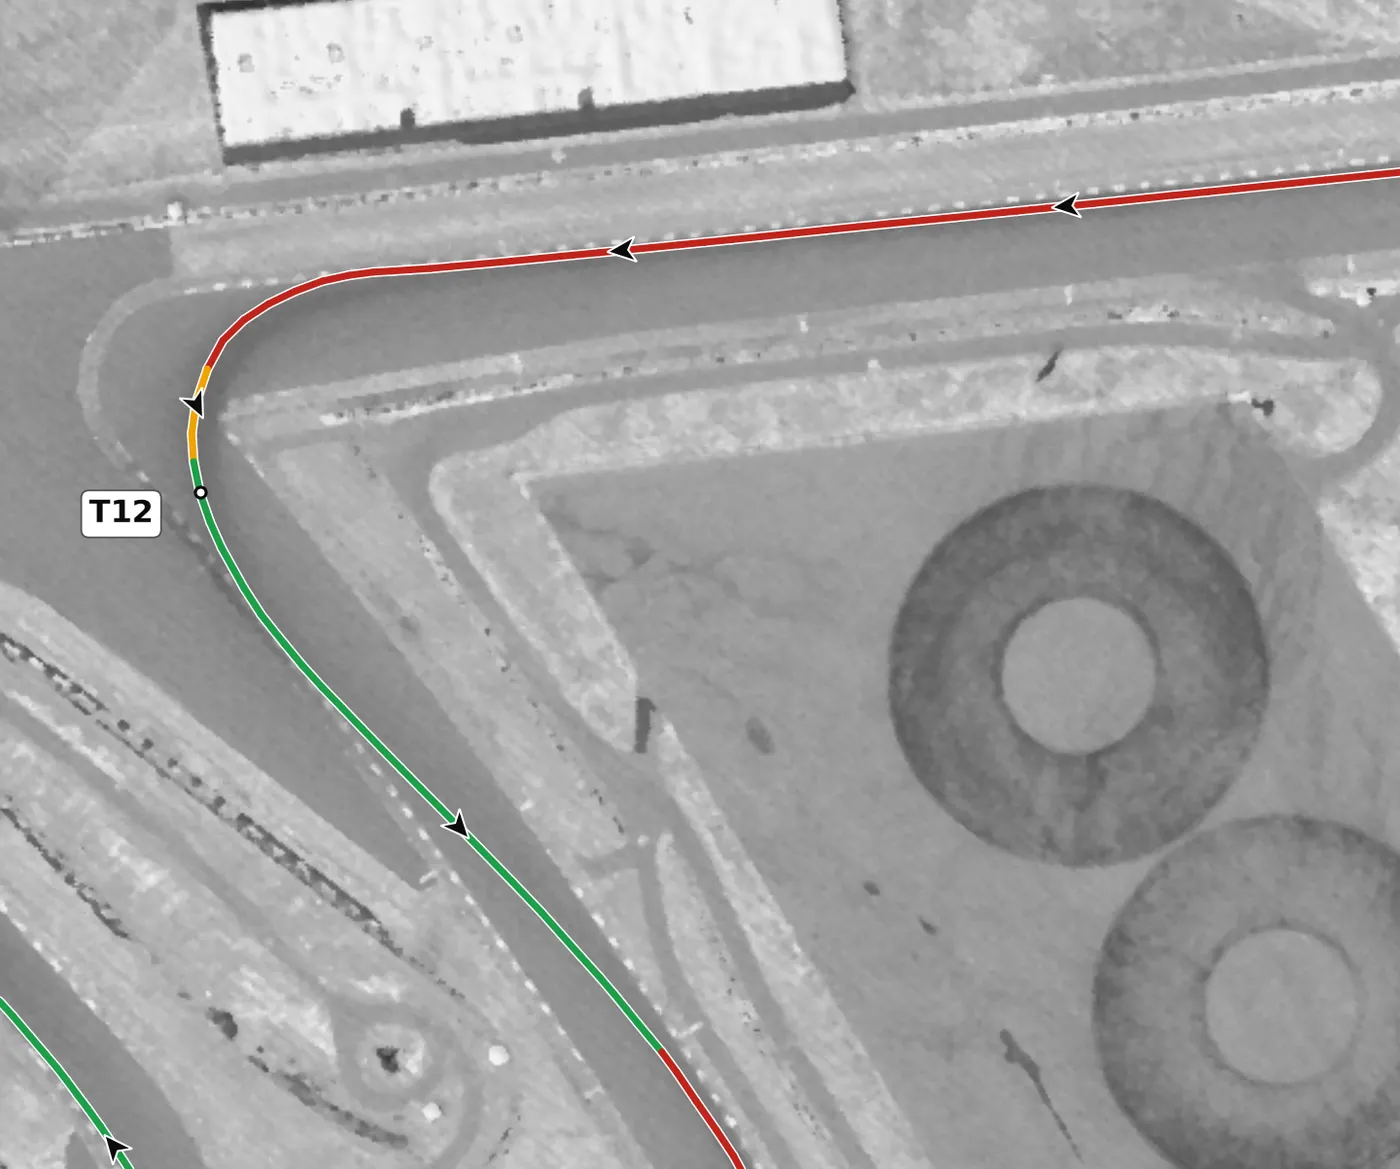
This is the biggest braking zone of the lap and it drops downhill as you get on the brakes. The boards are on the right and in feet: a pro in a GT race car uses about the 200 ft board, so in a heavy road car start well before it, brake hard in a straight line and move your marker only in small steps. The apex is slightly off camber, so most cars understeer there: be patient, pick up throttle at the apex and run out before setting up on the left for T13. Overshooting here is common, so give yourself margin until brakes and tires are proven.
From the survey: The biggest stop on the lap.
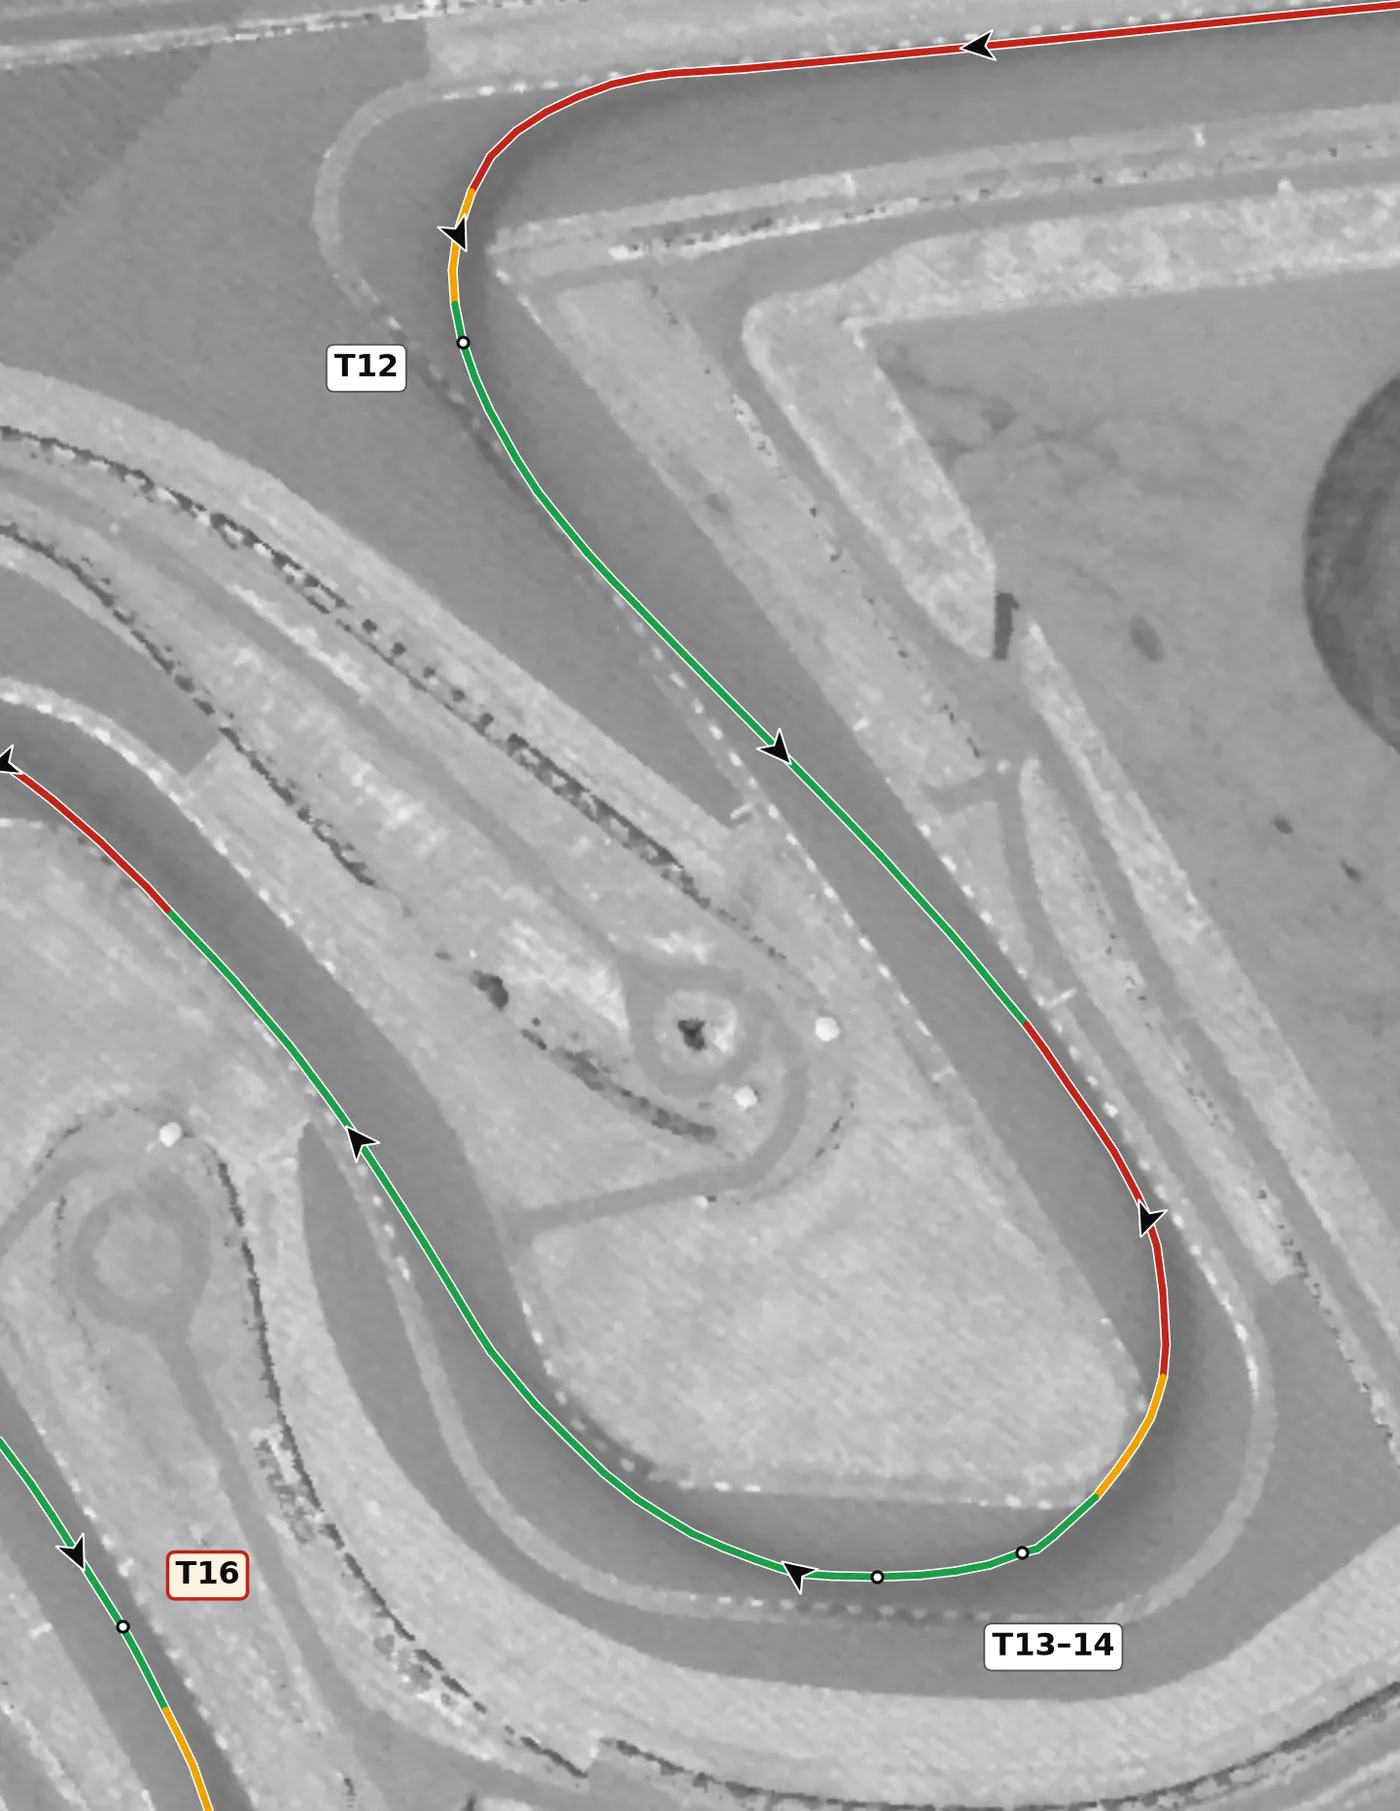
T13 and T14 are a single right-hander only a few car lengths apart. From the driver's seat T13 looks just like the entry to T16, but T13 needs real braking and T16 is flat: remember "brake for the right-hander after the back straight, flat for the right-hander after the switchbacks". Brake firmly on the left side of the road, trail the brakes to the apex, then turn straight in for the T14 kink, which is flat in lighter cars and may need a small lift in a heavy, powerful one. The mistake to avoid is an early apex at T13, which leaves you in the wrong place for T15.
From the survey: 19 m apart, driven as one.
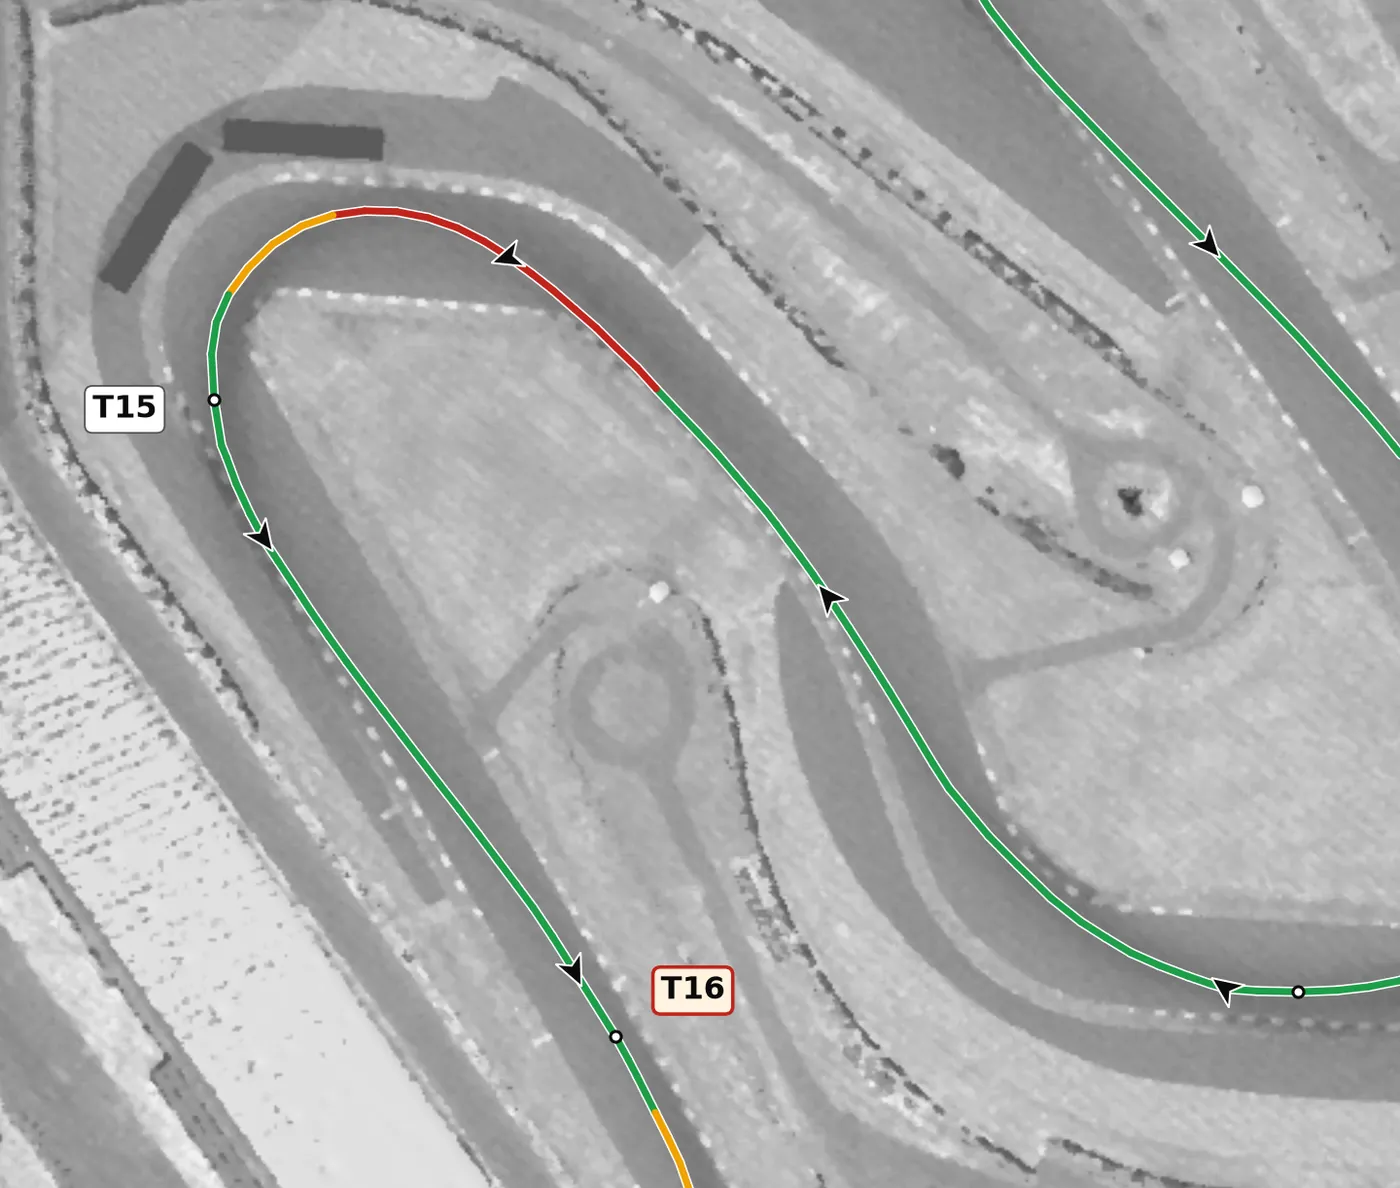
A tight, decreasing-radius left that unloads the left-front tire as you try to turn and slow at the same time. Start from the centre of the road and make the braking zone as straight as you can, aiming toward the right side; you can clip the first kerb or miss it to keep the braking straight. Then ease off the brakes and rotate the car down to a late apex before picking up the throttle. The mistake to avoid is braking while turning, which locks the left front.
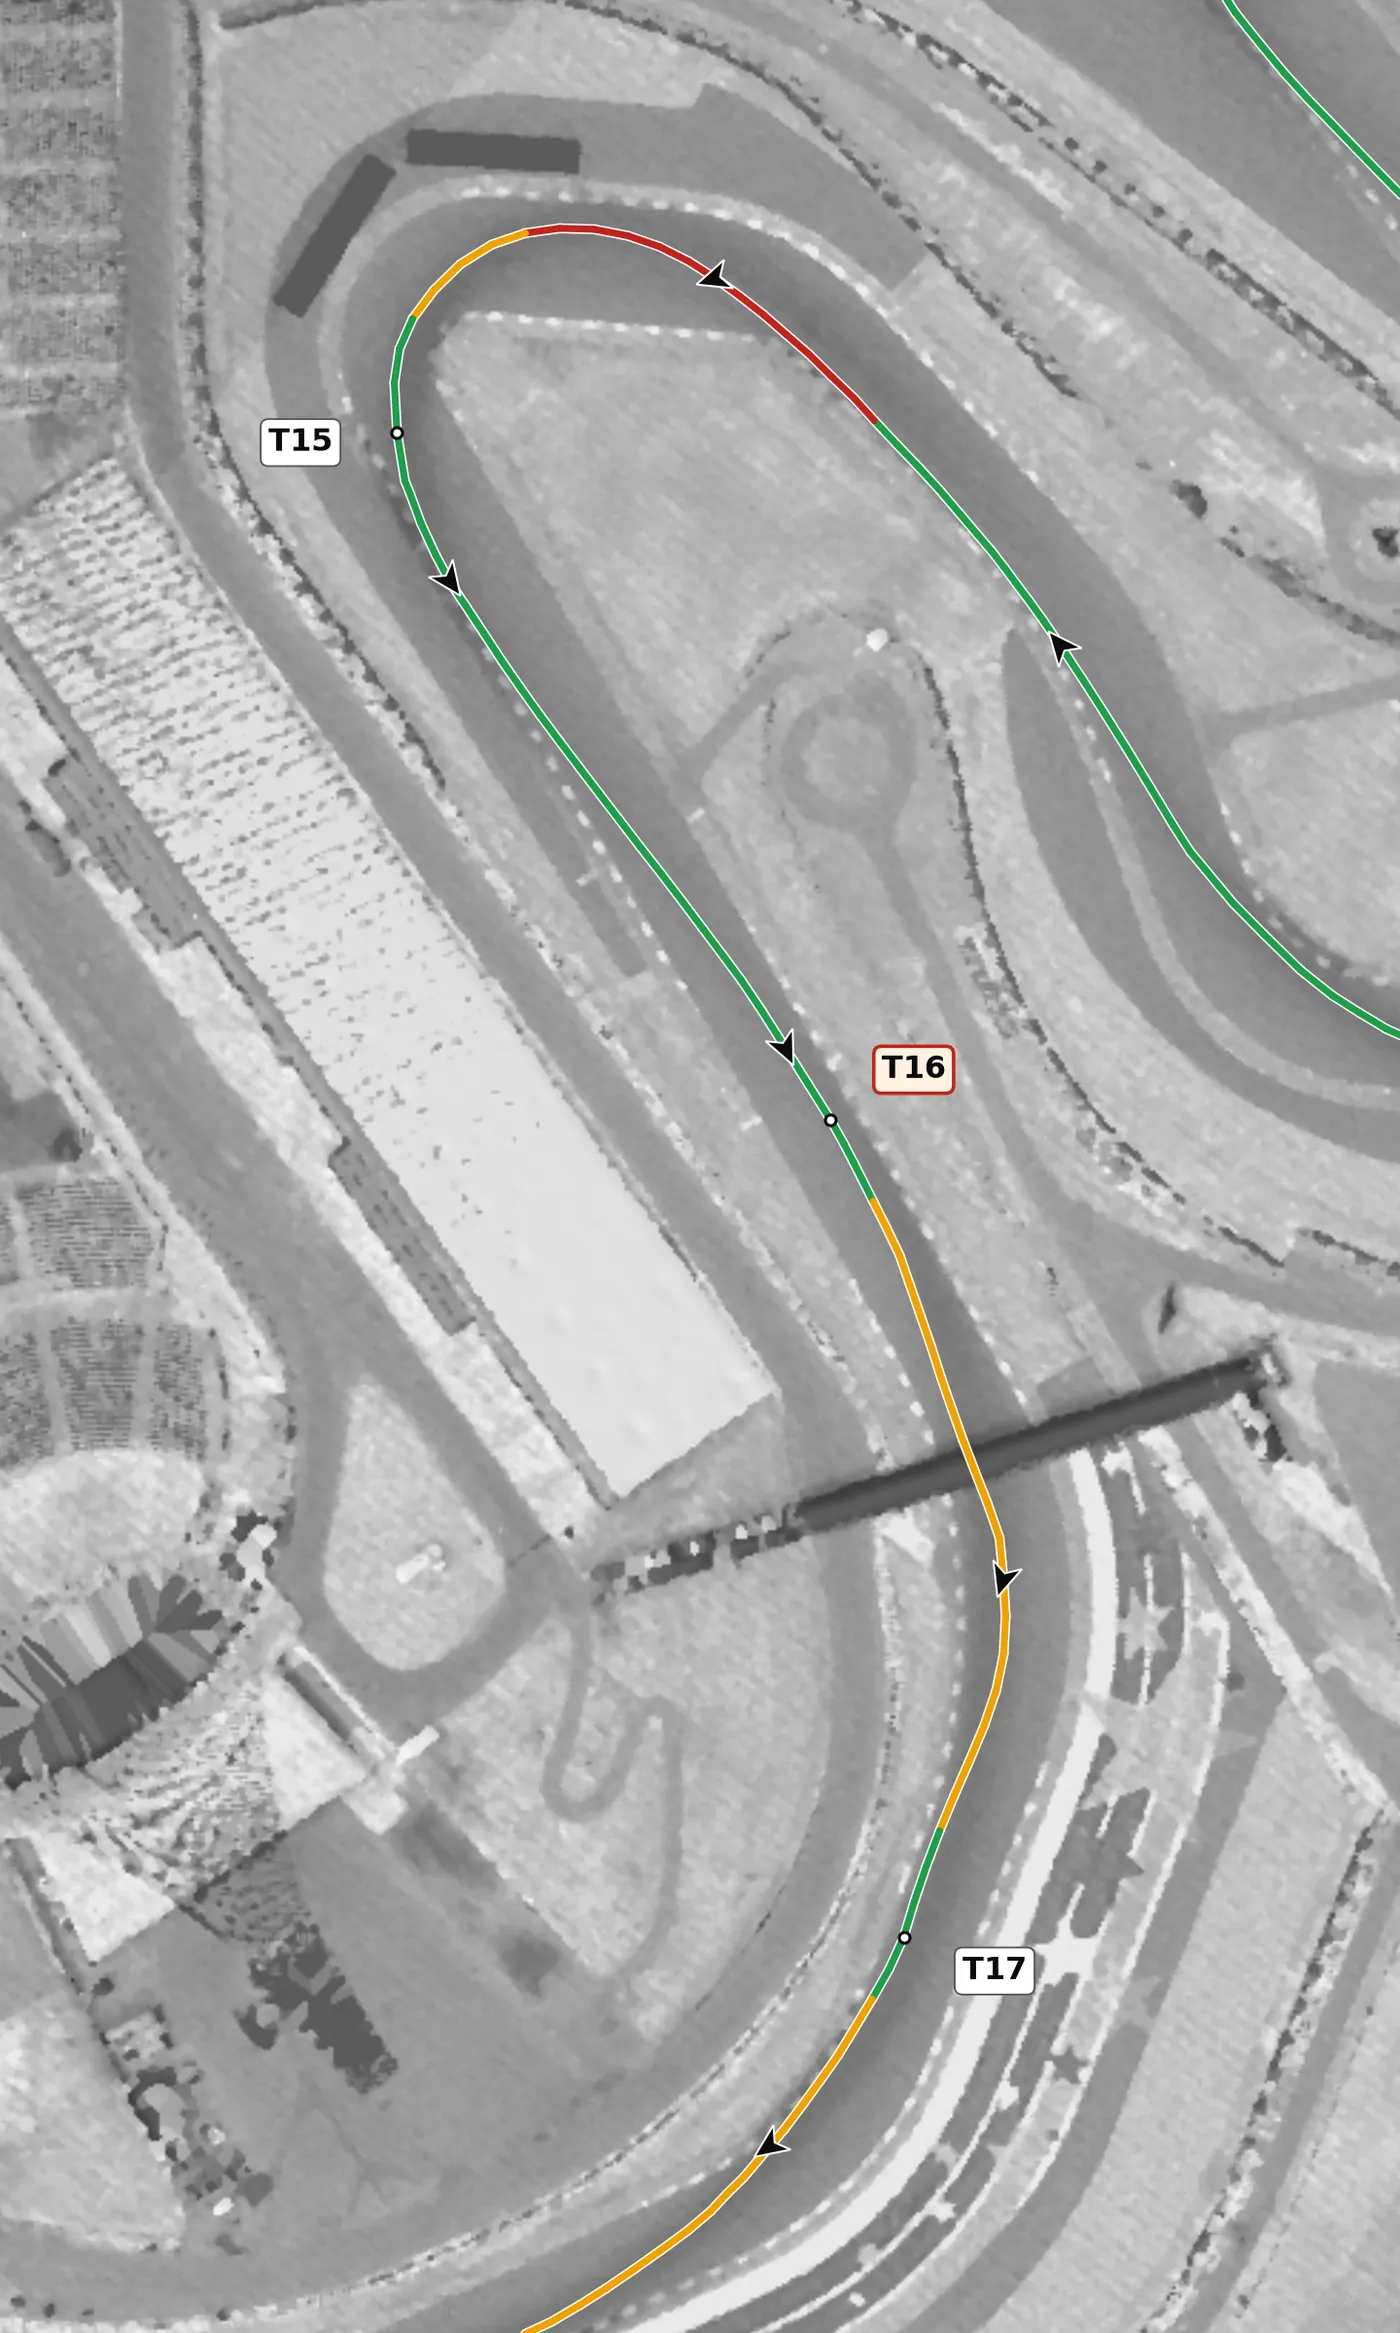
T16 opens the long right and changes from off camber on entry to on camber on exit, so turn in gently and let the car load up before adding speed. Turn in once and hold a steady arc toward T17 rather than chasing the first apex. The mistake to avoid is too much speed in on the off-camber entry, which pushes you wide for the rest of the sweep.
From the survey: Off camber on entry.
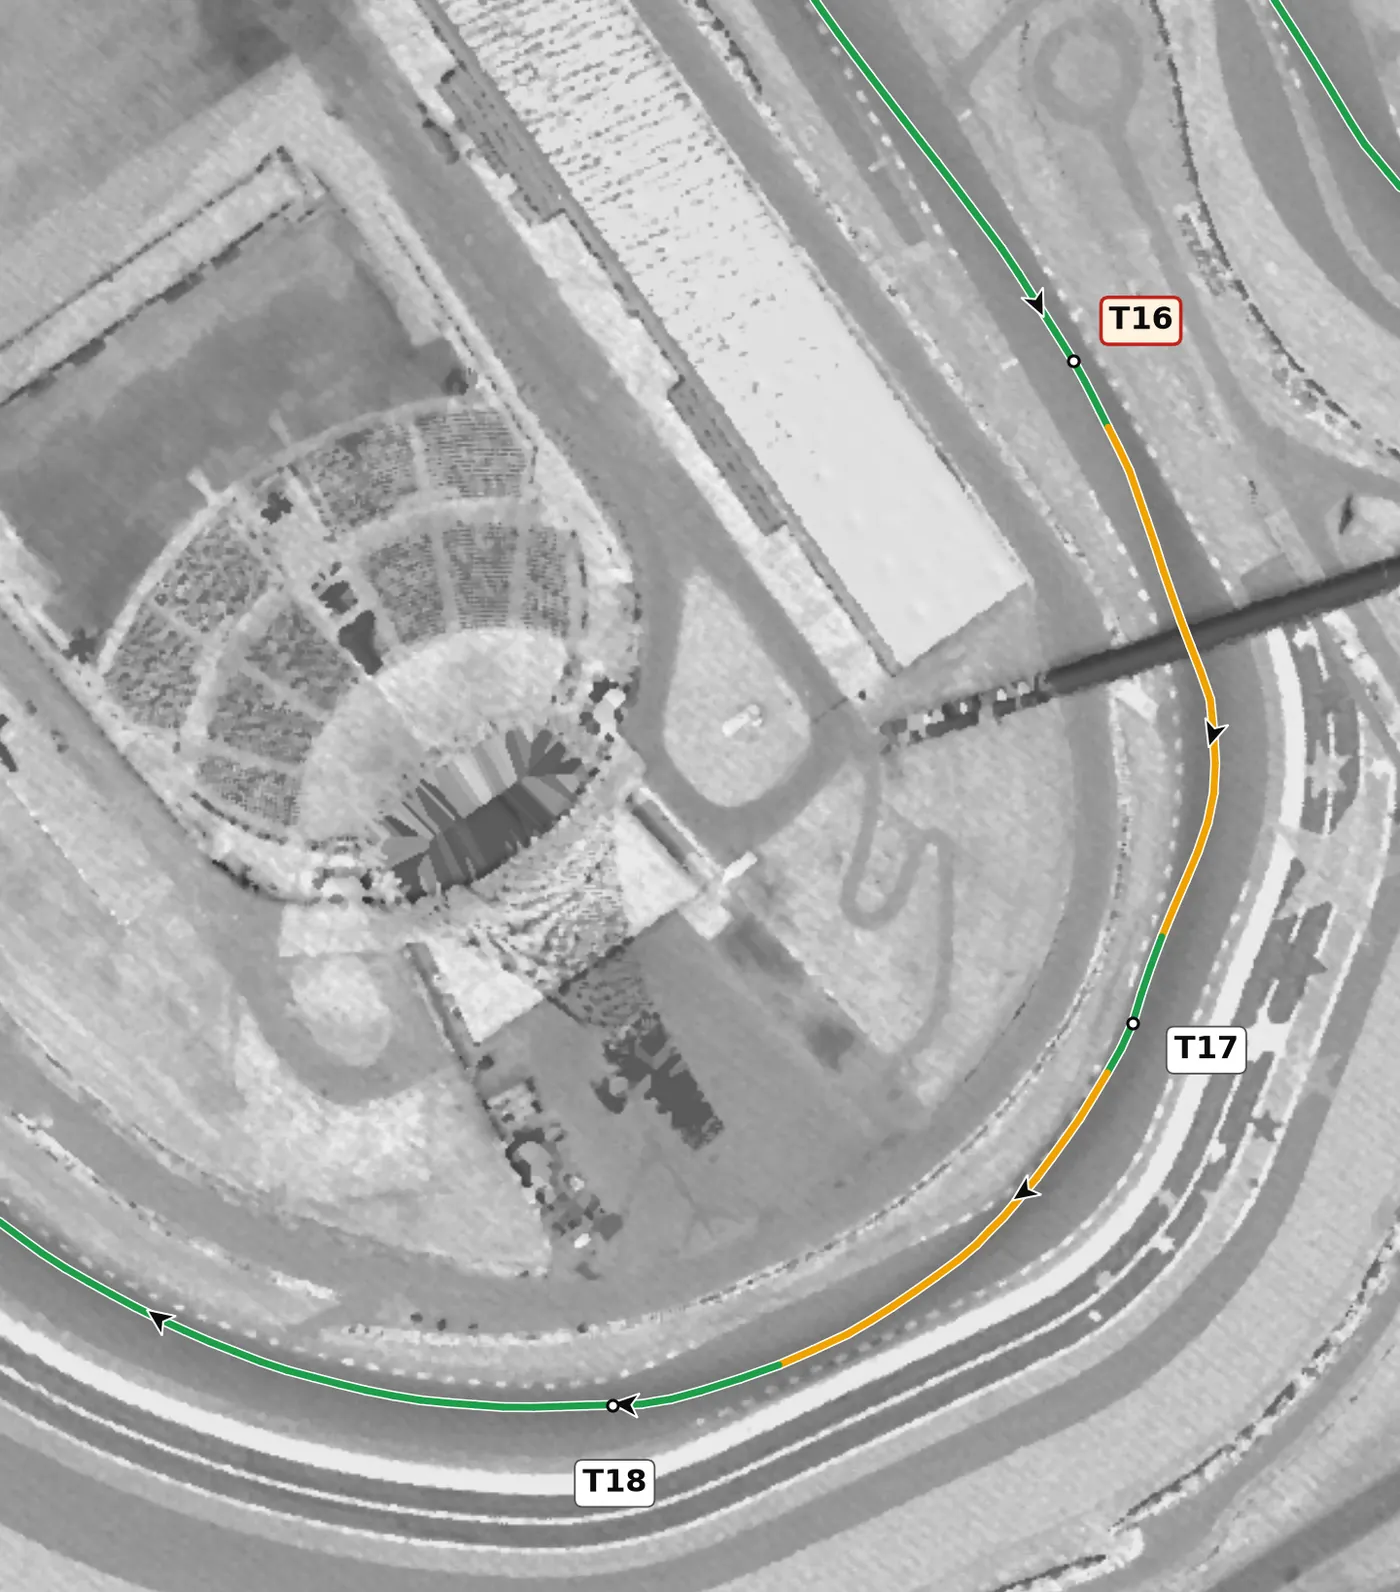
T17 is the middle of the multi-apex right: hold a small, steady amount of steering and balanced throttle while drifting out a little from the inside. Use this section to set up the last apex, because T18 is the one that leads onto the run to T19. Avoid stabbing the brakes or throttle mid-corner, which unsettles a heavy car that is already loaded on one side.
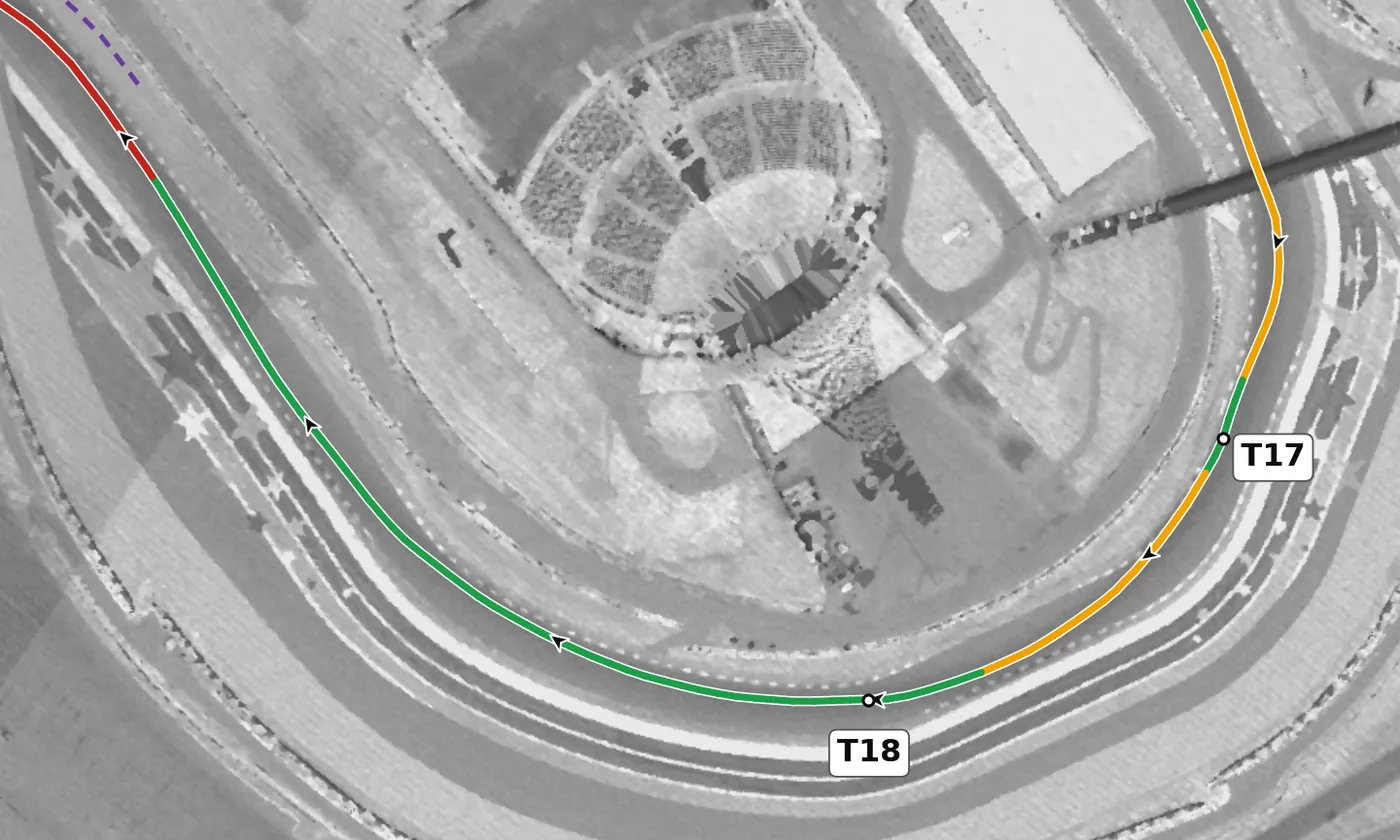
This is the final and most important apex of the long right, so build throttle gradually from T17 and get the car to the inside here. Use the road on exit but not all of it, because you need to be on the right for the T19 left. The mistake to avoid is running out to the left edge, which ruins the entry to T19.
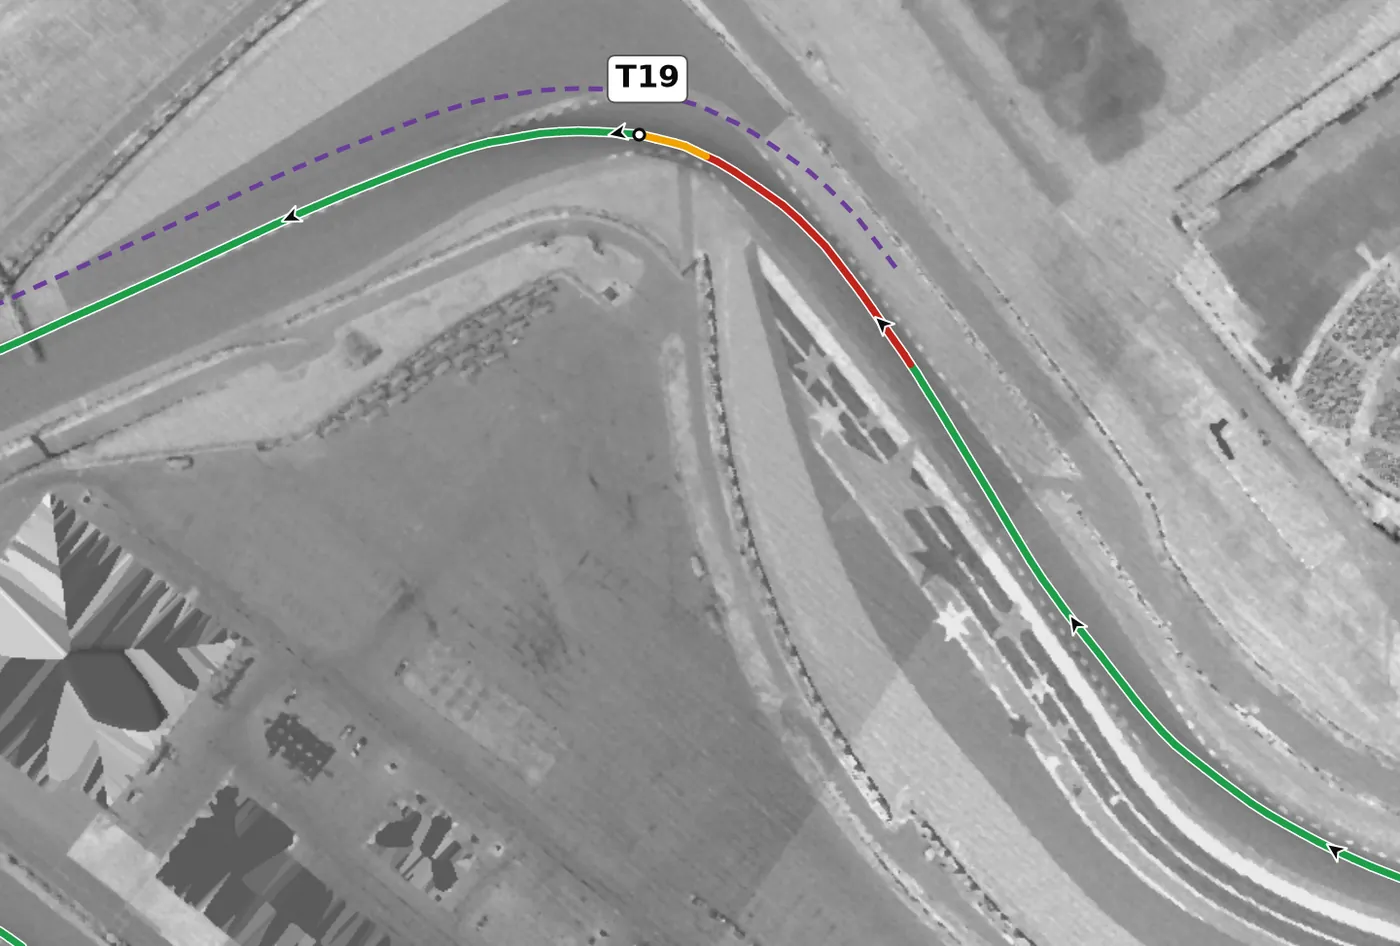
T19 is a fast, off-camber left that falls away at turn-in and is almost 90 degrees, so it needs real braking, harder than it looks. Approach from the right, brake in a straight line and turn in earlier than you think so you reach the apex, because the car pushes wide here easily. From here to the start/finish line COTA enforces a 103 dB sound limit, so short-shift and keep revs moderate through this section.
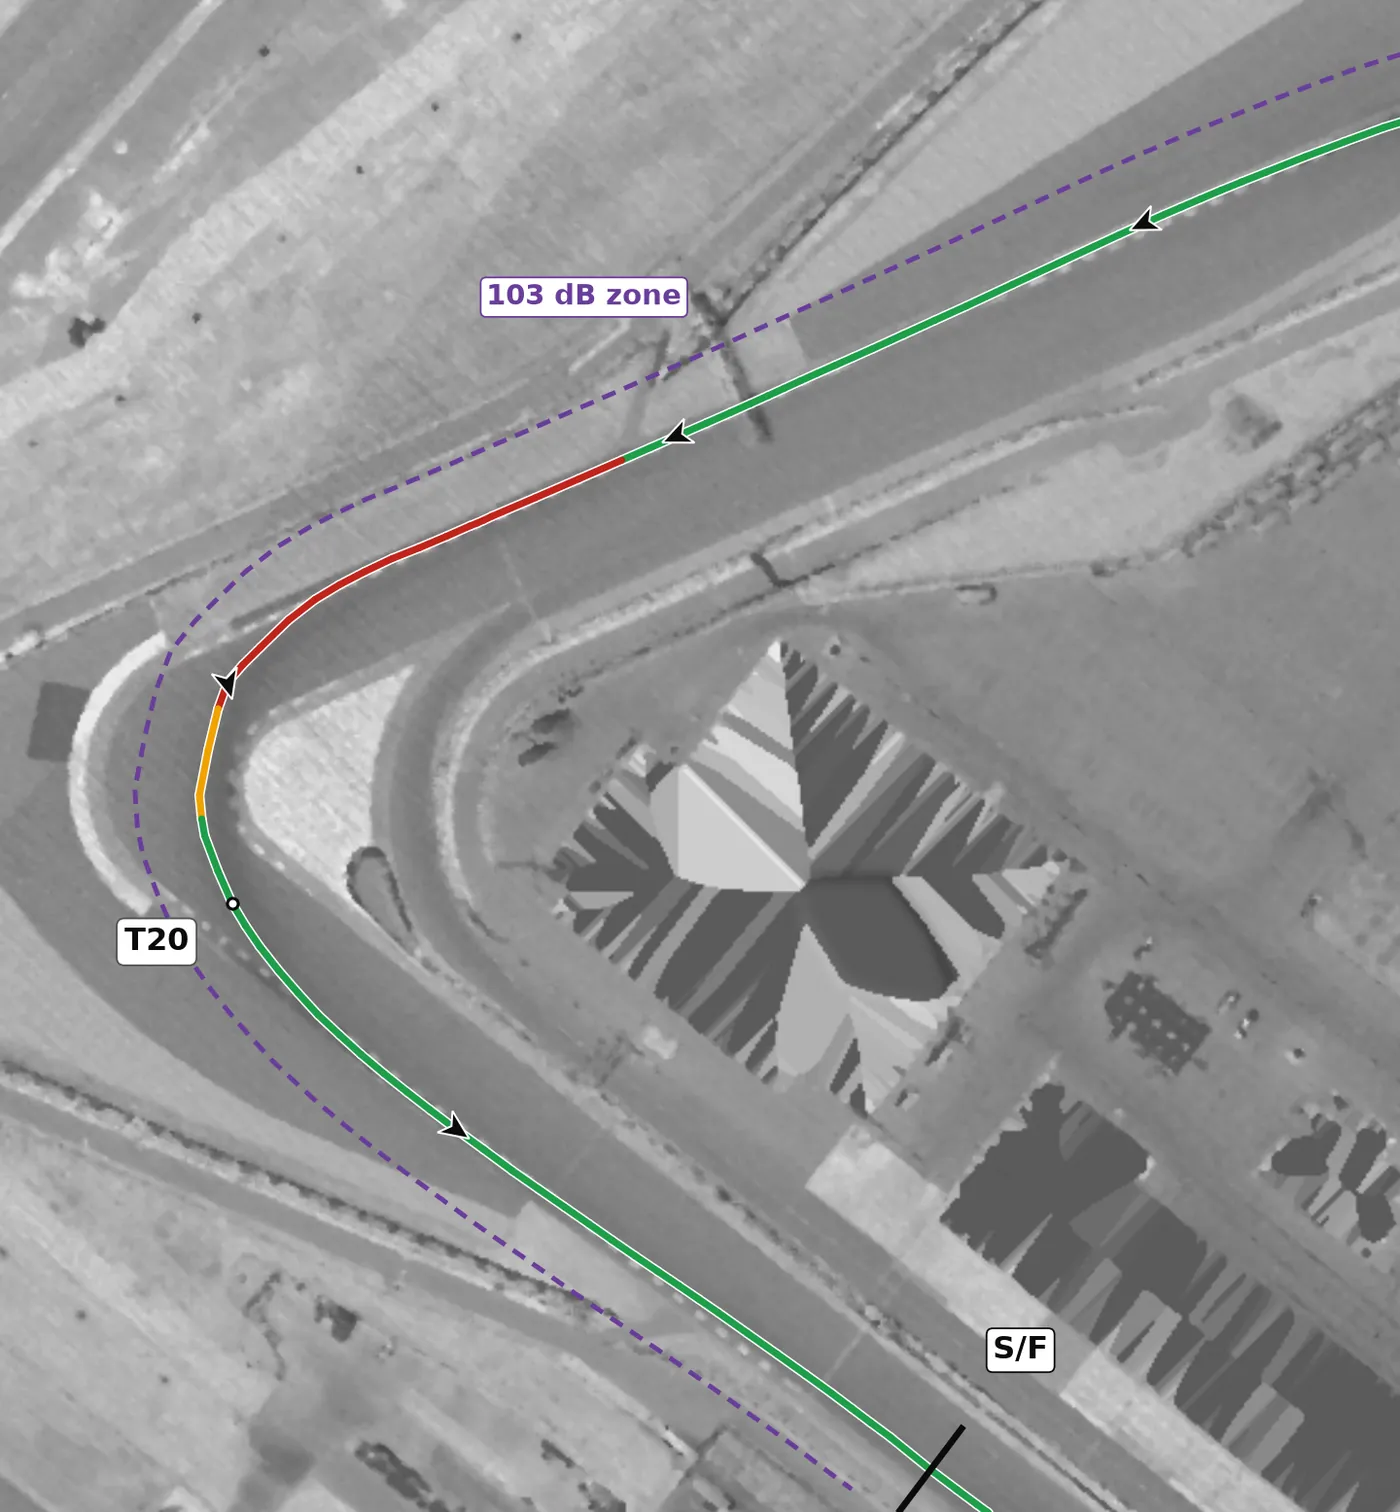
Brake firmly in a straight line for this slow left onto the front straight; the turn-in kerb on the right is a good brake reference, and so is the pit entry on your left. Pick one you can hit every lap, because it's easy to over- or under-shoot this corner. Trail the brakes to the apex, then be patient and finish the turn before full throttle. Remember the sound limit still applies until the start/finish line.
Version history
- v1.3 · 2026-10-01 — Corner notes updated from a pro driver's turn-by-turn guide: the brake boards are in feet, brake references for T11 (turn-in kerb), T12 (boards on the right) and T20 (kerb or pit entry), the T13-versus-T16 look-alike, and T19 now says it needs real braking. The line itself is unchanged.
- v1.2 · 2026-10-01 — T10 is now drawn on throttle: the car gains speed through it, so it is not a lift. Its note now says it is flat in most cars once you commit to a fixed turn-in point.
- v1.1 · 2026-10-01 — The line now goes straight from throttle to brake, with no coasting in between. Braking points checked against an HPDE braking rate and published brake markers; they stay where they were.
- v1.0 · 2026-10-01 — First version: my 2023 M5 line (1 Hz) on the F1 reference path.
Feedback contributors
Drivers and instructors whose feedback has improved this line. Thank you.
- Mike M — no coasting between throttle and brake; braking points (v1.1)
- Brian L — T10 is a throttle corner, not a lift (v1.2)
- Neal B — pointed us to a pro driver's COTA guide (v1.3)