FIRM — Race Line
Bill's '20 BMW M340i: the median line of his 3 fastest laps (1:27.03–1:28.32), January 29 2022, 1 Hz GPS smoothed between fixes. The three laps agree to about 0.4 m. The FIRM has no published turn map we could match, so the turn numbers are our own, in lap order.
Heads up: 1 Hz GPS: trust the shape and the braking zones, not the exact metre. The line wobbles by a couple of metres on the straights; that is the GPS, not the car.
- Throttle
- Coast / partial
- Braking
- Apex
- T4Off-camber corner
Arrows show the direction of the lap. The grey basemap is USGS LiDAR: dark = asphalt, light = grass. Tap any map for the full-size image.
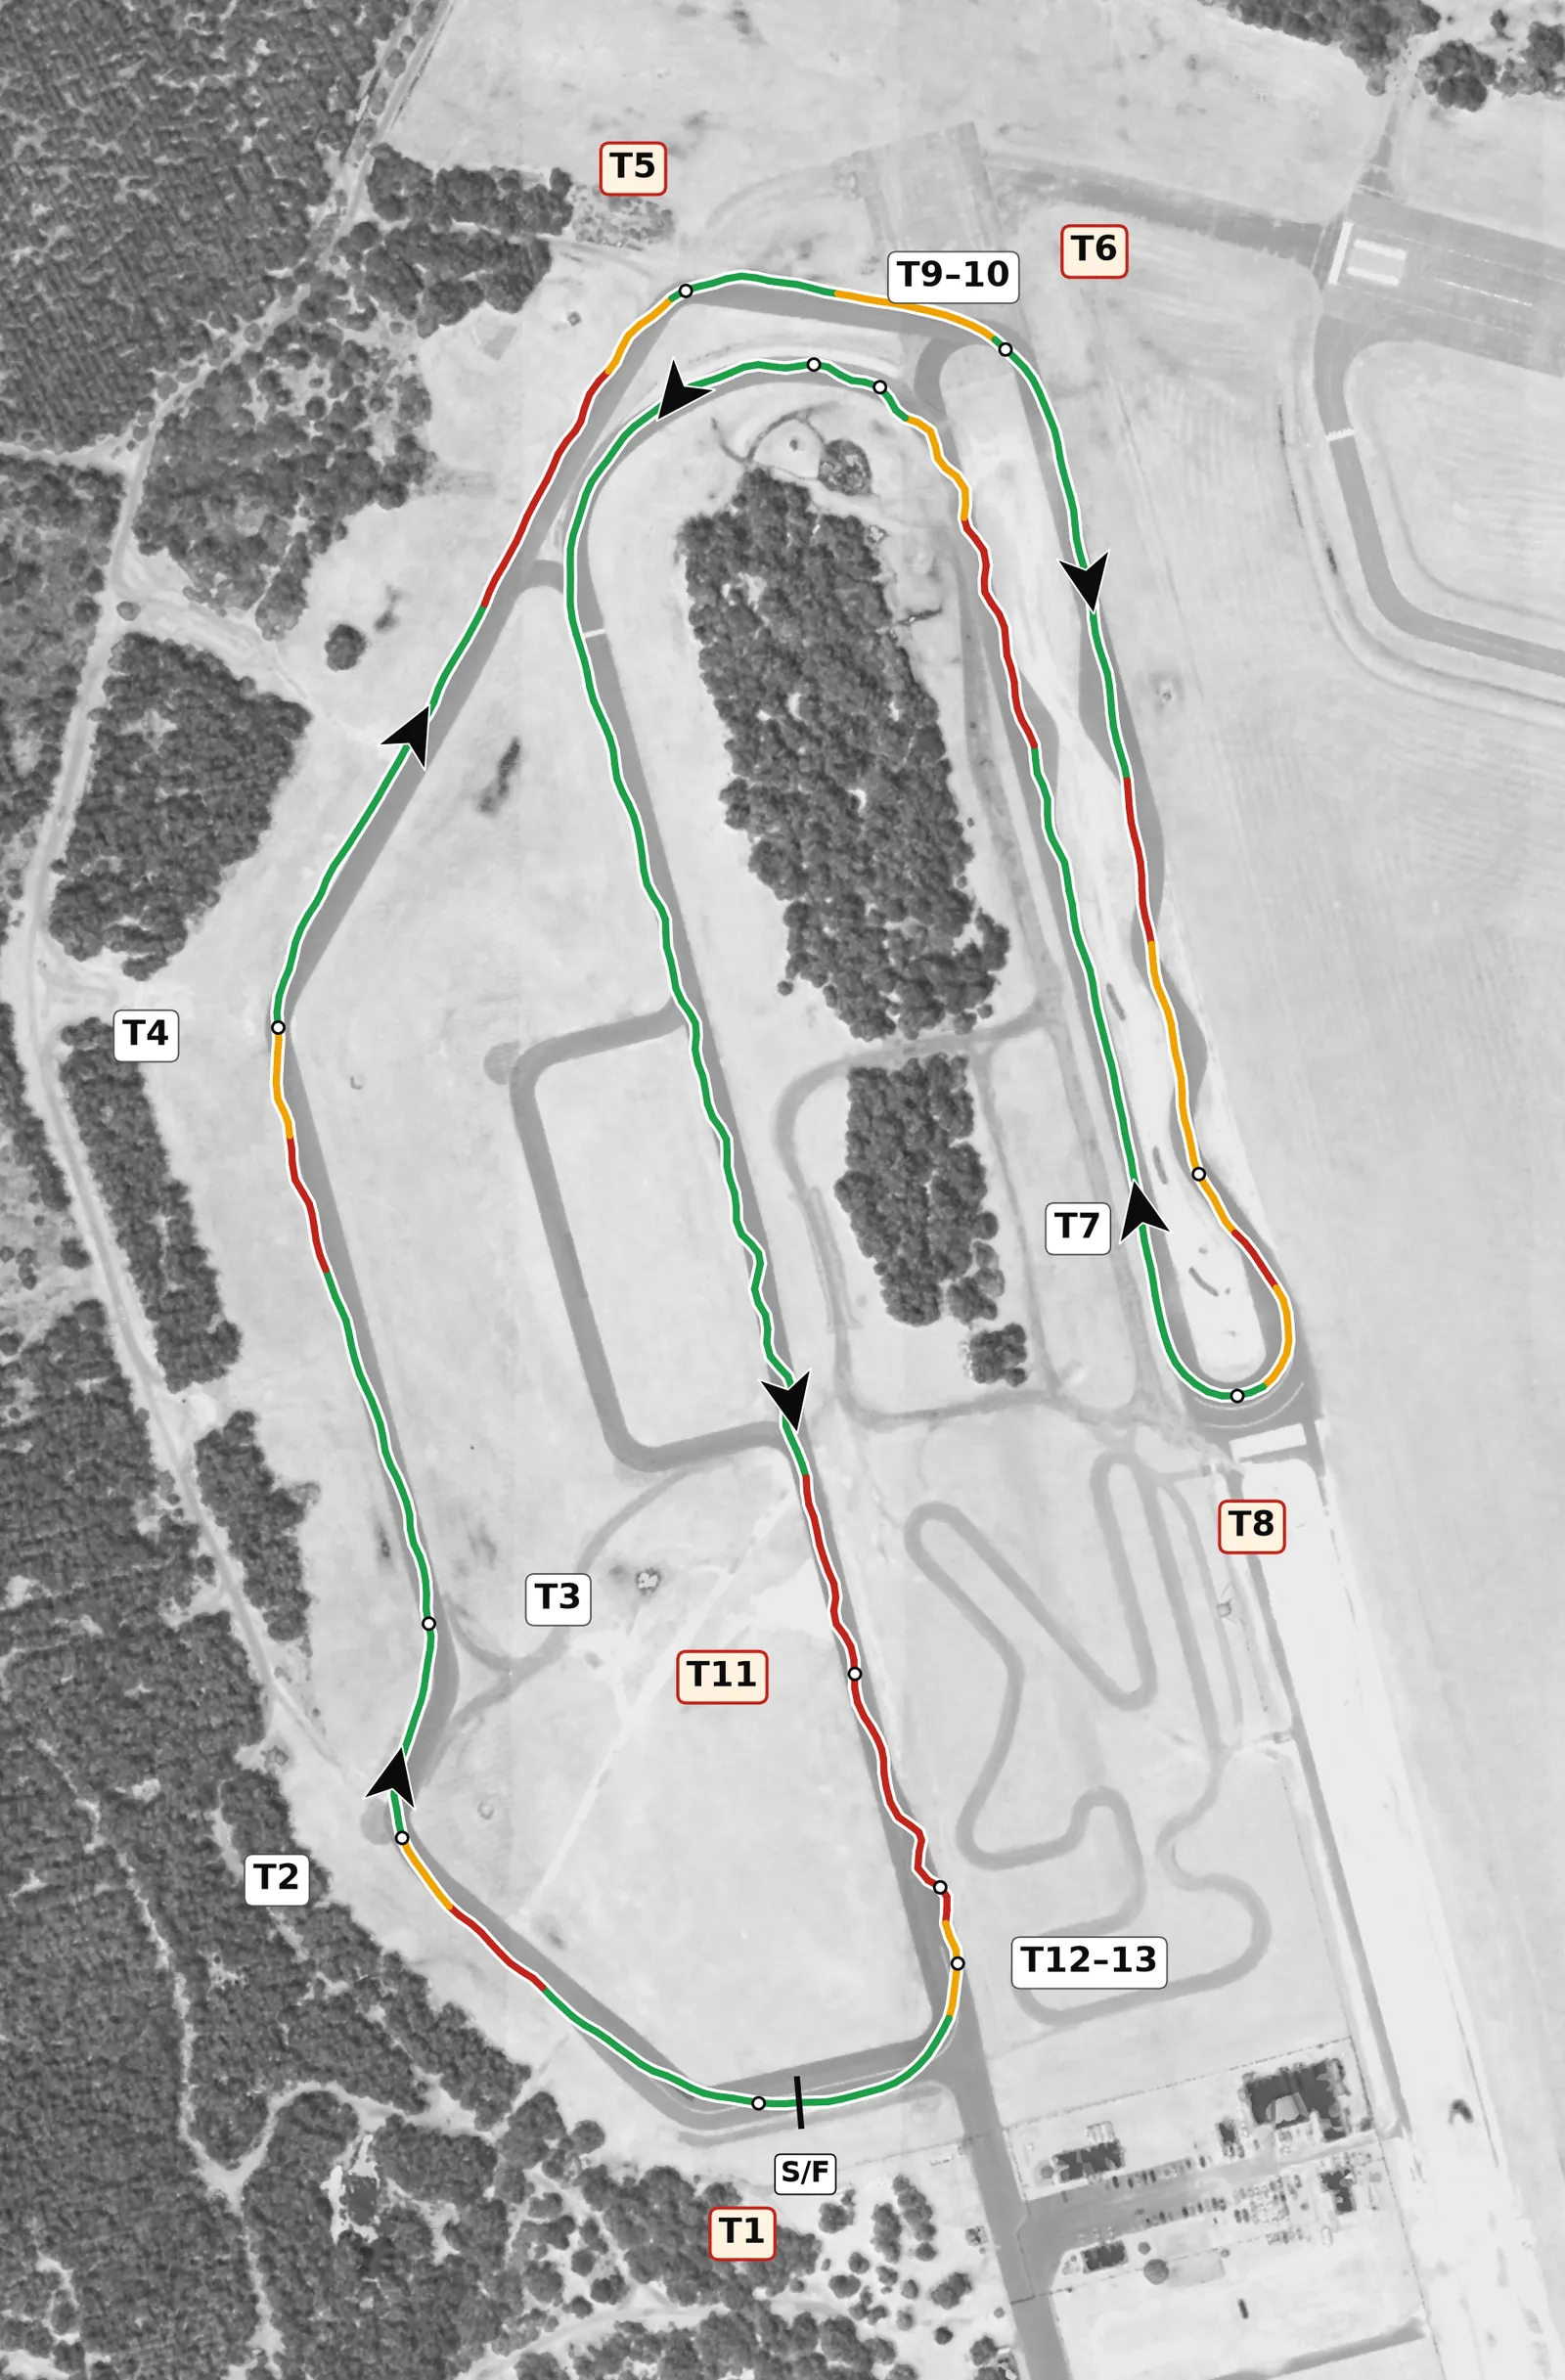
The FIRM's full course is two loops joined together on flat ground beside an airfield, with only about 1.6 m of relief and no crests or compressions, so the lap is all about braking, rotation and exits rather than elevation. The turn numbers are our own, in lap order, because there is no published map we could match, so don't expect them to line up with other guides. The biggest opportunity is the banked 180-degree left at T9–T10, which feeds the main straight and can carry more speed than most drivers give it; the hairpin at T8 and the last corner onto the start/finish straight are the other exits that matter.
Sectors
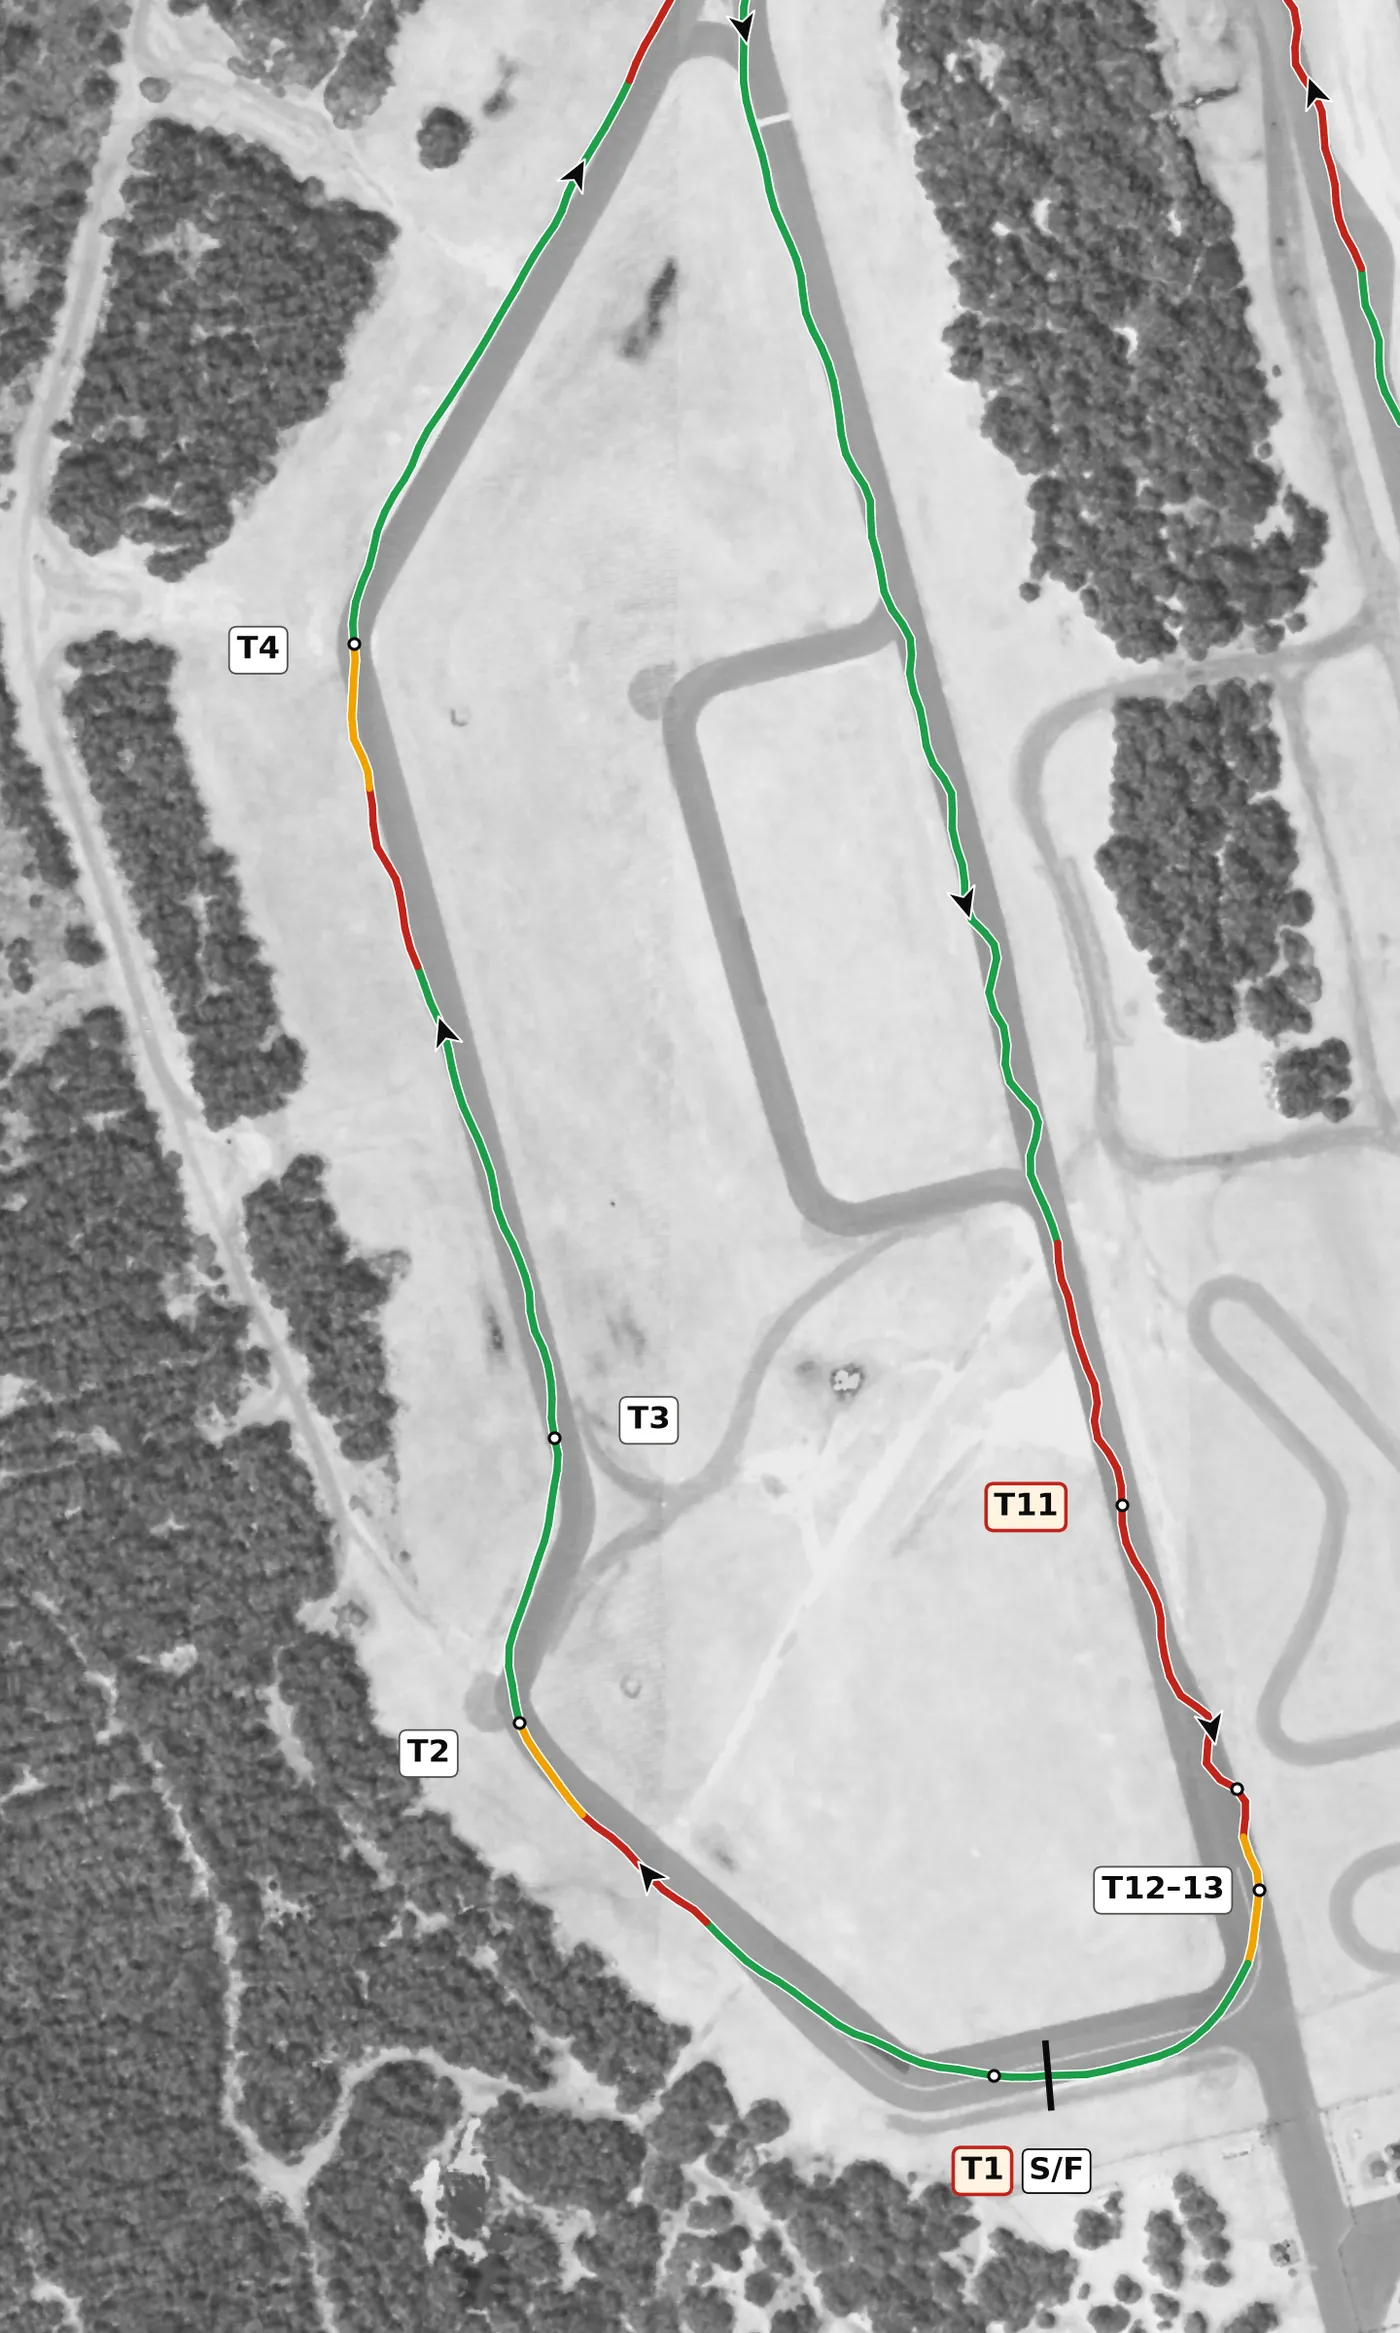
The lap opens with a right at T1 that drops slightly into the one real dip on the circuit, then a right–left at T2 and T3 and a long run up to T4. T2 climbs out of the lowest point on the lap, so do your braking on the way down into the dip and let the climb help you turn; T4 sits on narrow pavement, so be precise rather than ambitious.
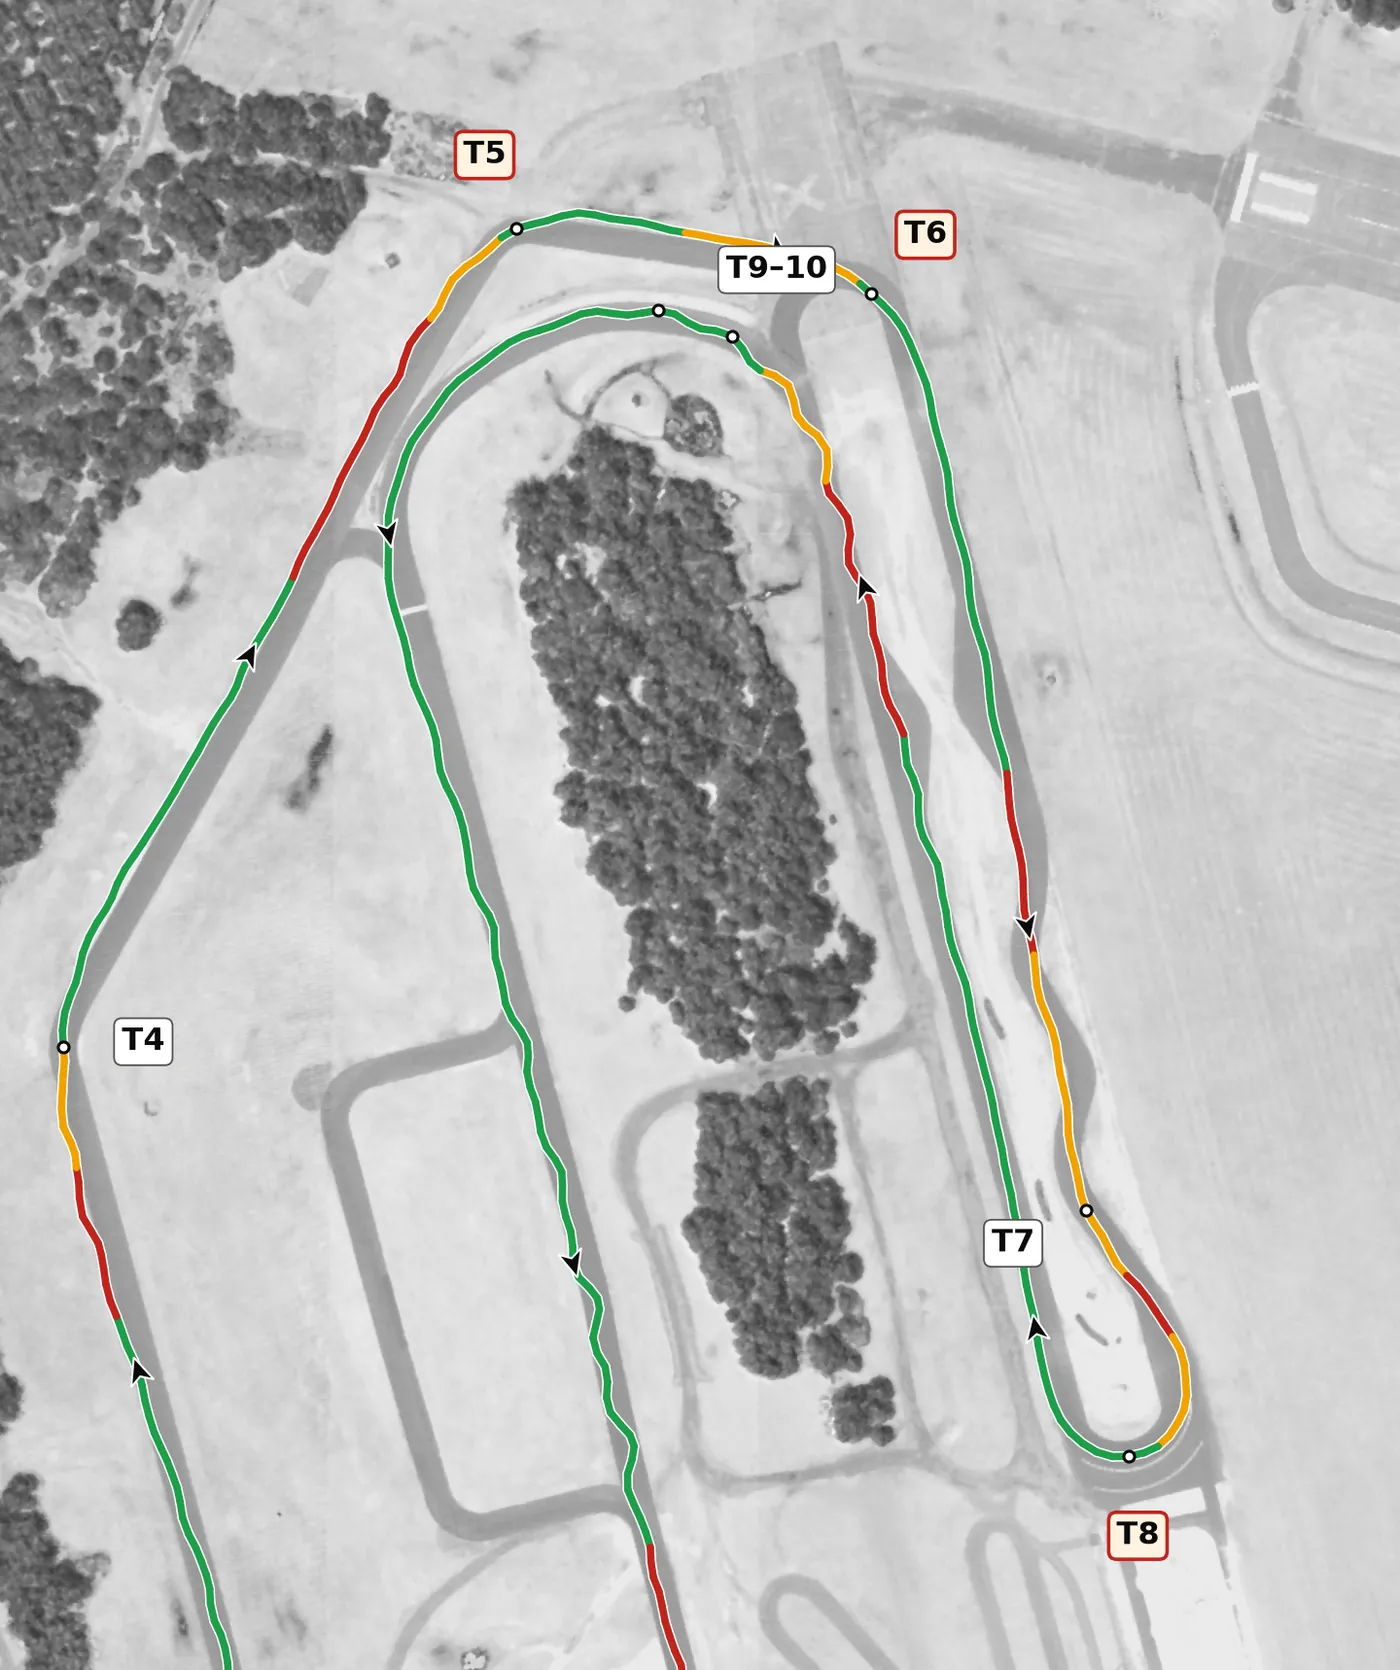
T5 and T6 are two off-camber rights at the top of the site, the second the most off camber on the lap, so be patient with the throttle. T7 is a fast, consistent left kink on the highest part of the circuit where the braking for the hairpin begins, and then T8 is the 201-degree hairpin, flat and wide, where everything comes down to brakes, tires and a late apex.
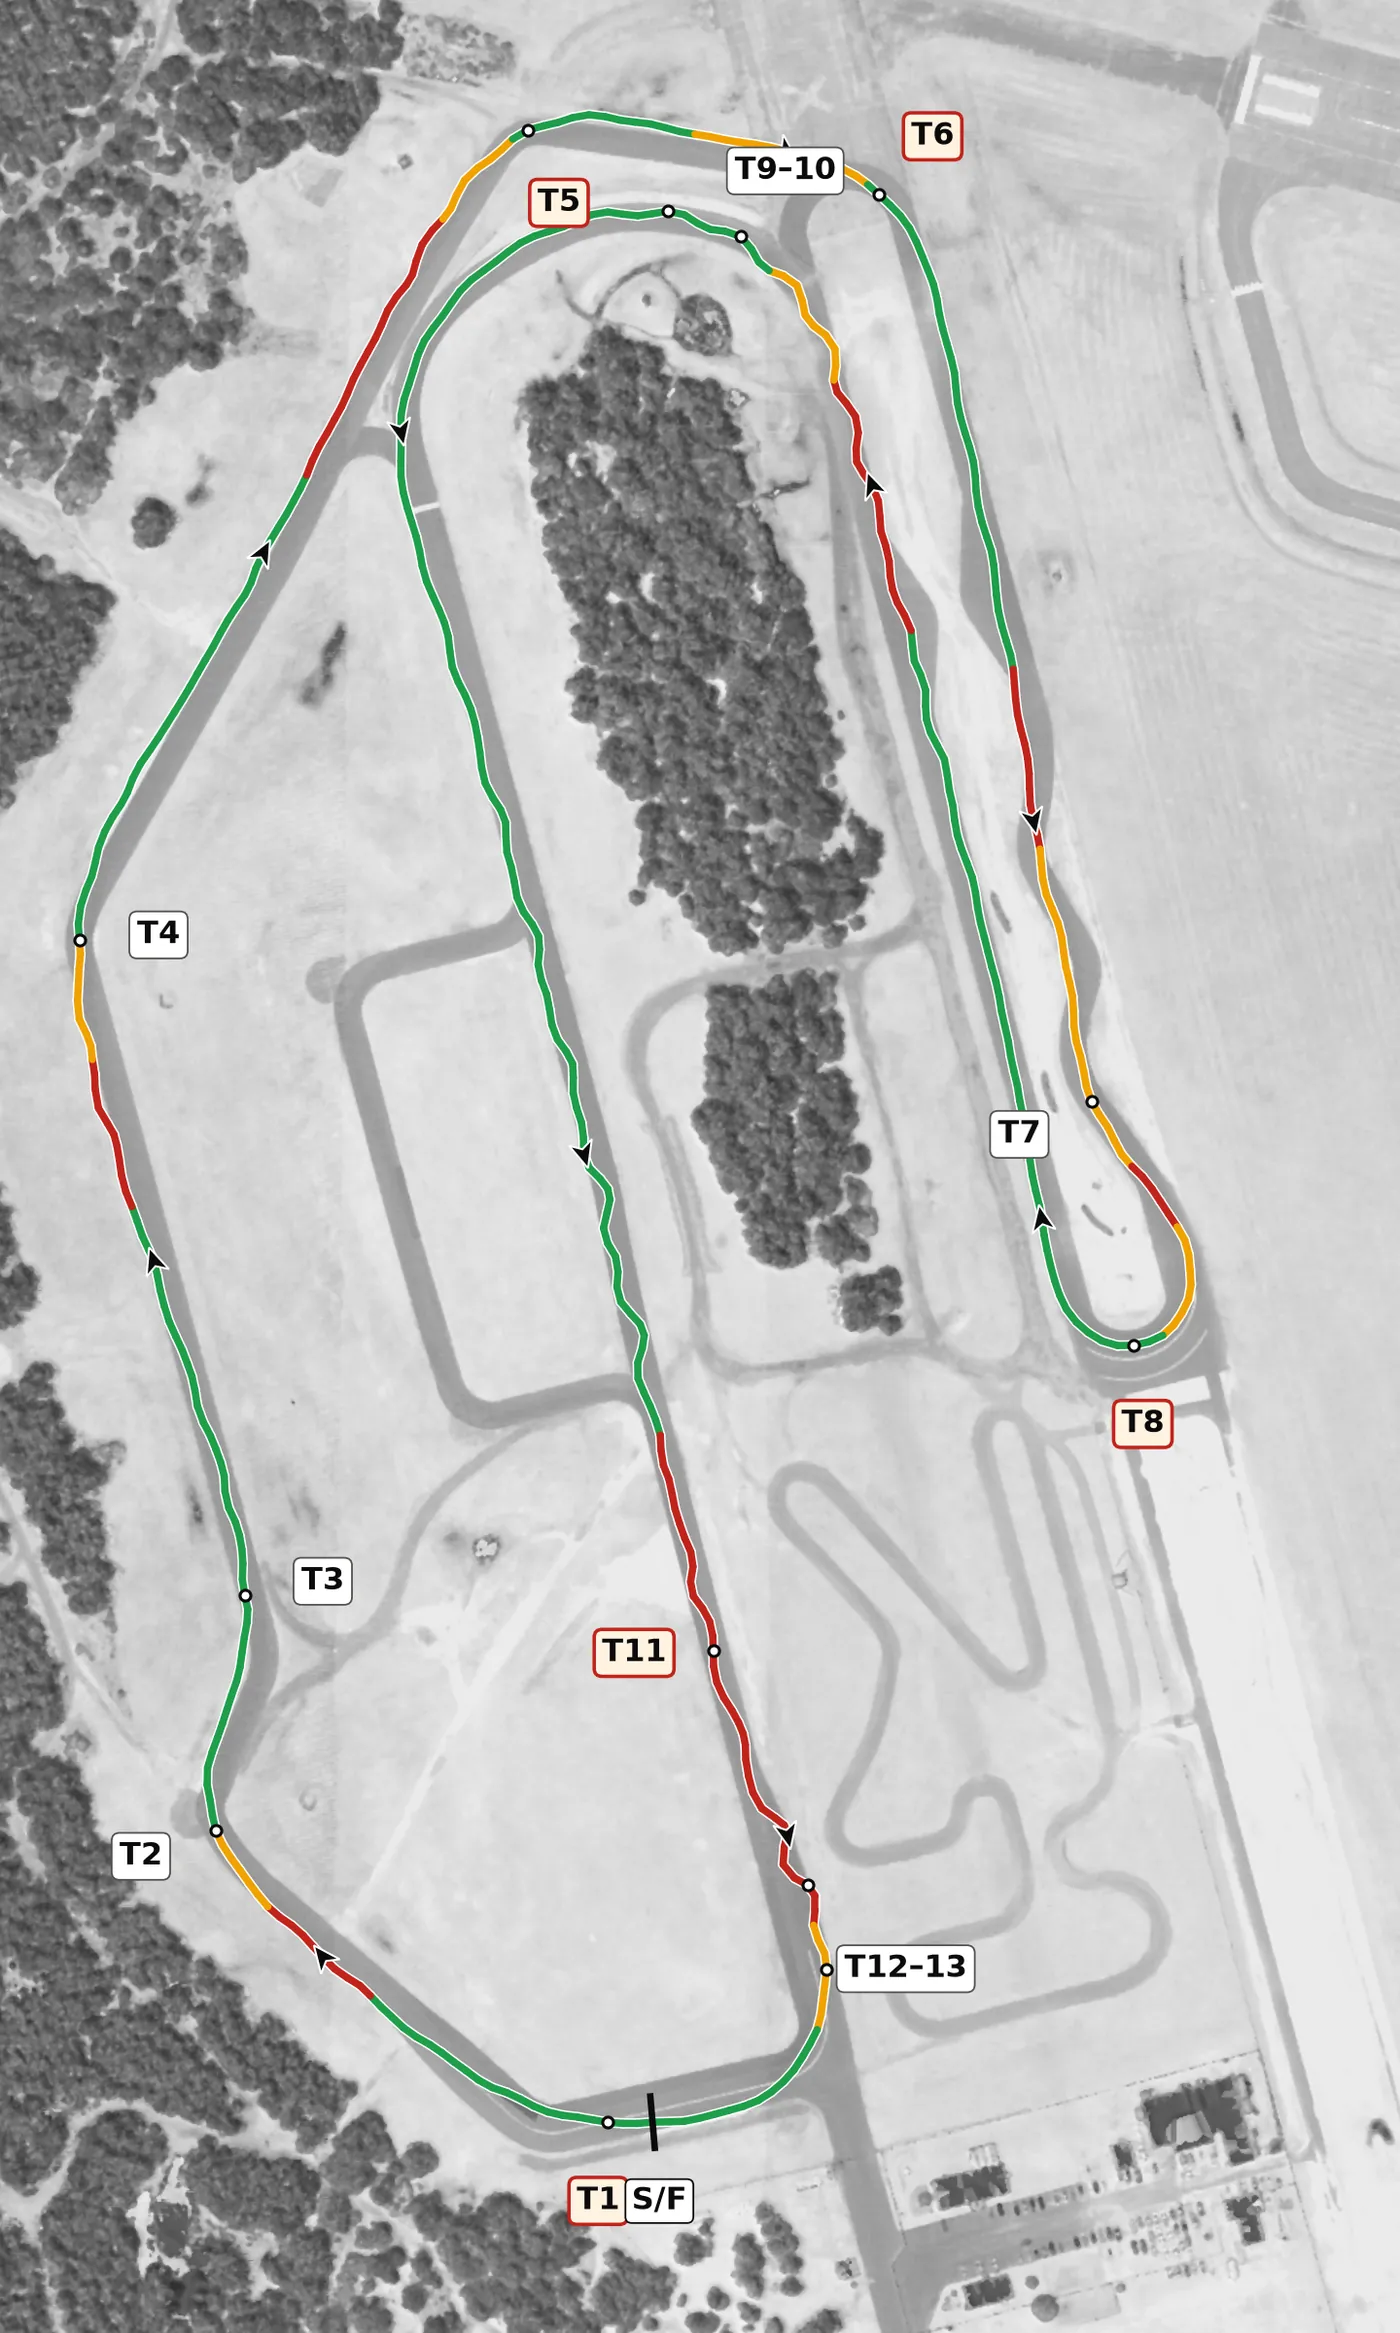
T9–T10 is one long, banked 180-degree left that gets steeper toward the second apex, so trust the banking and work up to a faster minimum speed, because it feeds the main straight. The straight bends gently through the T11 and T12 kinks, where the braking for T13 begins, the last right-hander, which is level, grip-limited and puts you back onto the start/finish straight.
Corners
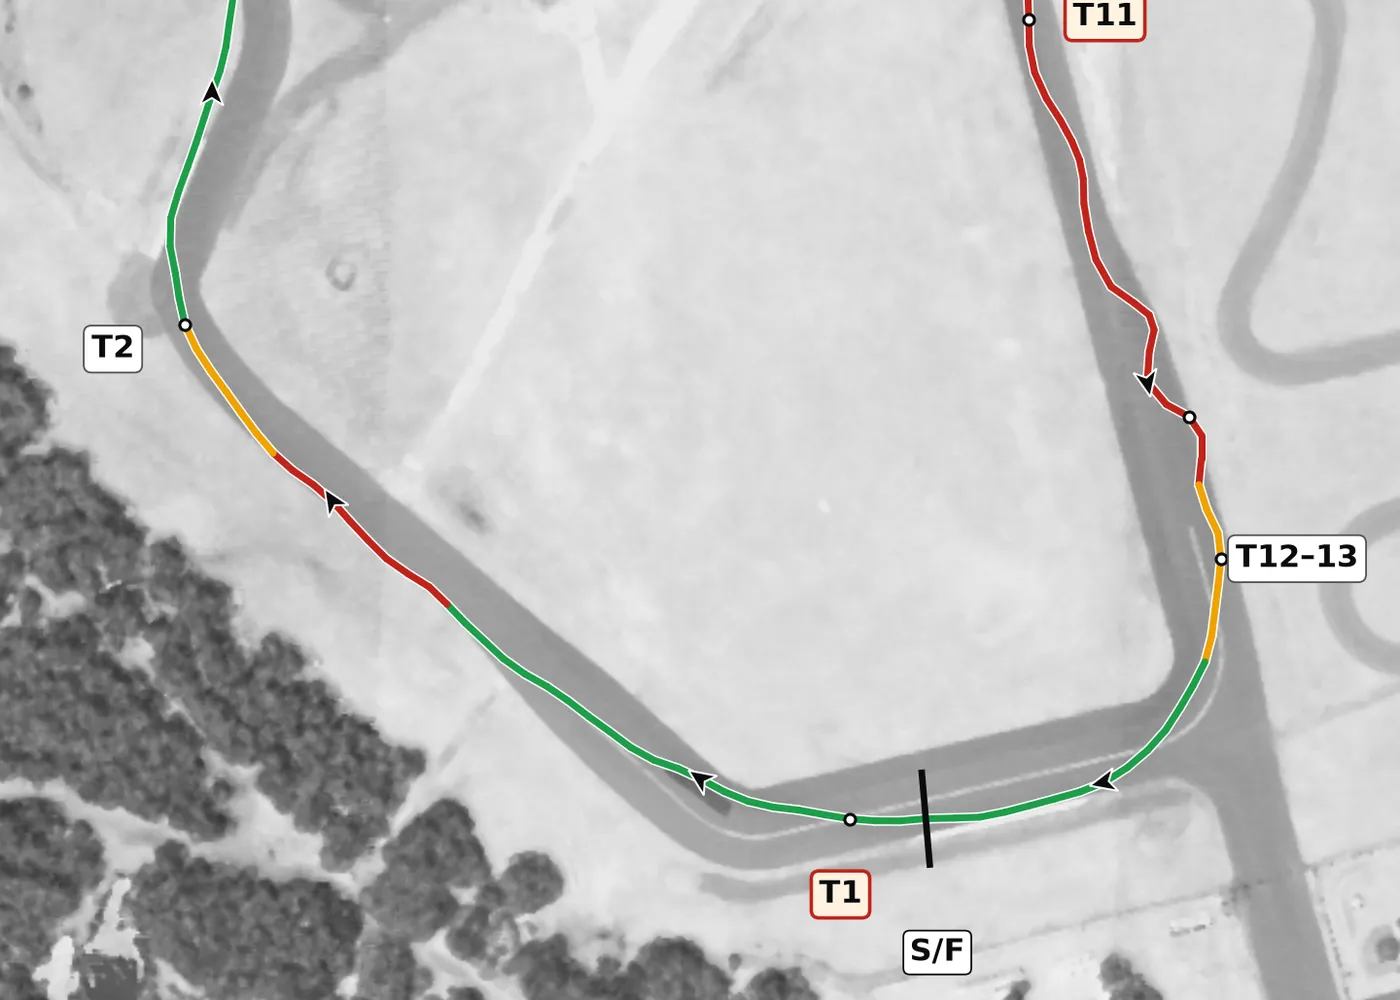
T1 is a medium-speed right that is slightly off camber at the apex, and the road drops away a little on exit. Turn in smoothly, use the drop to carry you toward the braking zone for T2, and let the car run out to the left. The mistake to avoid is adding steering to rescue an early apex, because the surface offers nothing extra here.
From the survey: Off camber at the apex (−0.6%).
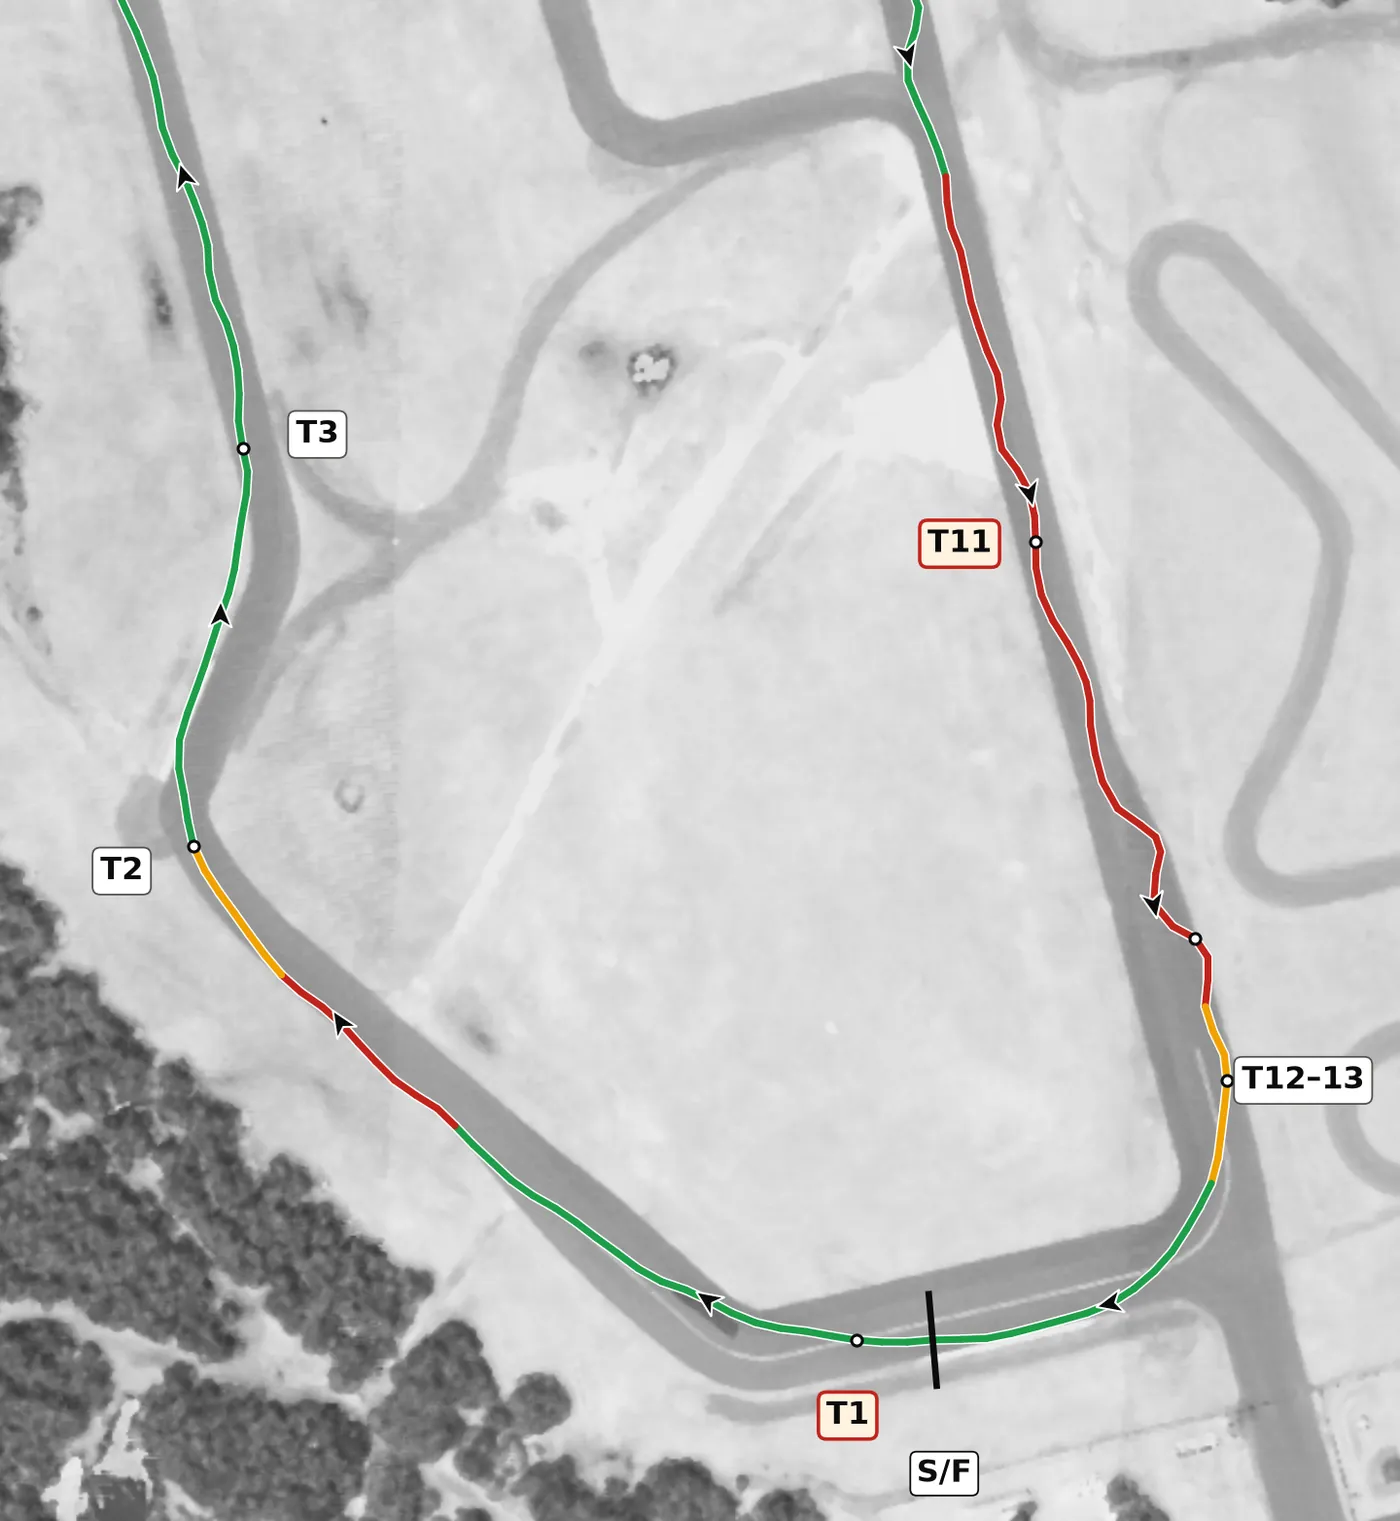
Brake on the way down into the dip before this right, not at the bottom, because the car is loaded at the low point and goes light again as it climbs through the apex. Turn in as the road starts to rise, take a late apex and let the uphill help you slow and turn. The mistake to avoid is braking hard at the bottom of the dip and arriving at the apex with the car unsettled.
From the survey: The lowest point on the lap is on the way in; the road climbs +2.1% through the apex.
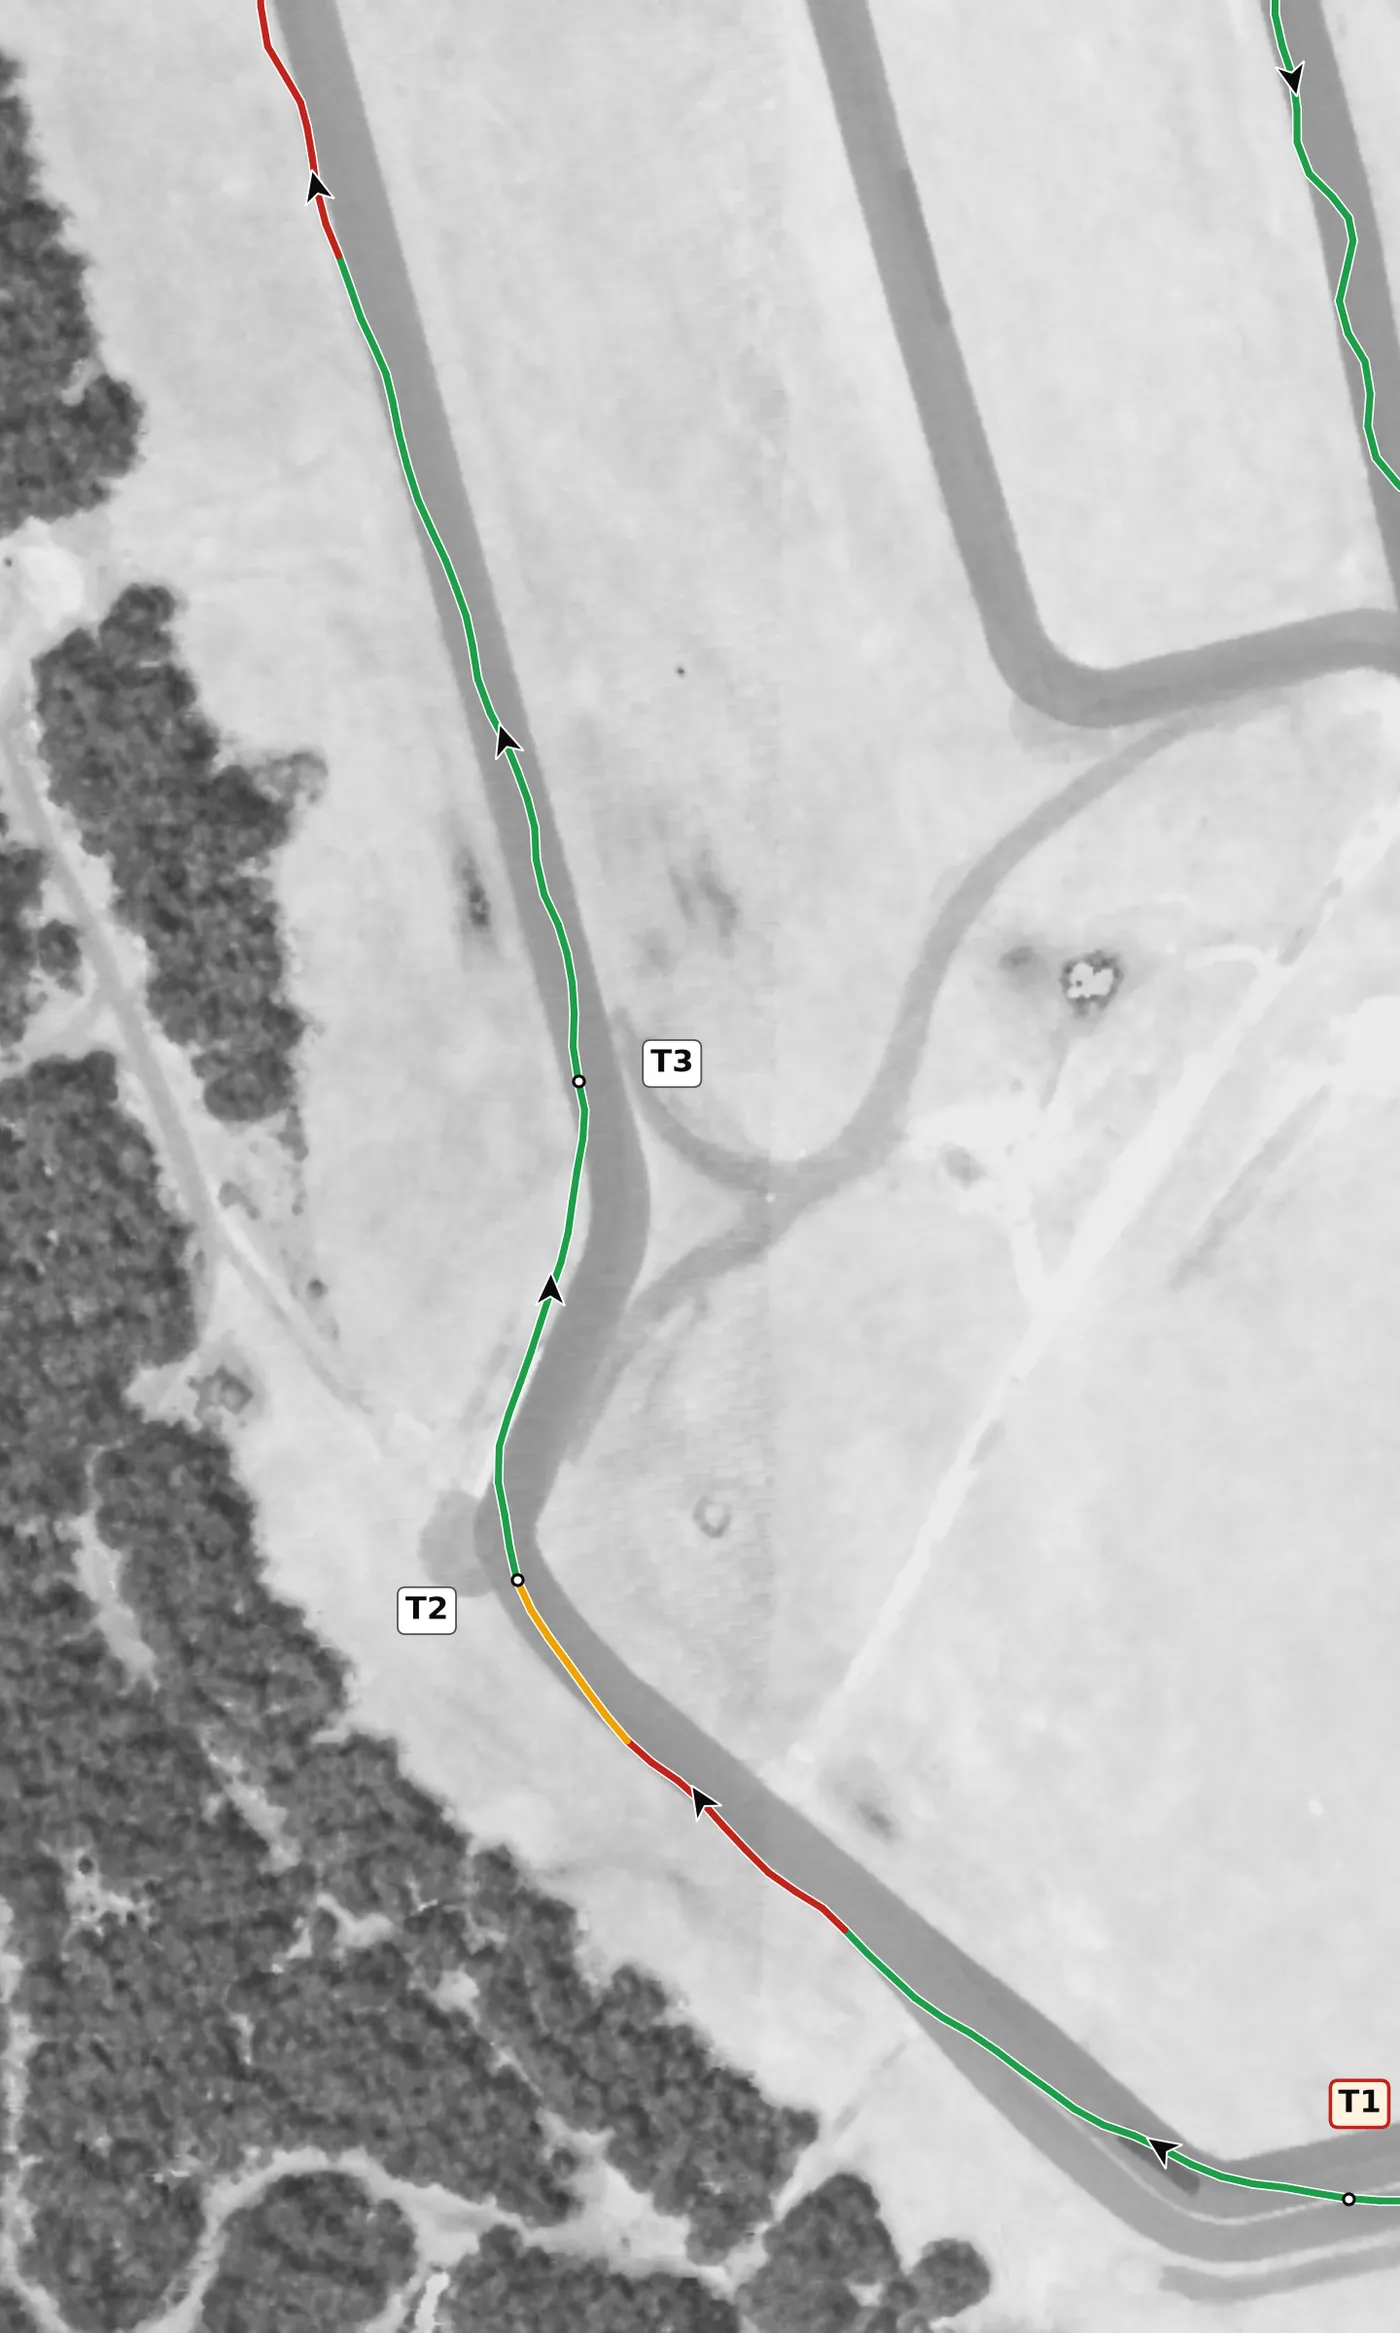
T3 is a flat, level left that is only mildly on camber, more a change of direction than a real corner. Take a smooth, shallow line that sets you up on the run toward T4 rather than stopping the car for it. The mistake to avoid is a big steering input here that scrubs speed you need for the following straight.
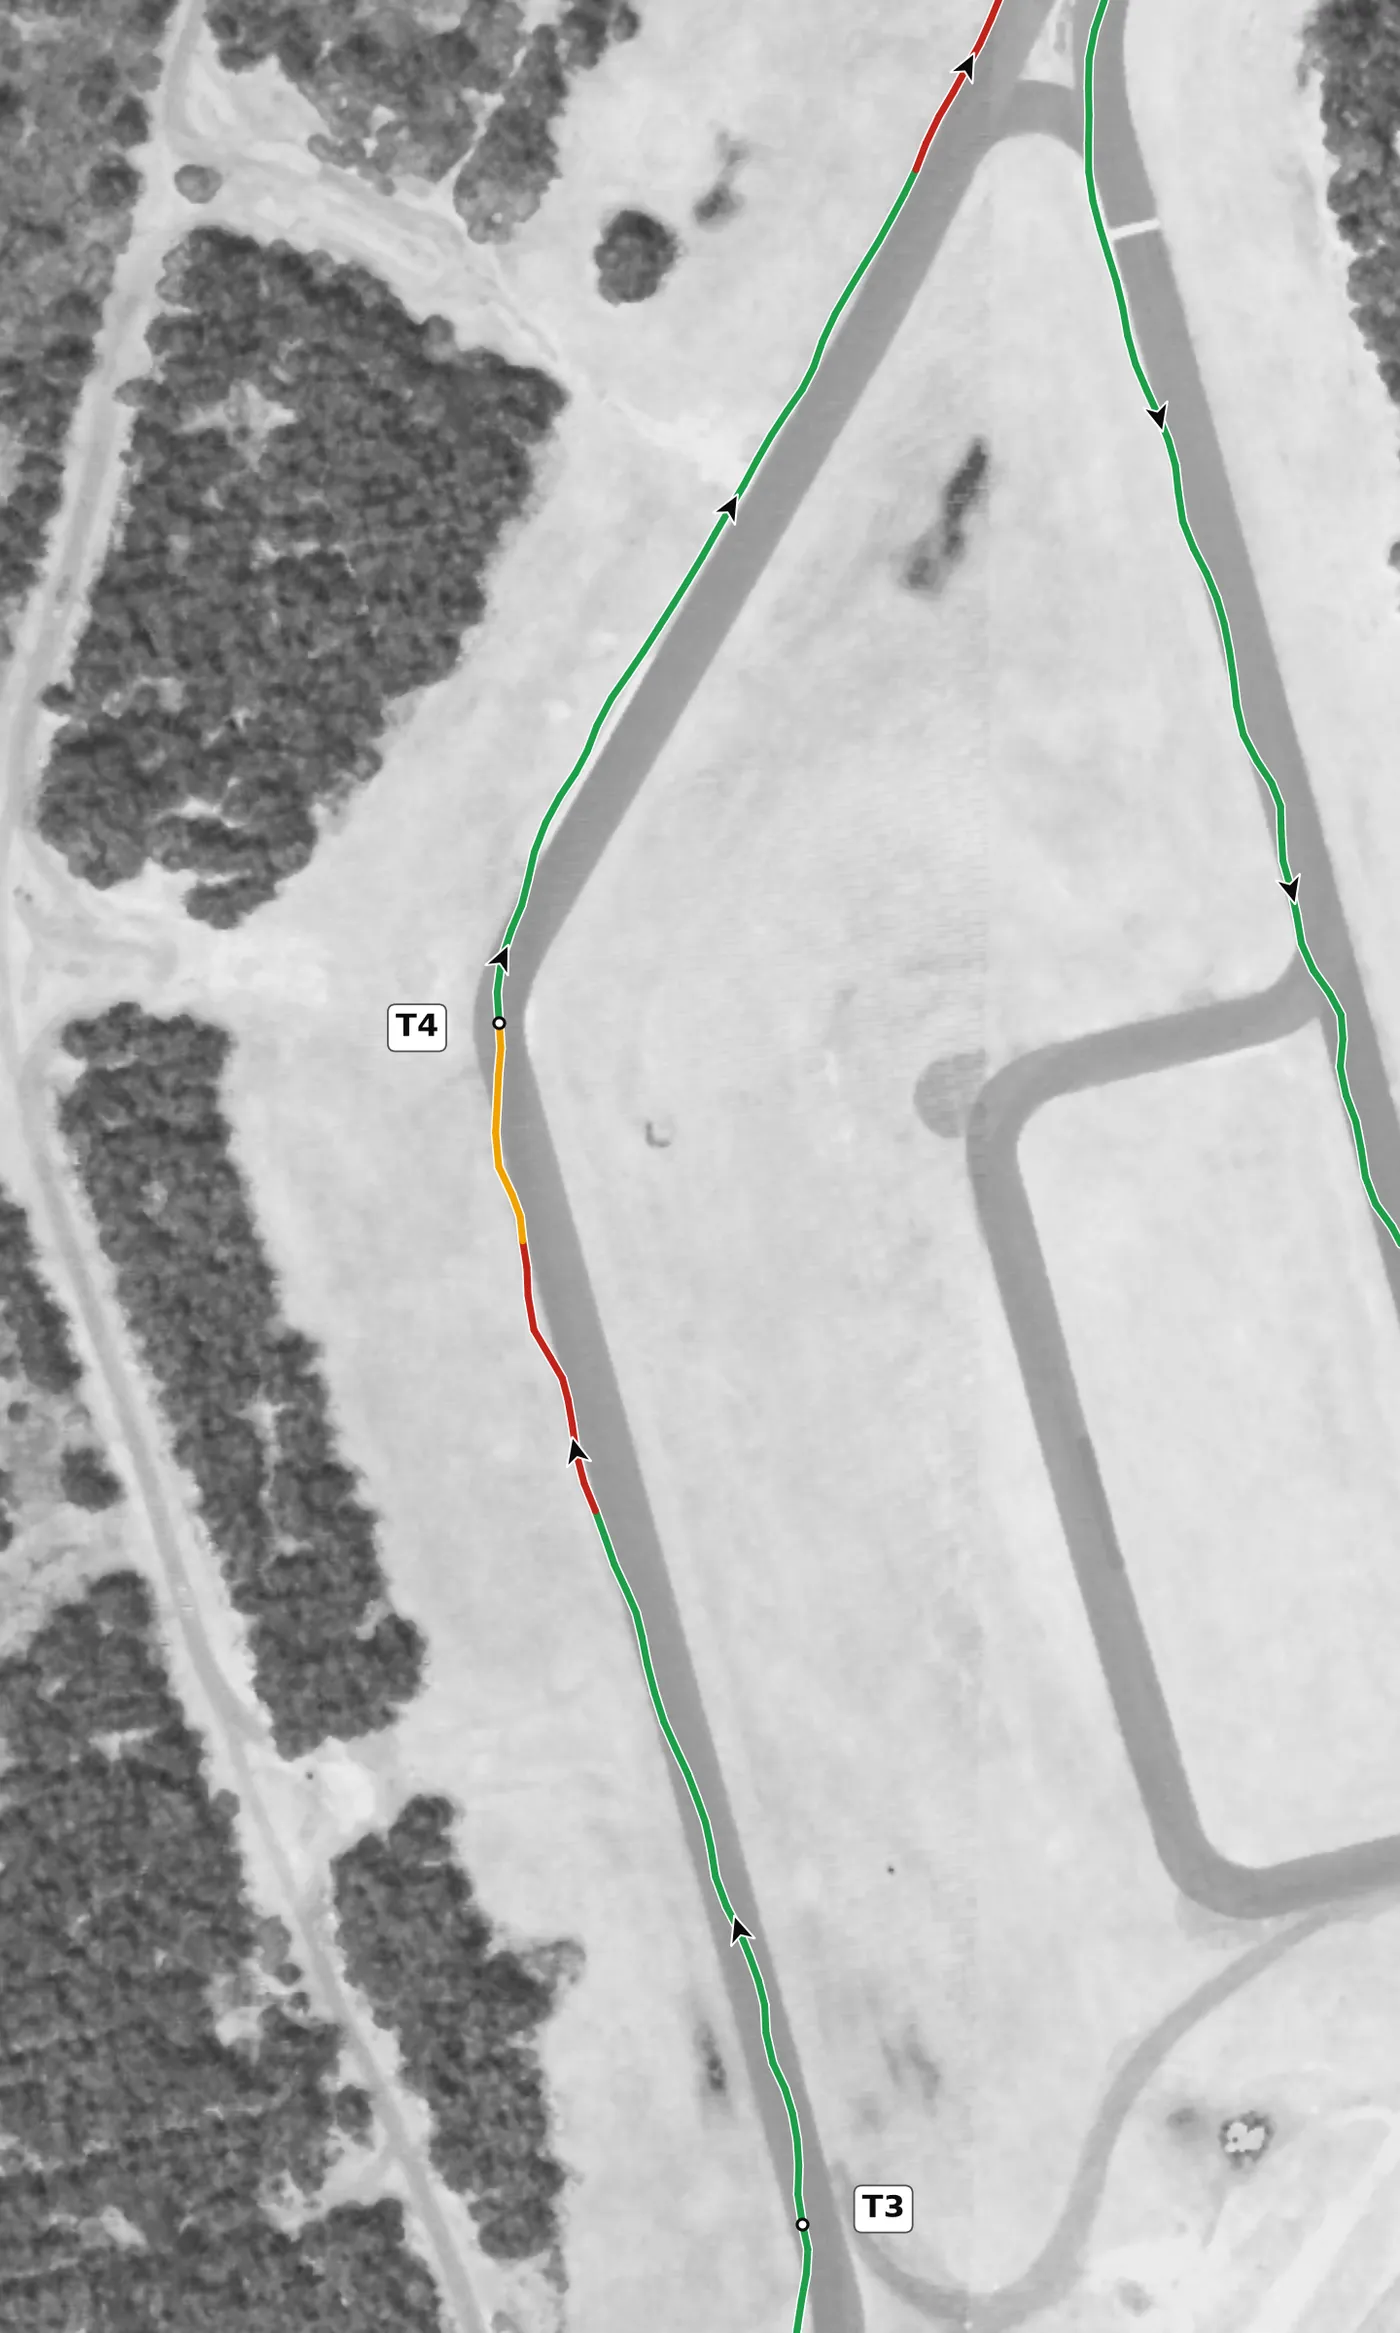
This right is level and mildly on camber along the line, but the pavement is narrow and the road falls away toward the left. Take a precise, slightly late apex and keep your exit inside the available width. The mistake to avoid is running wide: there is very little room past the edge here.
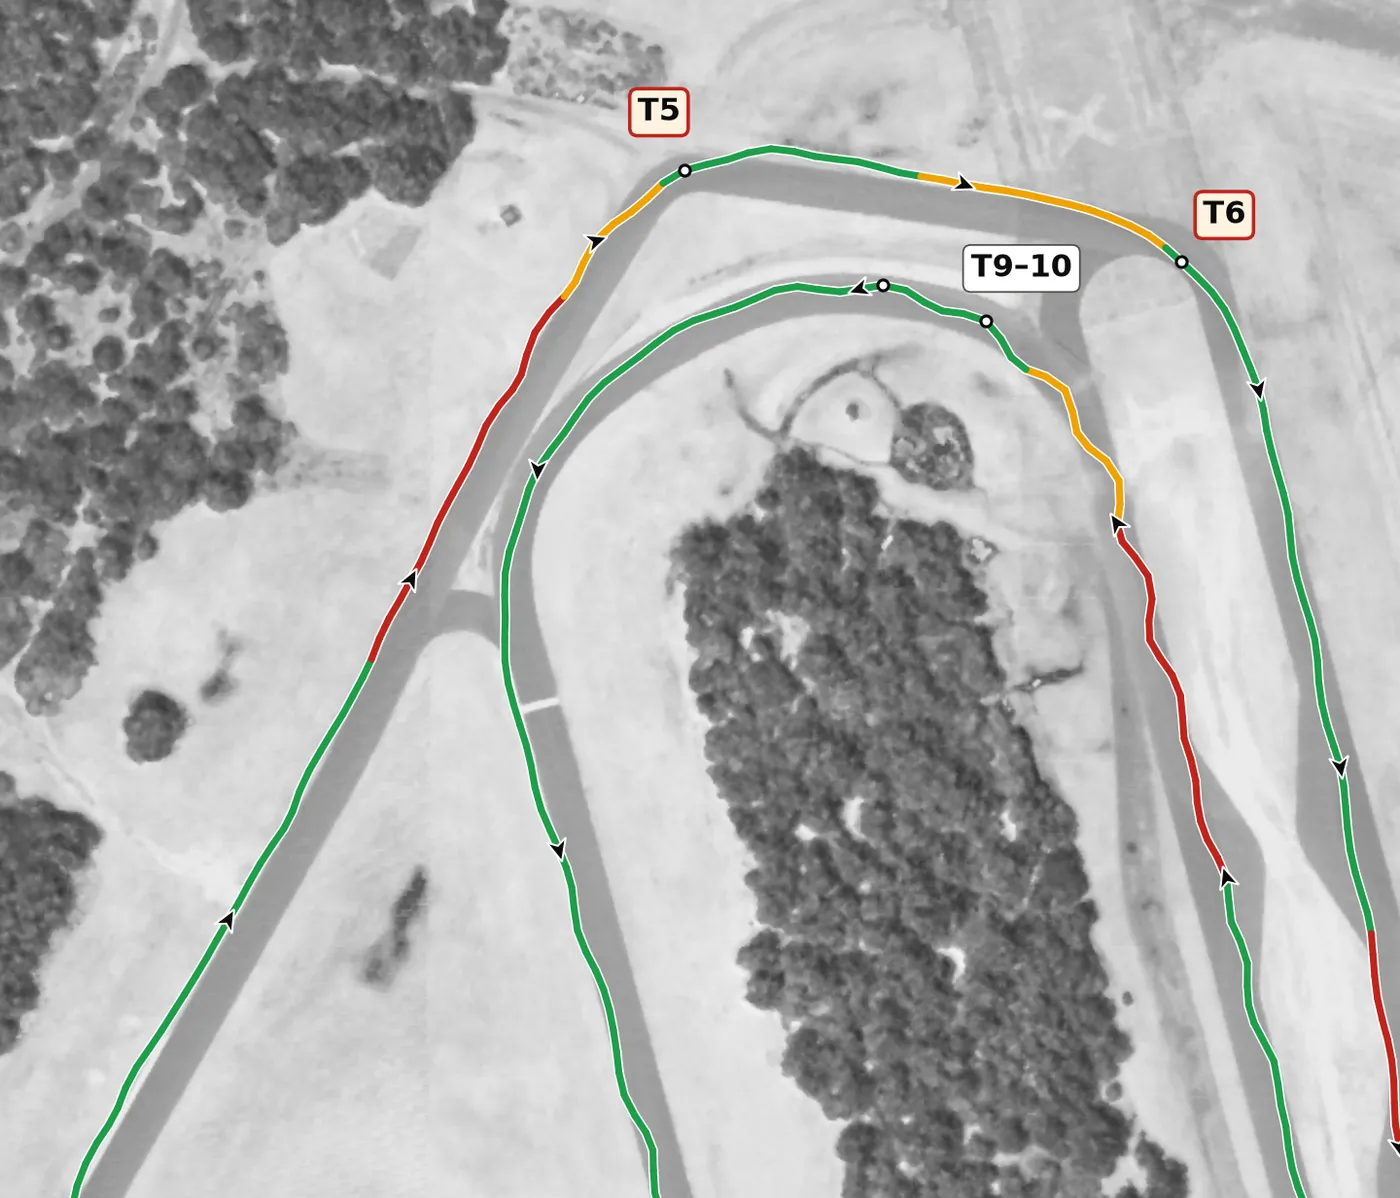
This right is off camber at the apex, and the pavement has a crown just to the right of the usual line, so the car changes attitude if you cross it. Pick a line on one side of the crown and stay there, braking in a straight line and turning in smoothly. The mistake to avoid is wandering across the crown mid-corner and losing grip just as you add power.
From the survey: Off camber at the apex (−0.6%).
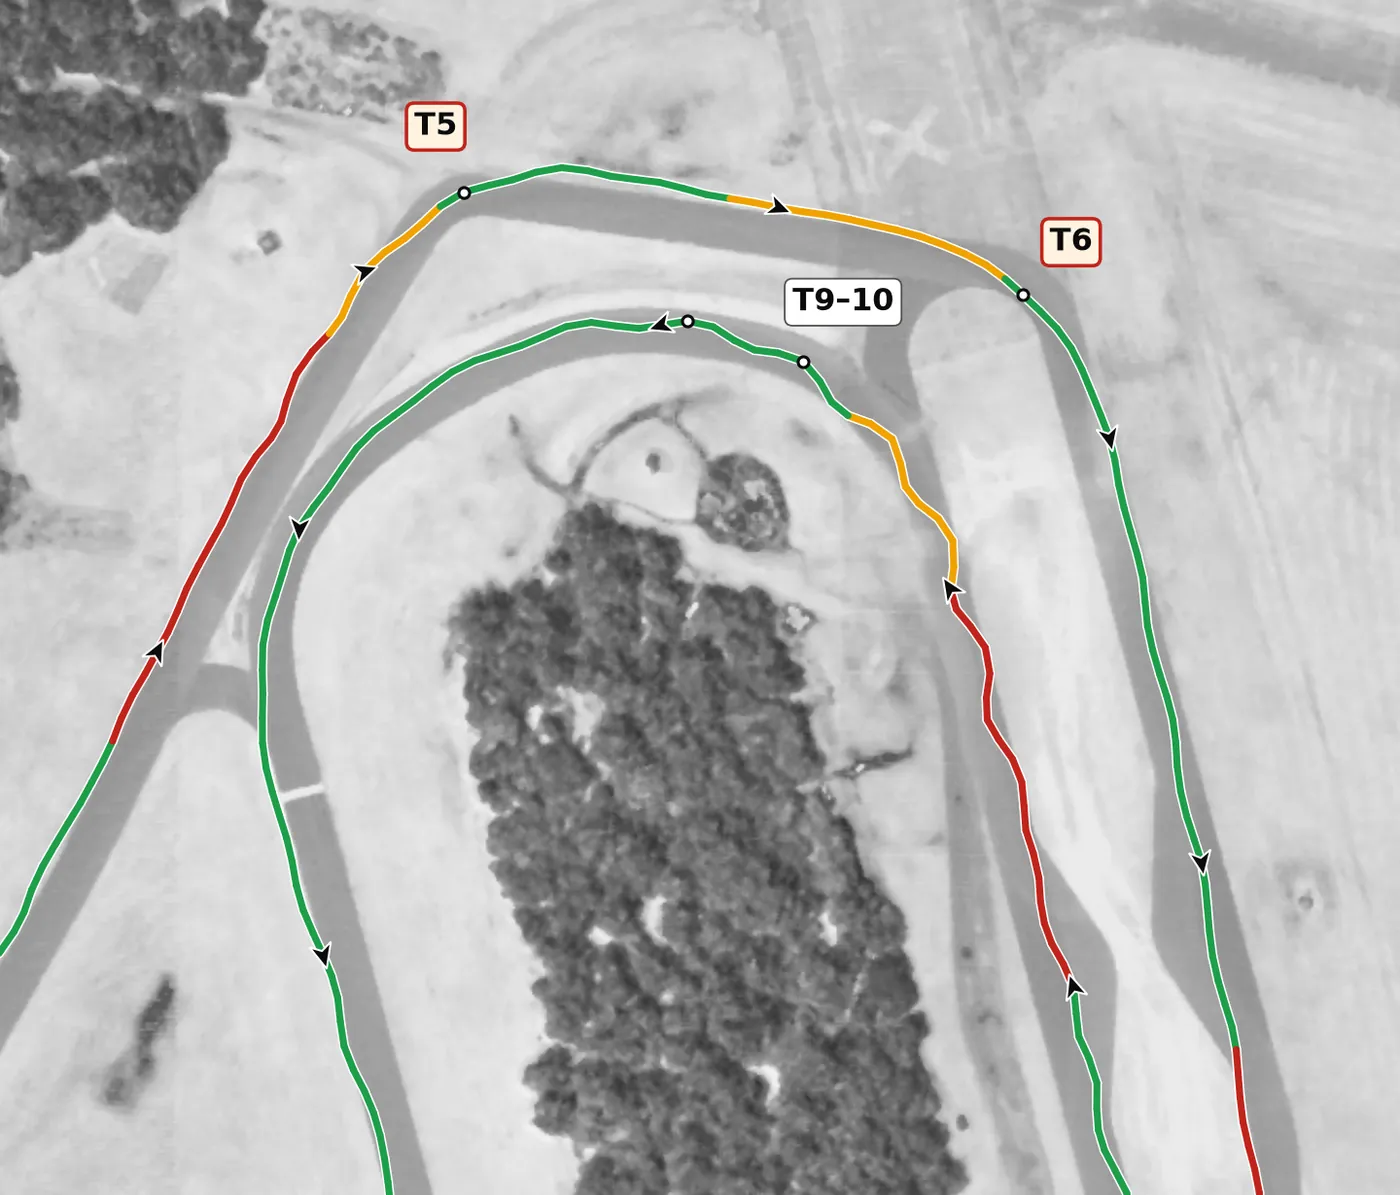
T6 is the most off-camber apex on the circuit, a right that comes soon after T5. Be patient on the throttle and keep a little steering in until the car is pointed down the straight, because the surface is working against you. The mistake to avoid is unwinding the wheel and adding power early, which sends the car wide with nothing under the exit to hold it.
From the survey: The most off-camber apex on the lap (−1.8%).
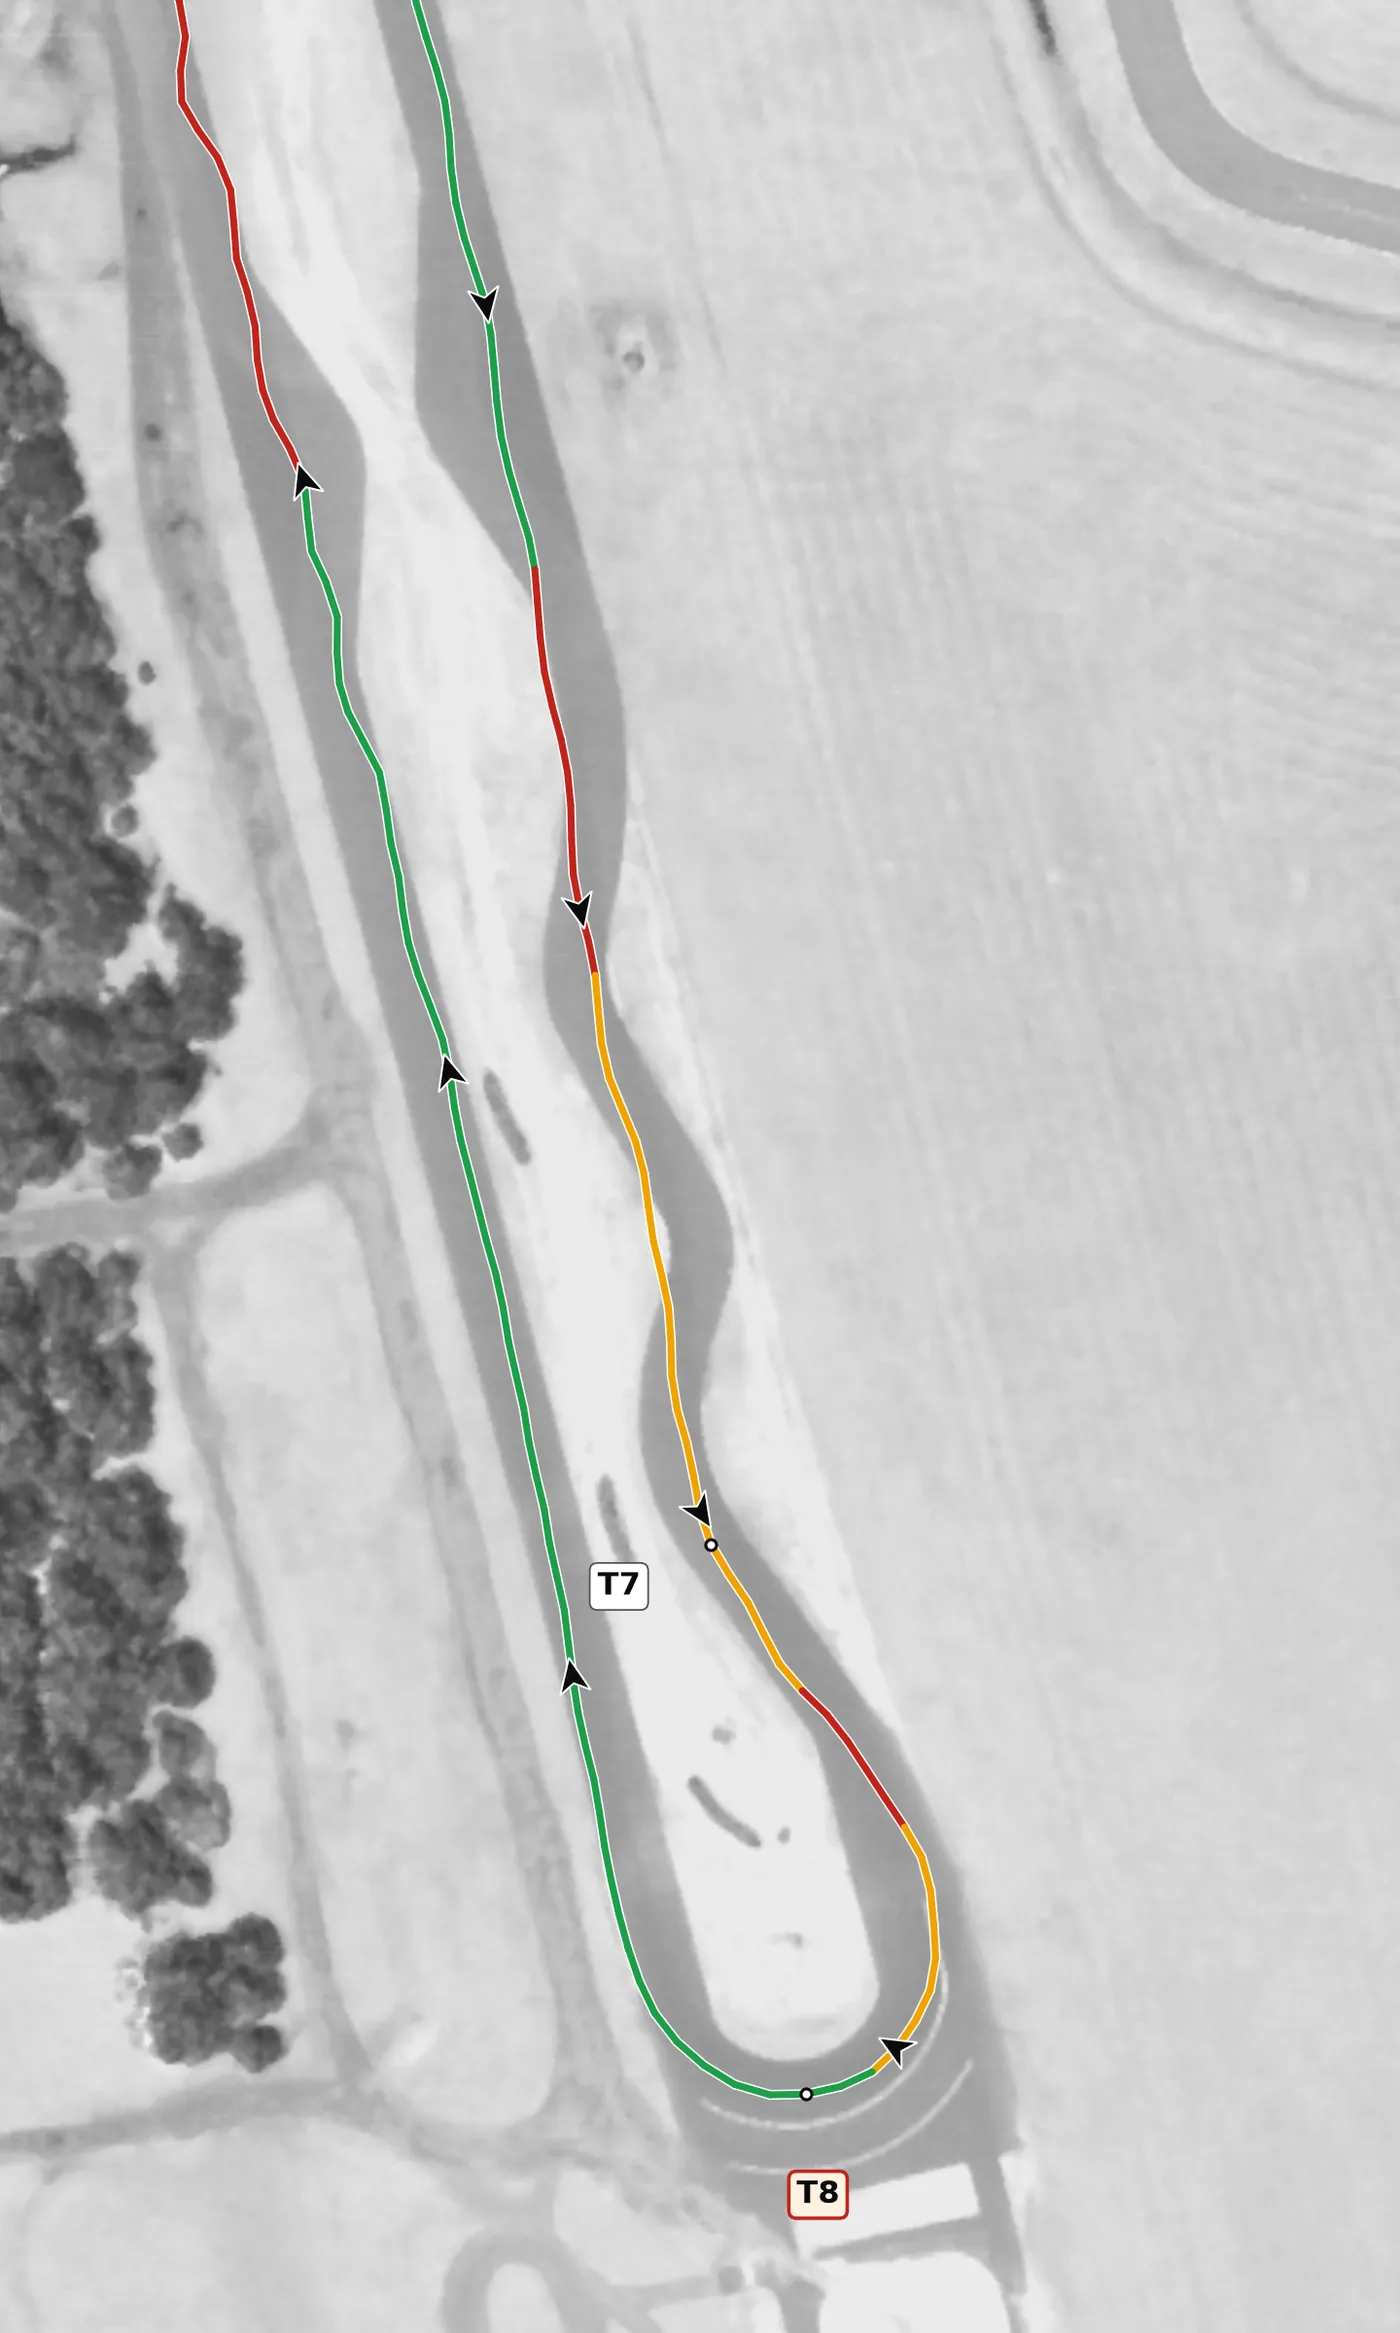
This fast left kink sits on the highest part of the lap and is the most consistently on-camber corner on the circuit, but the hairpin follows almost straight away, so the slowing for T8 starts before it. Brake in a straight line on the approach, take the kink with the car settled while you move to the left side of the road, then finish your braking there for the hairpin. The mistake to avoid is a tight line through the kink that leaves you on the wrong side for T8.
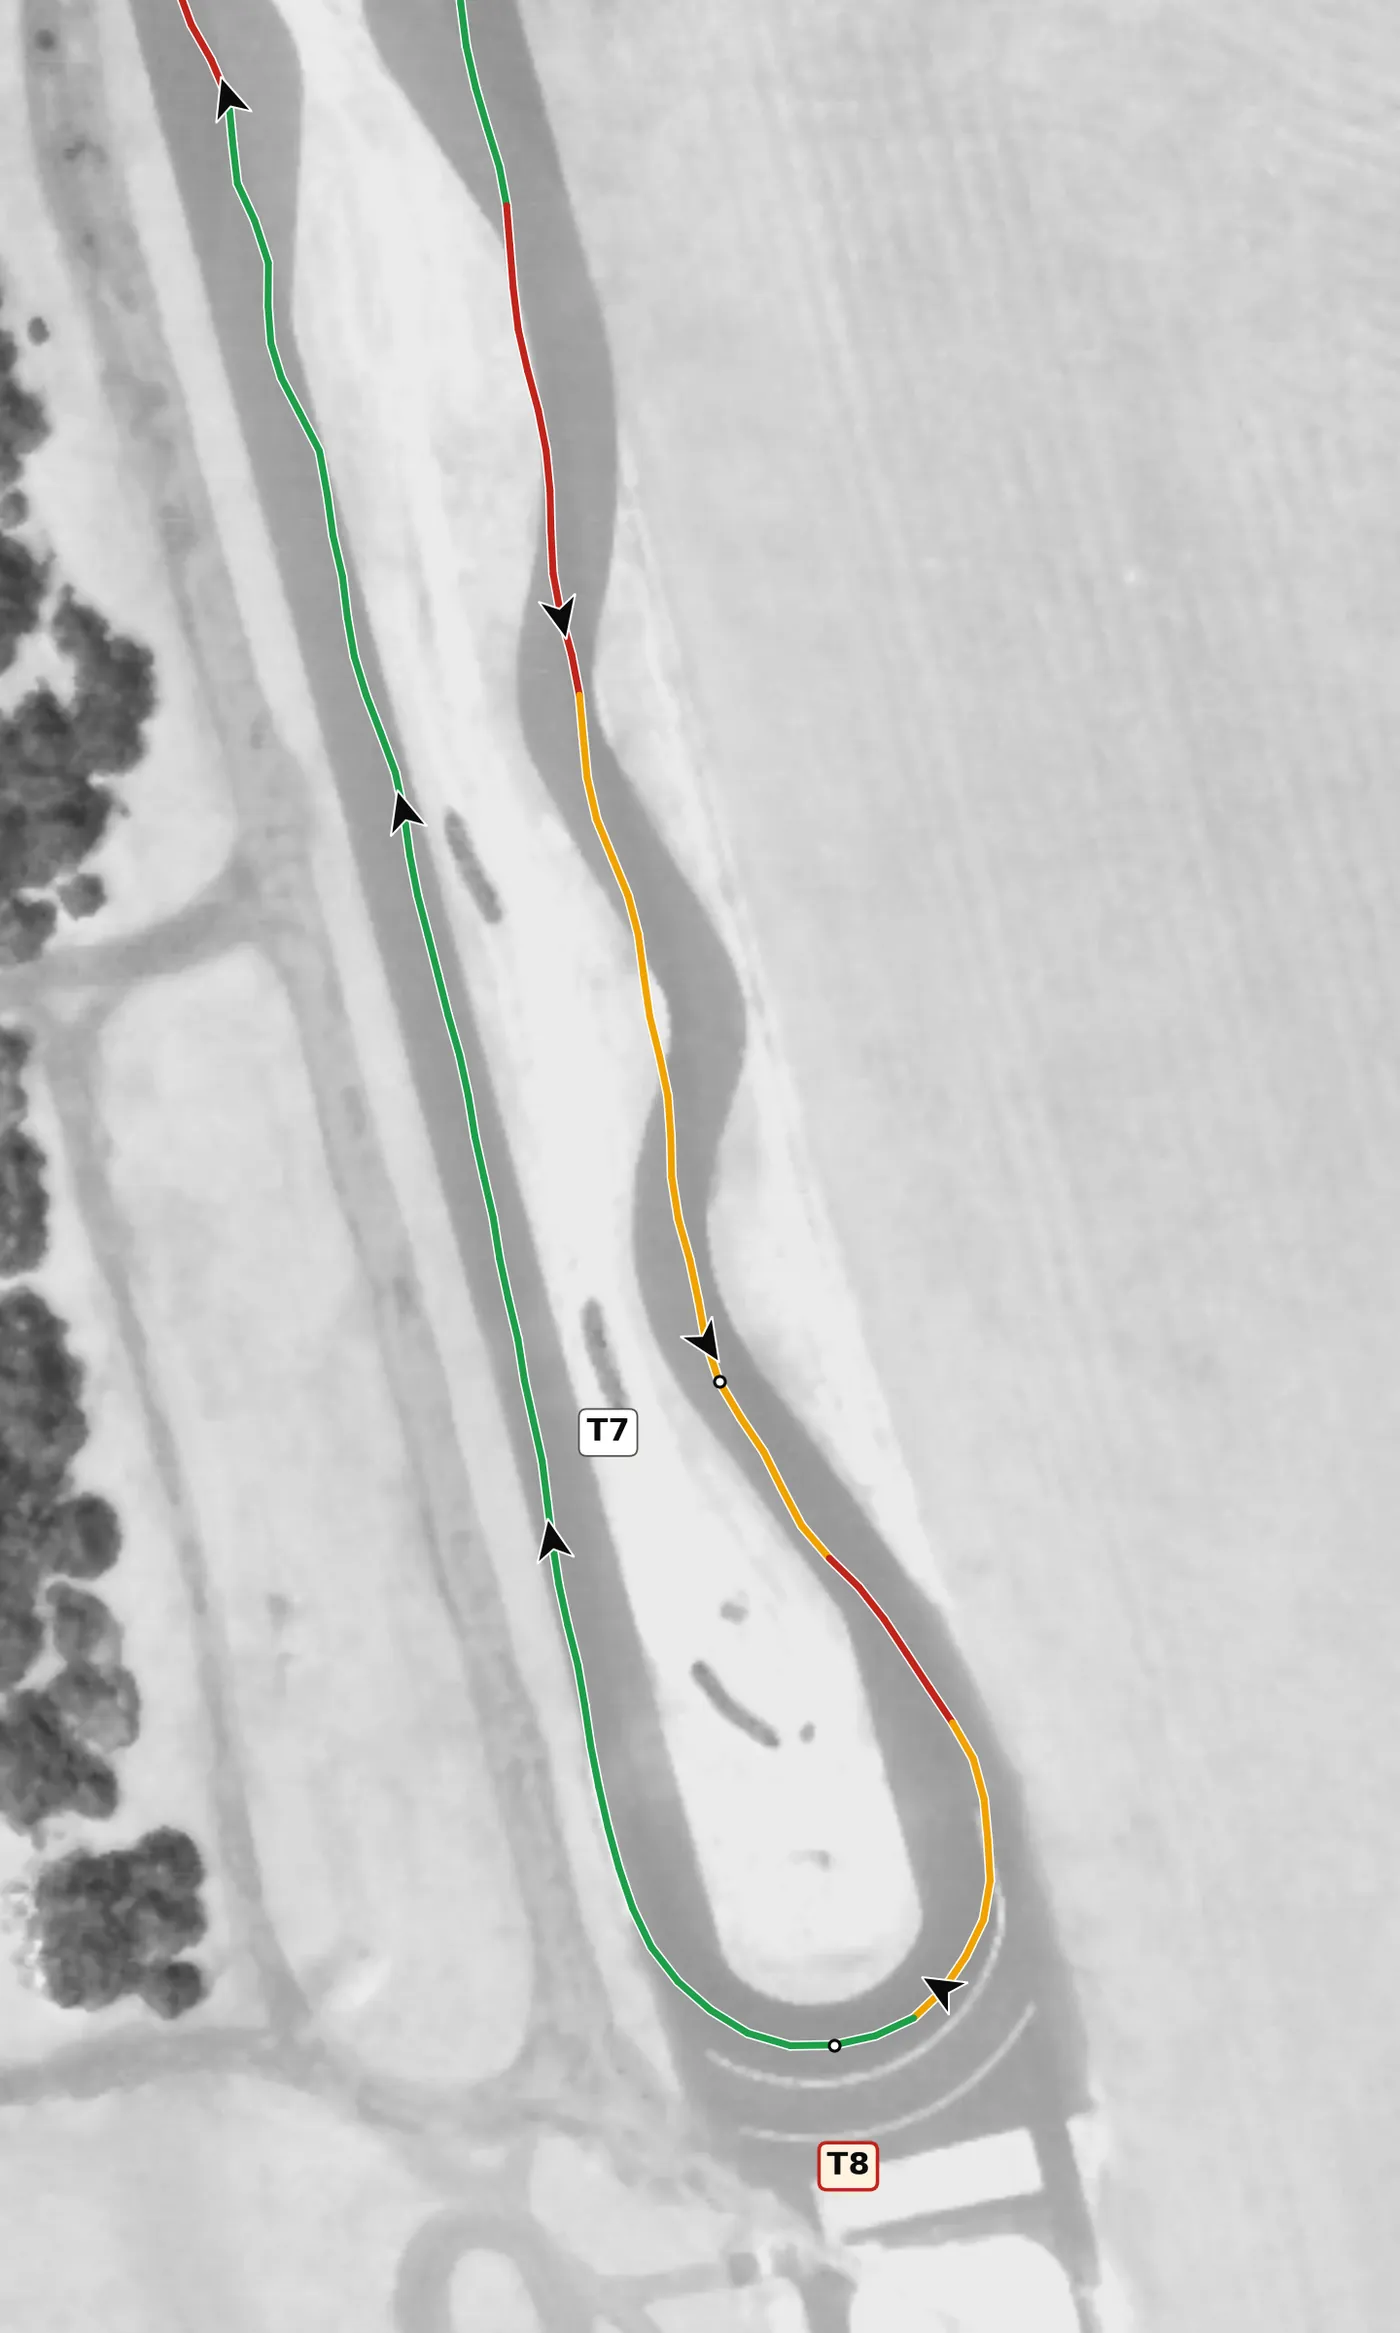
The hairpin turns through more than 180 degrees on dead-flat, wide pavement, so there is nothing to help the car rotate and nothing to catch you either. Brake hard and in a straight line from the left side, turn in late, aim for a late apex and drive out early with the car straight. The mistake to avoid is an early apex, which forces you to tighten the line and wait for the throttle on the way out.
From the survey: The hairpin: 201° of turn, level, and slightly off camber (−0.3%) at the apex.
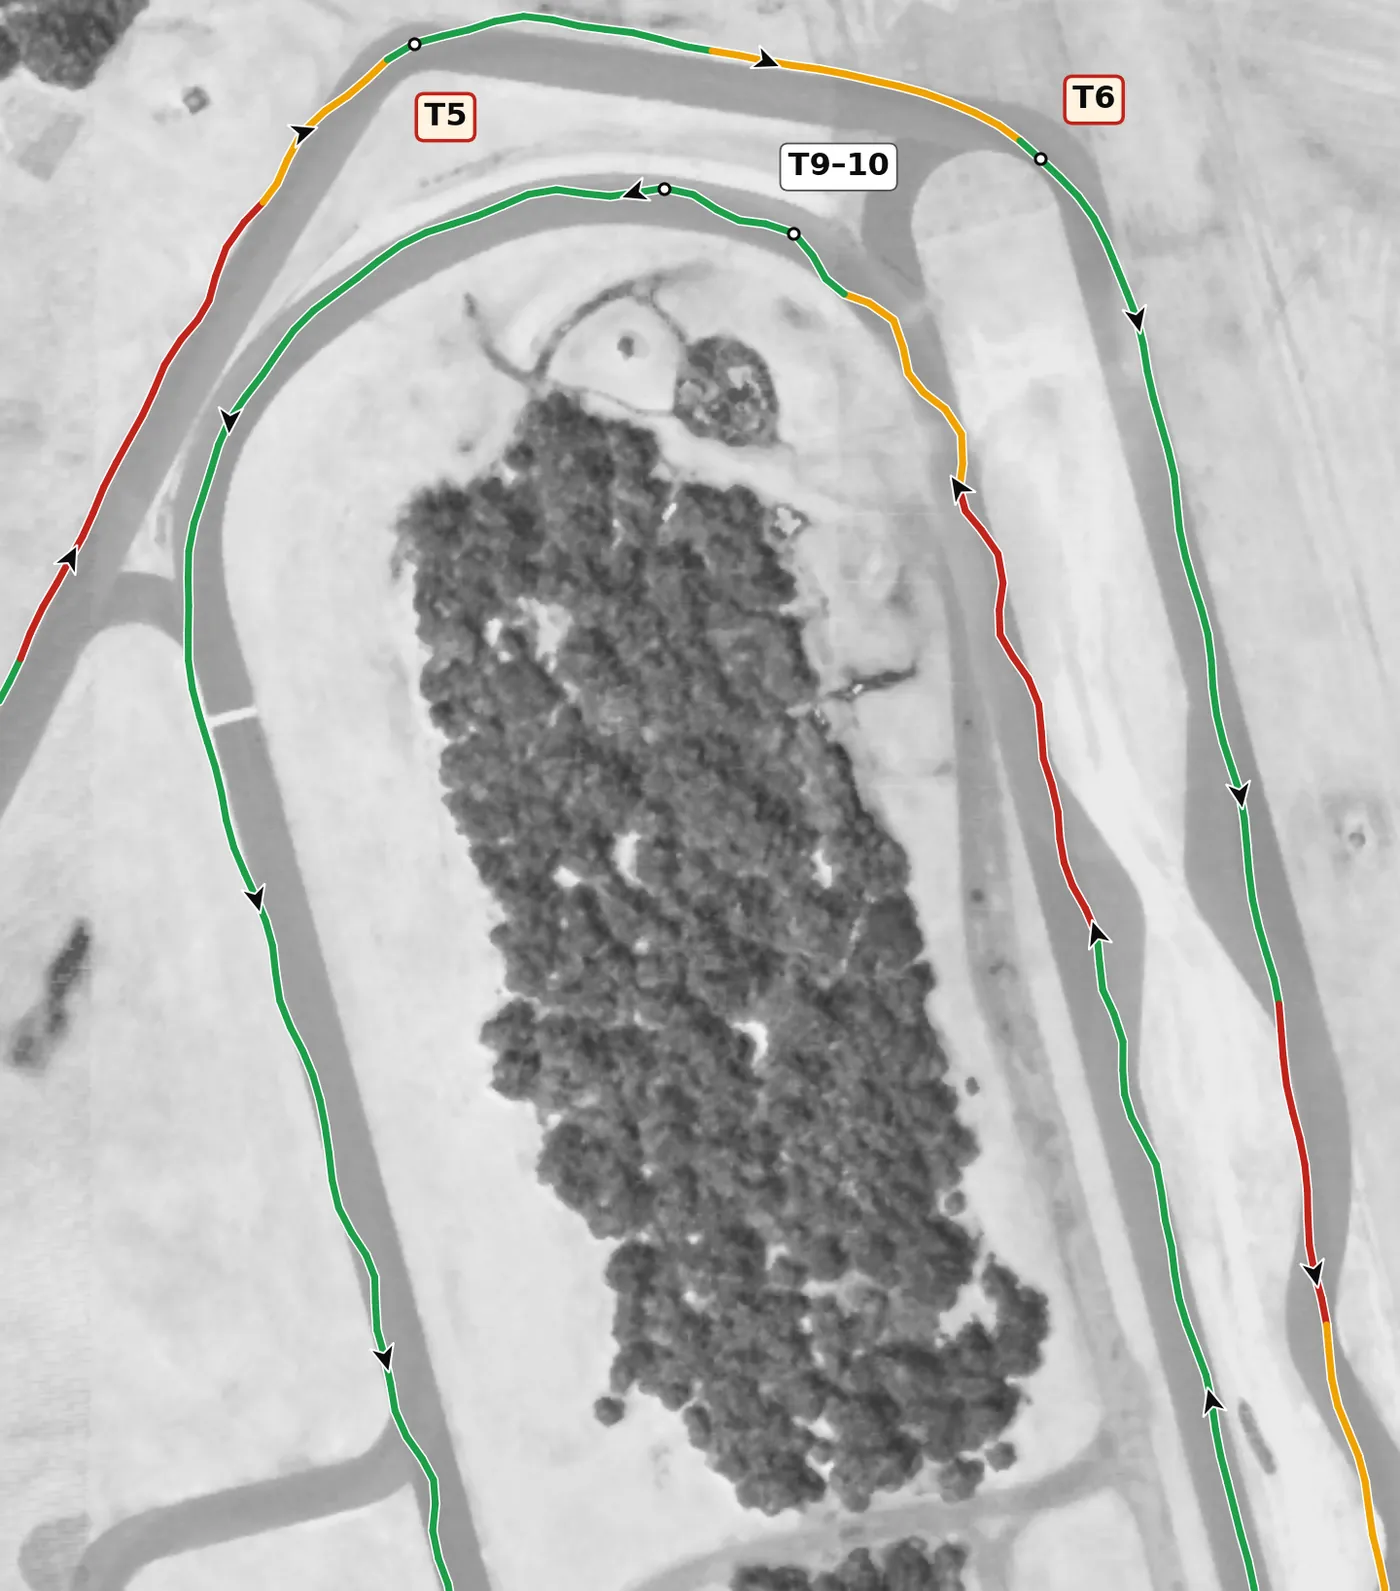
This 180-degree left is banked, and the banking builds through the corner to its steepest near the second apex, so it can carry noticeably more speed than it looks. Brake in a straight line, turn in for a steady arc that lets the banking hold the car, and add throttle as you approach the second apex so you exit onto the main straight with speed. The mistake to avoid is under-driving it: work up to a faster entry over several laps and let the banking do its job.
From the survey: The only banked corner: +3.8% at T9's apex, +7.5% at T10's, up to +8.8%.
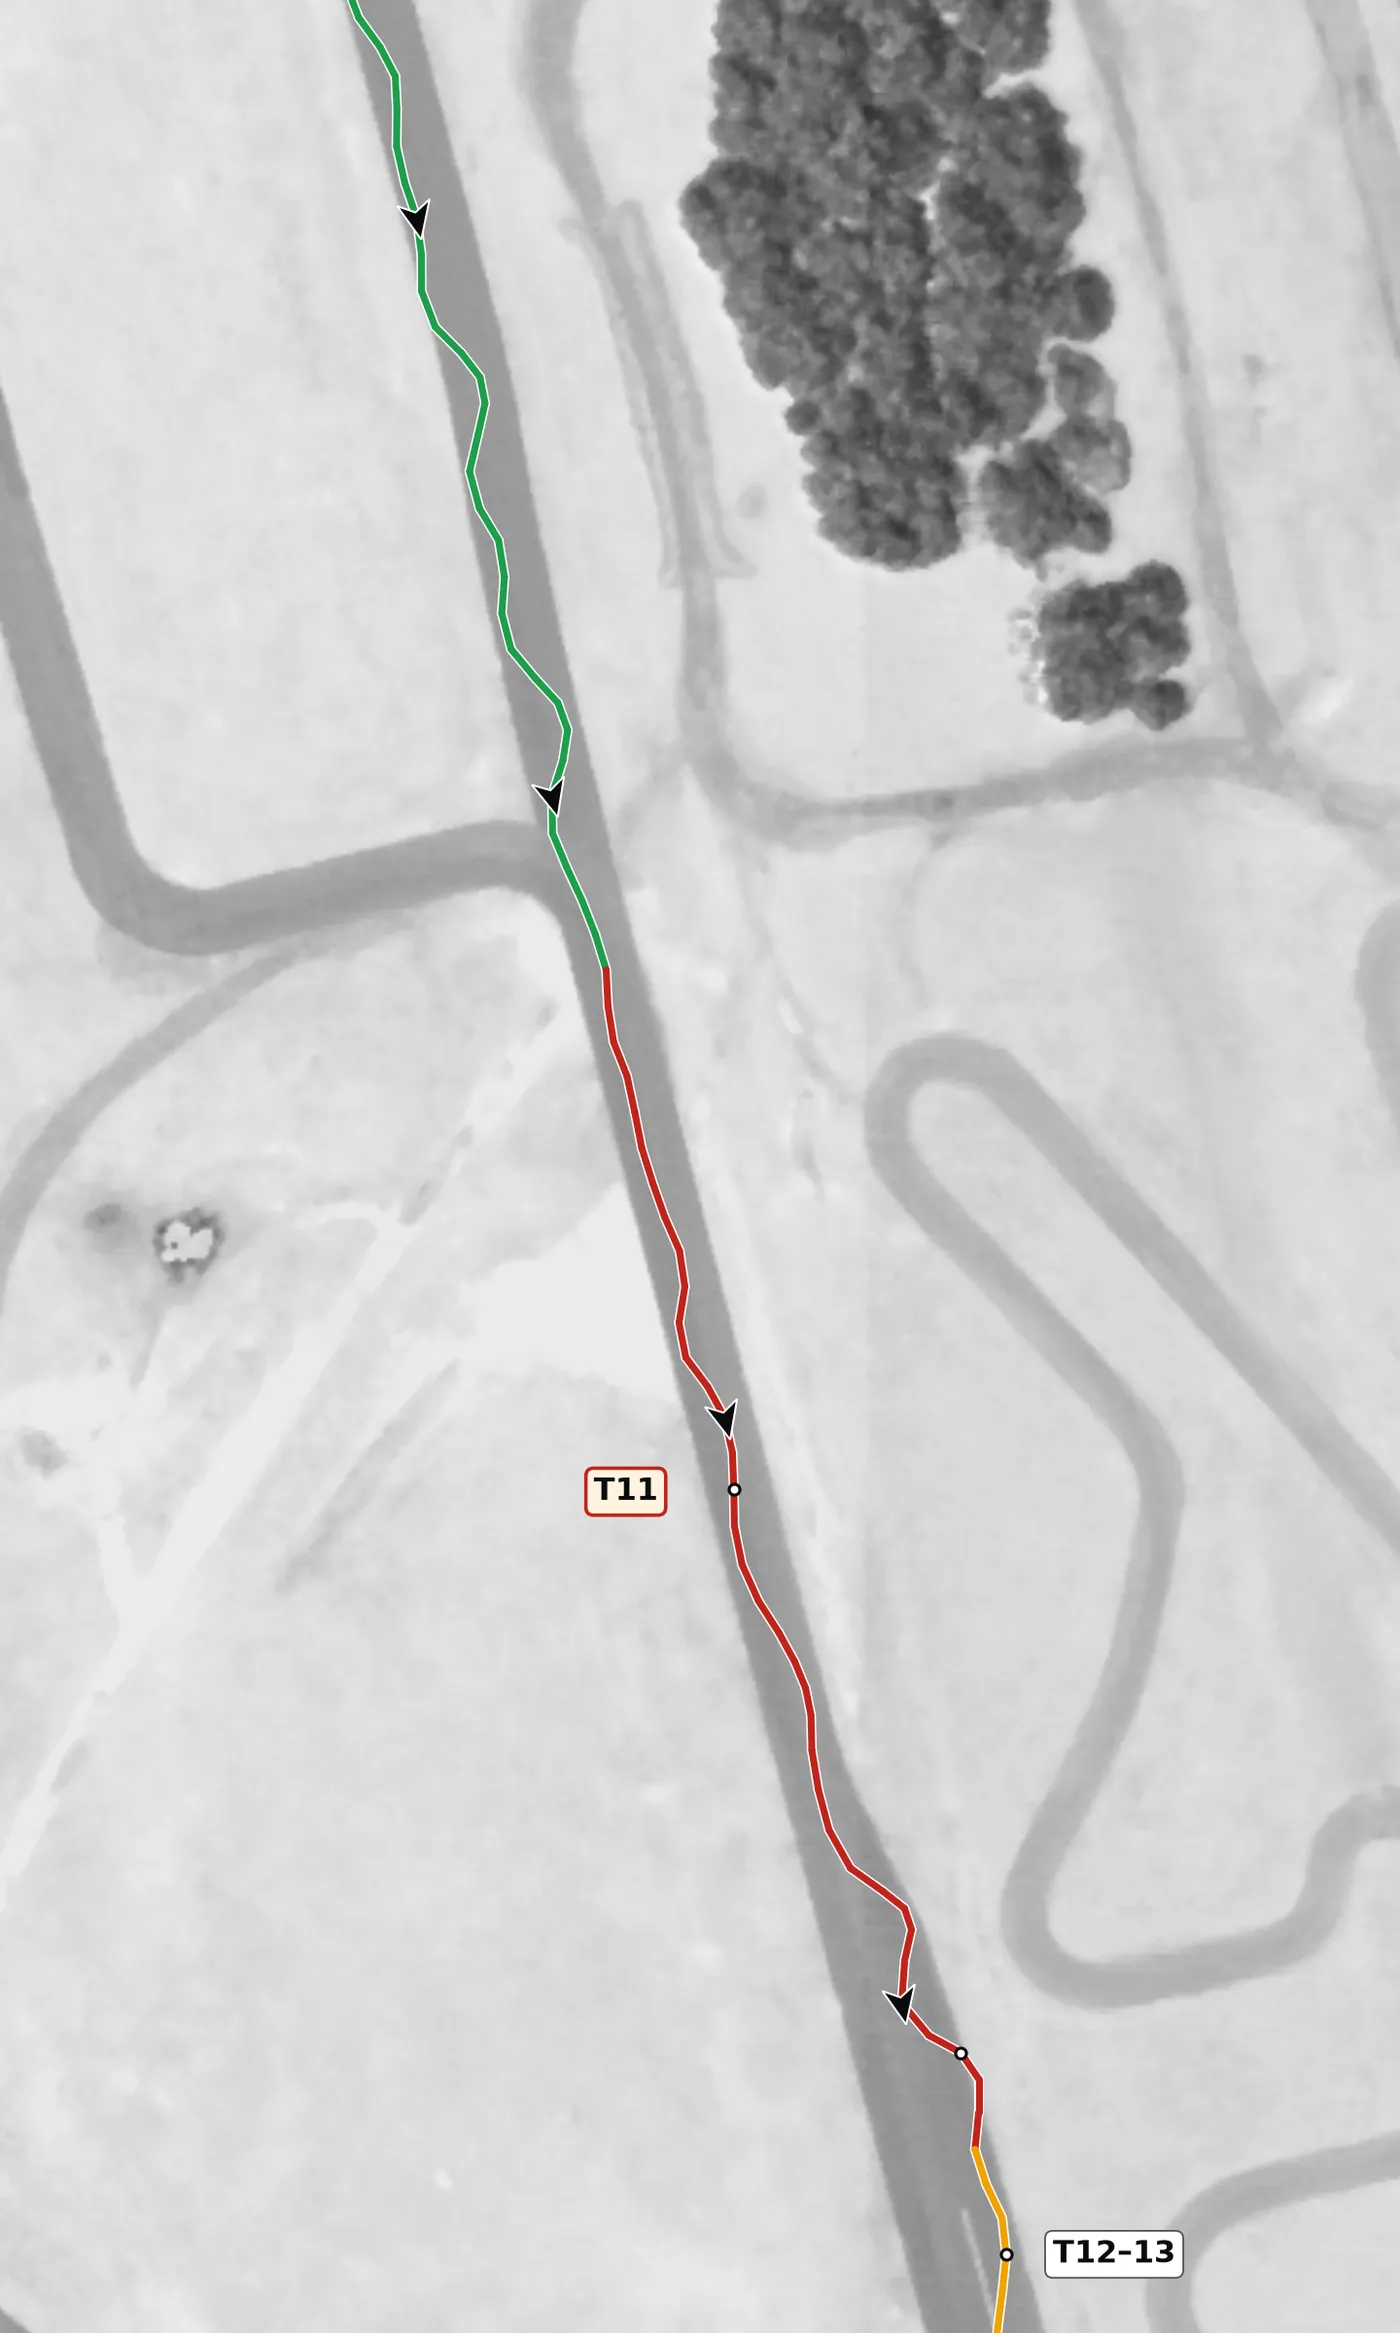
T11 is a gentle left kink at the end of the main straight, slightly off camber and the fastest point on the lap that isn't dead straight, and in a quick car you are already braking for T13 as you pass it. Keep the steering input small and smooth and brake in as straight a line as the kink allows. The mistake to avoid is a sharp steering correction while braking at speed, which unsettles the car before the last corner.
From the survey: A kink in the main straight, off camber (−0.9%).
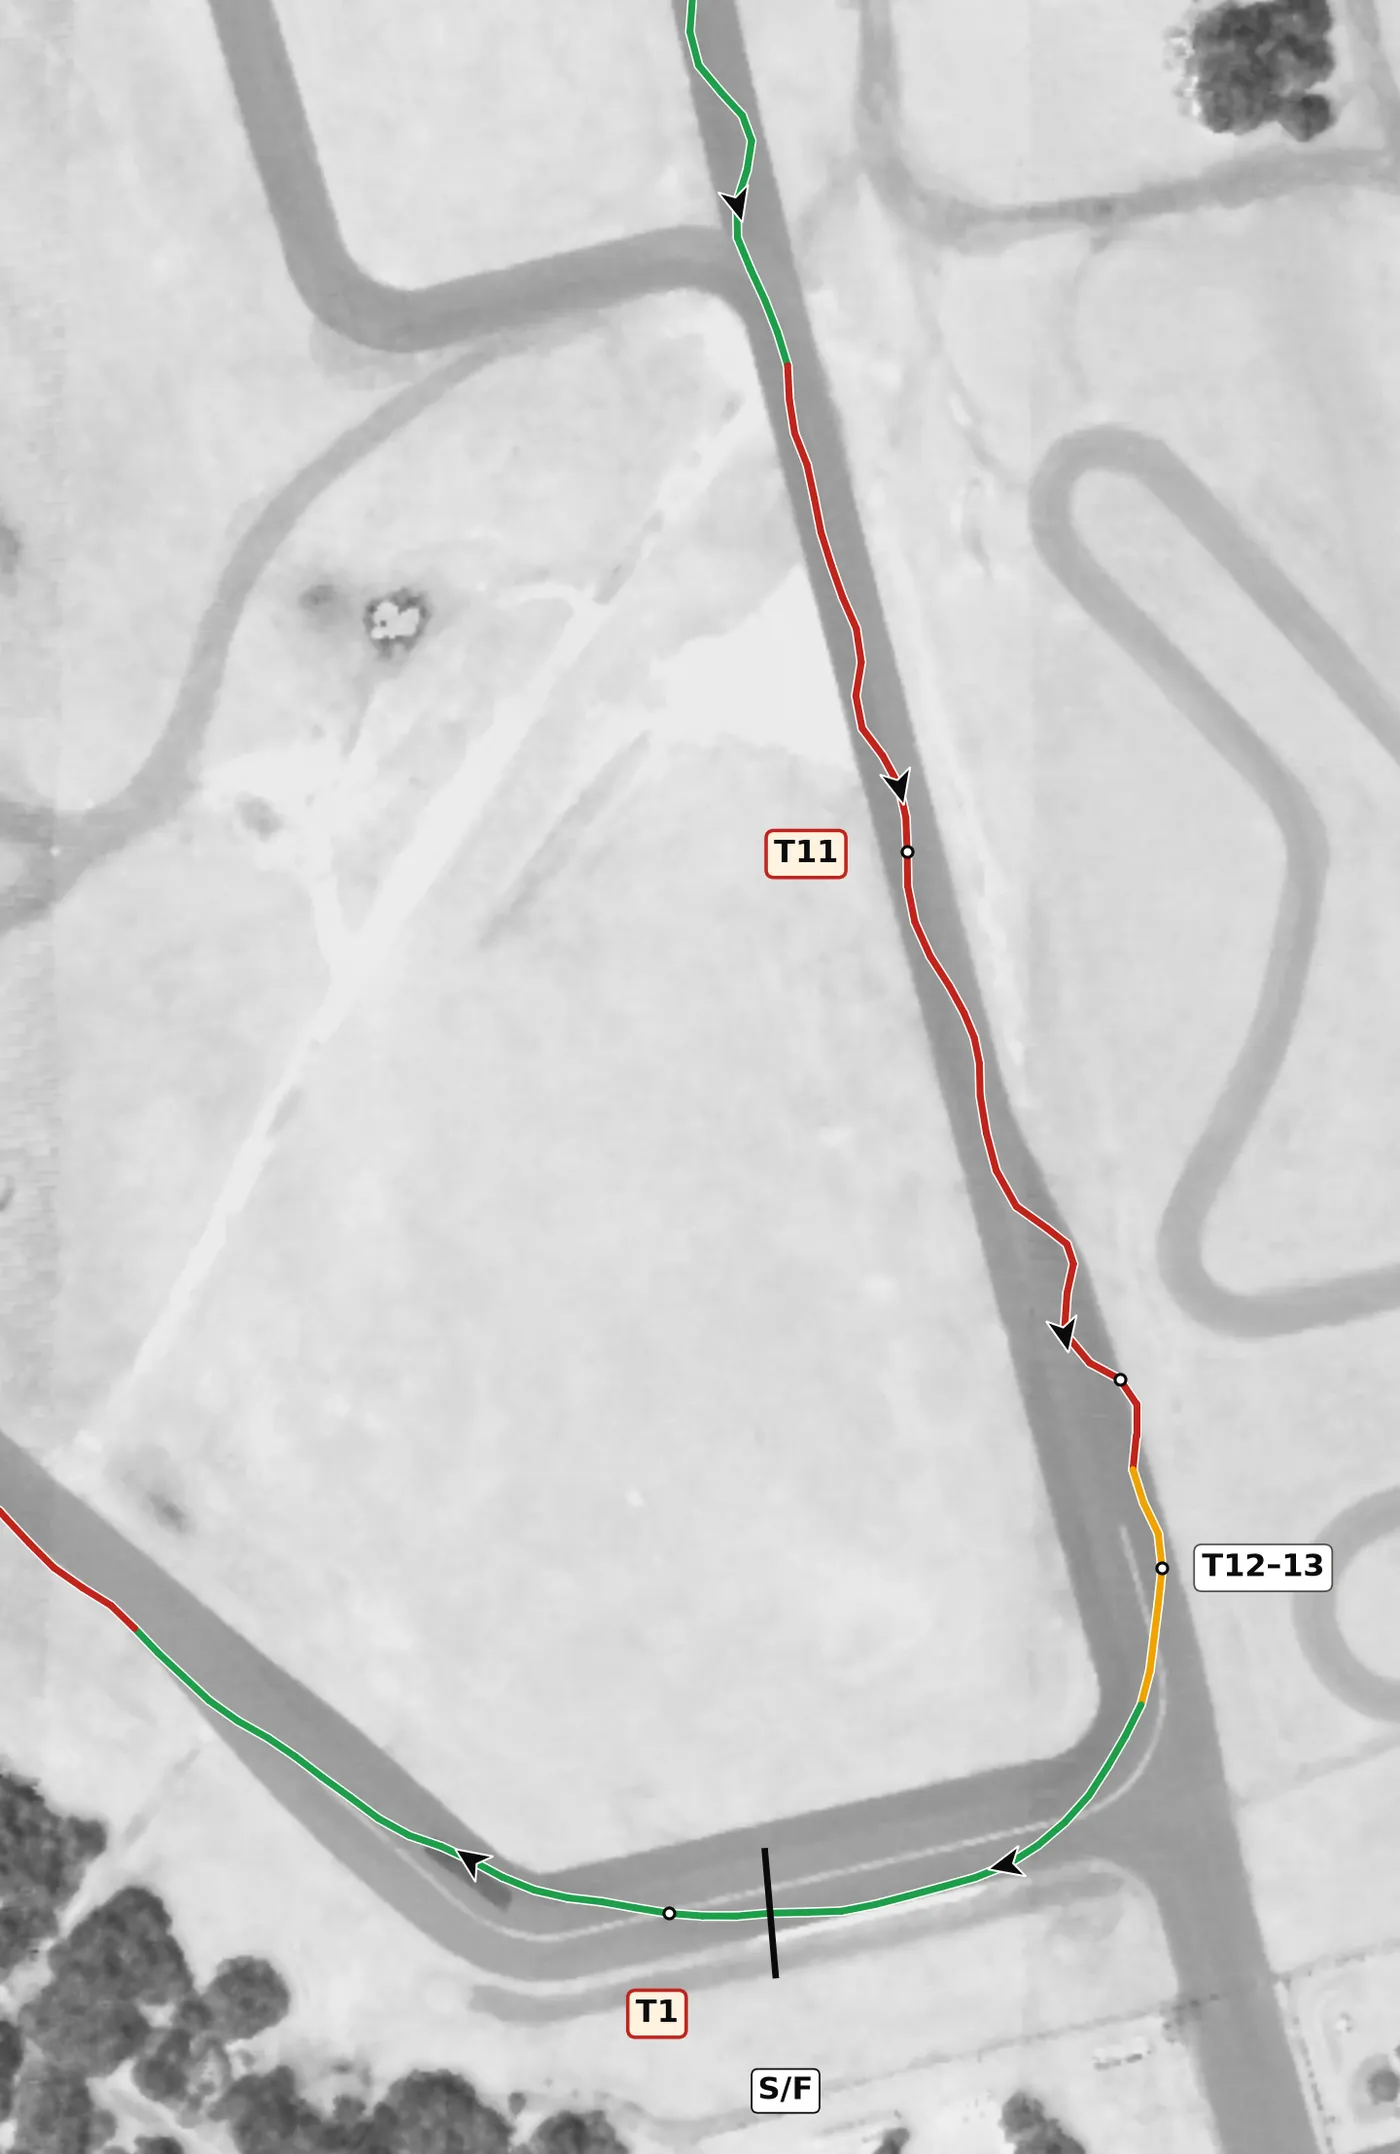
A small right kink leads into T13, a level right that is just on camber and is a genuine grip-limited corner onto the start/finish straight. Brake in a straight line from the left side, take a late apex and use the whole width of the track as you track out to the left. The mistake to avoid is turning in early: it compromises the exit onto the straight.
From the survey: A 13° kink, then the last corner onto the start-finish straight.
Version history
- v1.2 · 2026-10-01 — The second half of T9–T10 is now drawn on throttle: the car gains speed through the banking toward the straight, so it is not a lift. T6 stays a lift.
- v1.1 · 2026-10-01 — The line now goes straight from throttle to brake: the 15–25 m of coasting drawn before most brake zones is gone. Braking points checked against an HPDE braking rate; they stay where they were. Notes for T7 and T11 now say the braking for T8 and T13 starts there.
- v1.0 · 2026-10-01 — First version: my own M340i laps (1 Hz).
Feedback contributors
Drivers and instructors whose feedback has improved this line. Thank you.
- Mike M — no coasting between throttle and brake; braking points (v1.1)
- Brian L — corners where the car gains speed are throttle, not a lift (v1.2)