NCM Grand — Race Line
Estimated from data not in trackdays.ai. The line, speeds and braking points come from cars lapping at a typical quick HPDE pace, checked against published track guides and brake markers. If you have data you would like to contribute, please send it to upload@trackdays.ai to help improve our estimates.
Heads up: This is an estimate of a typical quick HPDE line, not any one car's lap. Braking points are a starting point, not a target: start a little earlier and work later in small steps. The line goes straight from throttle to brake; amber only marks where you really lift or hold part throttle. The LiDAR was flown in April 2014, four months before NCM opened, and has a coverage gap around T4 to T6: the streaked grey there is filler, not ground. Turn numbers follow Chin's map in lap order and are provisional; T19 to T23 are the least certain.
- Throttle
- Coast / partial
- Braking
- Apex
- T4Off-camber corner
Arrows show the direction of the lap. The grey basemap is USGS LiDAR: dark = asphalt, light = grass. Tap any map for the full-size image.
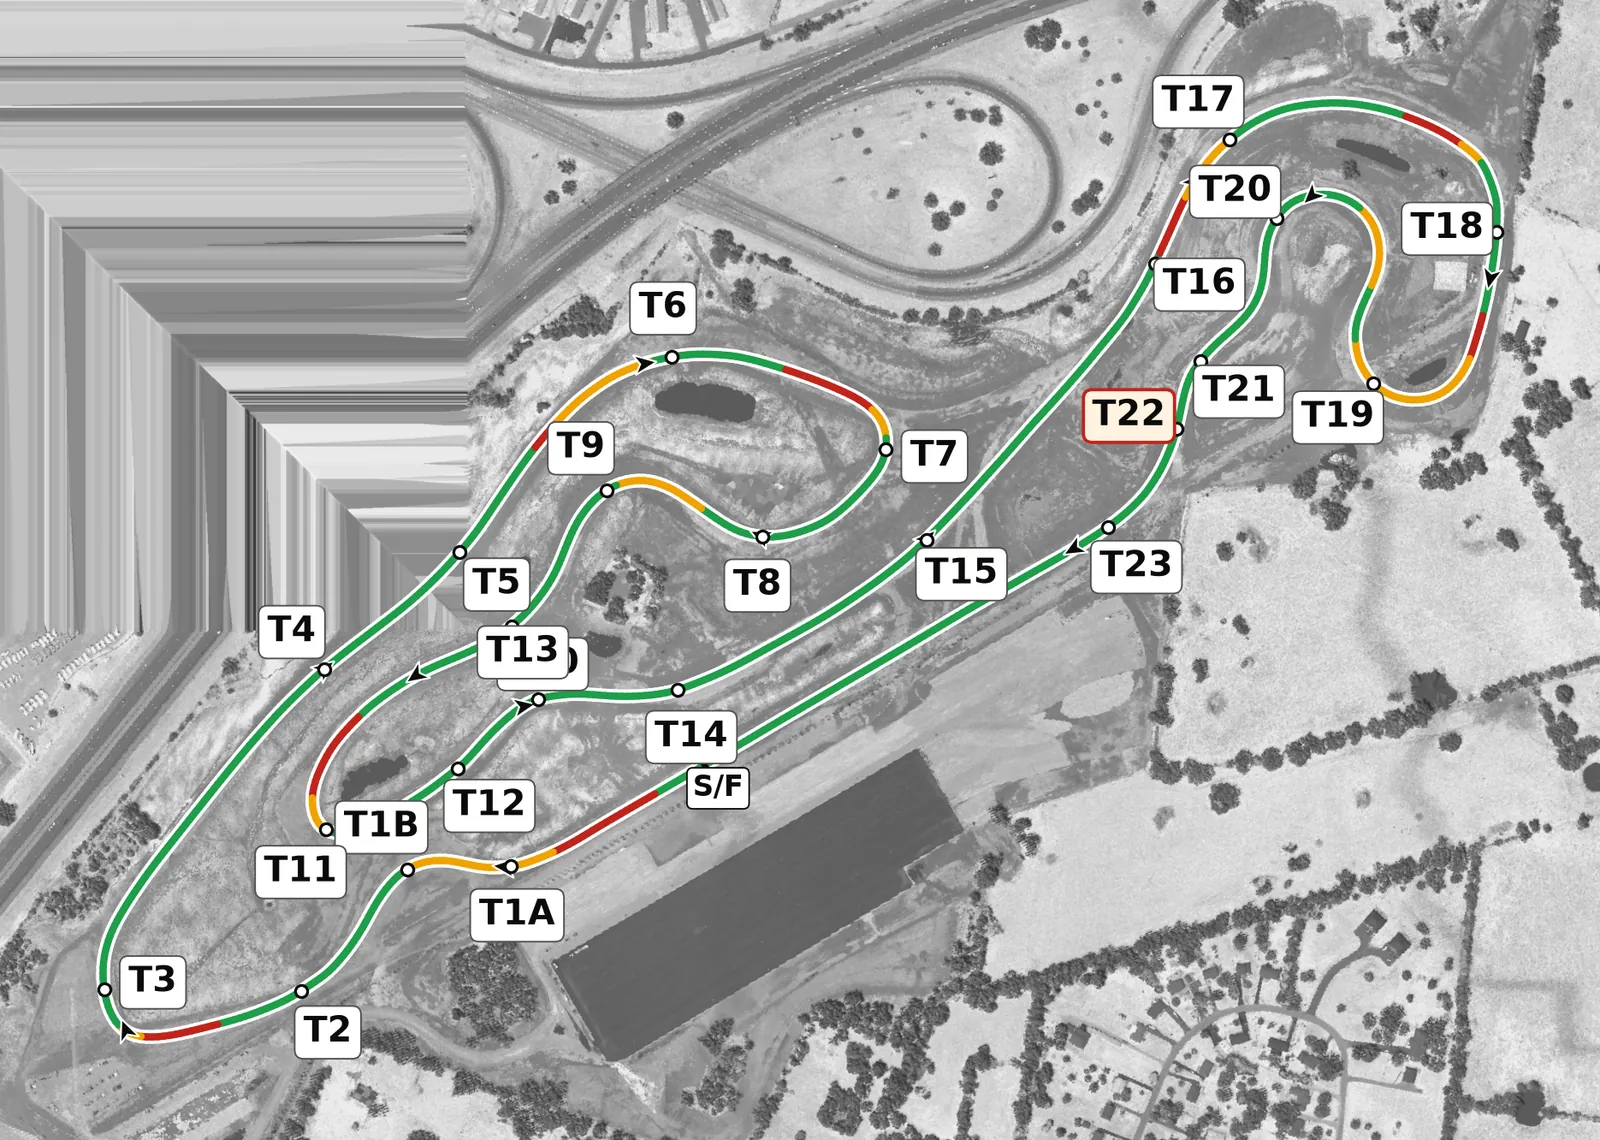
NCM's Grand Course is long and technical, with two fast straights split by tight, flowing sections, so be patient and build speed over several laps rather than chasing time in the first few. Exits matter most at Table Top before the back straight and at T23 onto the front straight. Most of the elevation change is packed into the Sinkhole near the end of the lap, where you must finish braking in a straight line before the blind crest; keep your wheels off the curbs where the surface falls away, such as T12.
Sectors
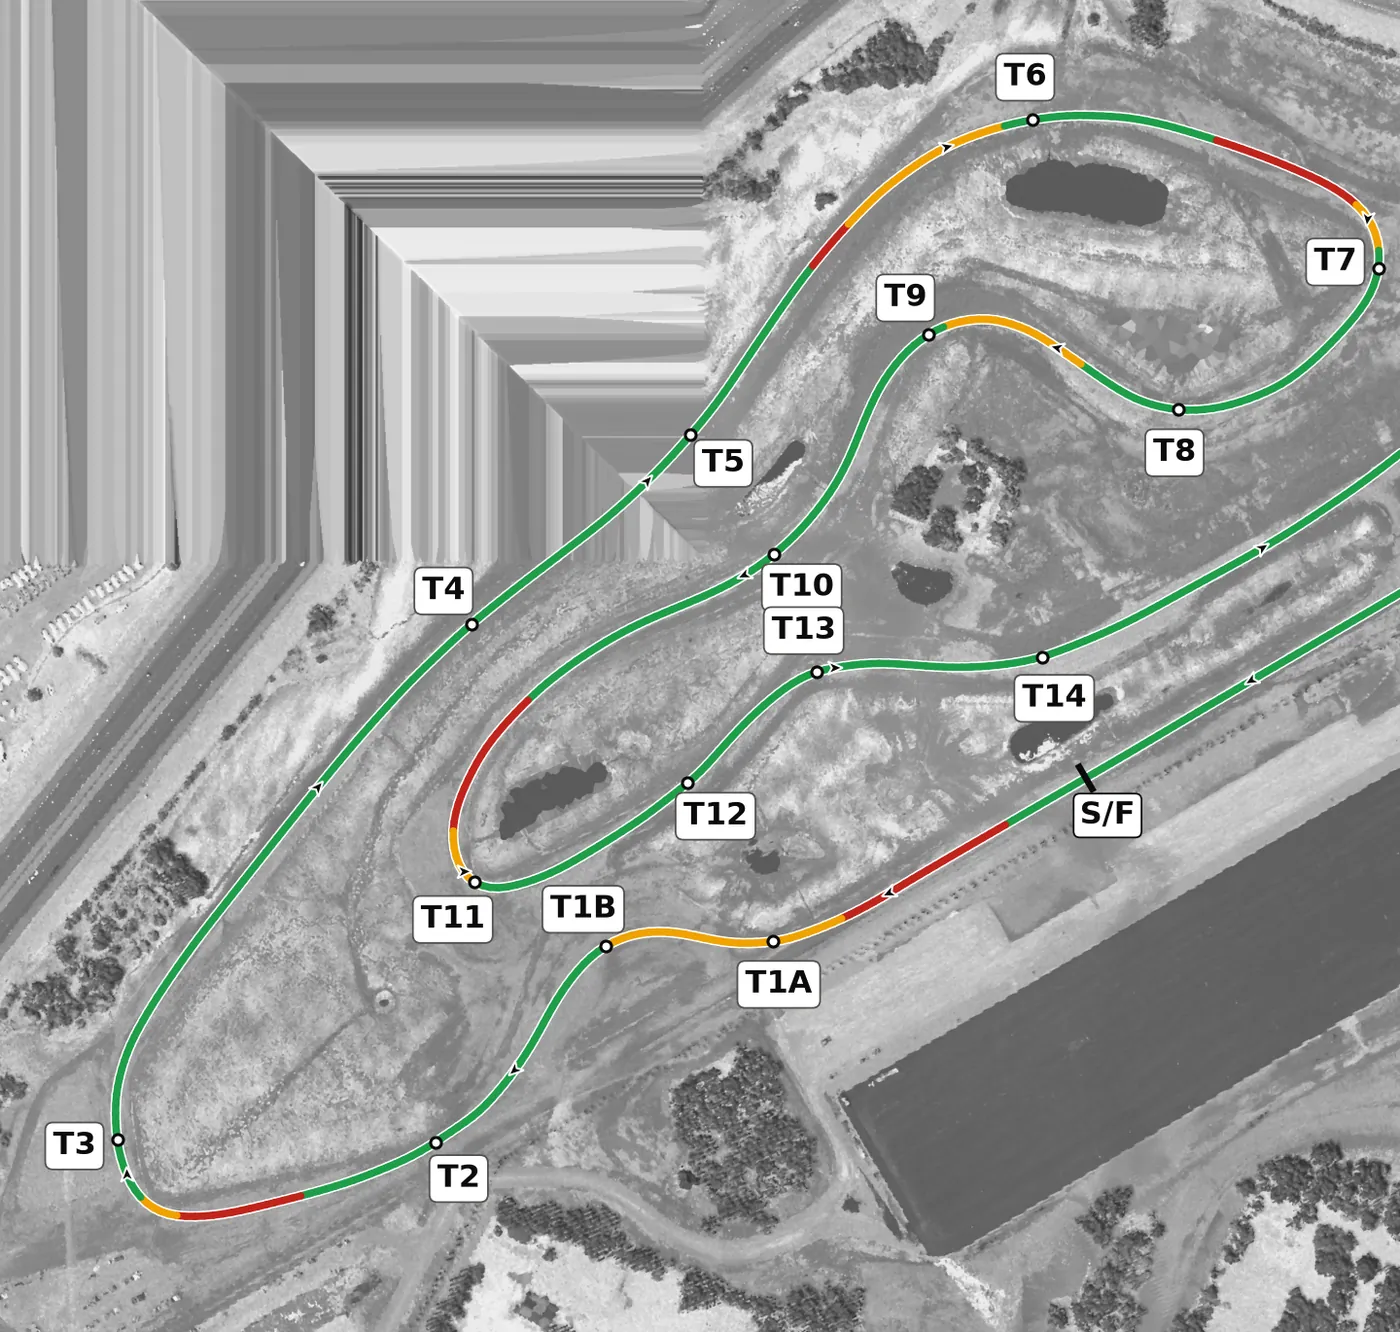
The lap starts with hard braking into the Mulsanne Chicane at T1, then the flat, evenly cambered T2 and the T3 hairpin, which has the best grip of the opening third. T4 starts the Corvette Curves; it is easy to overslow here, so keep the car moving and flowing into T5 and the long T6.
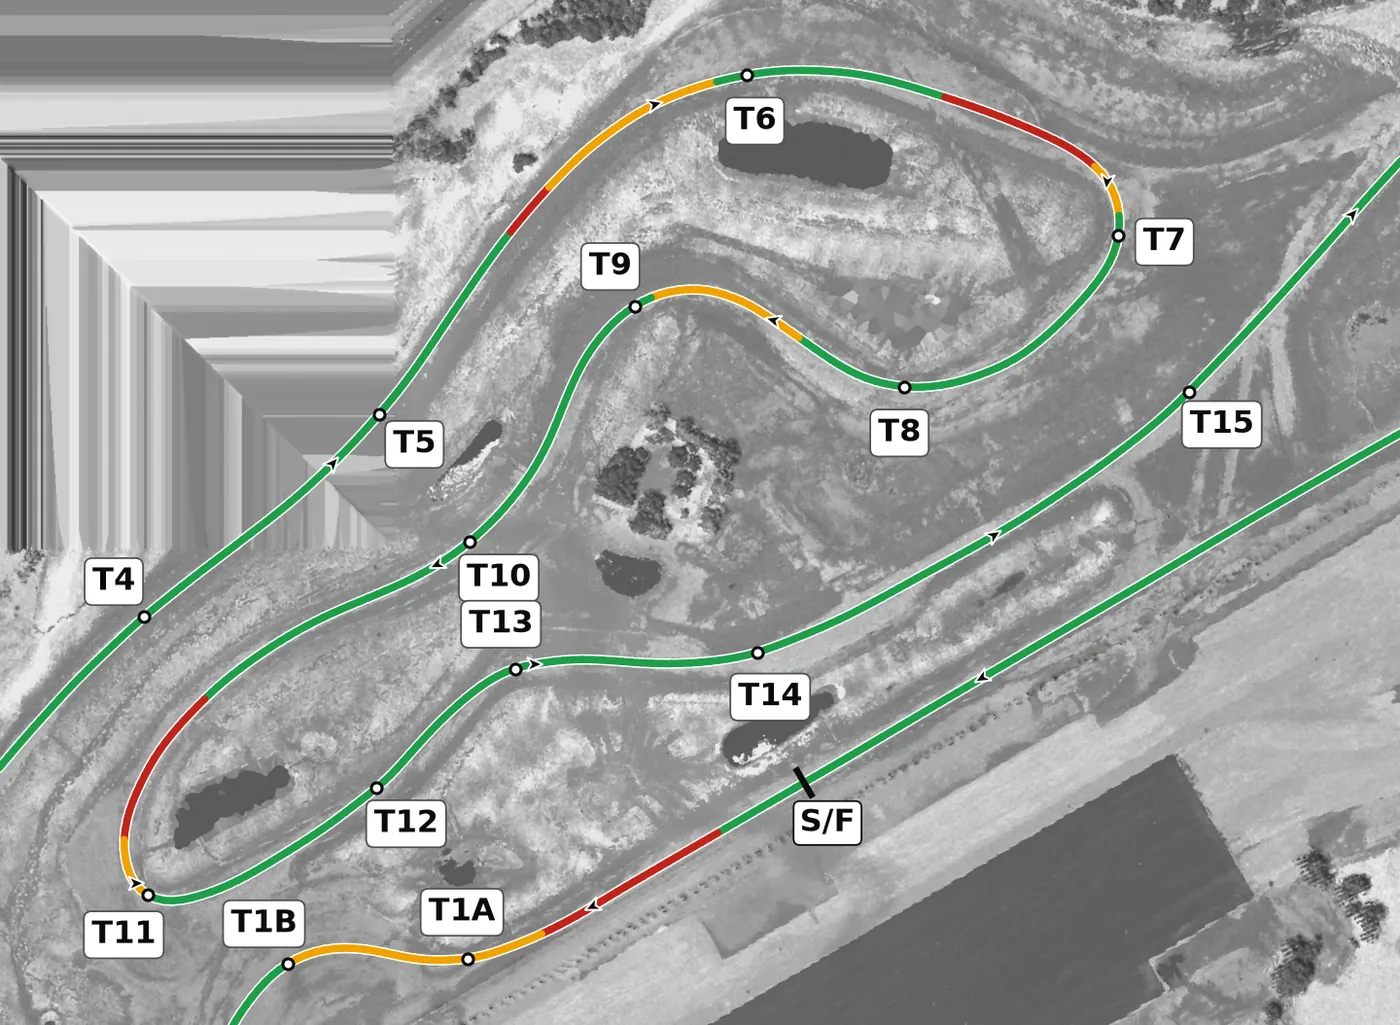
T7 to T10 drop down to one of the lowest points on the lap and climb back out, then the slow, well-cambered T11 and the T12 to T14 sequence lead onto the back straight. Deception at T13 hides its exit over a crest at the apex, so commit to a line you know, and favour the Table Top exit over its apex speed. Faux Rouge at T15 is a fast uphill left where the car goes light over the top, so keep the wheel steady there.
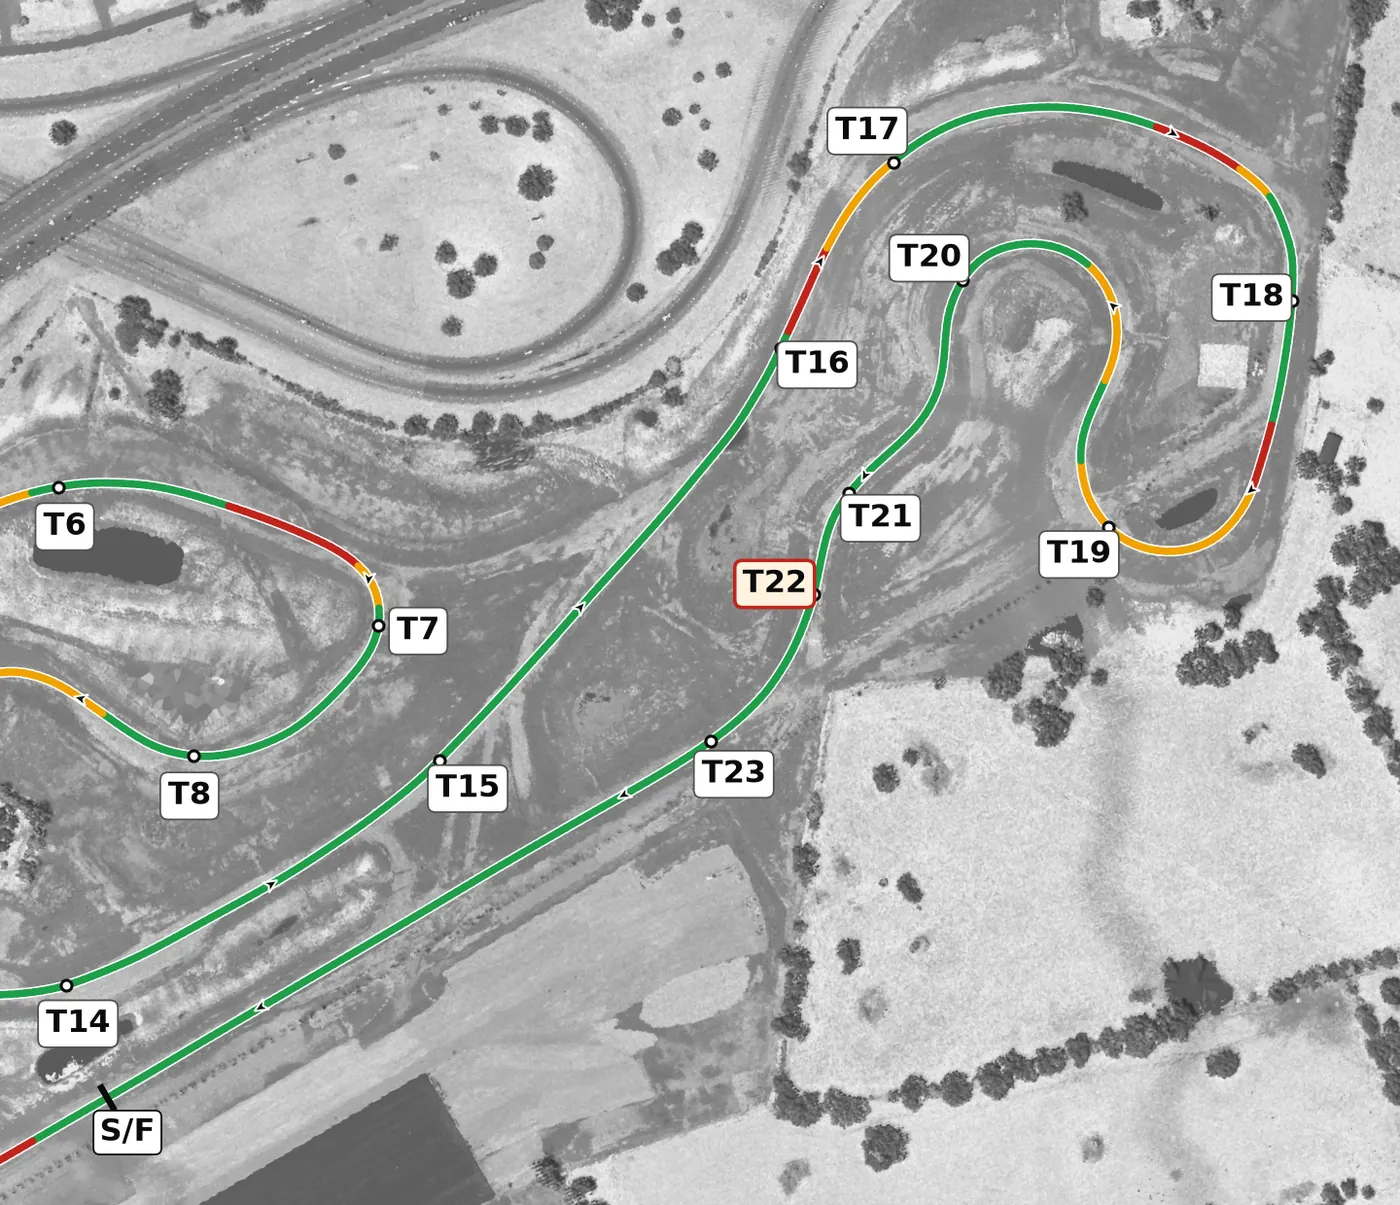
T16 to T18 climb to the highest ground on the lap, then T19 tips over a blind crest into the steep drop and compression of the Sinkhole and T20 climbs back out. Finish your braking in a straight line before that crest and keep inputs gentle at the bottom, then string T21 to T23 together, mindful of the off-camber exit at T22, and make T23 your best exit of the lap.
Corners
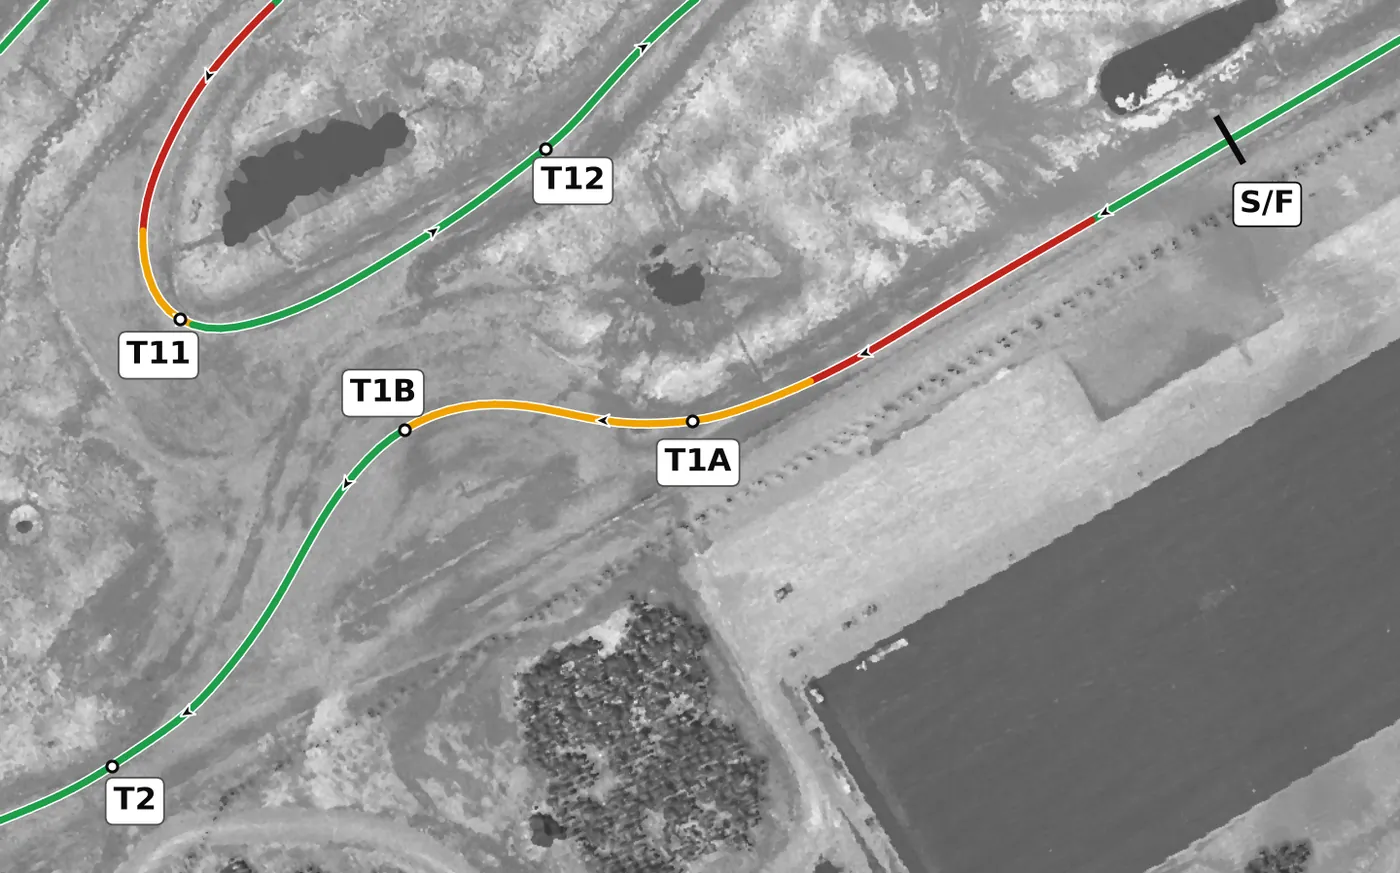
Brake hard and in a straight line at the end of the front straight, then turn right for T1A and immediately left for T1B on a dead-flat surface. Give up a little speed into the first part so you can take the second part cleanly and get back to the throttle early. The mistake to avoid is going in too fast, which leaves you sliding wide out of T1A and fighting the car through T1B.
From the survey: The Mulsanne Chicane: dead flat.
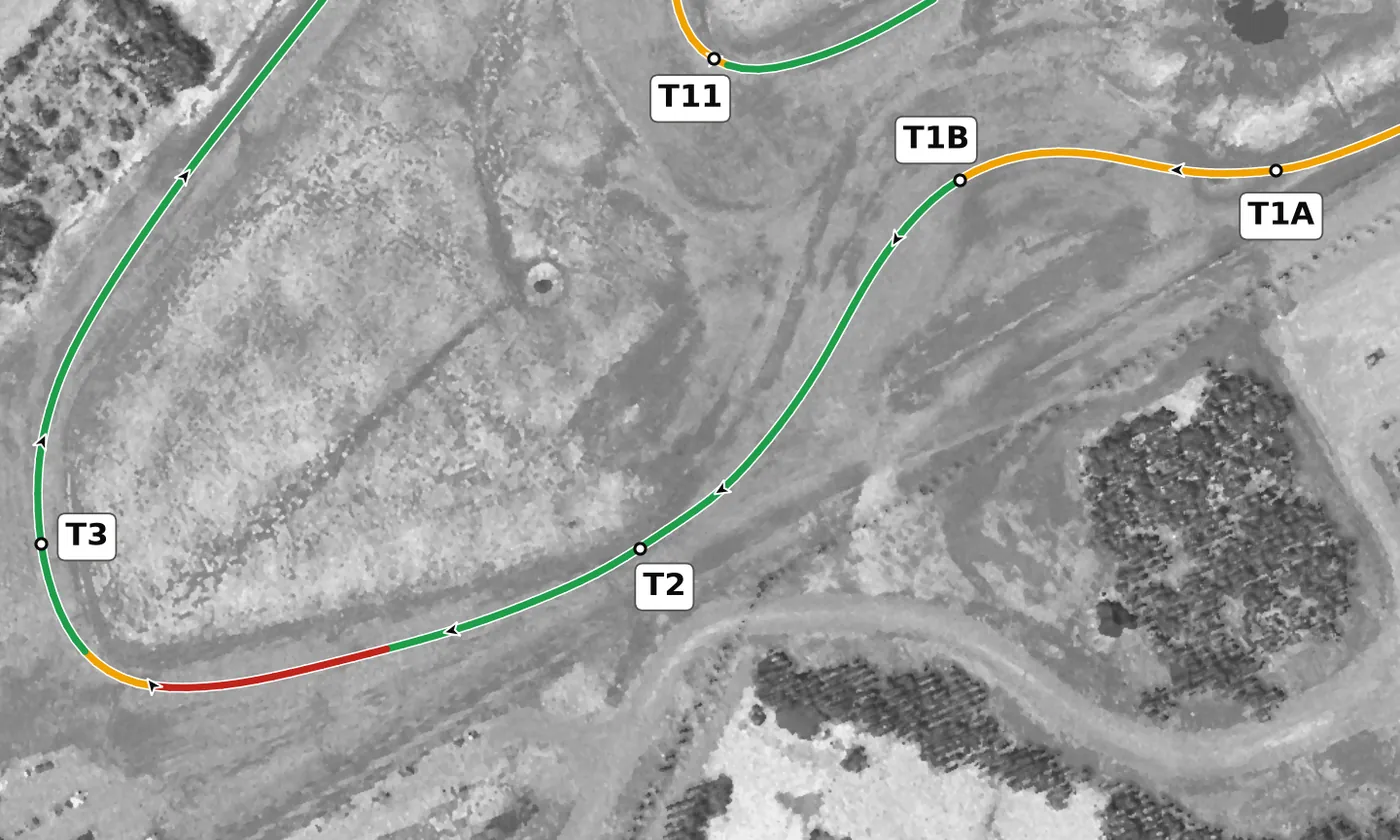
T2 is a flat right with even camber all the way through, so you are free to pick a smooth, wide arc. You arrive slow out of T1B, so there is no braking here: stay on the throttle, take a mid-to-late apex and let the car track out to the left on exit, setting up the hairpin at T3. The mistake to avoid is an early apex here, which leaves you badly placed for T3.
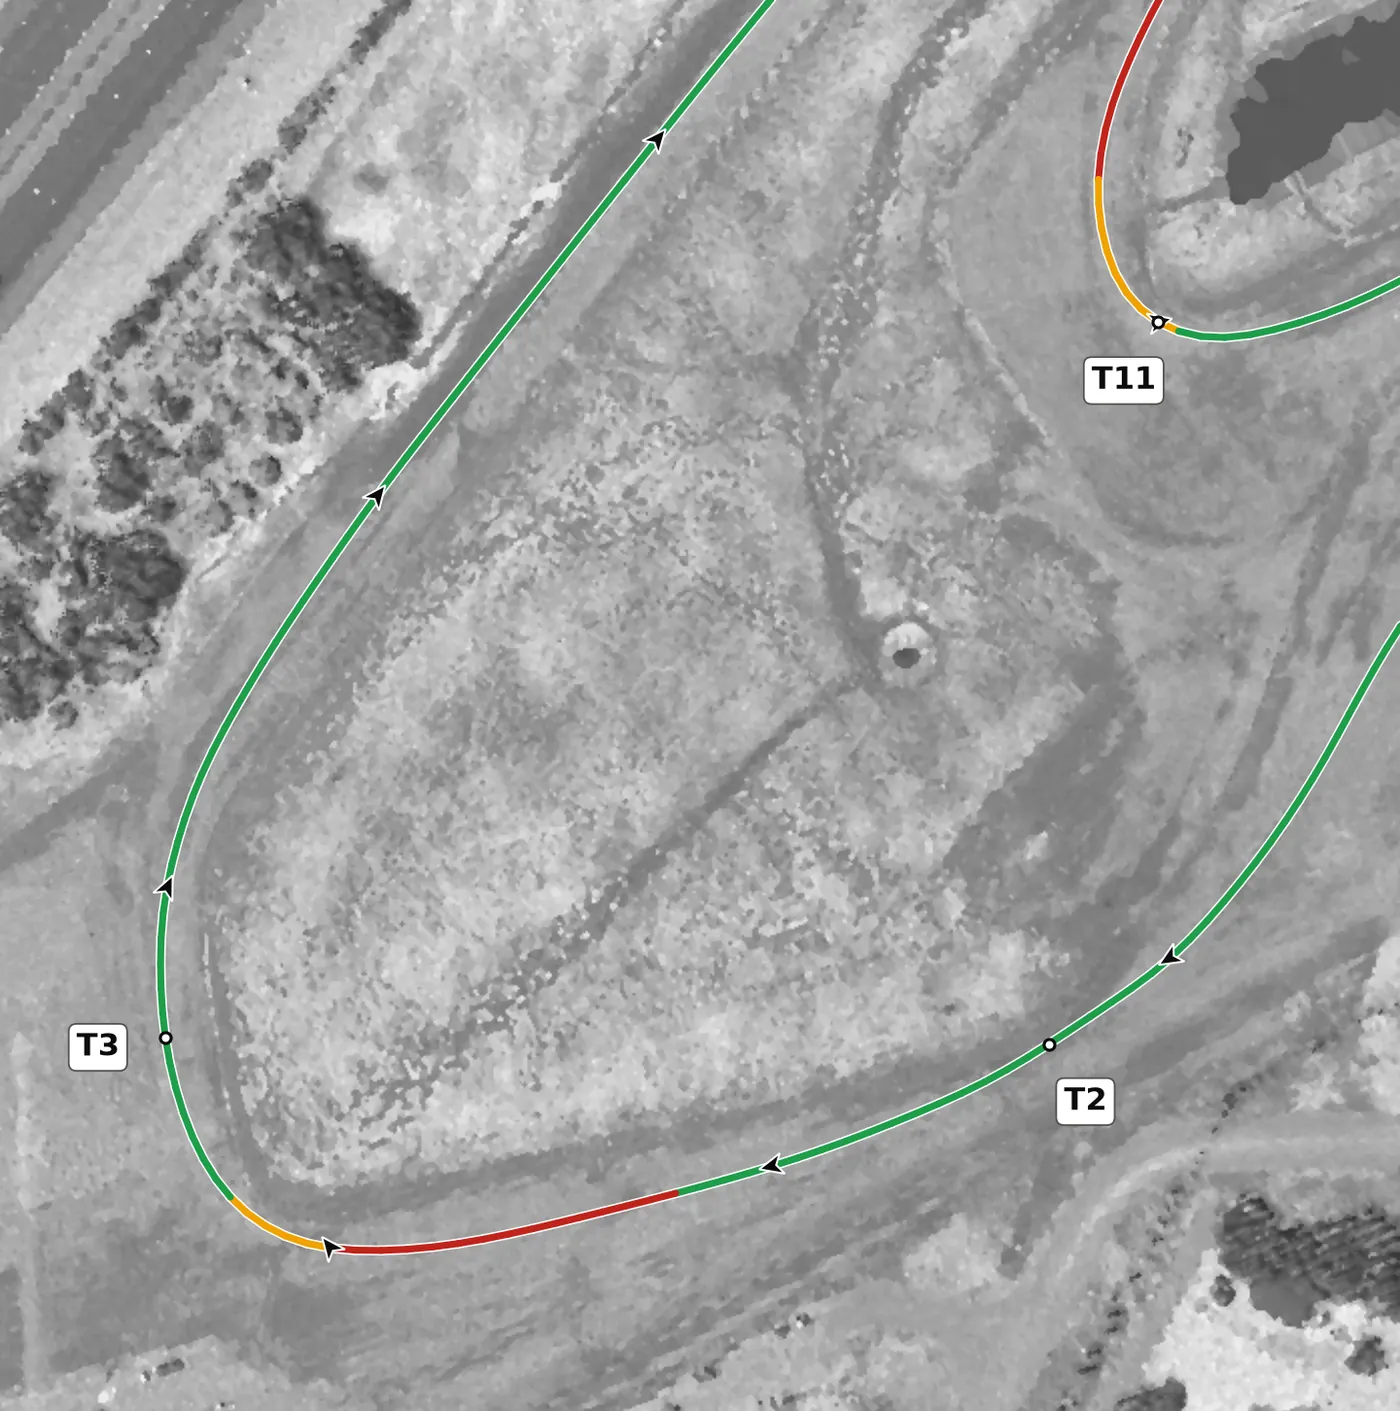
T3 is the tight right-hand hairpin at the far end of the lap, and it has the best grip of the opening corners, with an exit that climbs slightly. Brake firmly in a straight line, turn in late and aim for a late apex so you can feed in throttle early and track out to the left. The mistake to avoid is turning in early and having to lift on the exit.
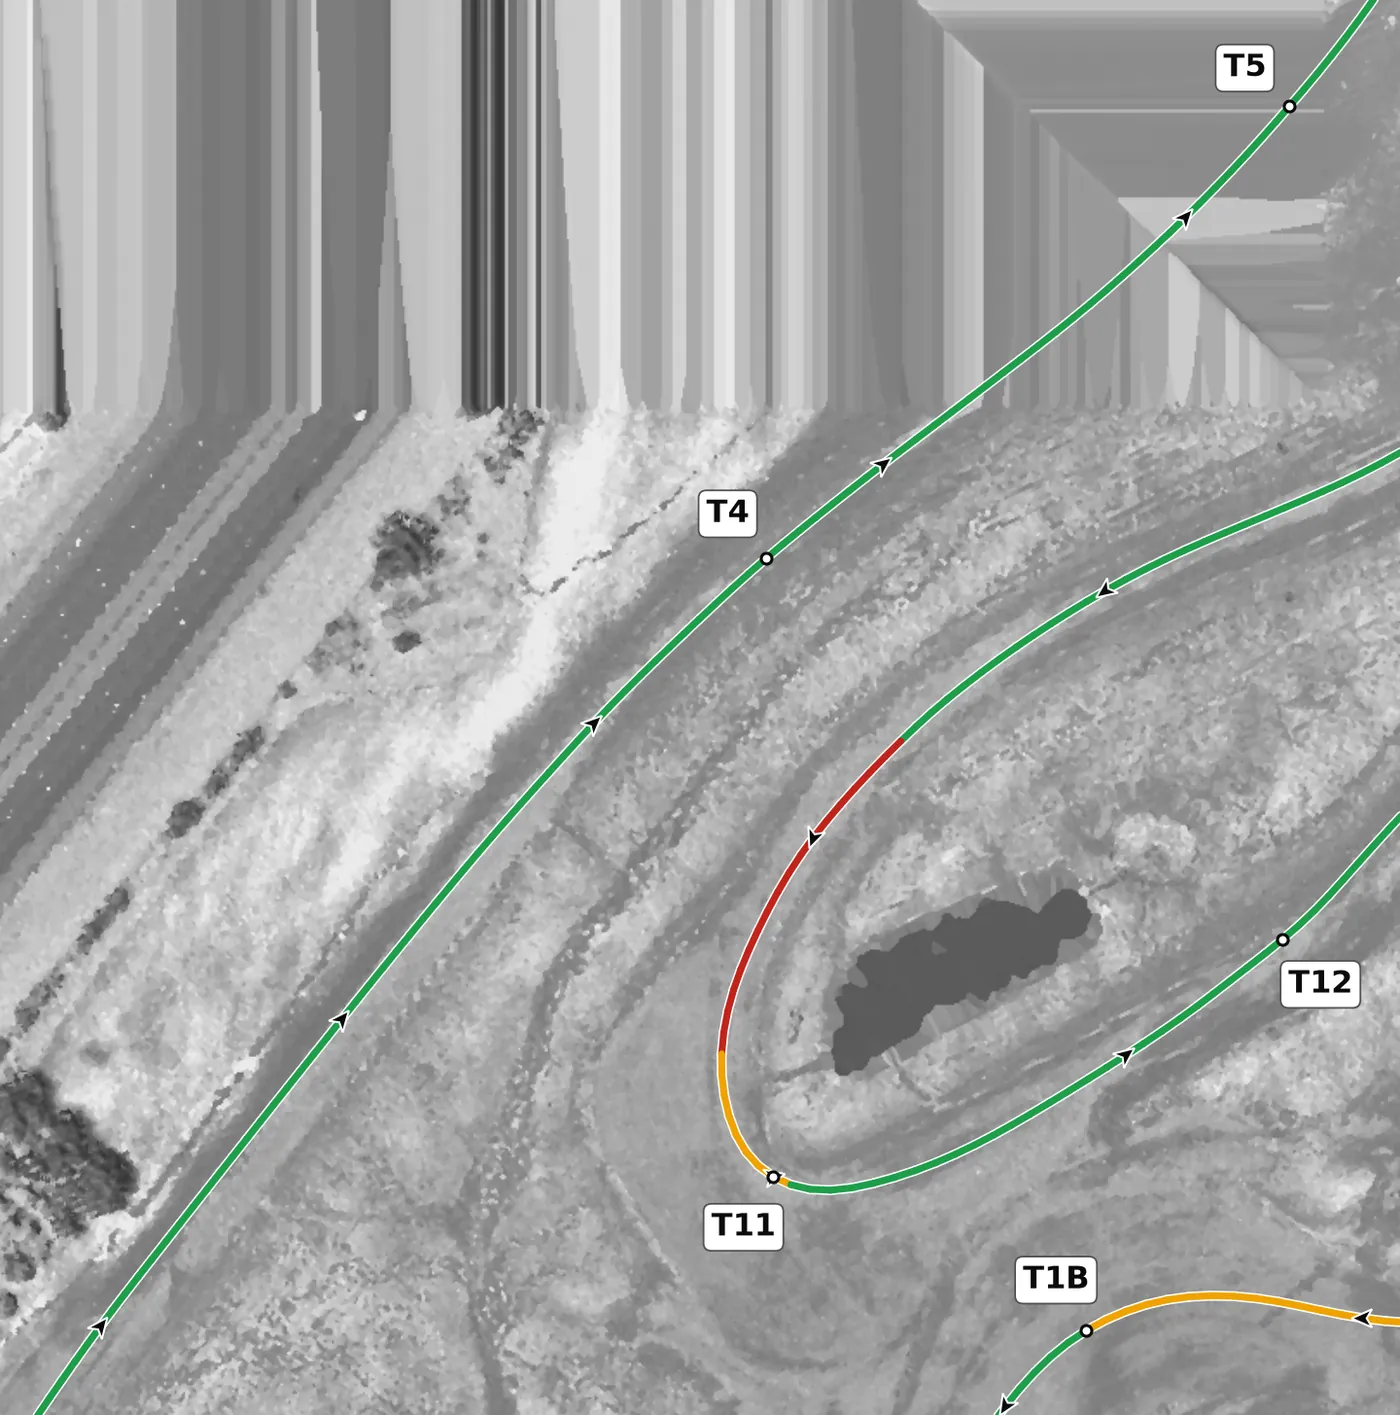
T4 starts the Corvette Curves: a right with an uphill exit and helpful camber through it. Keep up more speed than you think, take a smooth line and let the car run out toward the left edge on the exit. The mistake to avoid is overslowing on entry, which costs time through the whole sequence.
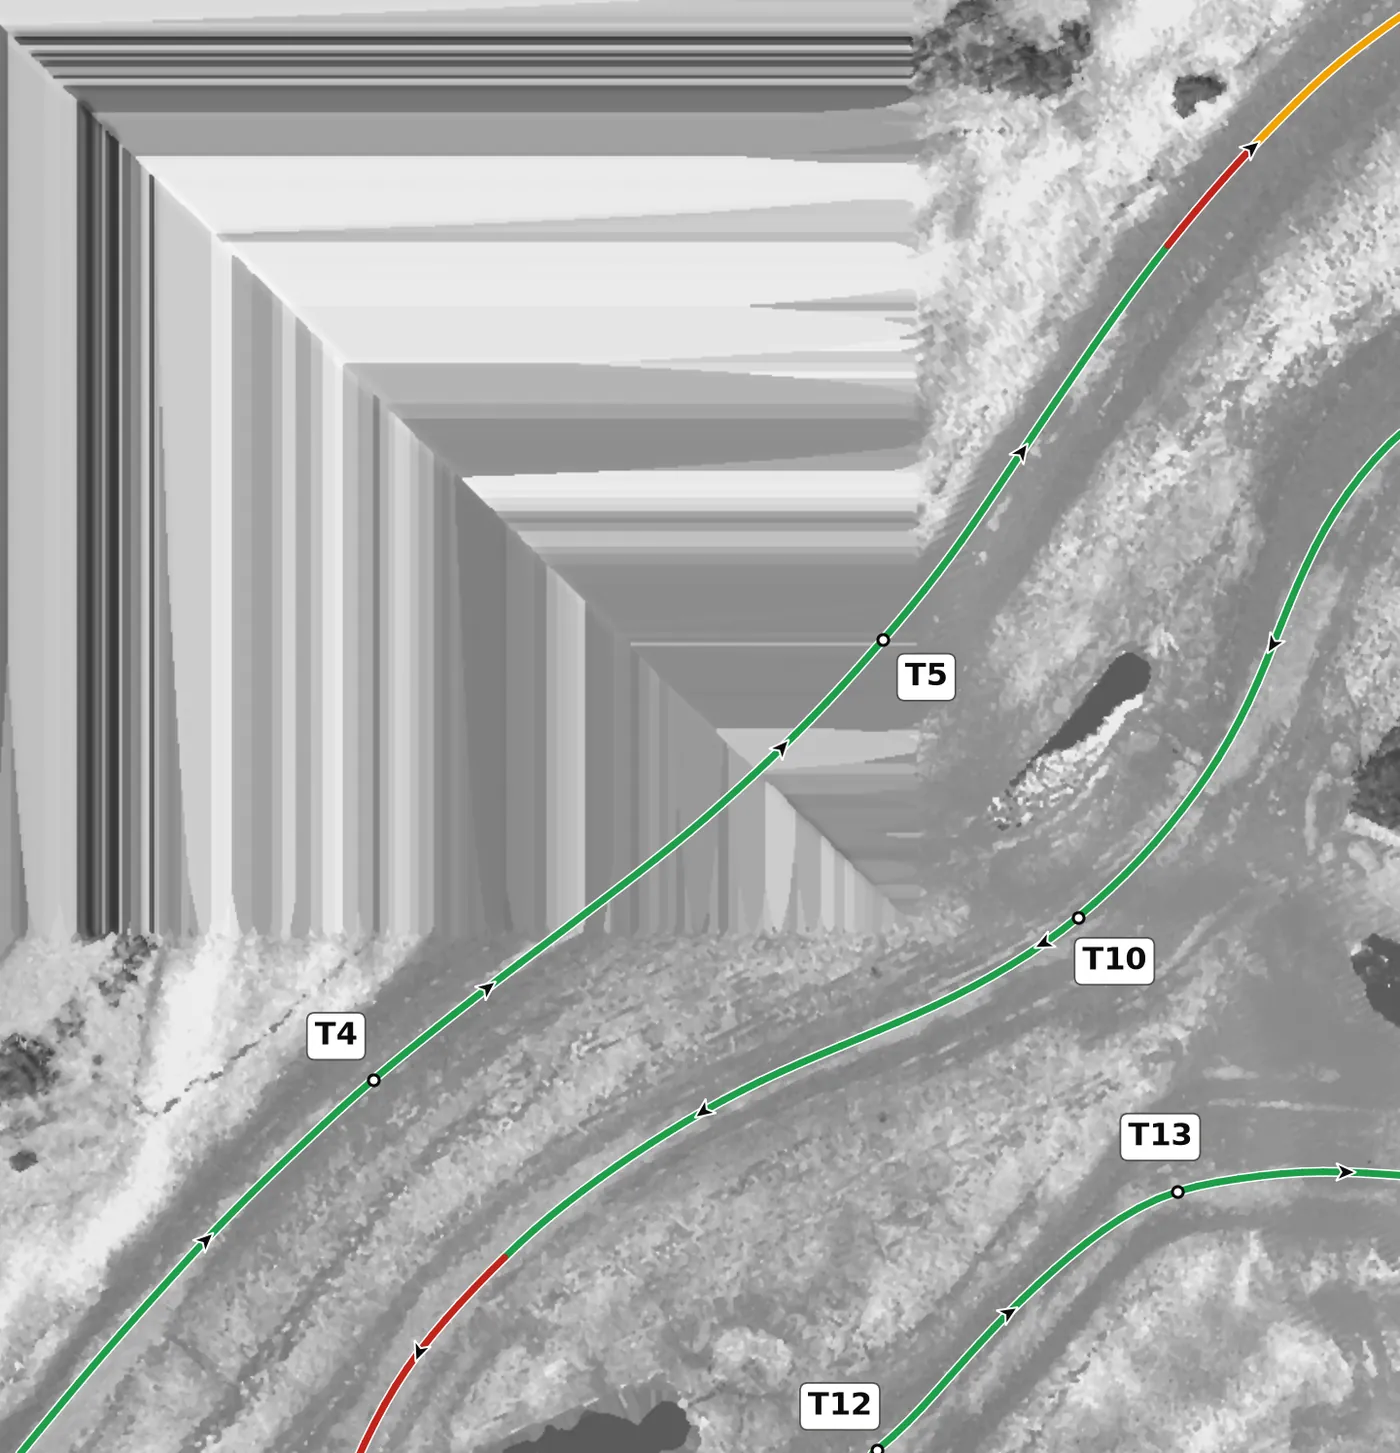
T5 is a left in the middle of the Corvette Curves and there is no survey data across its apex, so take it on a smooth, middle line rather than an aggressive one. Let it track out toward the right, then move back across to the left before turning in for the long right of T6. The mistake to avoid is cutting in tight and then running wide, which leaves you on the wrong side for T6.
From the survey: The 2014 survey has no ground returns across this apex.
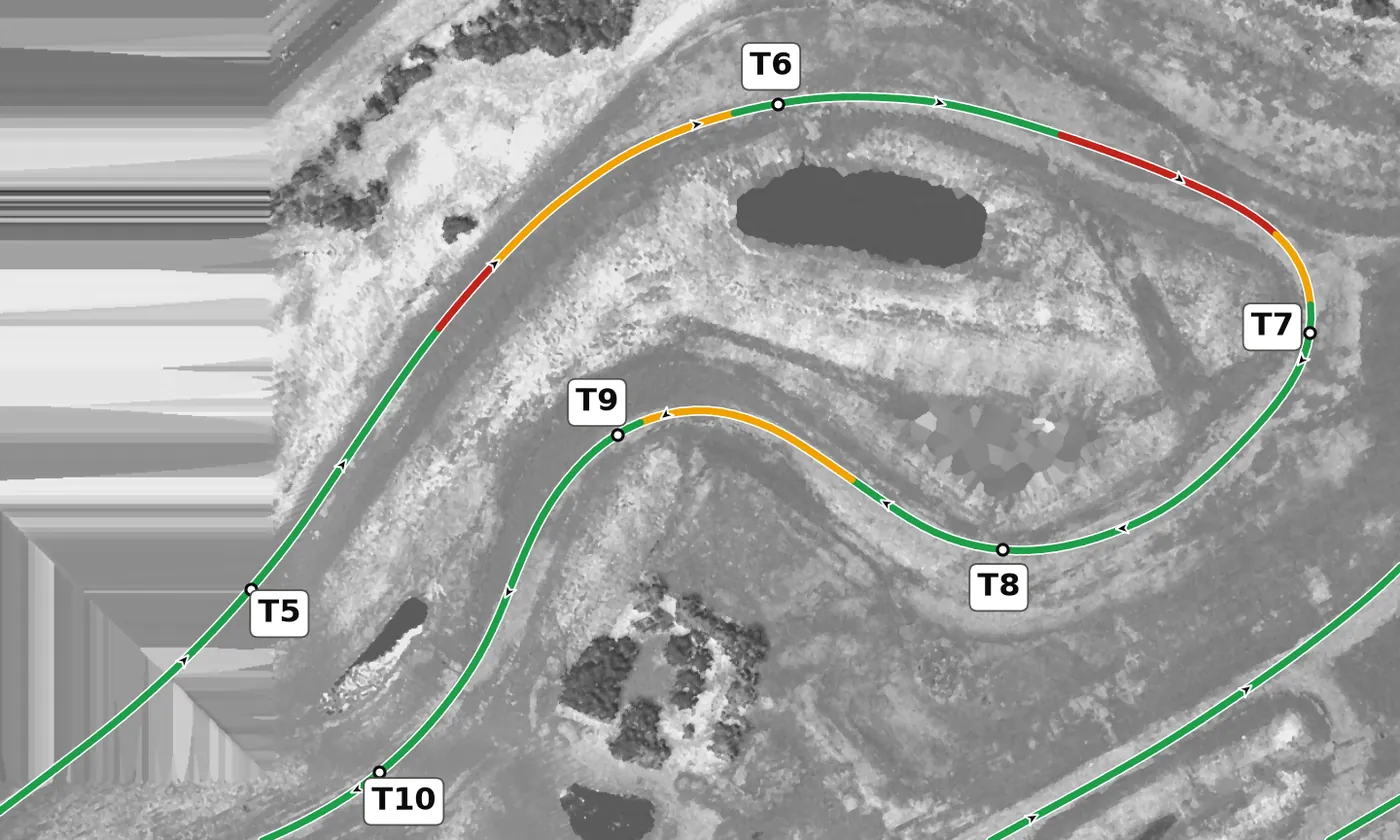
T6 is a long right that dips slightly to the apex and then climbs back out, so after a short brake or firm lift at turn-in you can carry speed through it on steady part throttle. Turn in from the left, keep the car on one smooth arc and track out to the left on exit. The mistake to avoid is turning in too early on such a long corner and running out of road on the exit.
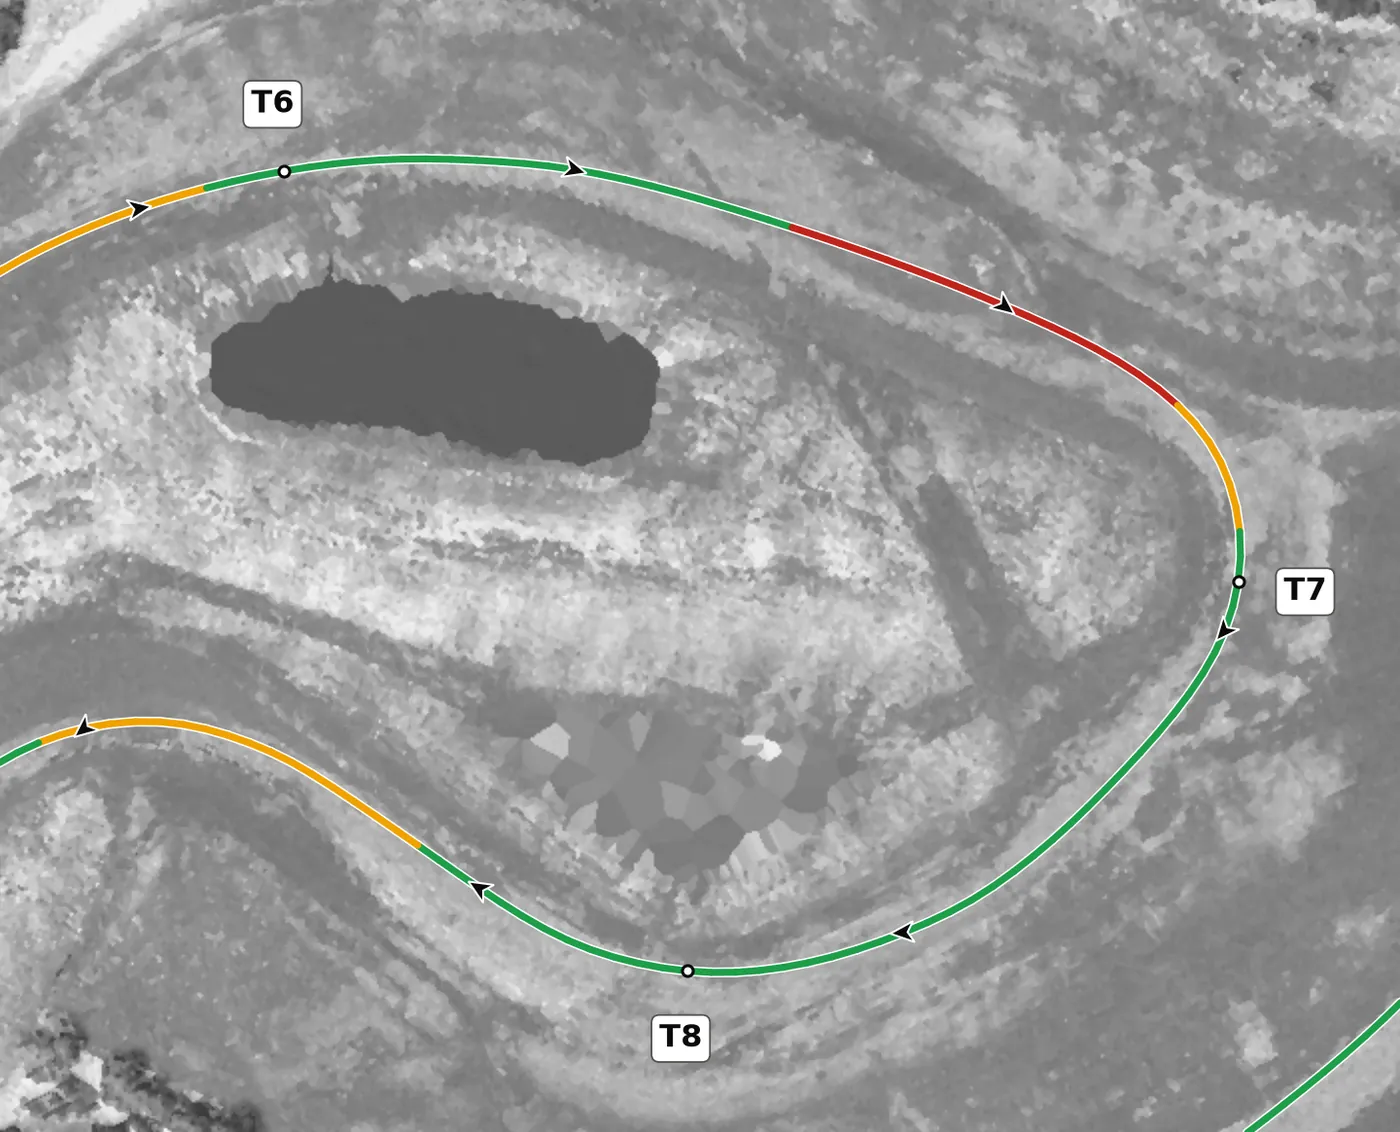
T7 is a right with the weakest camber in the Corvette Curves, and its exit falls away downhill toward T8. Brake firmly in a straight line on the way in, turn in smoothly, take a slightly later apex and keep the car settled as the road drops, because a correction mid-corner costs the most here. The mistake to avoid is early throttle as the road falls away, which pushes the car wide.
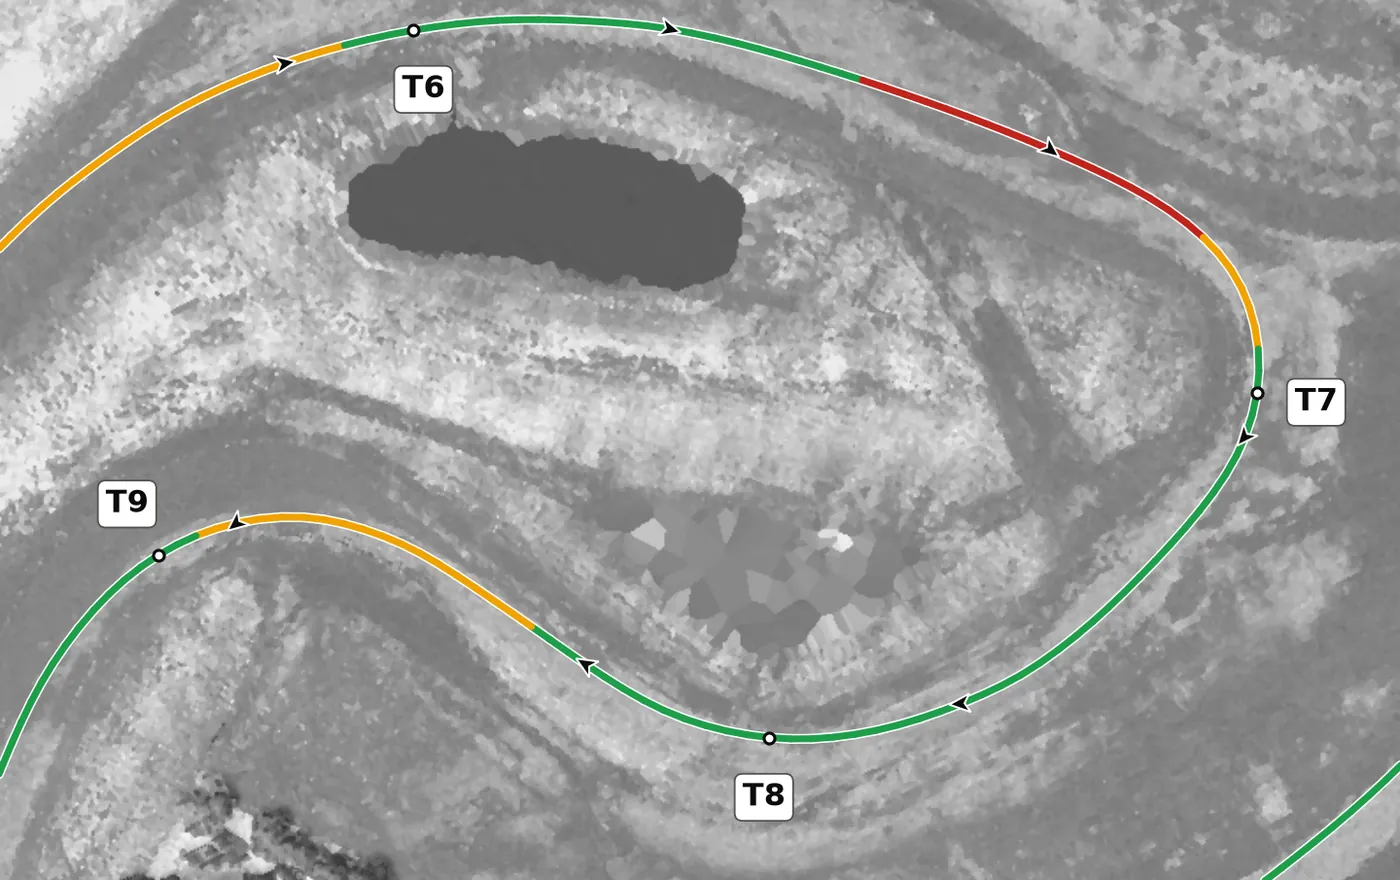
T8 is a right near the lowest part of the lap, and you arrive downhill into a well-cambered corner. You are already slow from the T7 stop, so there is no braking zone here: carry steady throttle down the slope and trust the camber, which holds more speed than the approach suggests. The mistake to avoid is overslowing on the downhill entry; the corner gives you more grip once you are in it.
From the survey: The second-lowest point on the circuit.
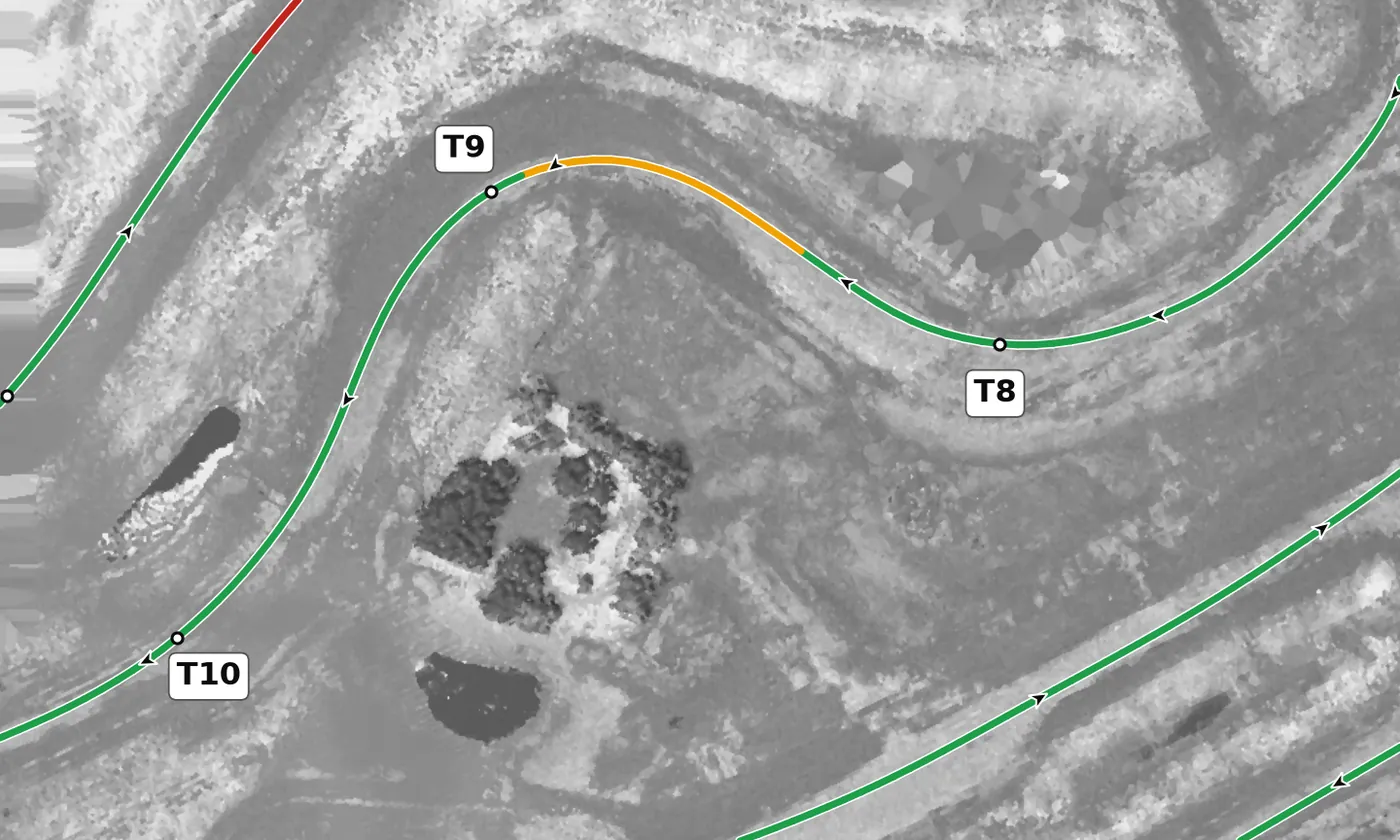
T9 is a well-cambered left that climbs on the exit, one of the places where the surface really helps you. Turn in from the right, take a mid apex and start feeding in throttle early as the road climbs, tracking out toward the right. The mistake to avoid is staying wide on the exit when you need to set up on the left for T10.
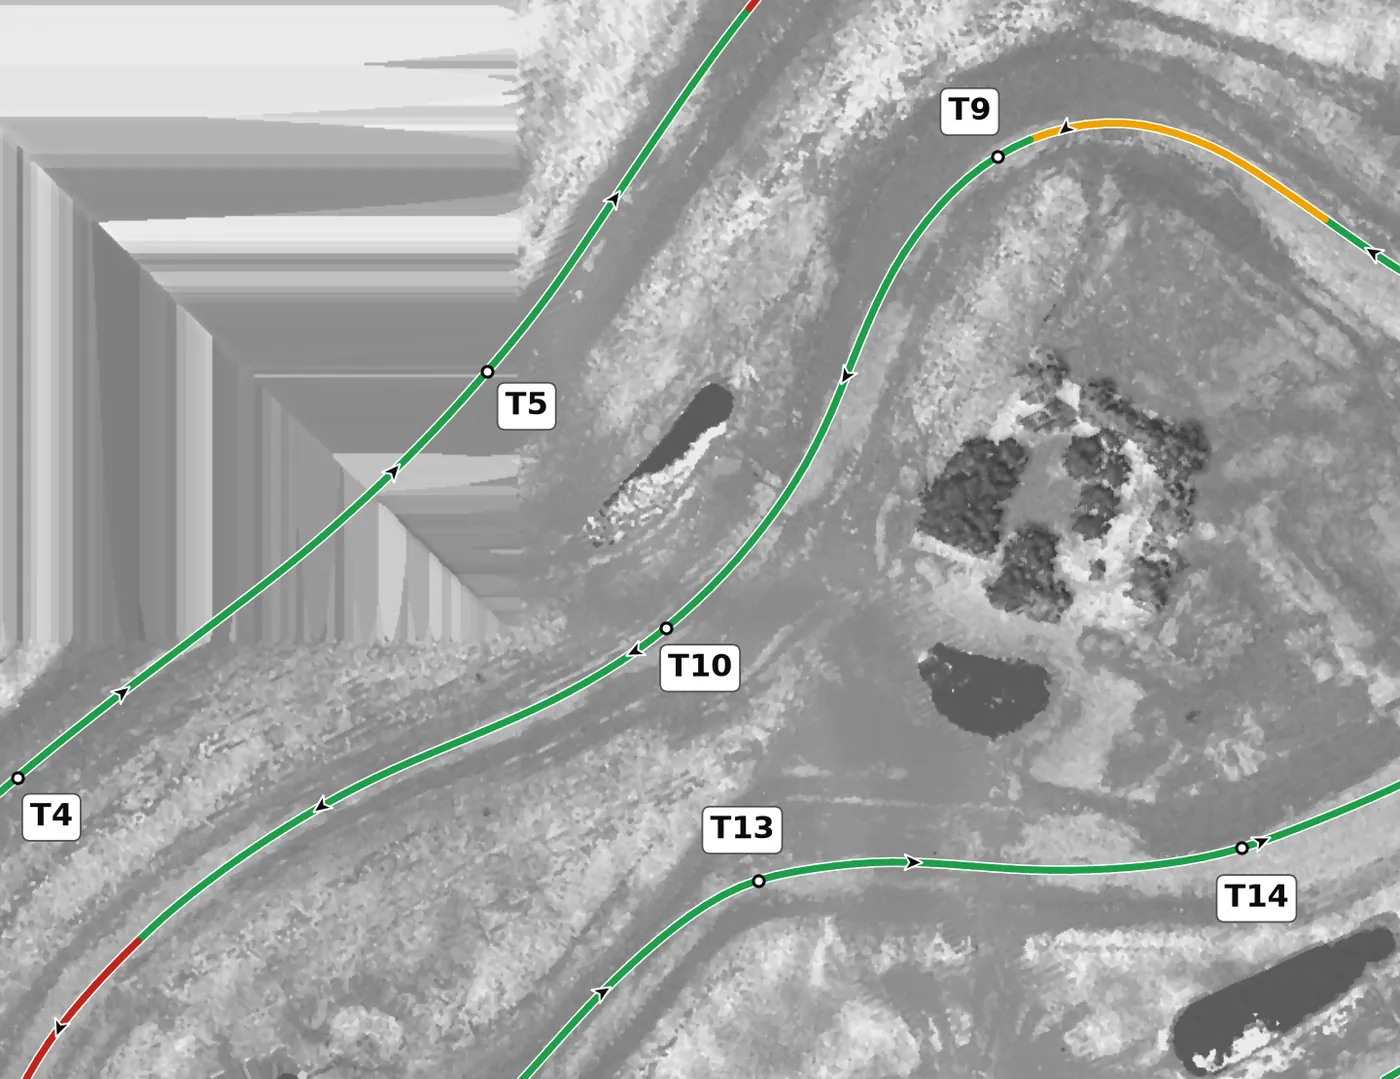
T10 is a right on a steady climb, and the car gains speed through it: stay on a steady throttle, turn in from the left and take a mid-to-late apex, letting the climb settle the car. Any lift belongs earlier, in T9. The mistake to avoid is braking or lifting here out of habit, which only costs you speed up the hill.
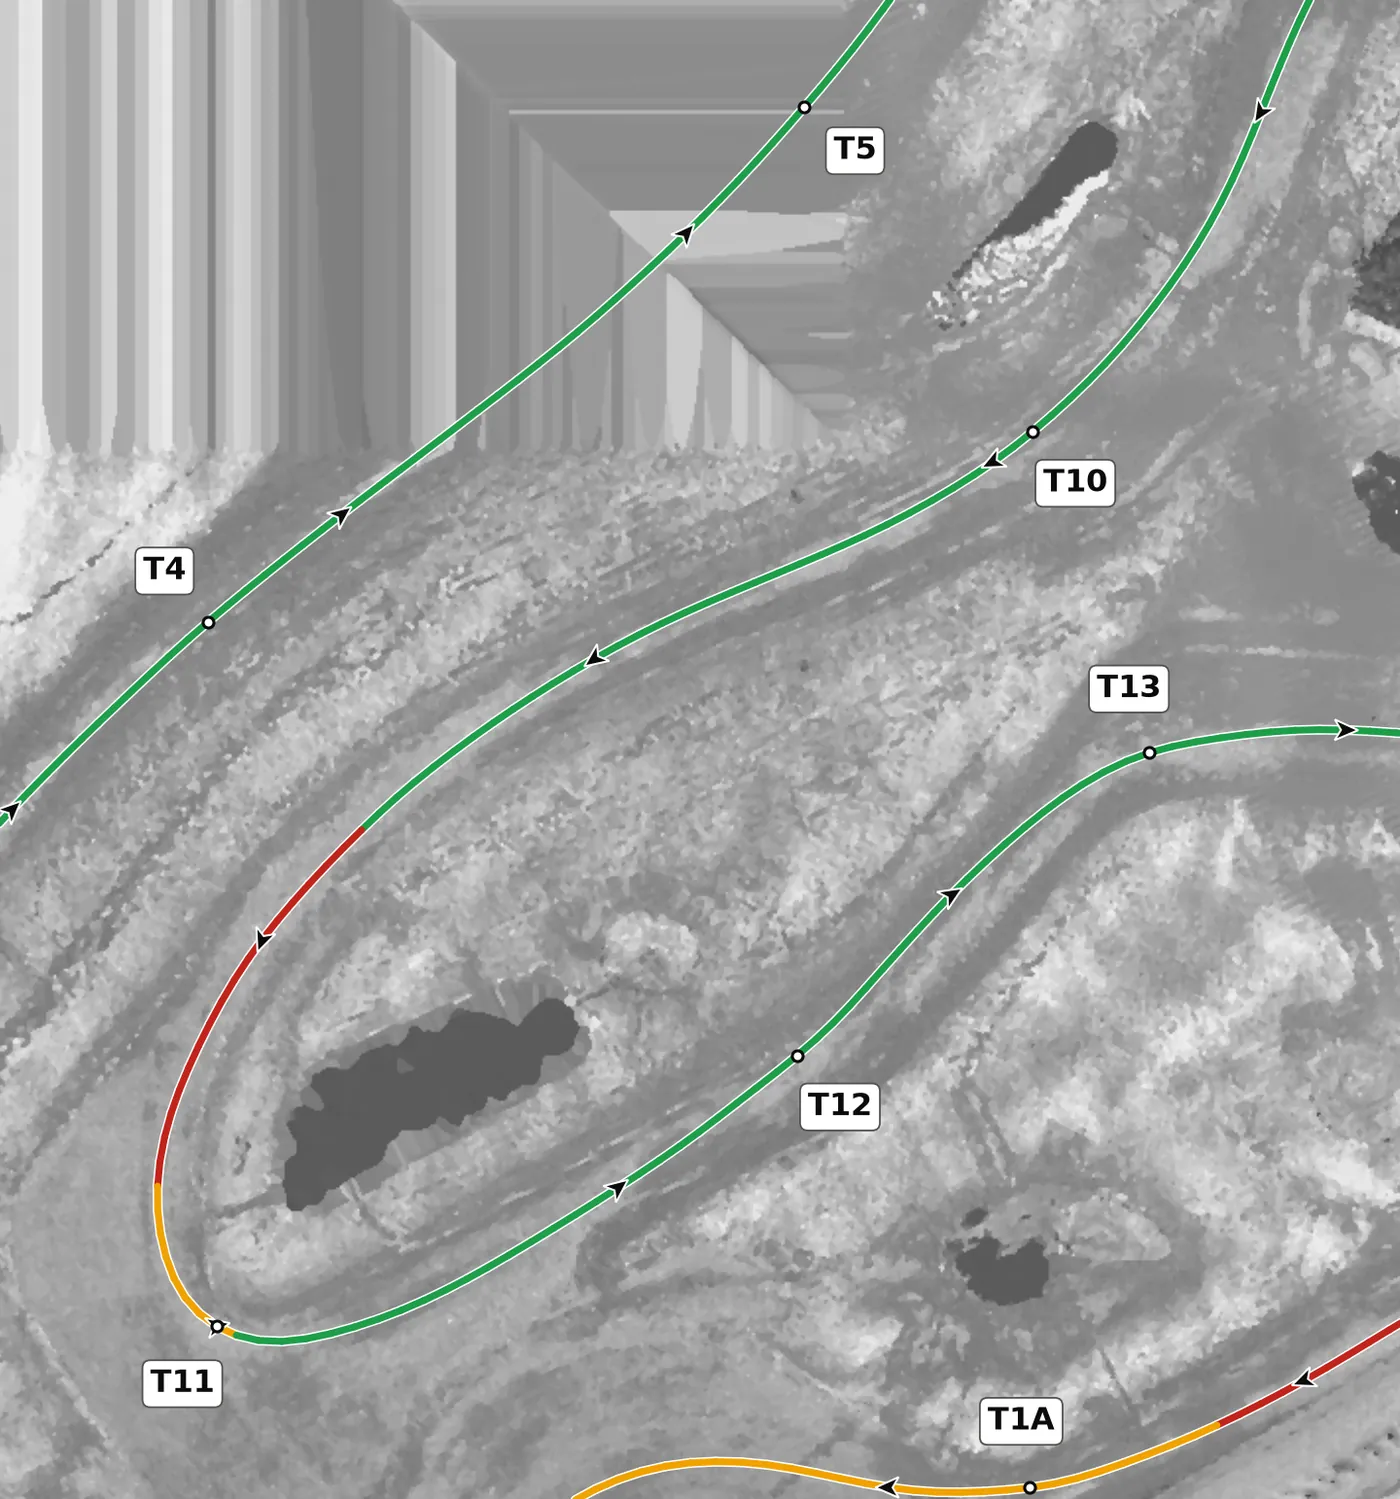
T11 is the slowest corner on the lap, a left with the best camber on the circuit. Brake firmly in a straight line, turn in late, aim for a late apex and trust the camber to hold the car as you get back on the power, tracking out to the right. The mistake to avoid is rushing the entry and having to wait for the car before you can accelerate.
From the survey: The slowest corner on the lap, and the best cambered (+2.4% at the apex).
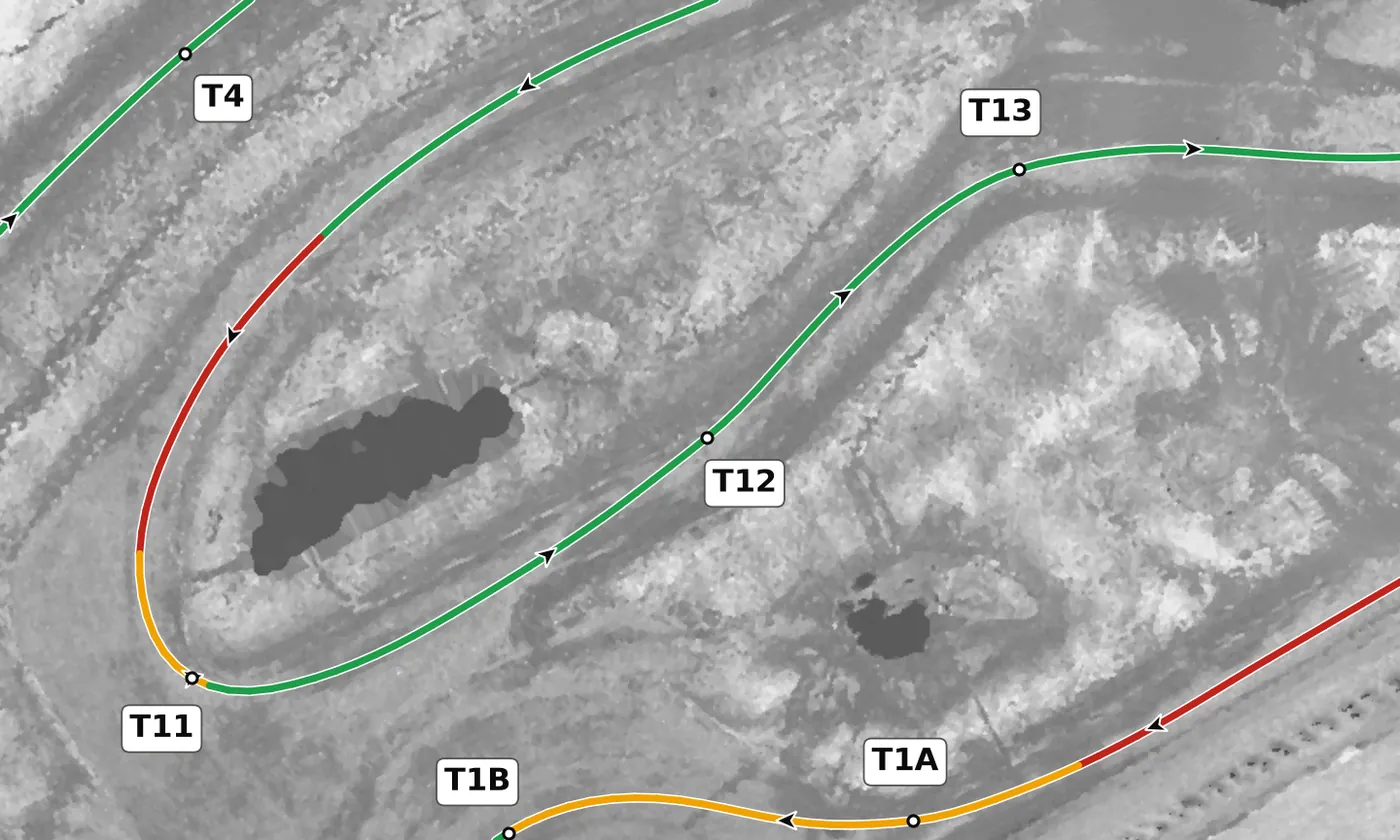
T12 is a left whose surface falls away on entry, but you arrive slow out of T11, so there is no braking to do: get the car rotated before the apex. Keep your wheels off the curbing where the surface drops away, then let the car track out to the right once the camber flattens. The mistake to avoid is turning in early on the part that falls away, which makes the front run wide.
From the survey: Off camber on entry (down to −1.9%).
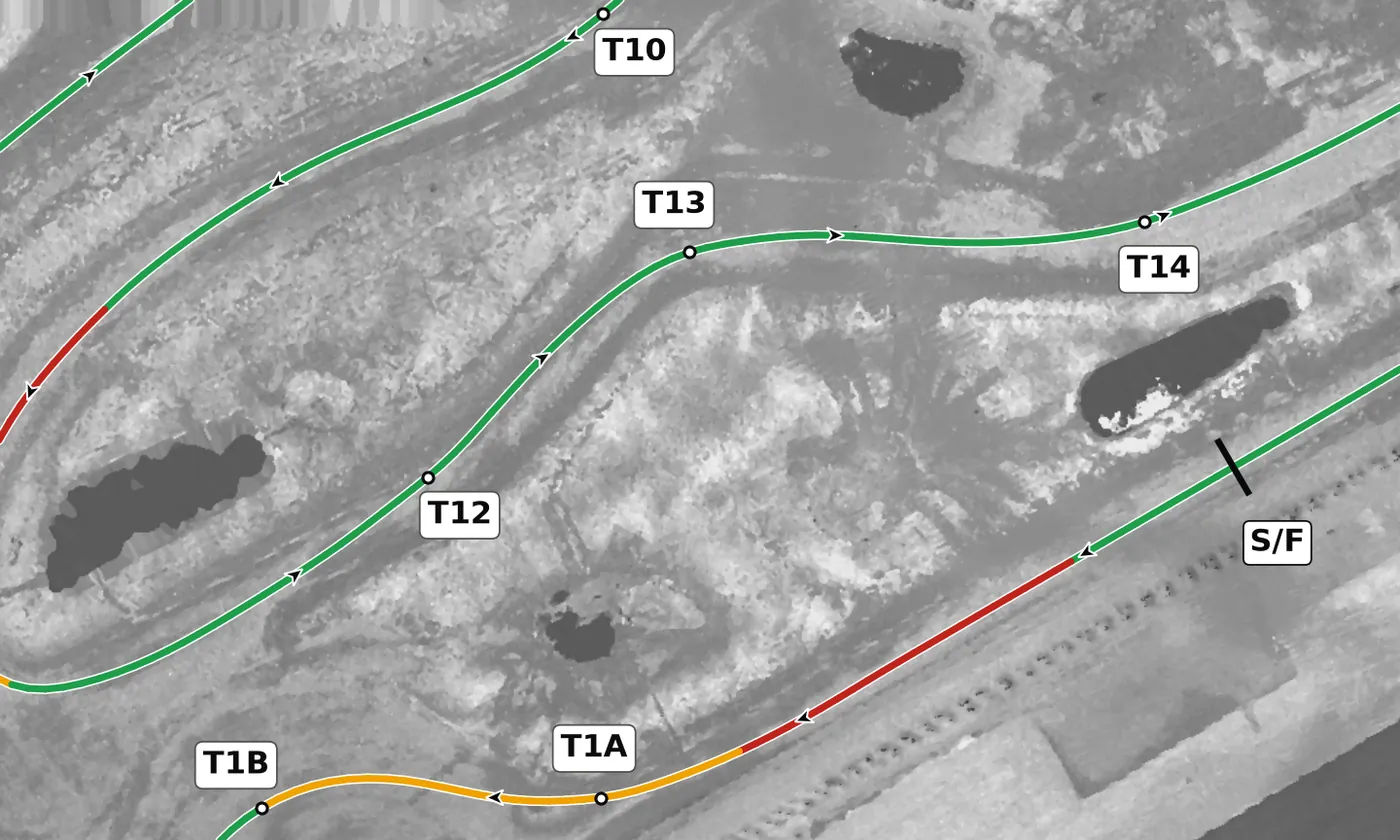
Deception is a right with a crest at the apex that hides the exit as you turn in. At most a small lift before the turn-in, then commit to a line you have learned at lower speed and trust the good camber where you can't see, letting the car track out to the left. The mistake to avoid is guessing at the exit at speed; build up here over several laps and never turn harder as the car goes light.
From the survey: Deception: a crest at the apex hides the exit.
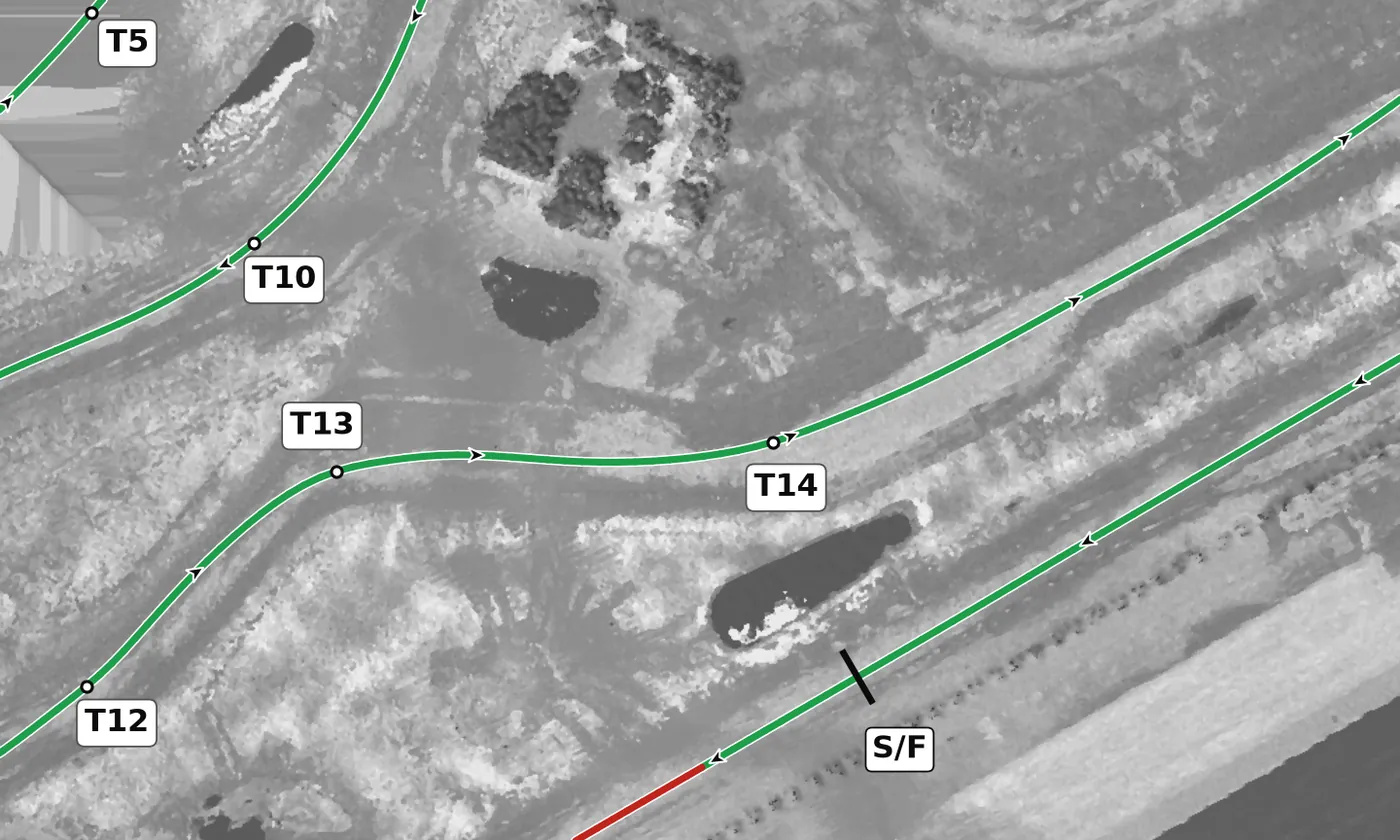
Table Top is a flat-topped, well-cambered left that leads onto the back straight, so the exit matters far more than the apex speed. There is a slight crest at the entry, so make any lift in a straight line before it, take a late apex and use all the road out to the right as you add throttle. The mistake to avoid is charging the entry and wrecking the run down the straight.
From the survey: Table Top.
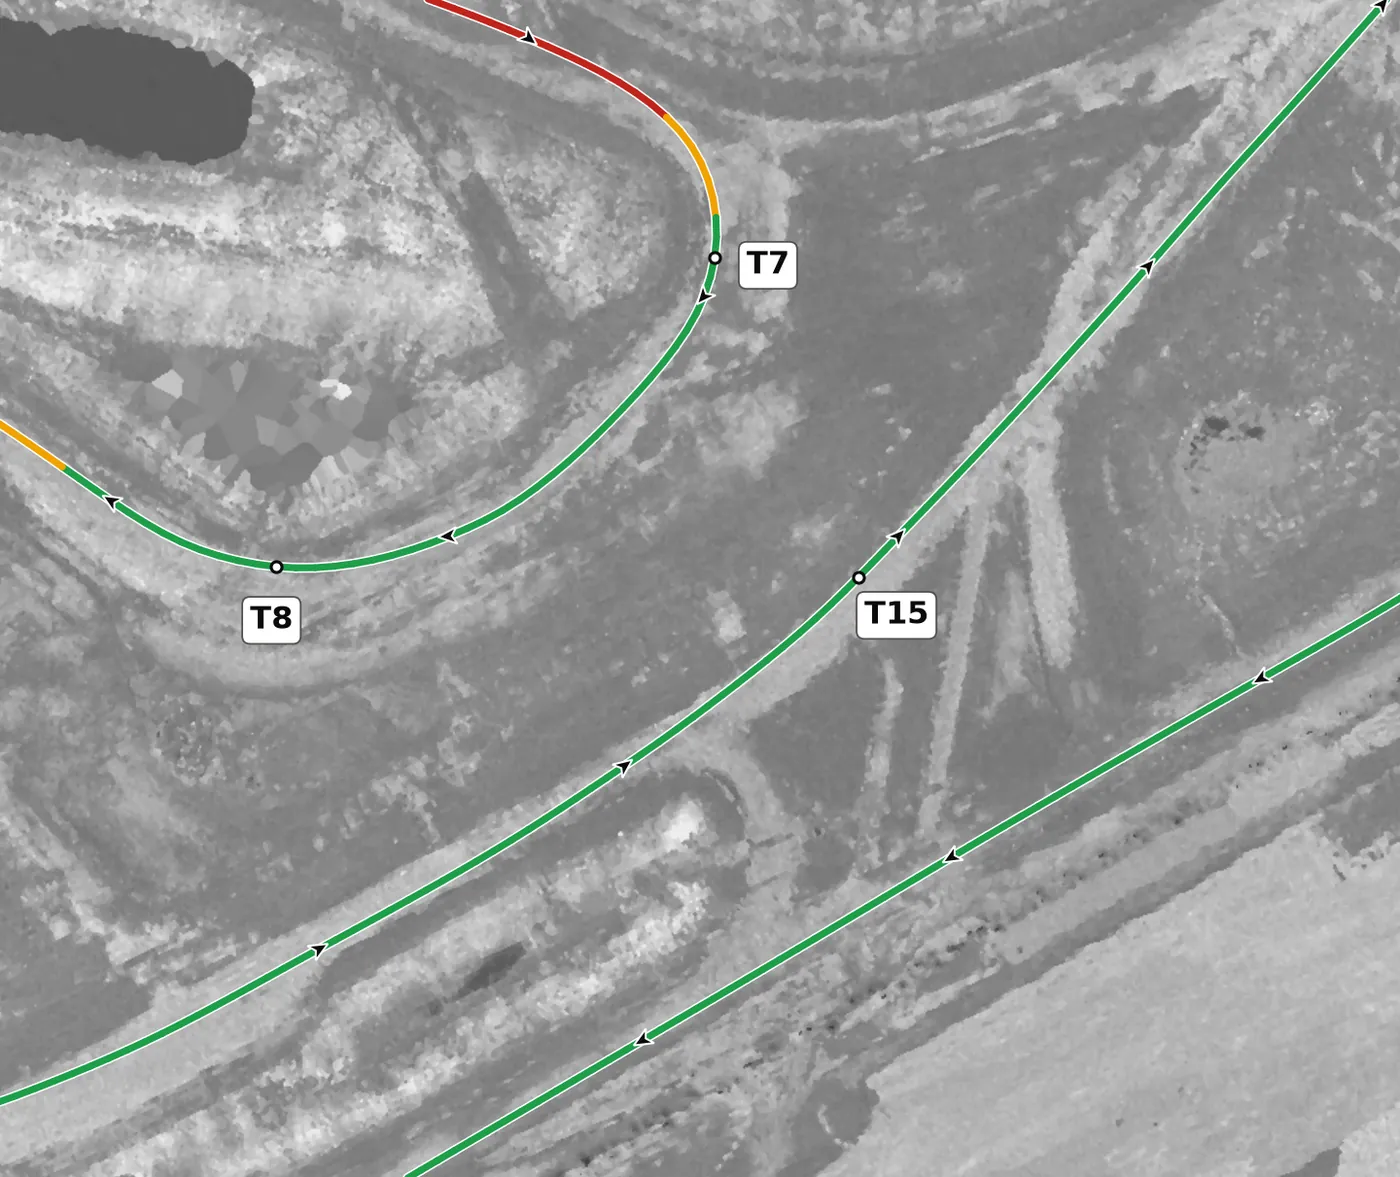
Faux Rouge is a fast left that climbs sharply, and the car goes lighter over the crest just after it than anywhere else on the lap. Set your line before the climb, keep the wheel steady over the top and let the car settle before you ask for more. The mistake to avoid is adding steering or lifting suddenly over the crest; if you are unsure, lift smoothly before the corner instead of in it.
From the survey: Faux Rouge: a +4.6% climb, then the lap's strongest crest just after the corner.
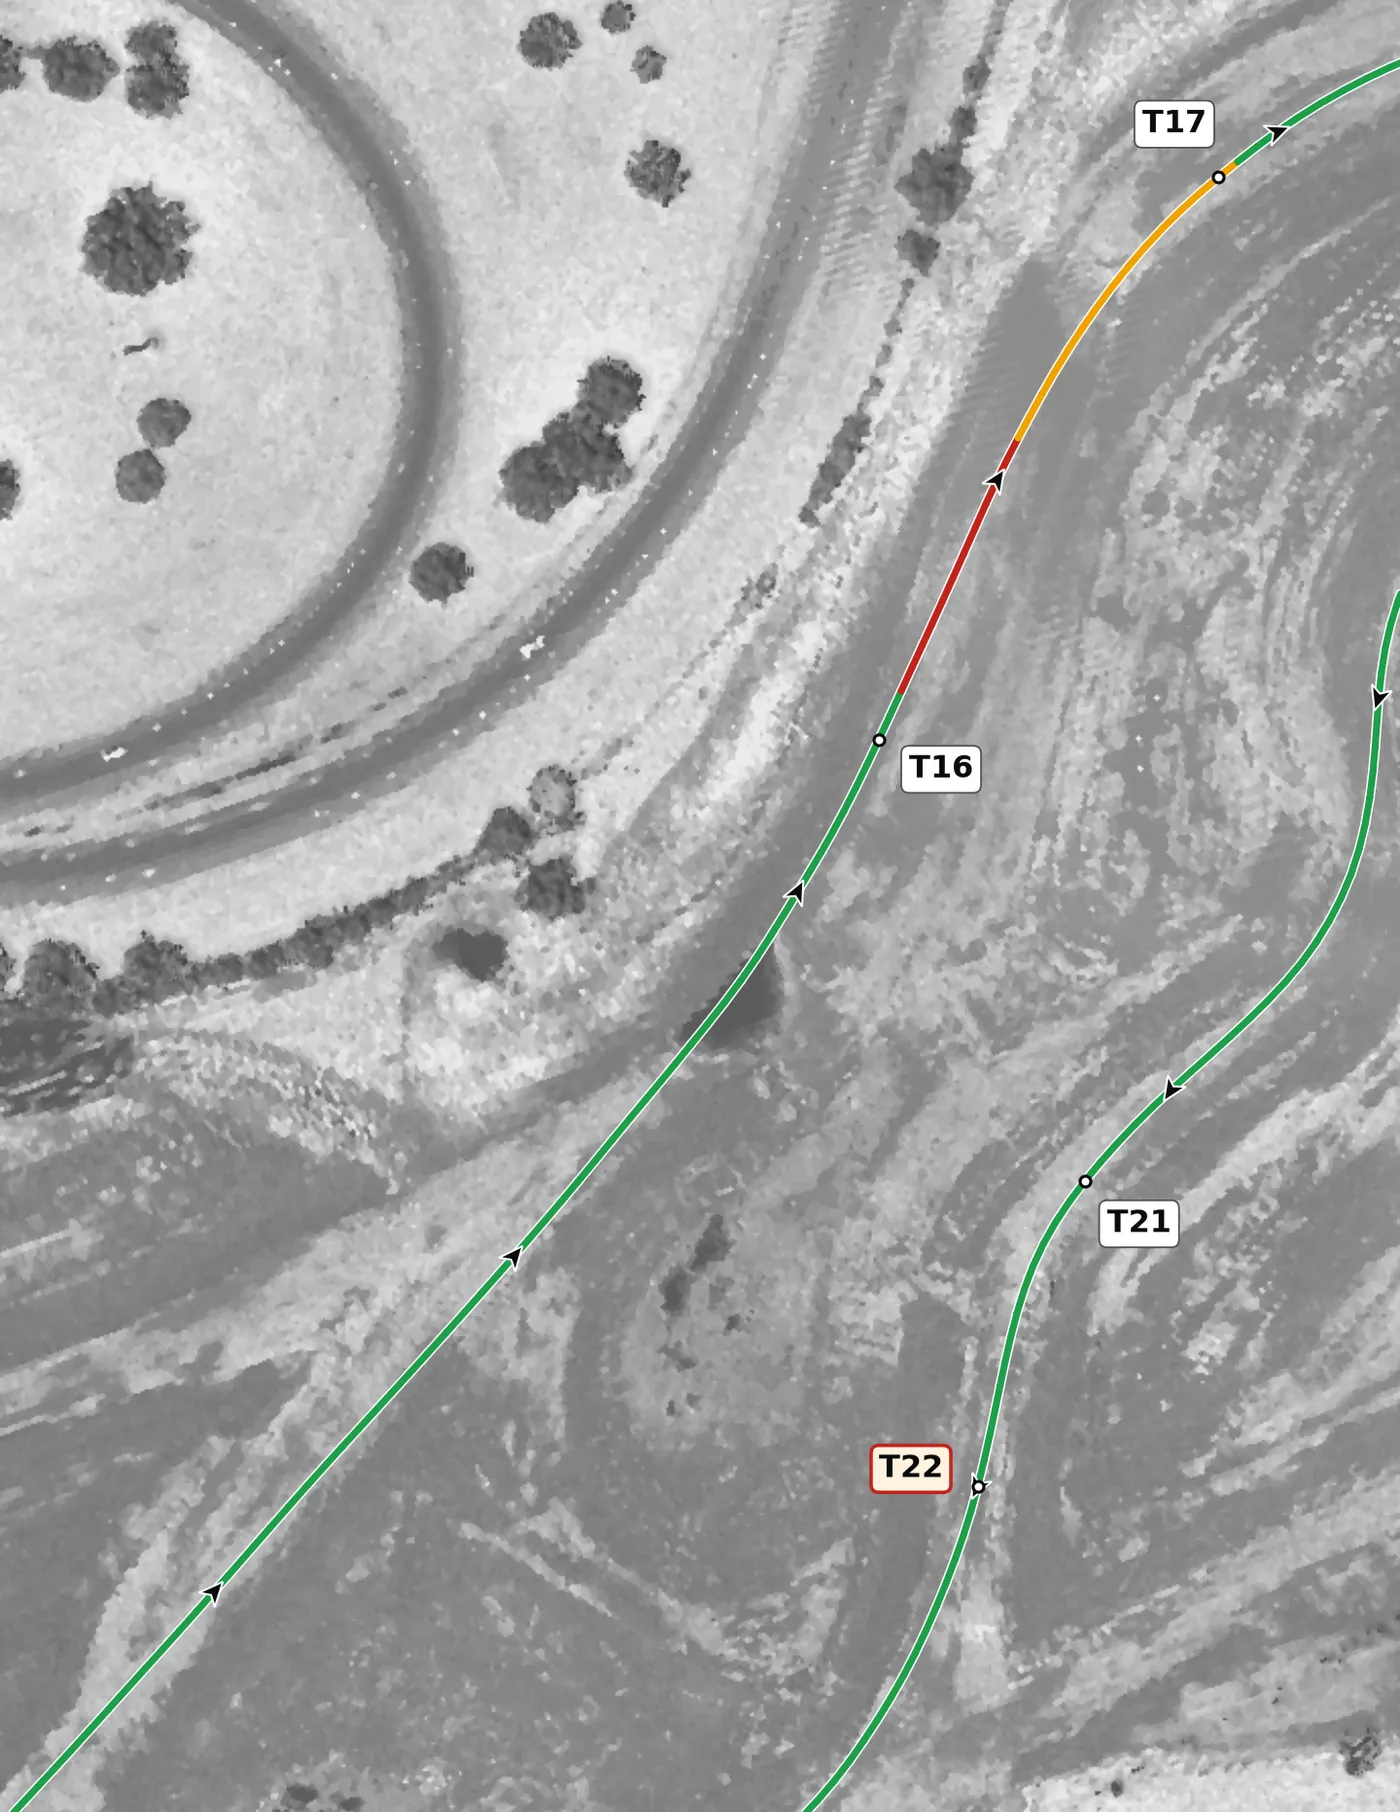
T16 is a left that is still climbing, with light camber and a compression that loads the car. Brake in a straight line, then make a quick, smooth direction change while the car is loaded and track out to the right. The mistake to avoid is a rushed, jerky turn-in that unsettles the car in the compression.
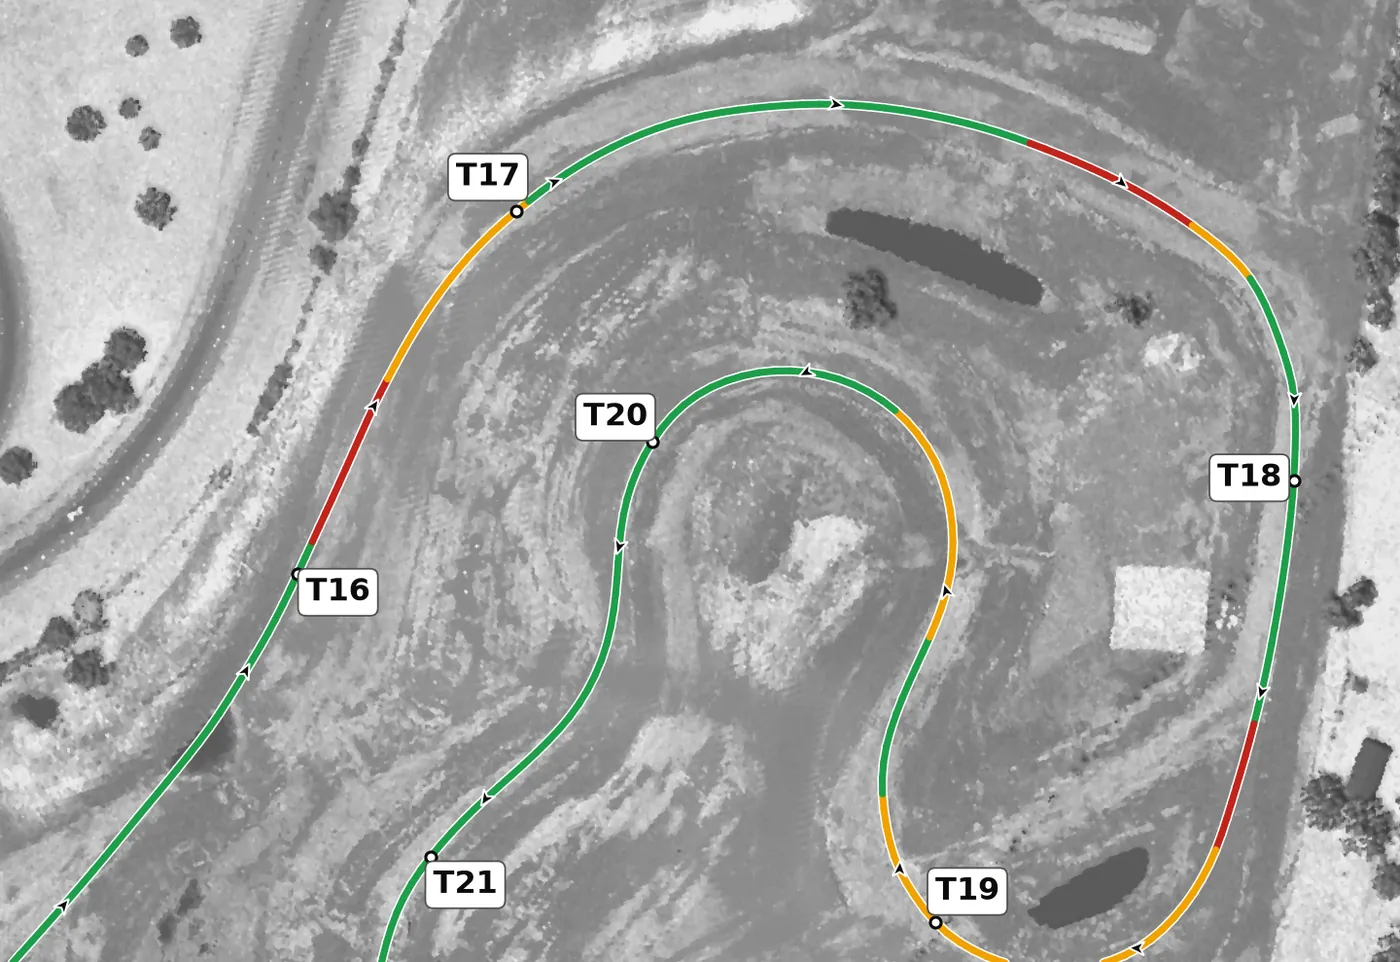
Rockhouse is a well-cambered right near the highest ground of the circuit, with an exit that falls away downhill. Turn in smoothly, take a mid-to-late apex and expect the grip to fade a little as the road drops on the exit, so ease in the throttle. The mistake to avoid is too much throttle on the falling exit, which runs you wide.
From the survey: Rockhouse.
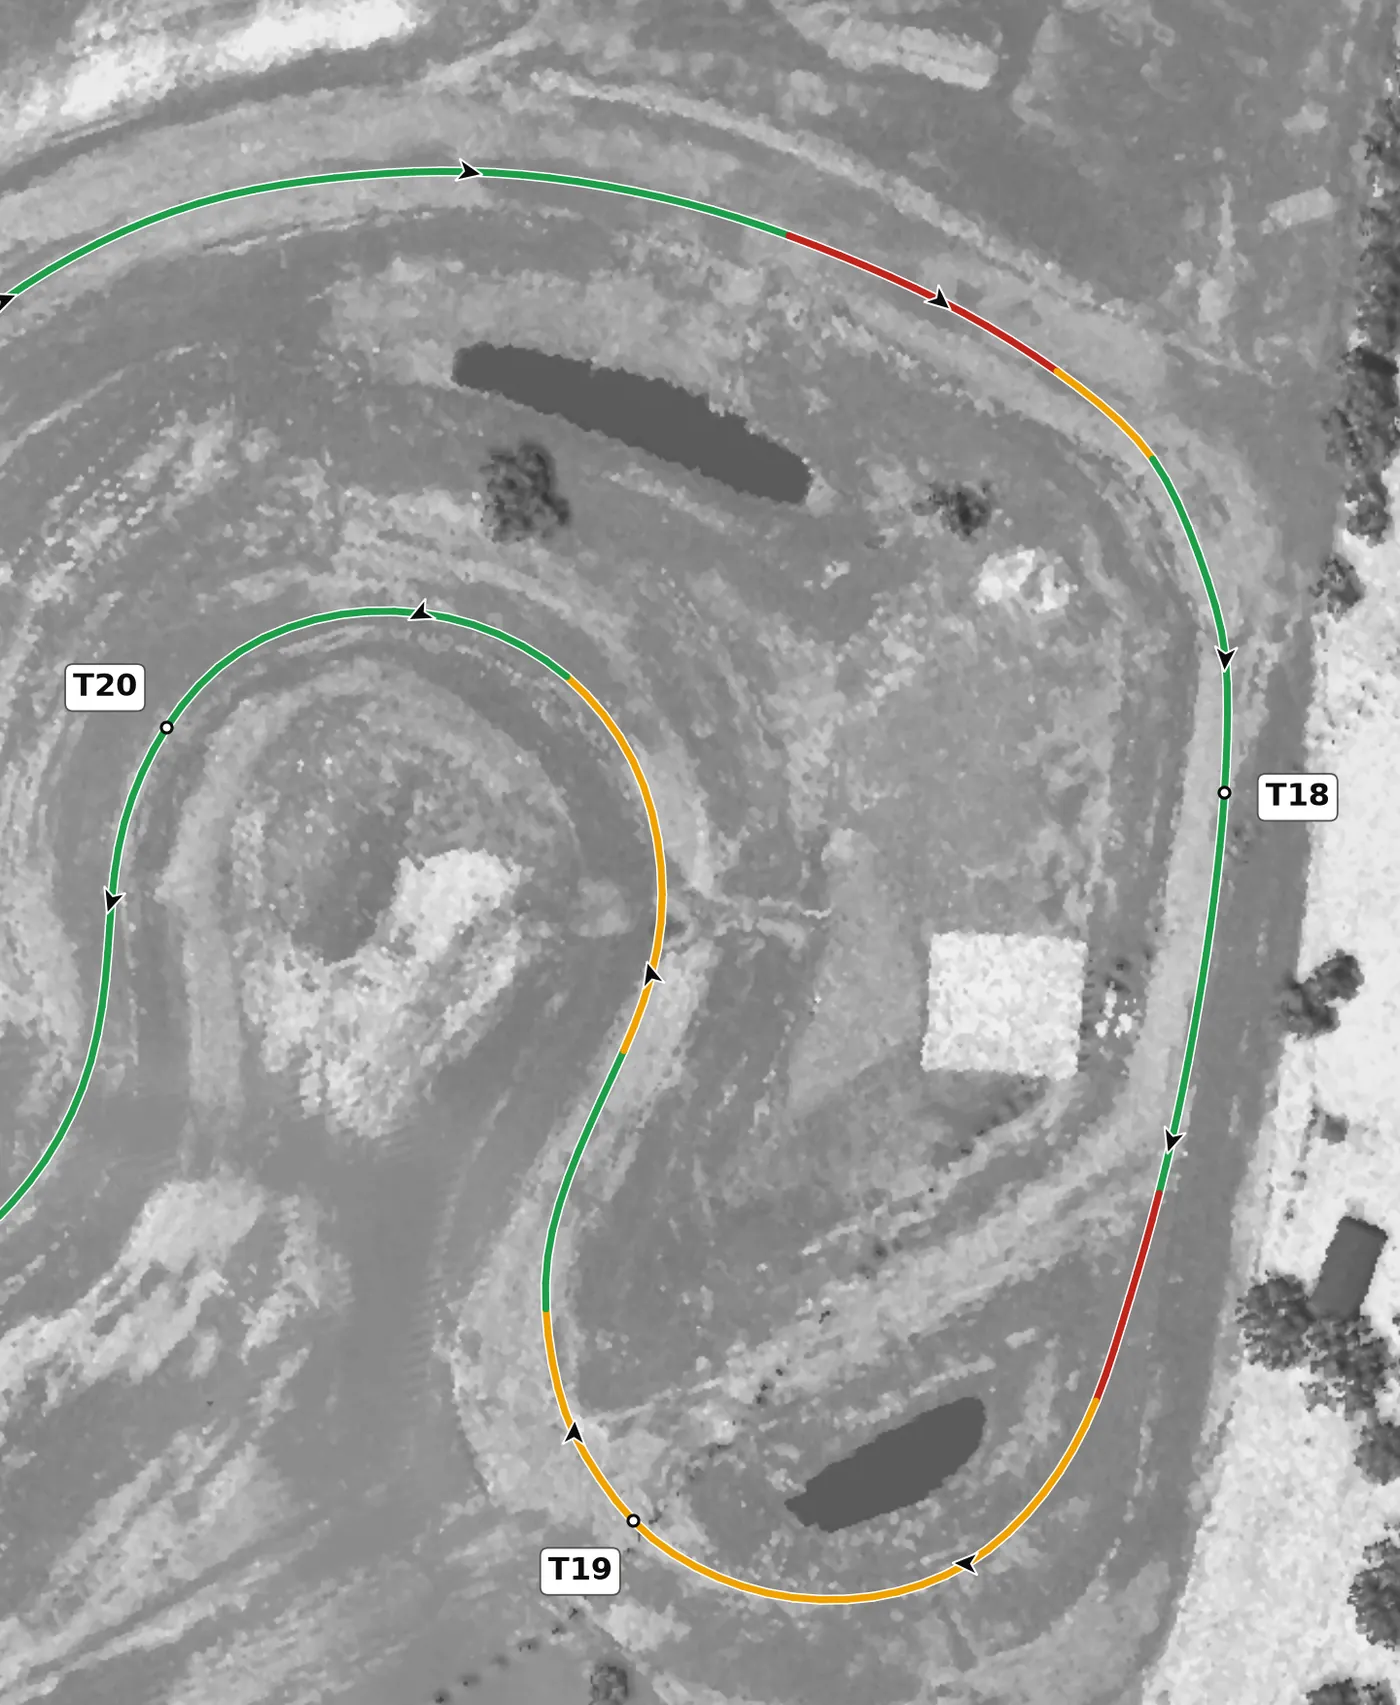
T18 is a right at the highest point of the lap and the most consistently cambered corner, so you can lean on it with confidence. Keep the exit tidy and don't run out to the edge, because the Sinkhole follows immediately and you want the car straight and settled before the crest. The mistake to avoid is carrying speed out of T18 that you then have to scrub off over the blind crest.
From the survey: The highest point on the lap, and the most consistently cambered corner.
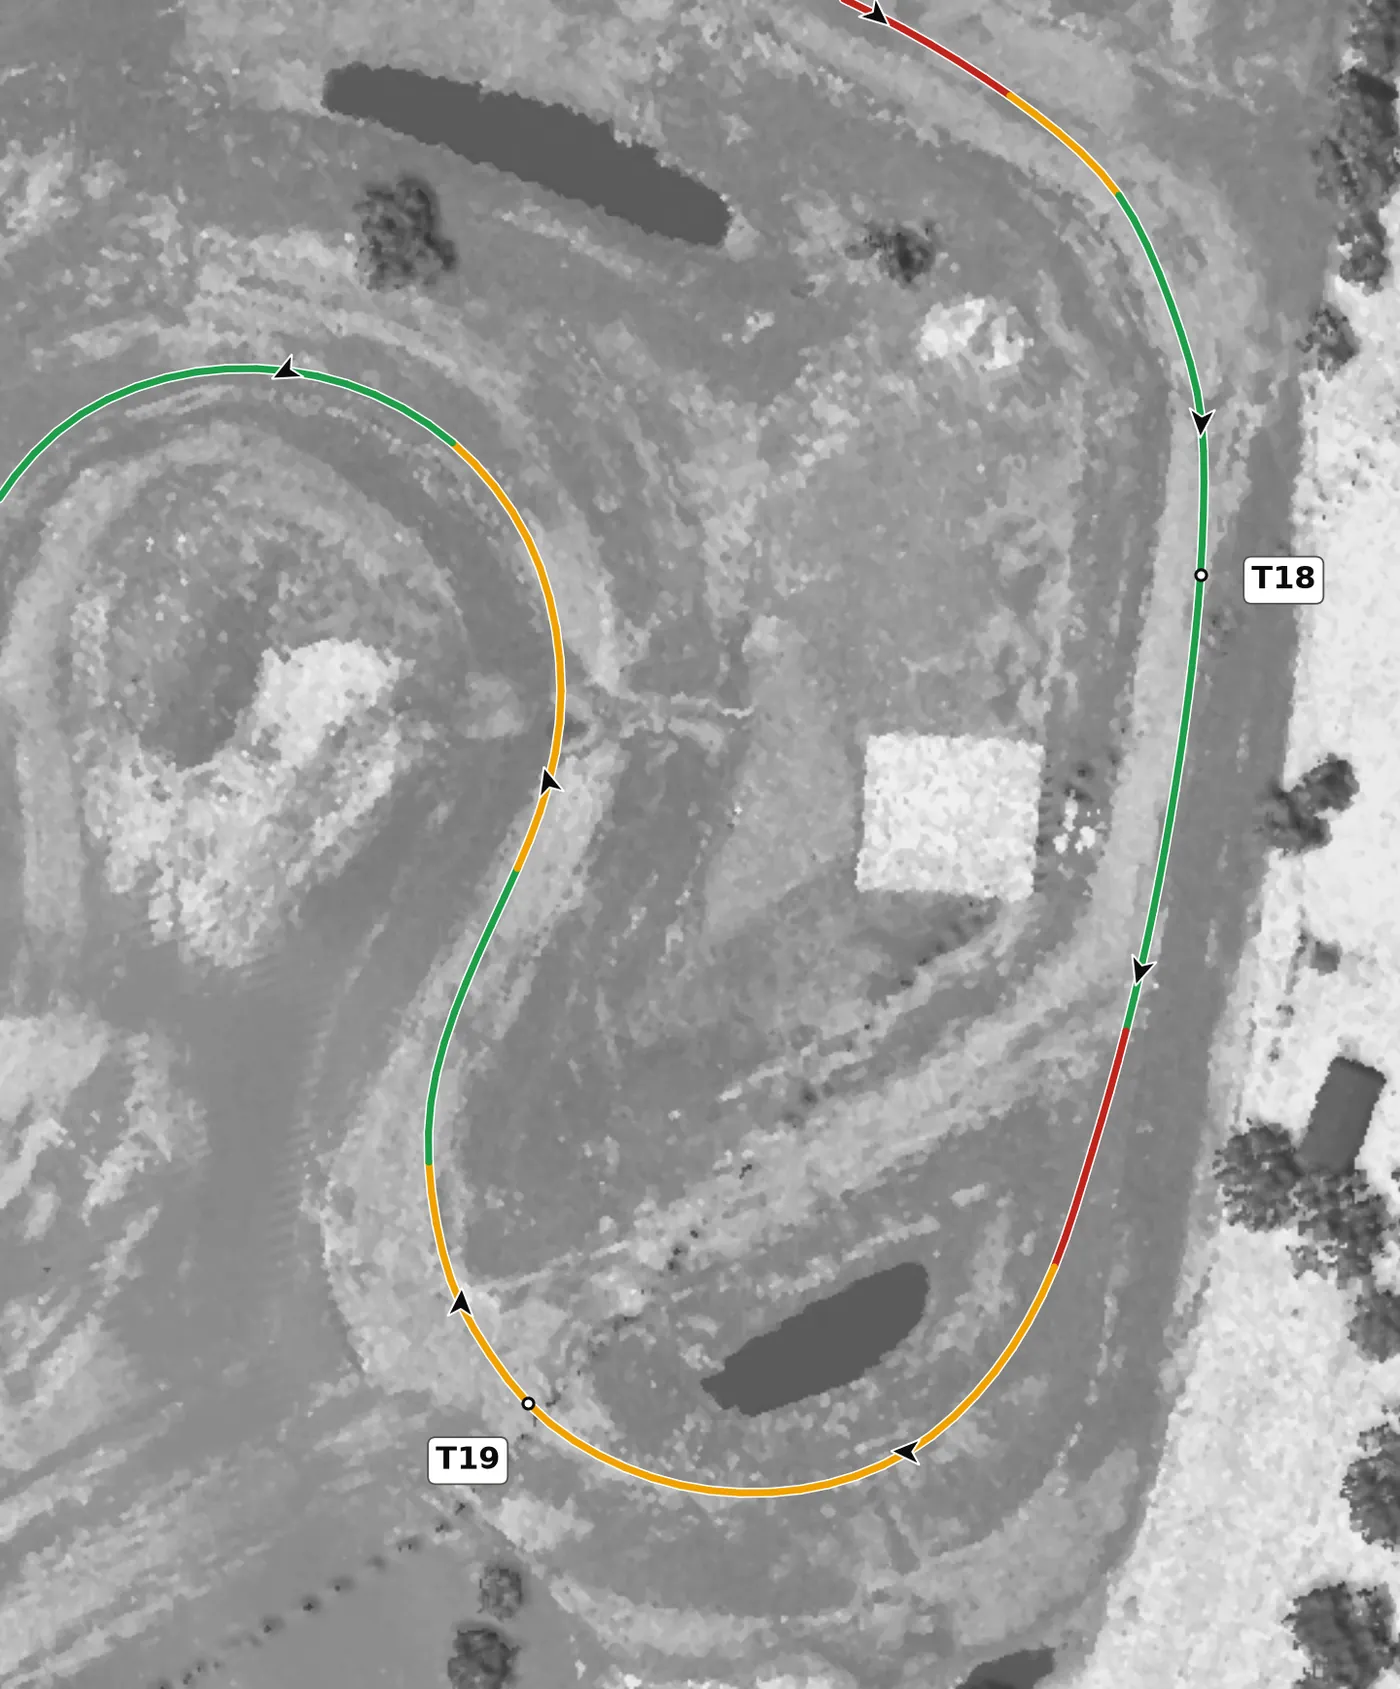
T19 is a right that tips over a blind crest into the steepest drop on the circuit and down into the compression at the bottom of the Sinkhole. Finish your braking in a straight line before the crest, keep a light, steady throttle as the car goes light, and let the compression load it before you ask for more. The mistake to avoid is braking or turning hard on the crest itself; anything you have left at the bottom is spent on the compression.
From the survey: A crest, then a −13.5% drop to the lowest point on the circuit.
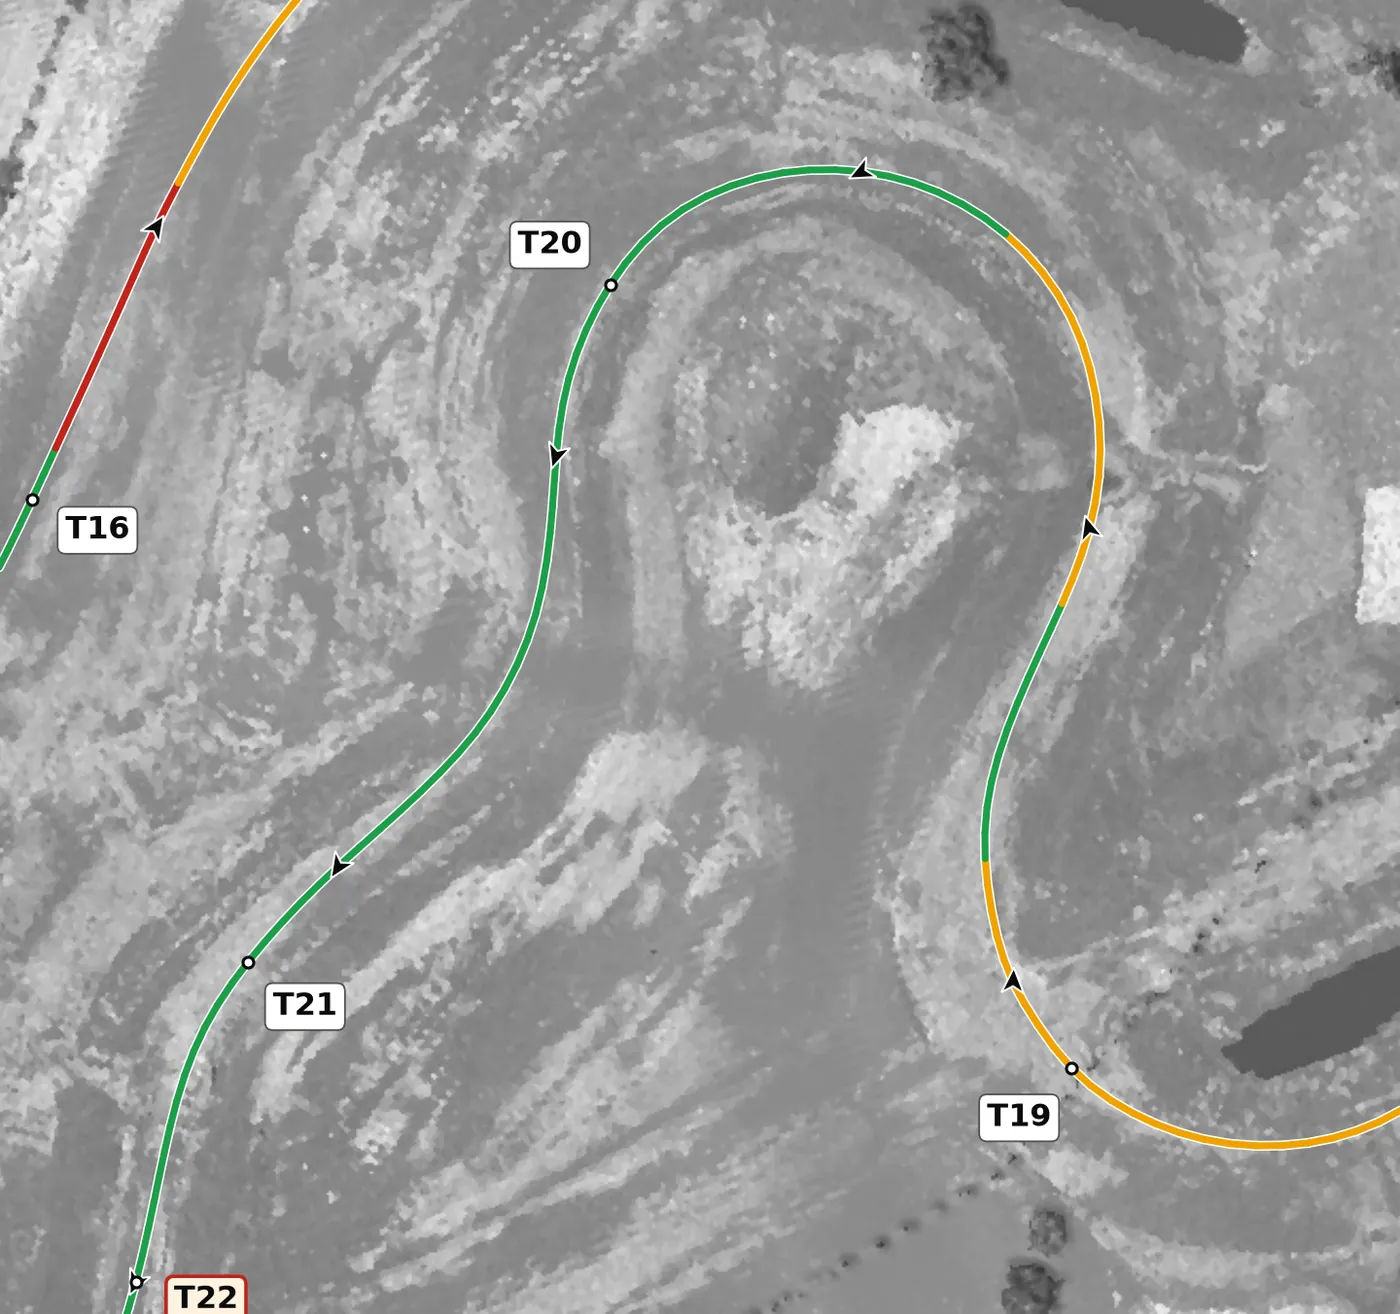
T20 is the left that climbs out of the bottom of the Sinkhole on a steep slope, and the camber helps you here. Let the car settle from the compression, turn in smoothly and then use the climb to get on the power, tracking out to the right. The mistake to avoid is turning in before the car has recovered from the compression, which upsets it on the way up.
From the survey: The Sinkhole: out of the compression at the bottom and up a +9.7% climb.
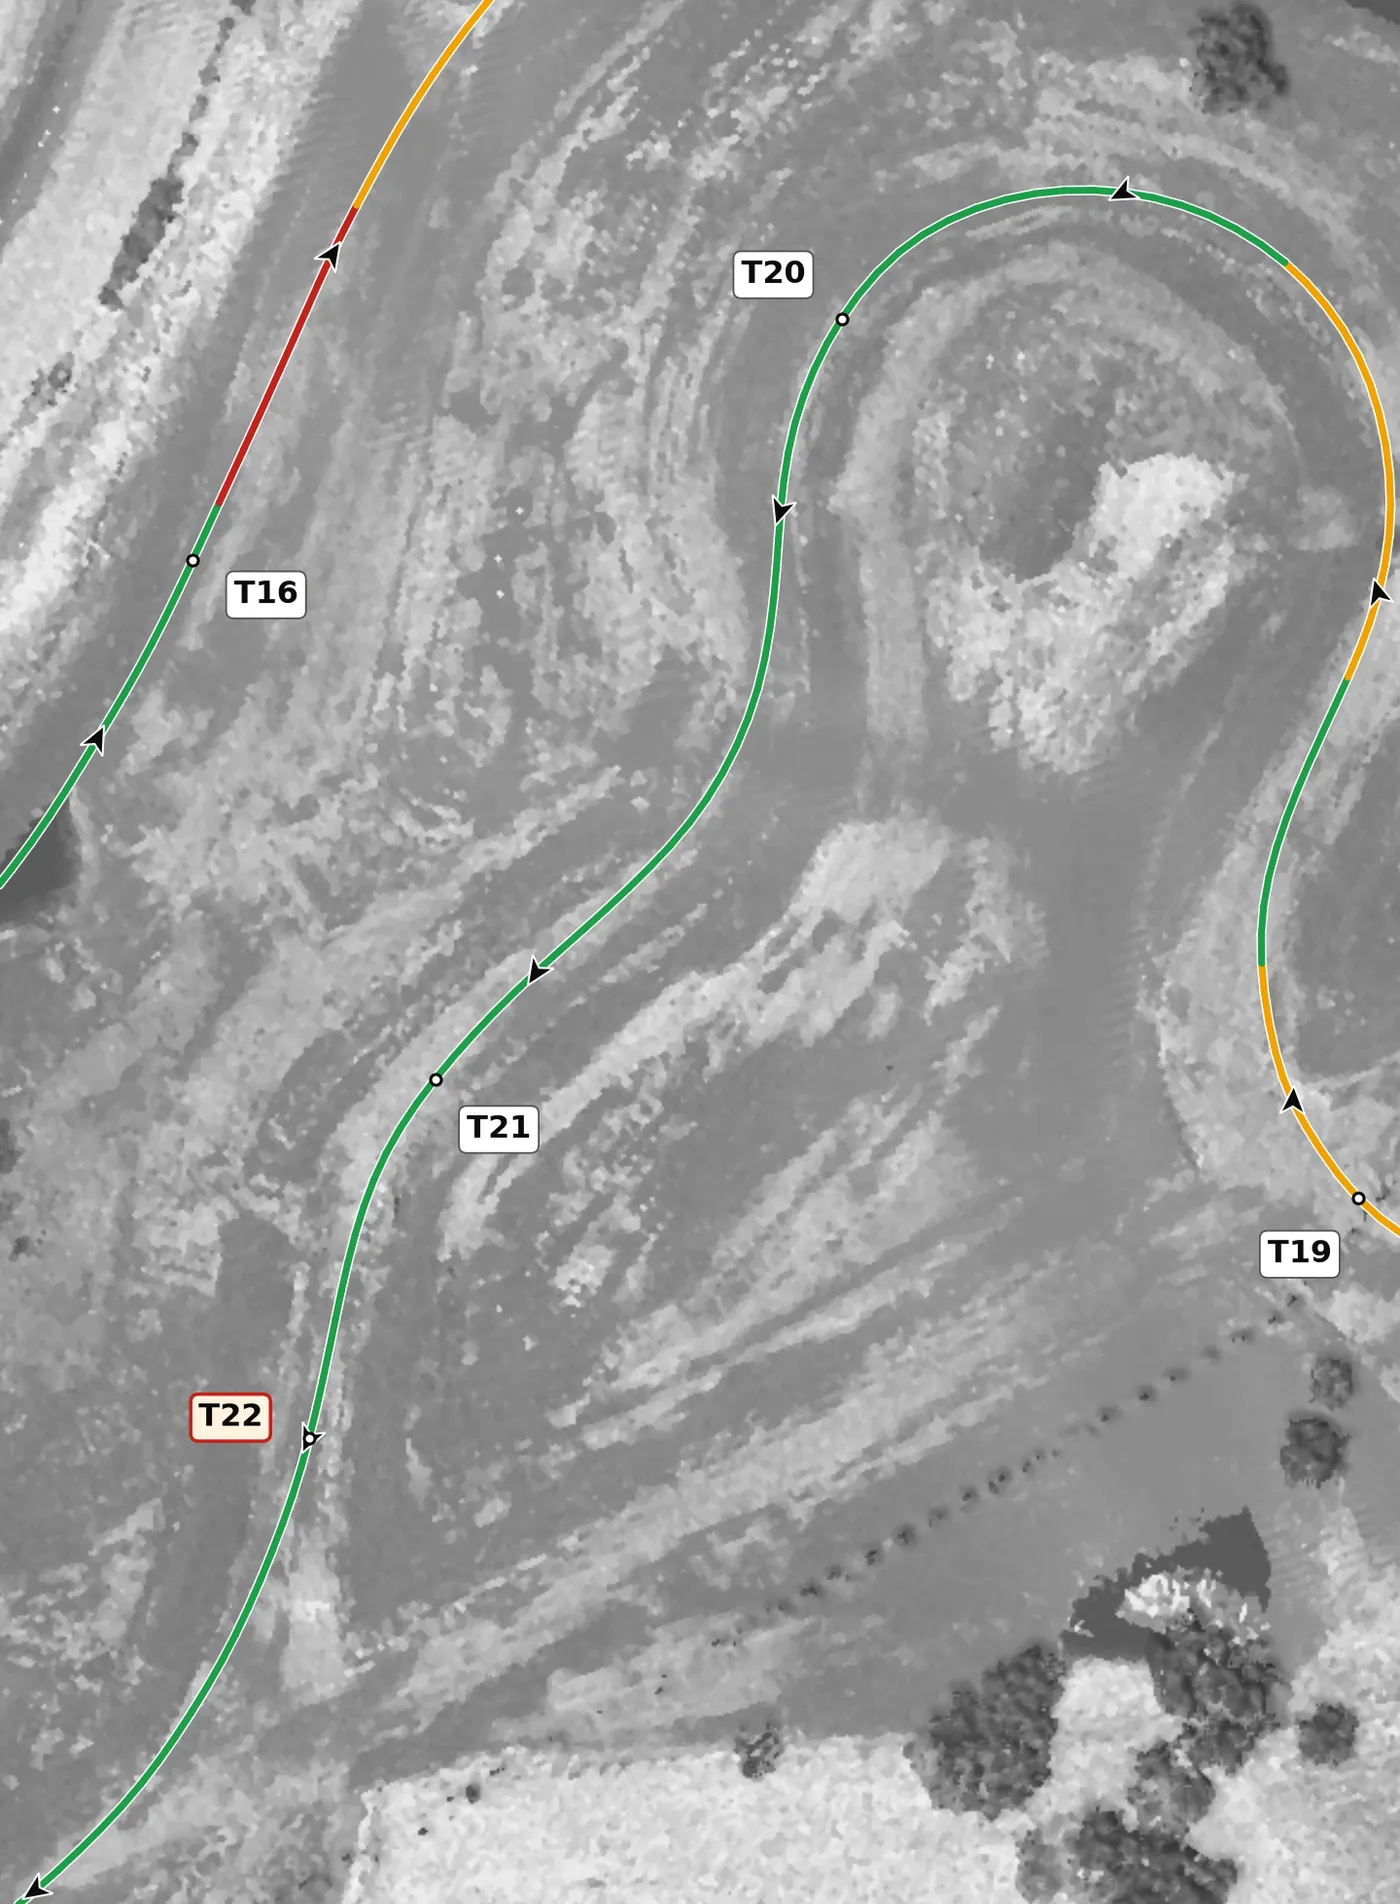
T21 is a right on a downhill run with no camber to help you. Take a smooth, middle-of-the-road line, keep your inputs gentle and keep the exit tight, because the left of T22 follows straight away. The mistake to avoid is overdriving it: on a flat surface going downhill, grip is limited.
From the survey: Almost no cross-slope (+0.03% at the apex).
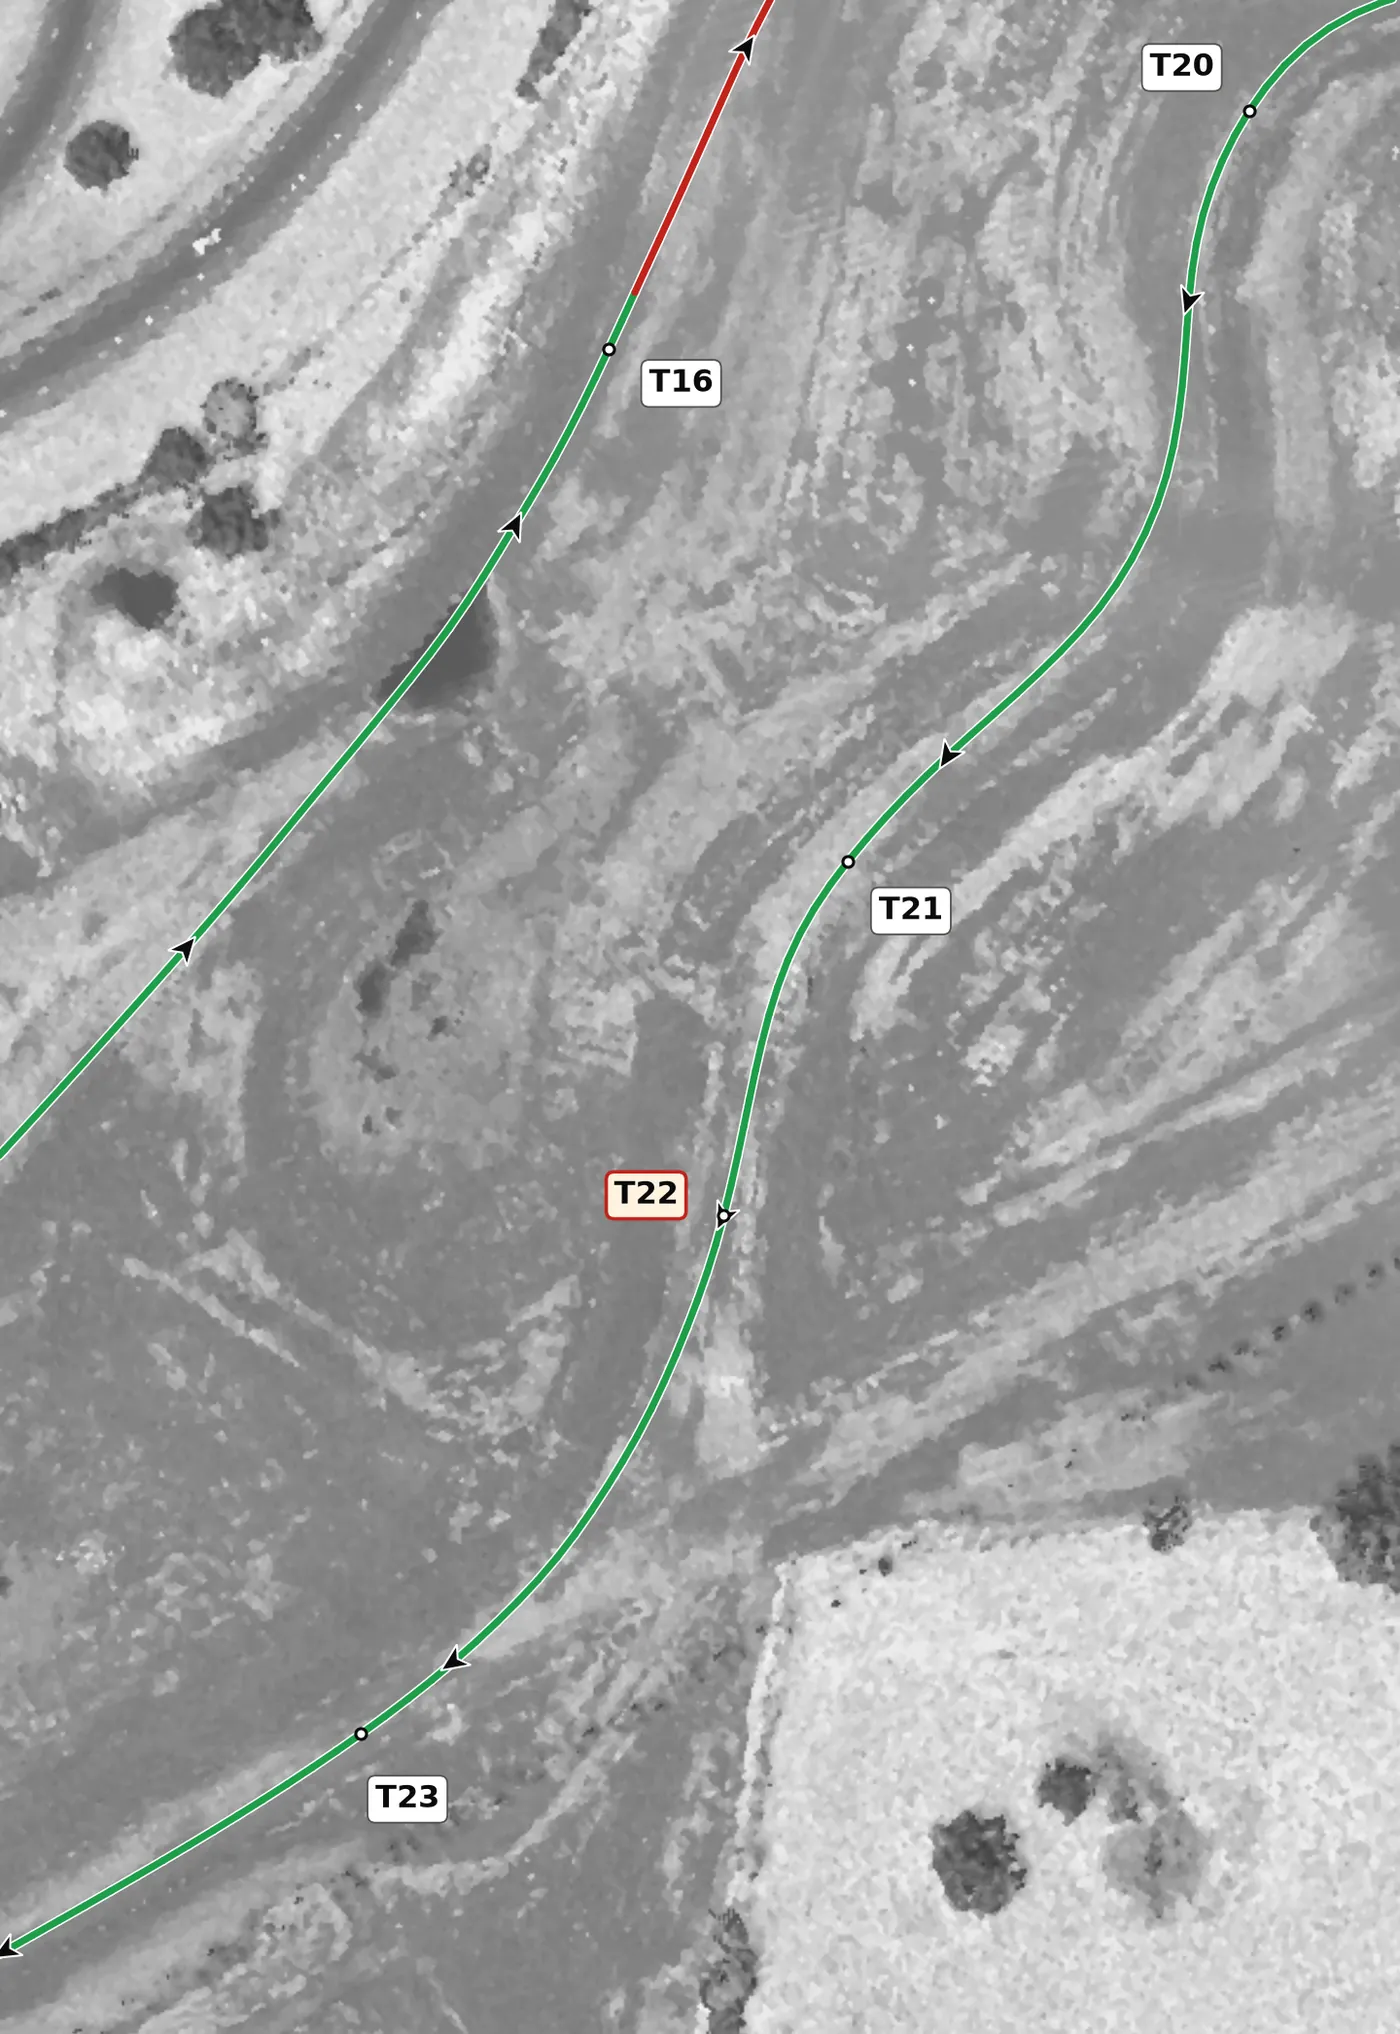
T22 is a left whose exit is off camber while the road climbs, the only stretch like it on the circuit. Turn in under control, keep the steering steady past the apex and don't add throttle until the wheel starts to come back straight. The mistake to avoid is unwinding early or adding power too soon, which drifts the car toward the outside on the part that falls away.
From the survey: The only off-camber stretch on the circuit, down to −2.3% on the exit.
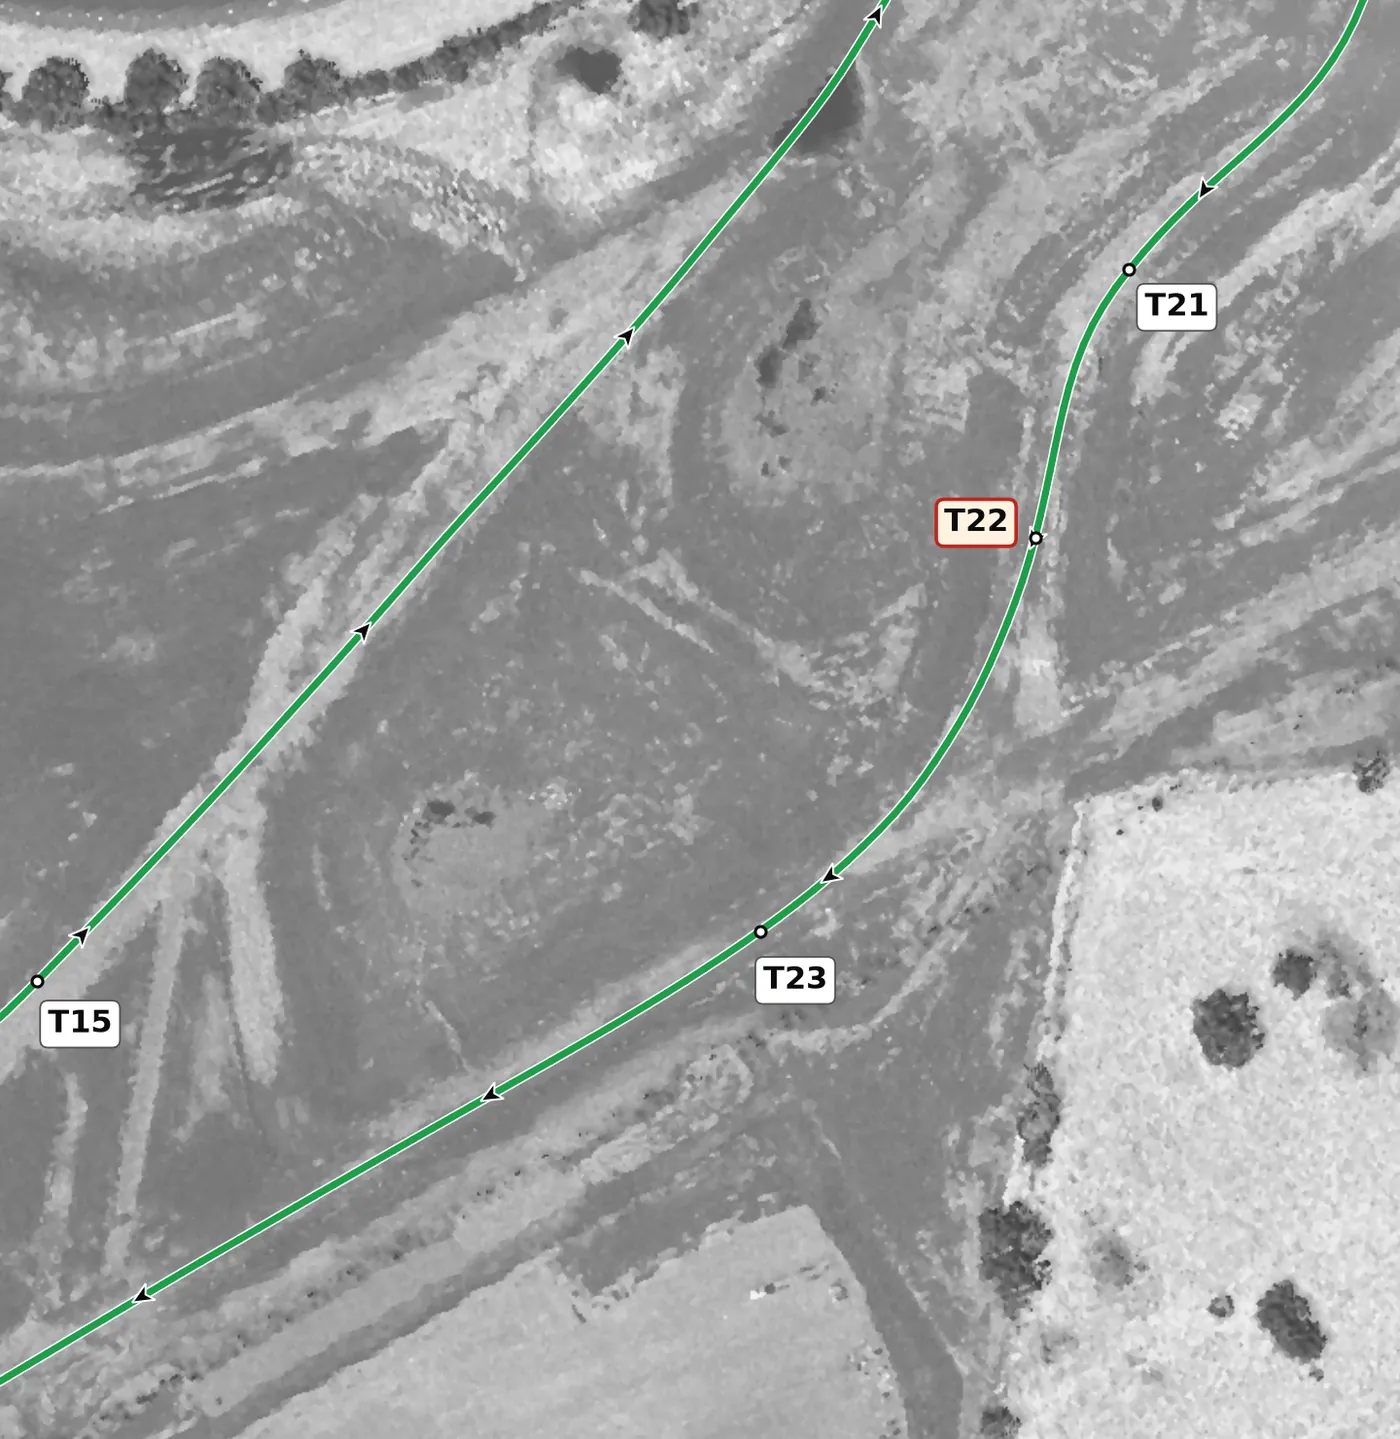
T23 is the right onto the front straight, cambered and downhill, so make this the best exit of your lap. Take a late apex and use all of the road out to the left as you open the throttle. The mistake to avoid is an early apex that forces a lift on the exit and costs you all the way down the straight.
Version history
- v1.2 · 2026-10-01 — T8 is now drawn as throttle from turn-in: the car gains speed through it, so it is not a lift.
- v1.1 · 2026-10-01 — Speeds and braking points rebuilt from cars at a typical quick HPDE pace, with each brake zone placed where the braking actually starts. Braking now starts later at T1A (about 20 m), T6 (45 m) and T11 (25 m), and within 10 m elsewhere; T1B, T9, T13 and T16 no longer show a separate brake zone. The line now goes straight from throttle to brake, with no coasting in between. Version history and feedback contributors added.
- v1.0 · 2026-10-01 — First version.
Feedback contributors
Drivers and instructors whose feedback has improved this line. Thank you.
- Mike M — no coasting between throttle and brake; braking points (v1.1)
- Brian L — corners where the car gains speed are throttle, not a lift (v1.2)