Pitt Race — Race Line
Estimated from data not in trackdays.ai. The line, speeds and braking points come from cars lapping at a typical quick HPDE pace, cross-checked against published brake markers. If you have data you would like to contribute, please send it to upload@trackdays.ai to help improve our estimates. Turn numbers are Chin's 19, inferred from the geometry; the venue has renumbered before, so treat them as a guide.
Heads up: This is an estimate of a typical quick HPDE line, not any one car's lap. Braking points are a starting point, not a target: start a little earlier and work later in small steps. The line goes straight from throttle to brake; amber only marks where you really lift or hold part throttle. Pitt Race closed after the 2025 season, so this is a record of the full course as it was last raced.
- Throttle
- Coast / partial
- Braking
- Apex
- T4Off-camber corner
Arrows show the direction of the lap. The grey basemap is USGS LiDAR: dark = asphalt, light = grass. Tap any map for the full-size image.
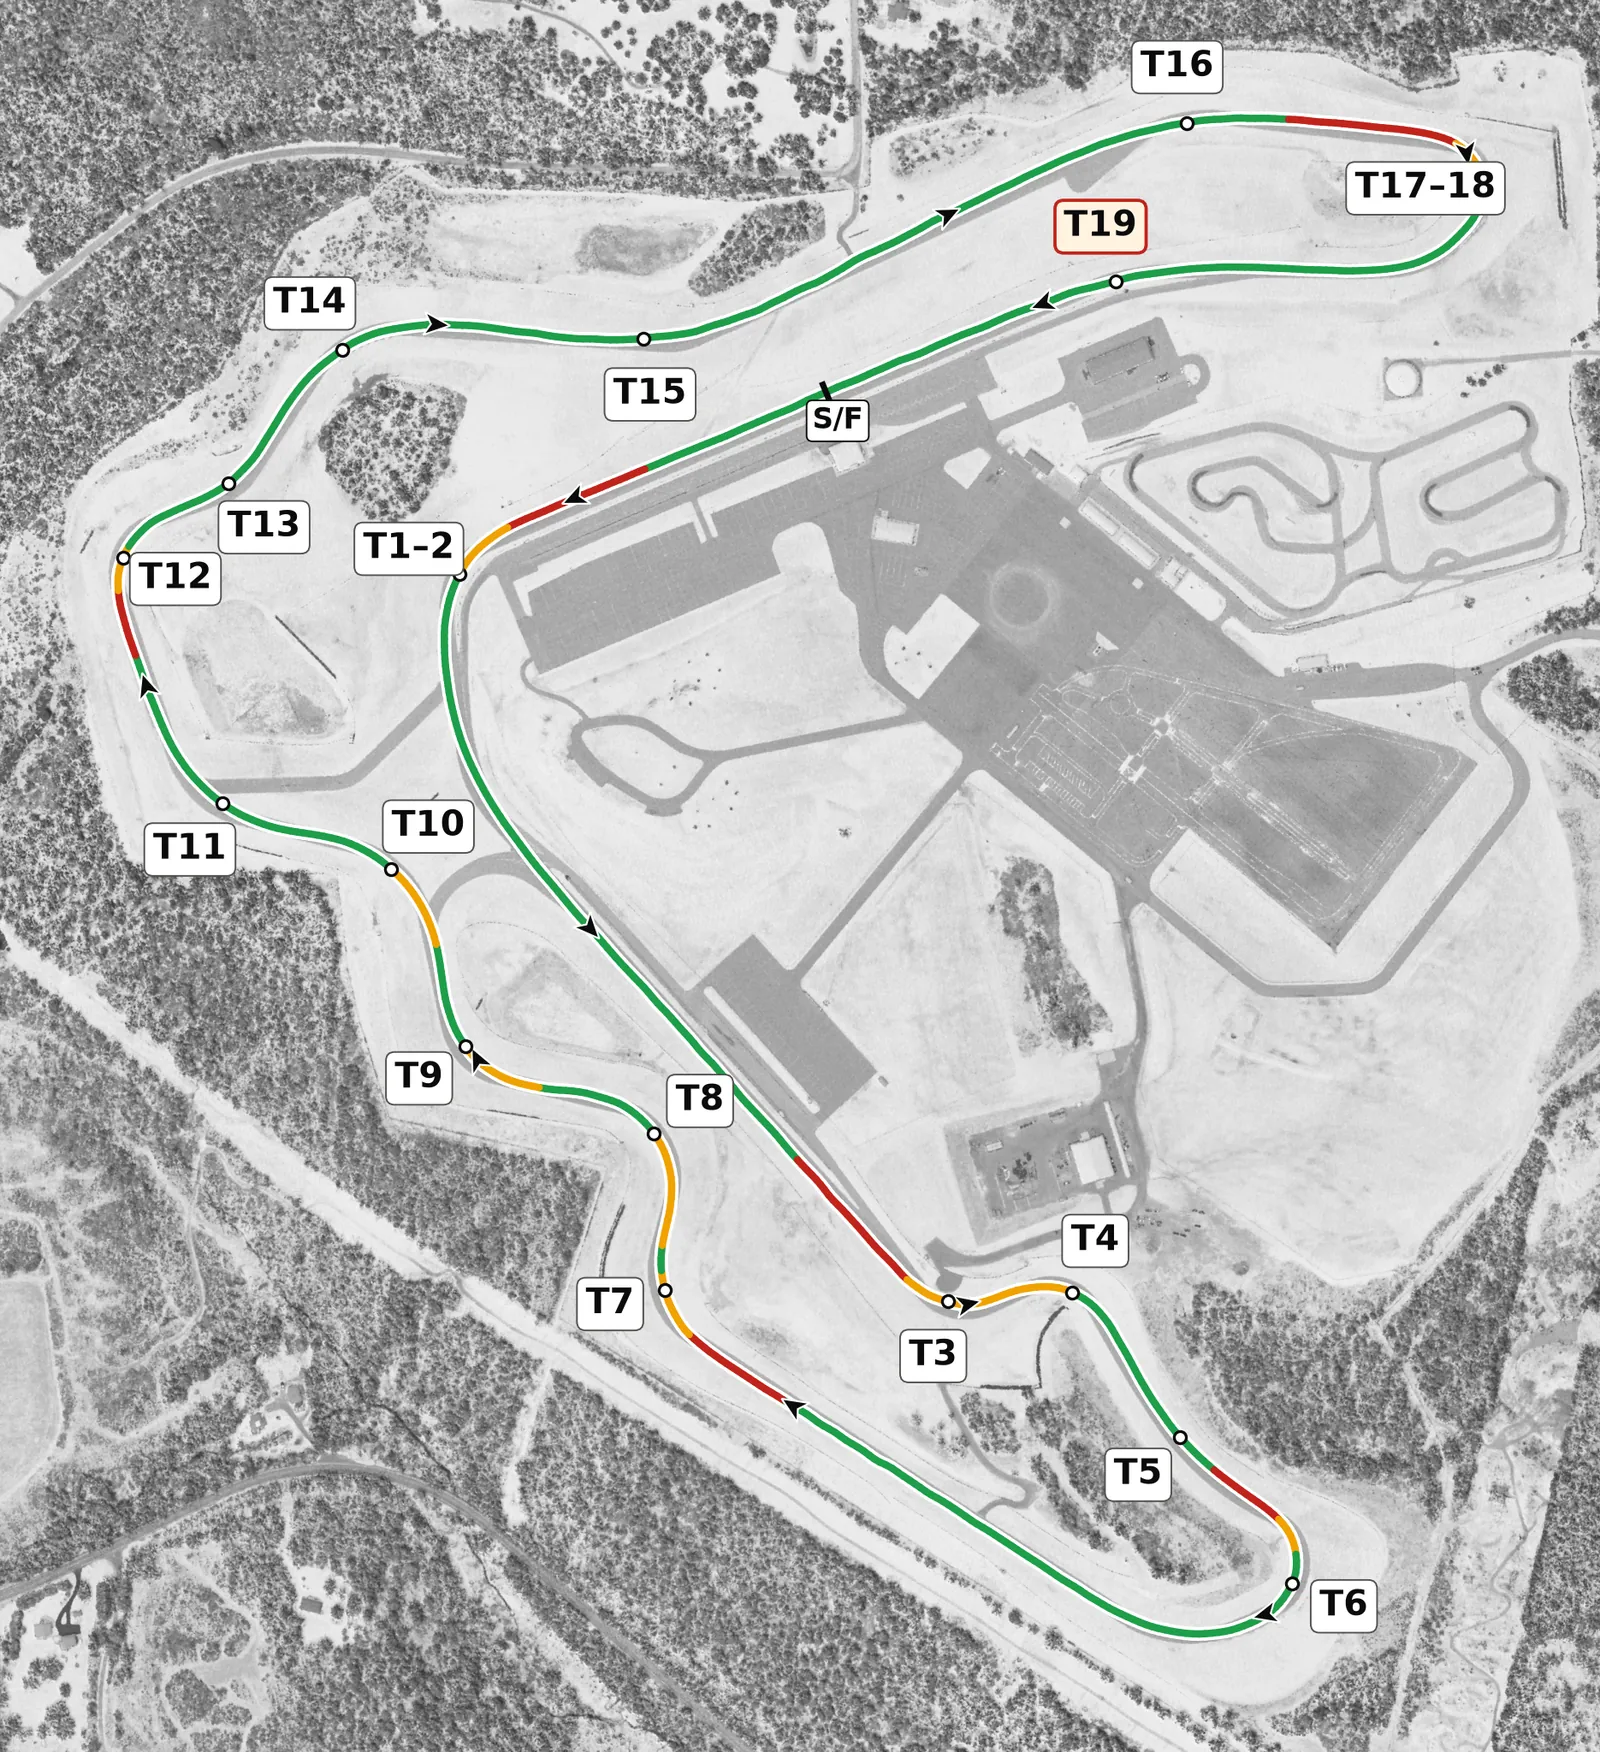
Pitt Race's full course was a hilly, clockwise circuit with big elevation changes, a steep plunge to a hairpin at the bottom of the site, a long climb back up through the esses and a blind crest onto the back straight. The turn numbers are Chin's, inferred from the geometry, and the venue has renumbered before, so match advice to corners by what they are rather than by number. Lap time came from the exits that feed long climbs and straights, the T6 hairpin, T14 and the T17–T18 arc, and the safest approach is to brake before the steep drops and blind crests rather than on them.
Sectors
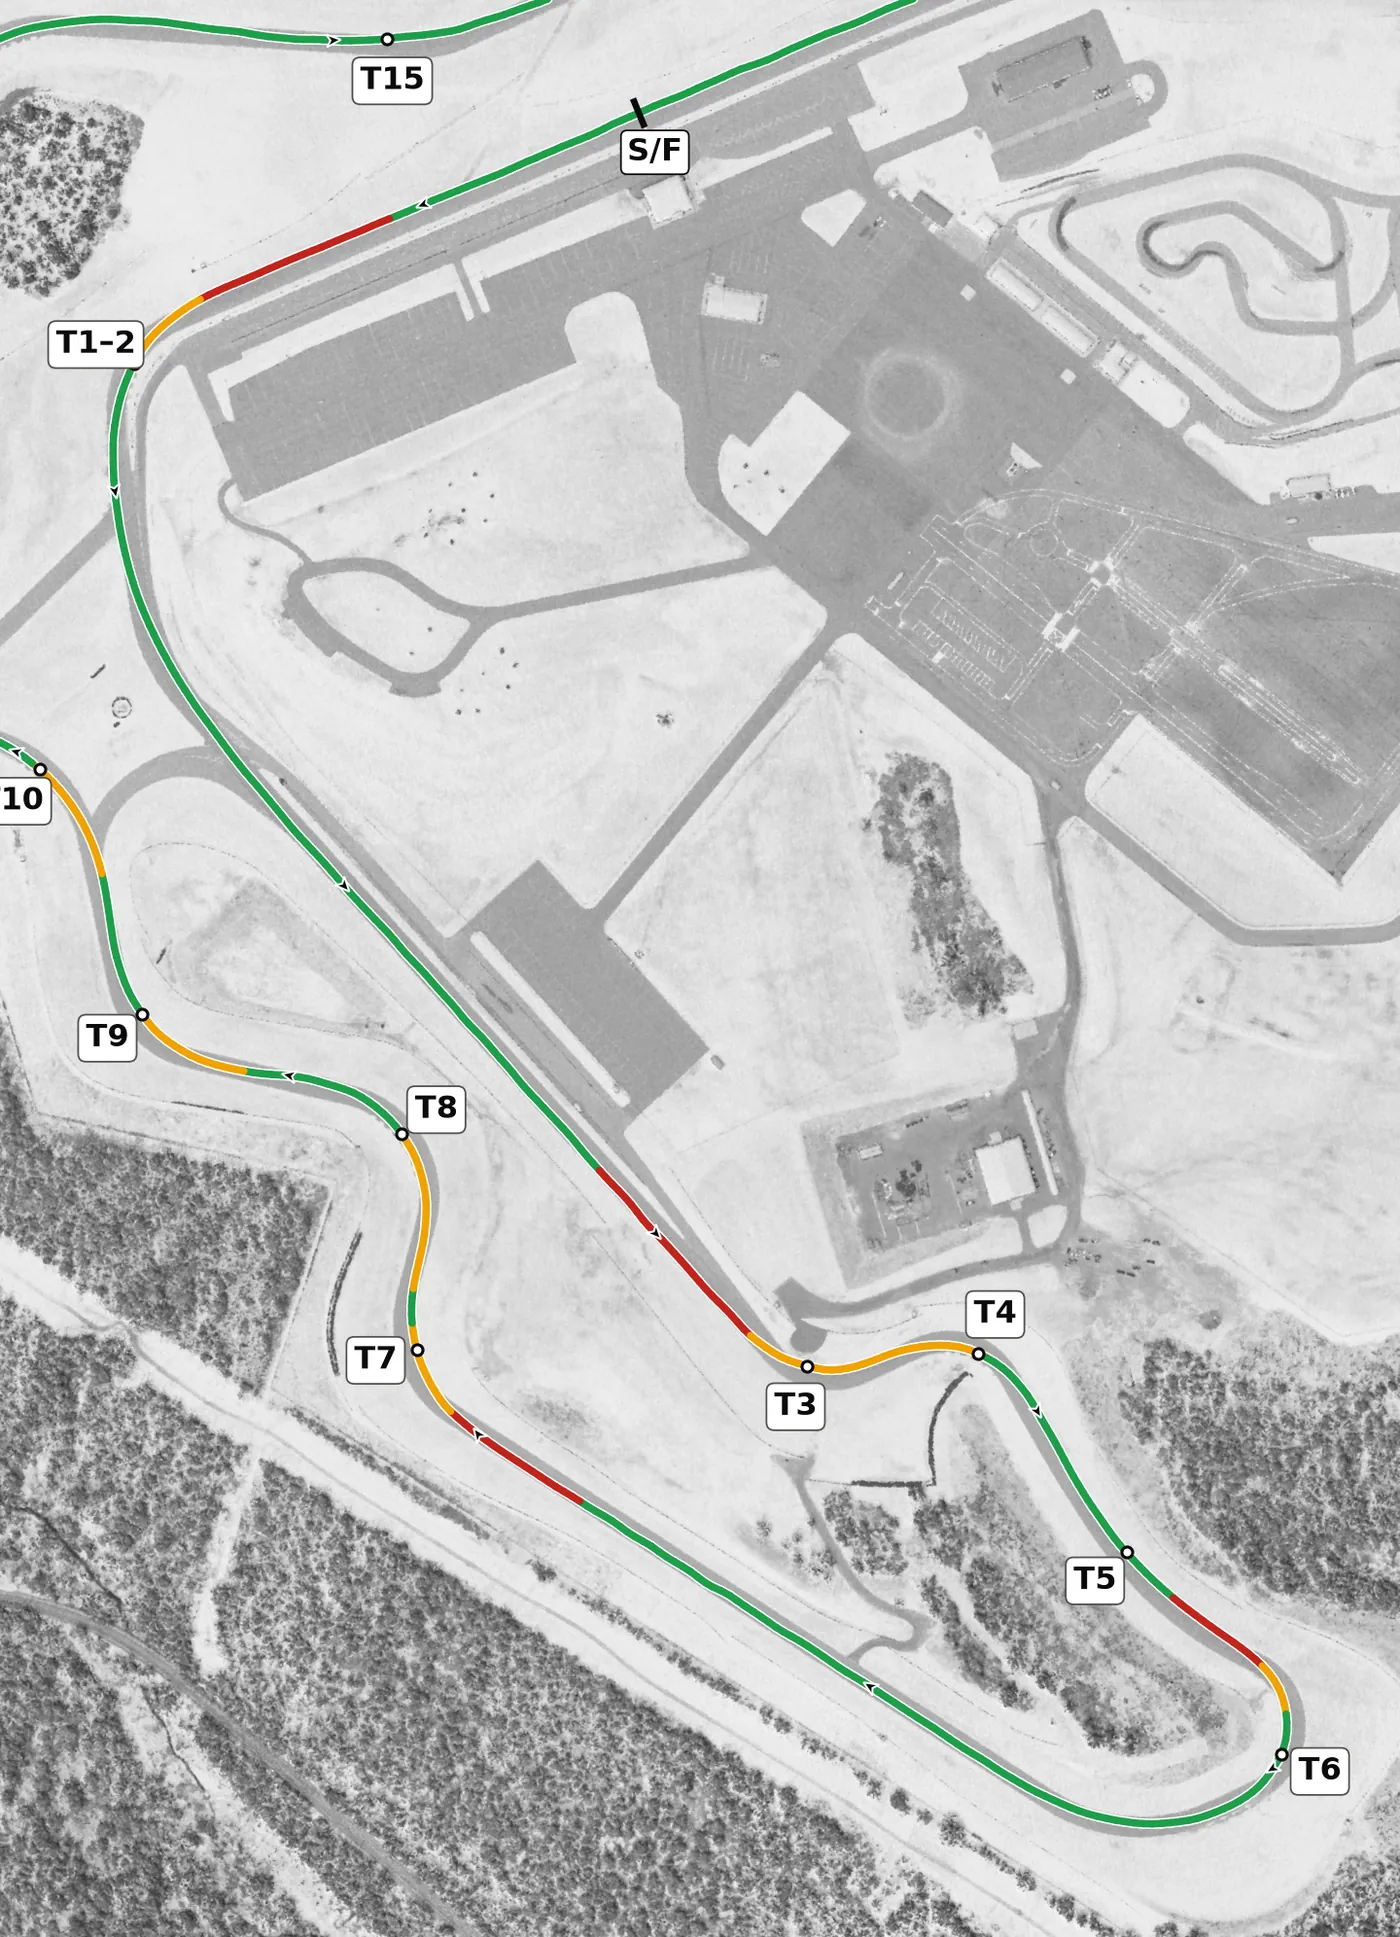
The lap opens with a long left (T1–T2) that dips and climbs, followed by a long straight and then the big descent: T3, T4 and T5 tip downhill in quick succession, much like a corkscrew, and end at the hairpin at T6, the lowest point on the lap. Brake before each drop while the car is settled, keep it balanced as it goes light, and then give everything to the exit of T6, where the road climbs steeply.
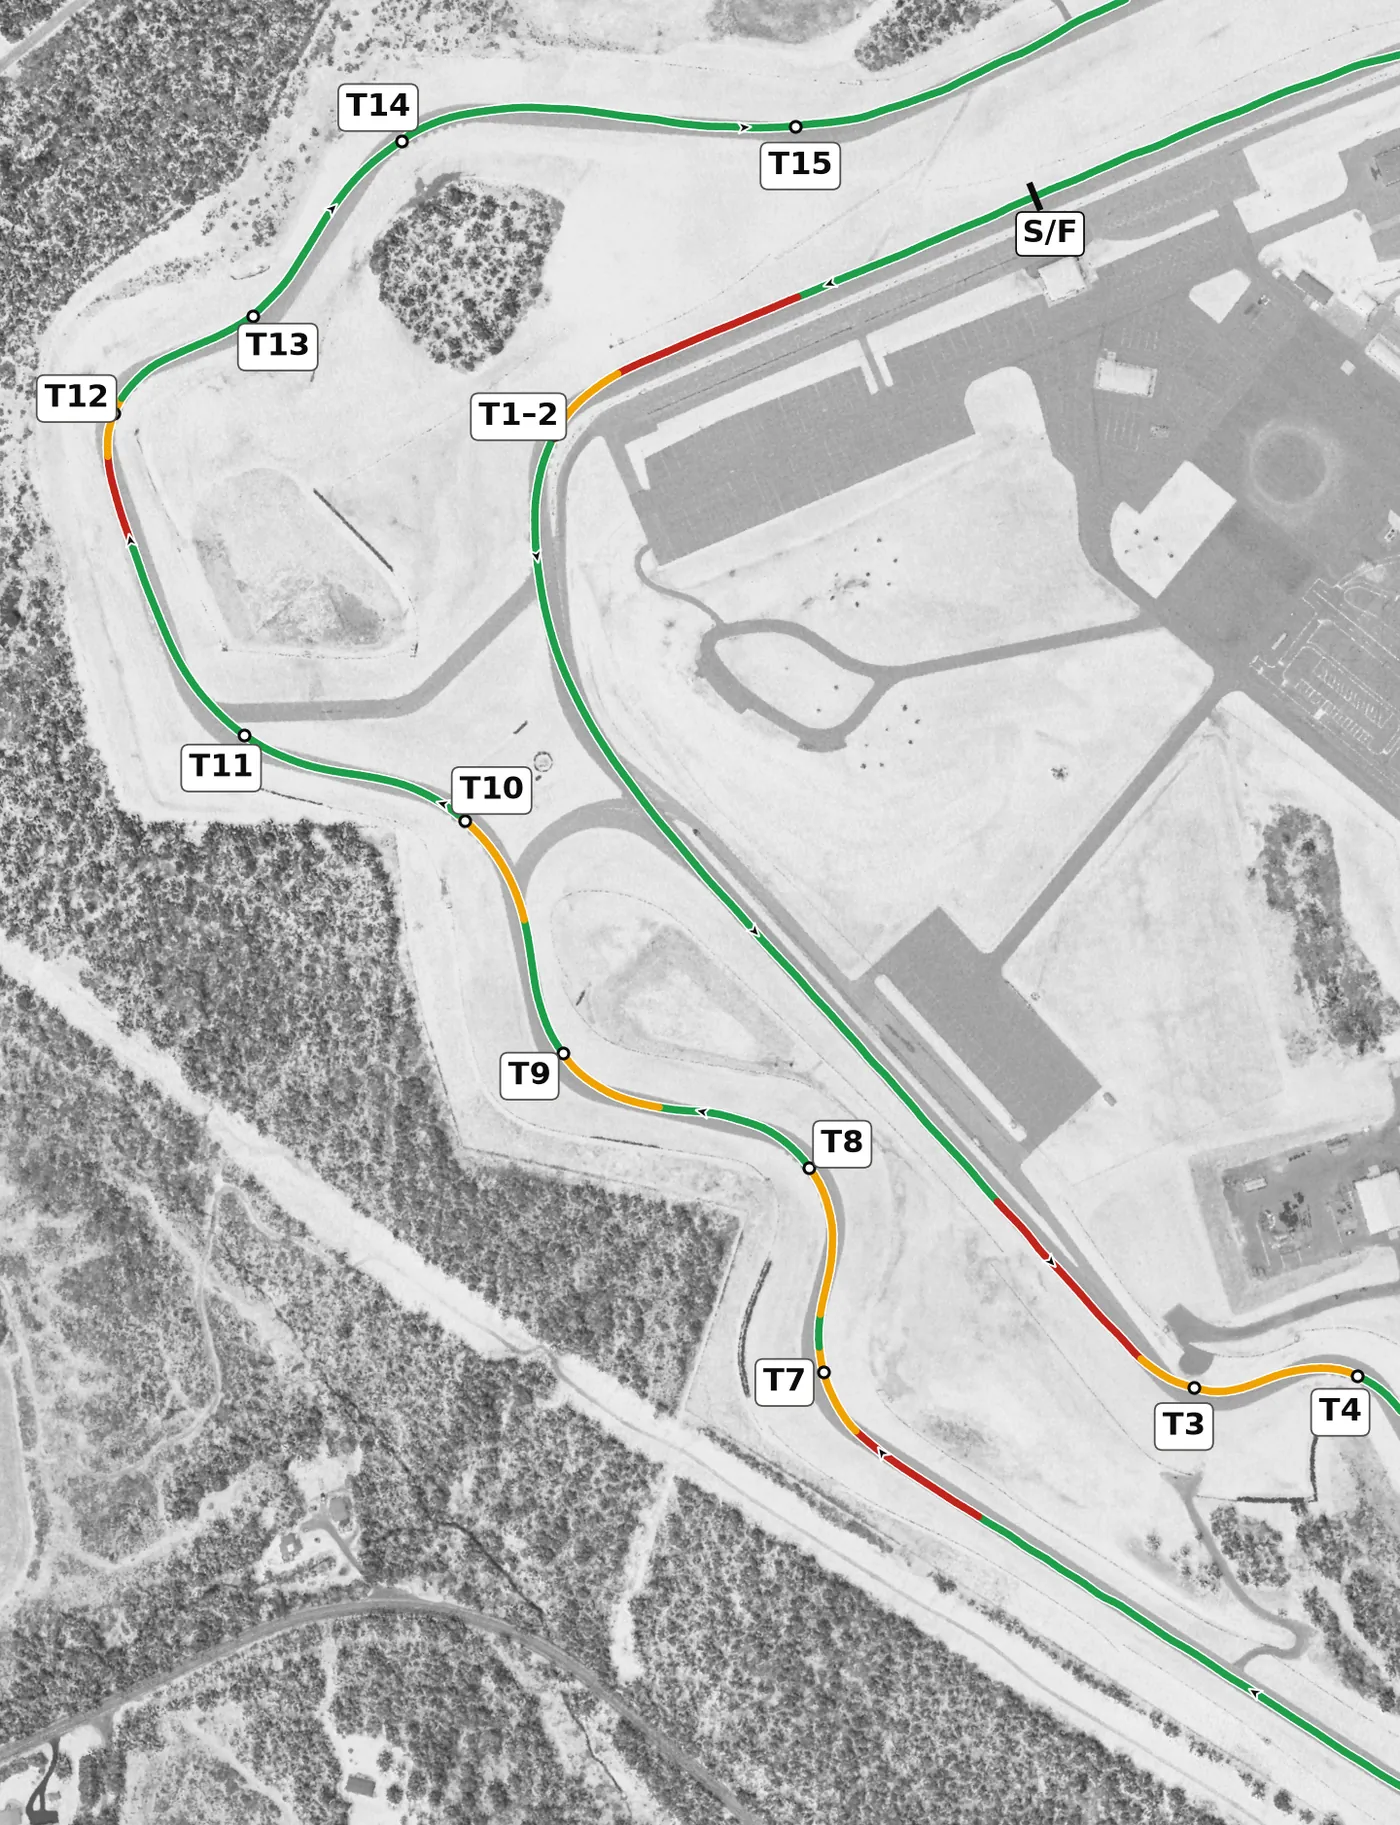
T7 is the gateway to the esses, and T7 through T11 are a rhythm section where each corner sets up the next, so a good line through T7 pays off all the way to T11. T12 and T13 climb to the highest part of the circuit and must be right, because they lead to T14, a blind right over a crest that drops onto the back straight.
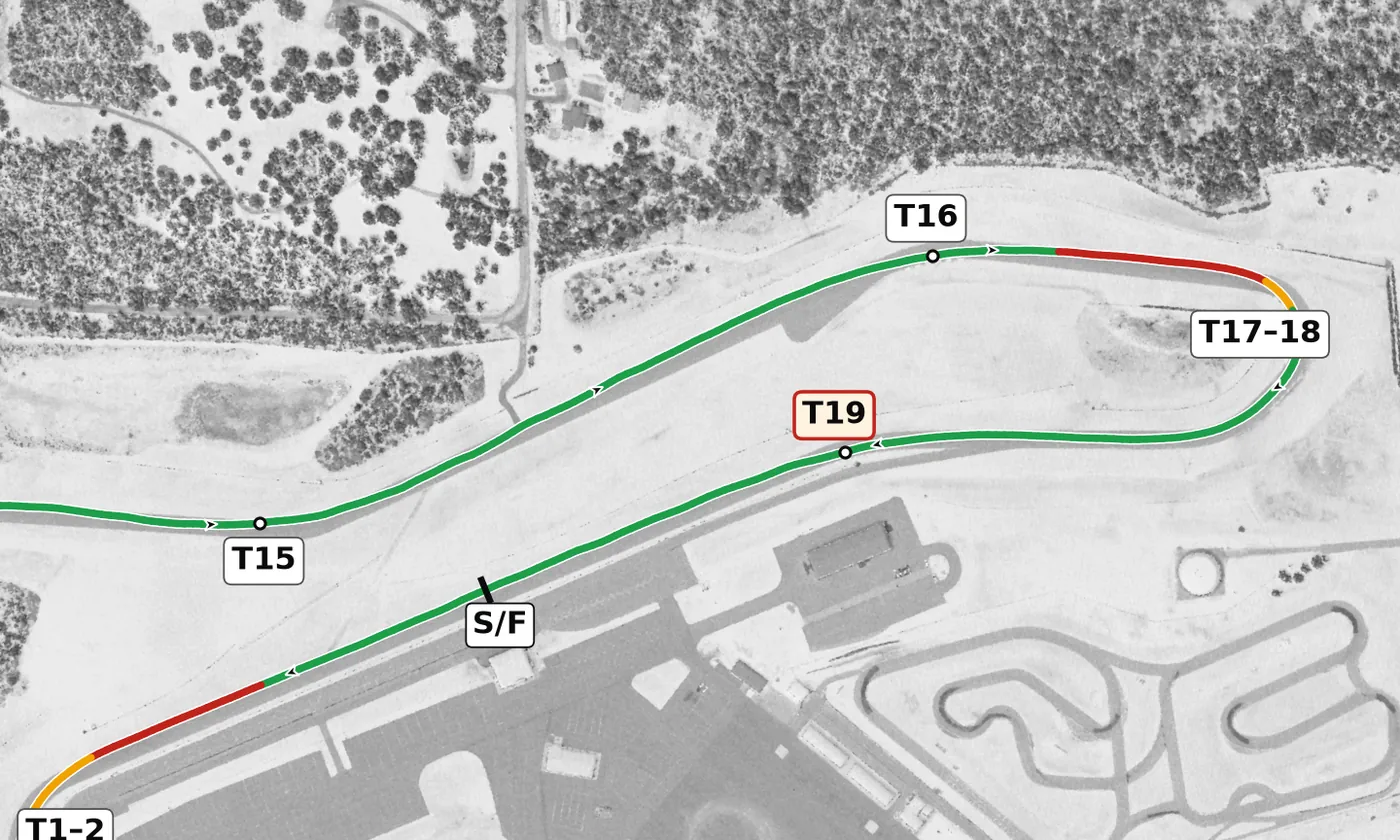
T15 is a fast, banked left kink and T16 is the fastest corner on the lap, a long, gently downhill right, so keep your hands smooth and look far ahead. The T17–T18 arc is the slowest corner on the circuit, at the end of a fast section, so brake hard and early, then hold one long arc up the hill before the off-camber T19 left onto the front straight.
Corners
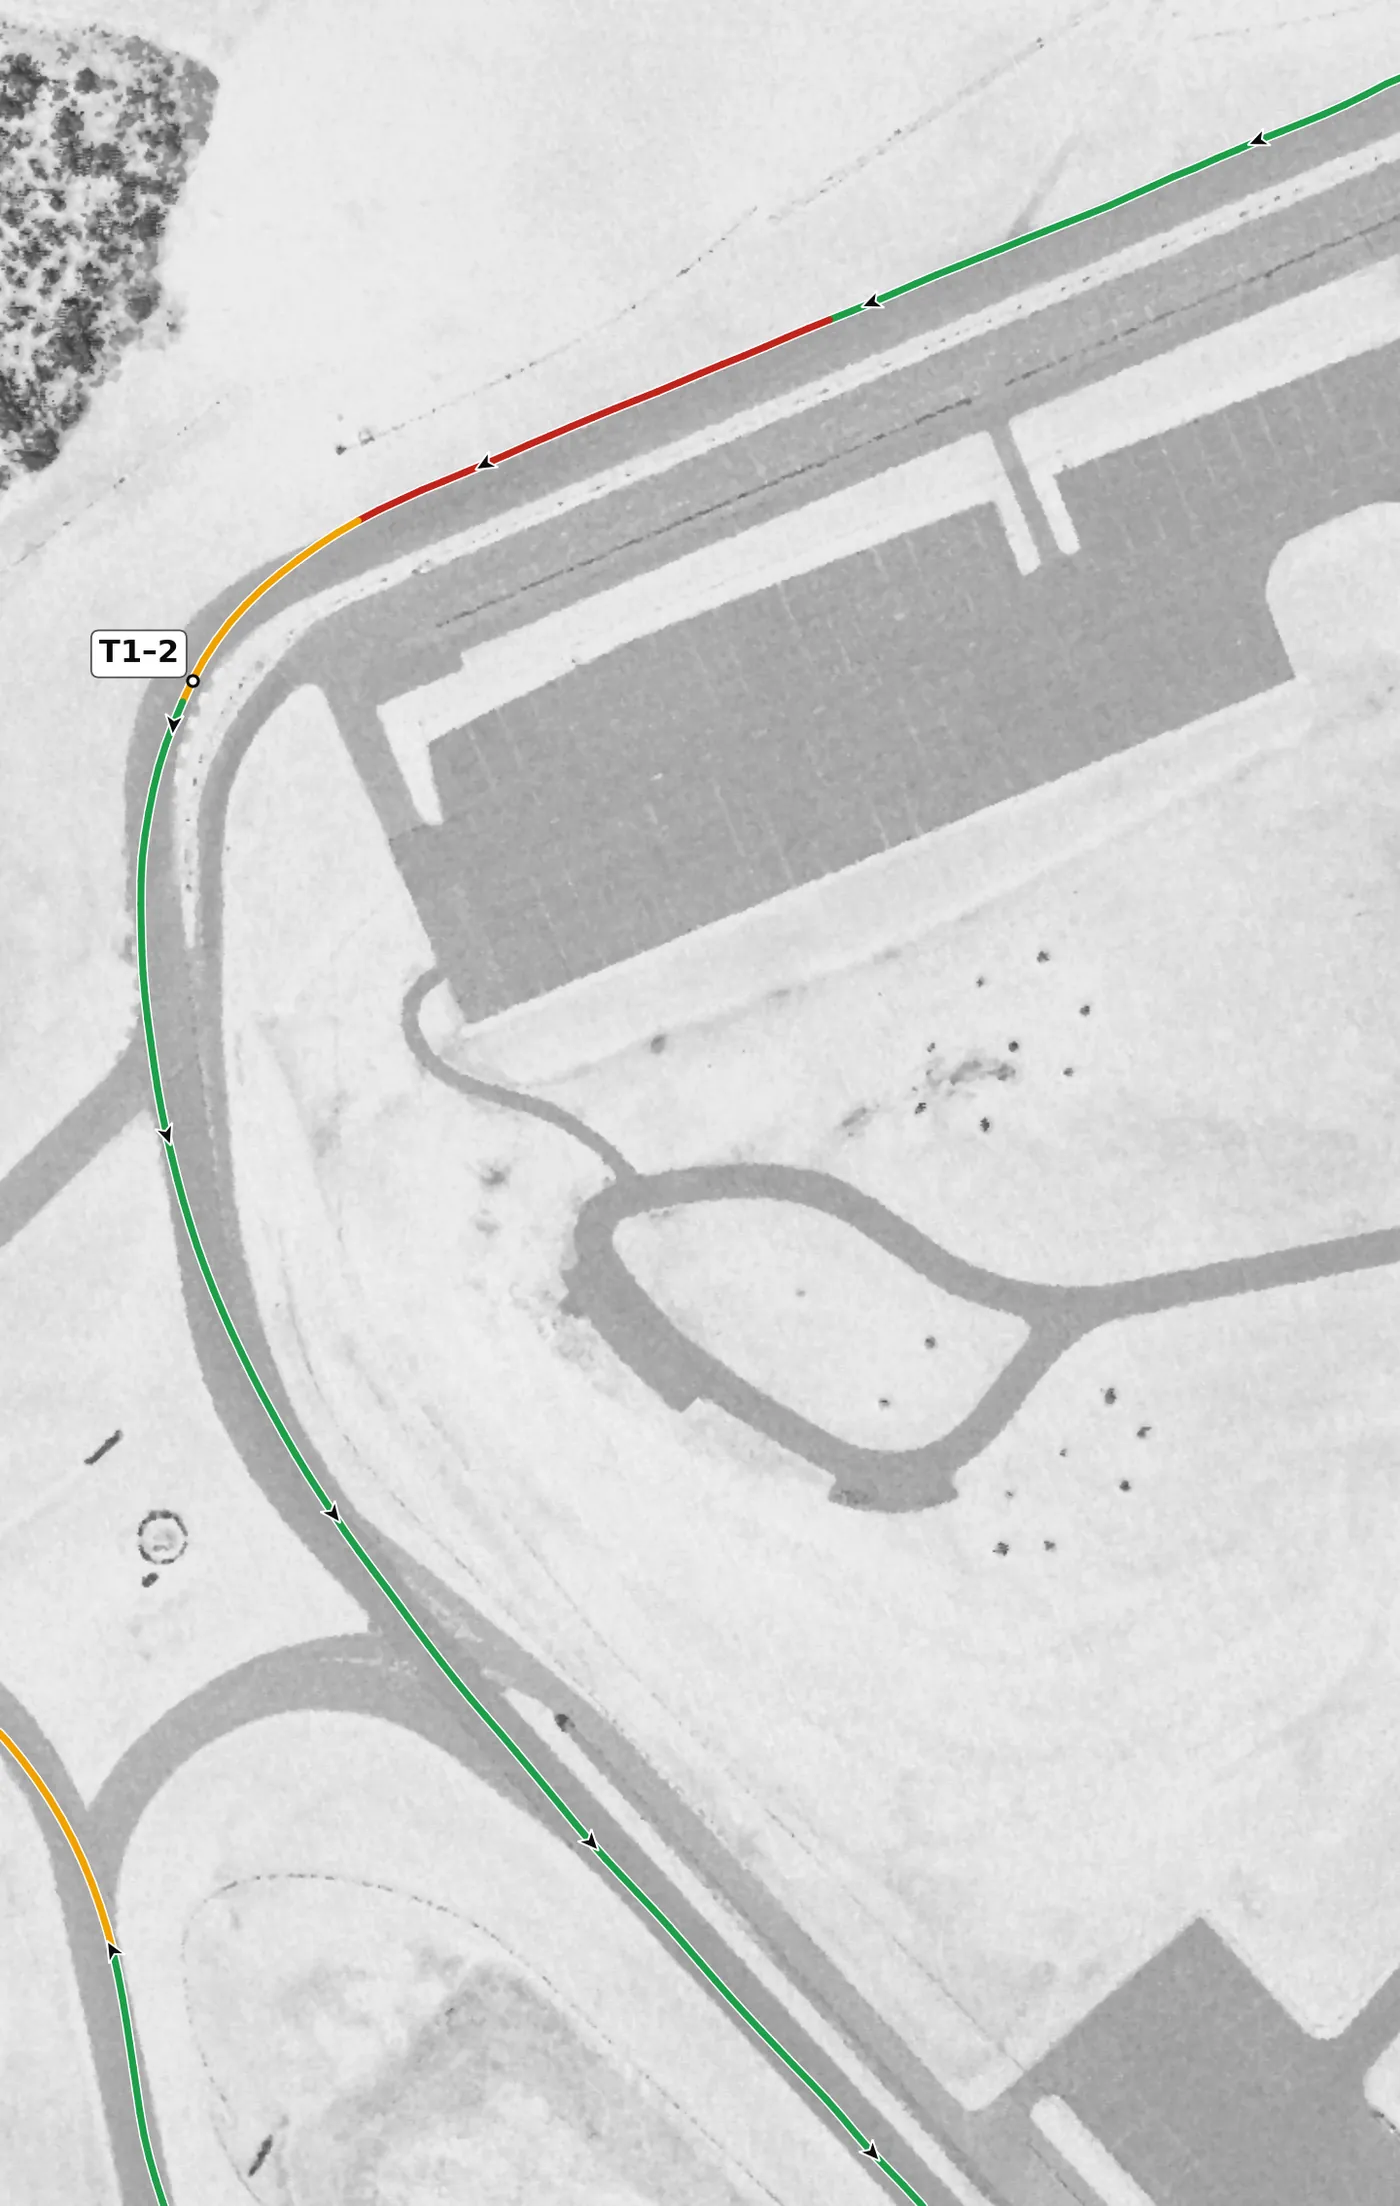
Chin numbers this as two corners, but it drives as one continuous left that drops into a dip toward the apex and climbs out again, onto a long straight. The car goes light as it starts down, so brake in a straight line before the drop, turn in a little late, and treat the second part as the one that matters, using a late apex and a wide exit to the right. The mistake to avoid is attacking the first part, which leaves you compromised for the second and slow onto the straight.
From the survey: One continuous left that Chin numbers T1 and T2: it drops 2.7 m to the apex and climbs 2.8 m out.
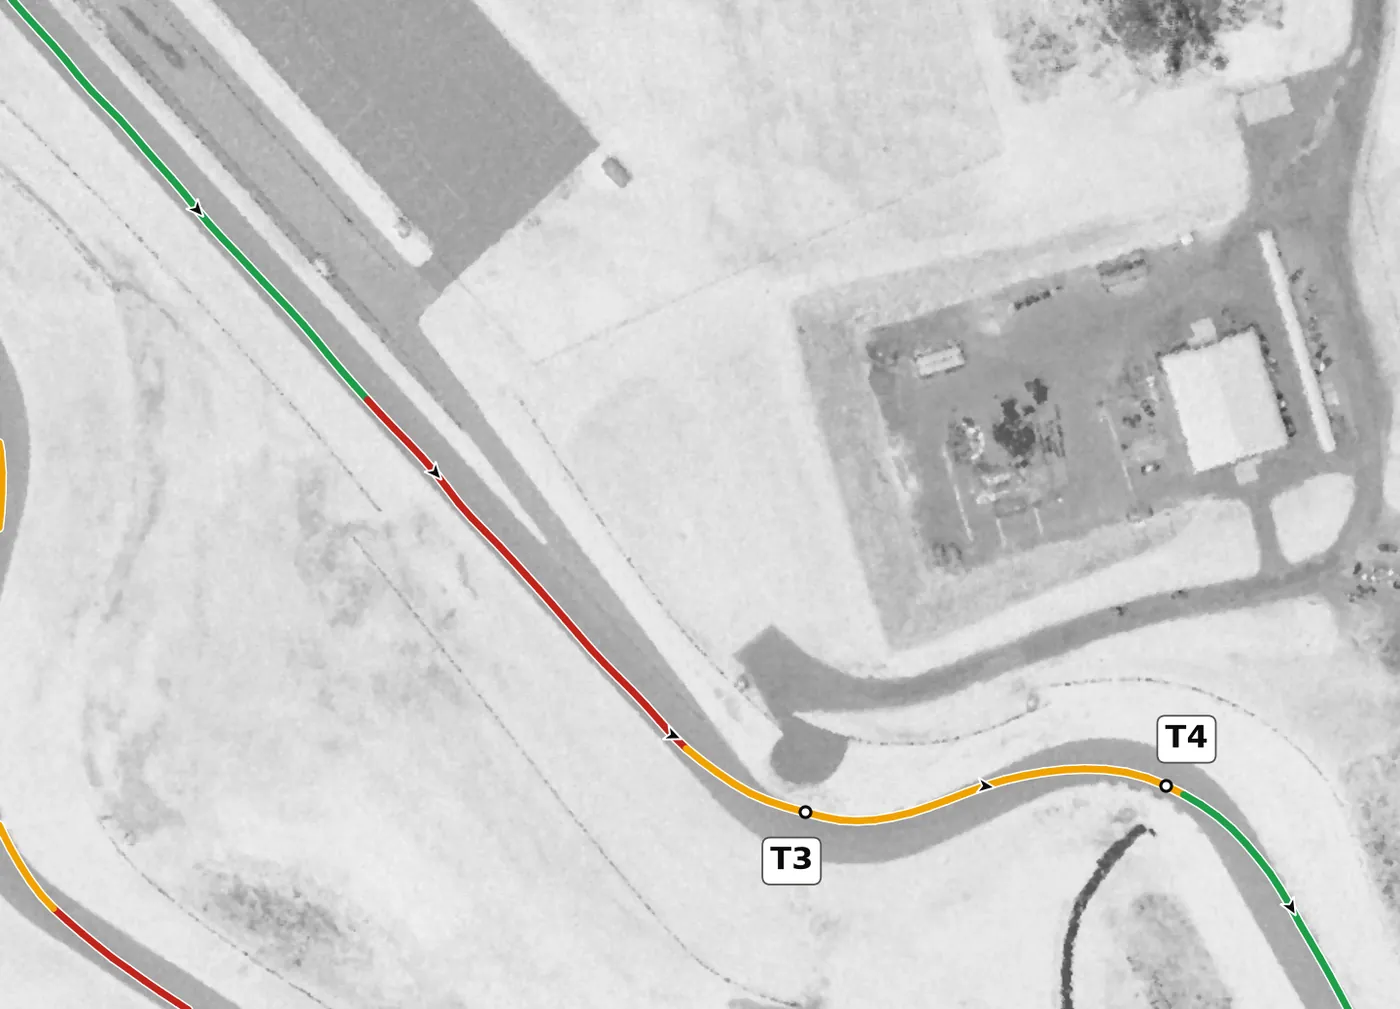
This banked left is where the big descent begins, and the road falls away after the apex. Brake while the road is still level, take a smooth apex and get the car as far left as you can before the next corner. The mistake to avoid is still braking as the road drops away, when the car is getting lighter.
From the survey: Banked +4.1% at the apex; the road falls away 2 m on exit.
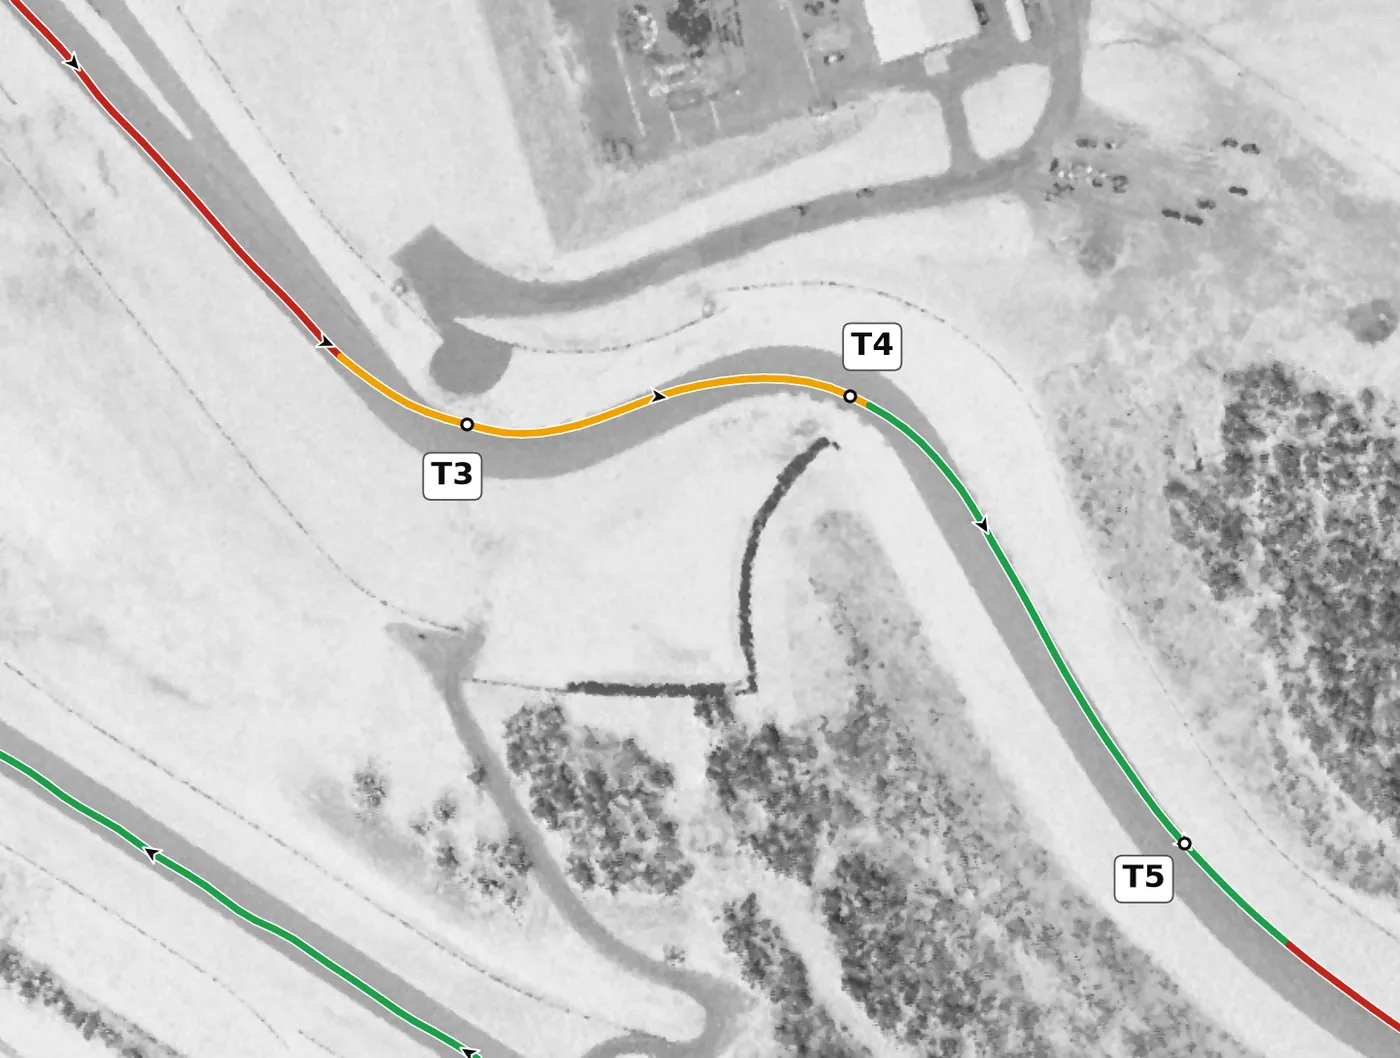
T4 is a right on a steep downhill grade, and it is also the most banked corner on the lap, so the banking helps you while the slope fights you. Keep the car balanced with smooth inputs, let the banking hold it, and avoid sudden braking on the steep descent. The mistake to avoid is turning in too fast and then trying to brake hard on the slope, which is when the car is least stable.
From the survey: −9.2% grade at the apex, the start of the big descent, and the most banked corner on the lap (up to +9.9%).
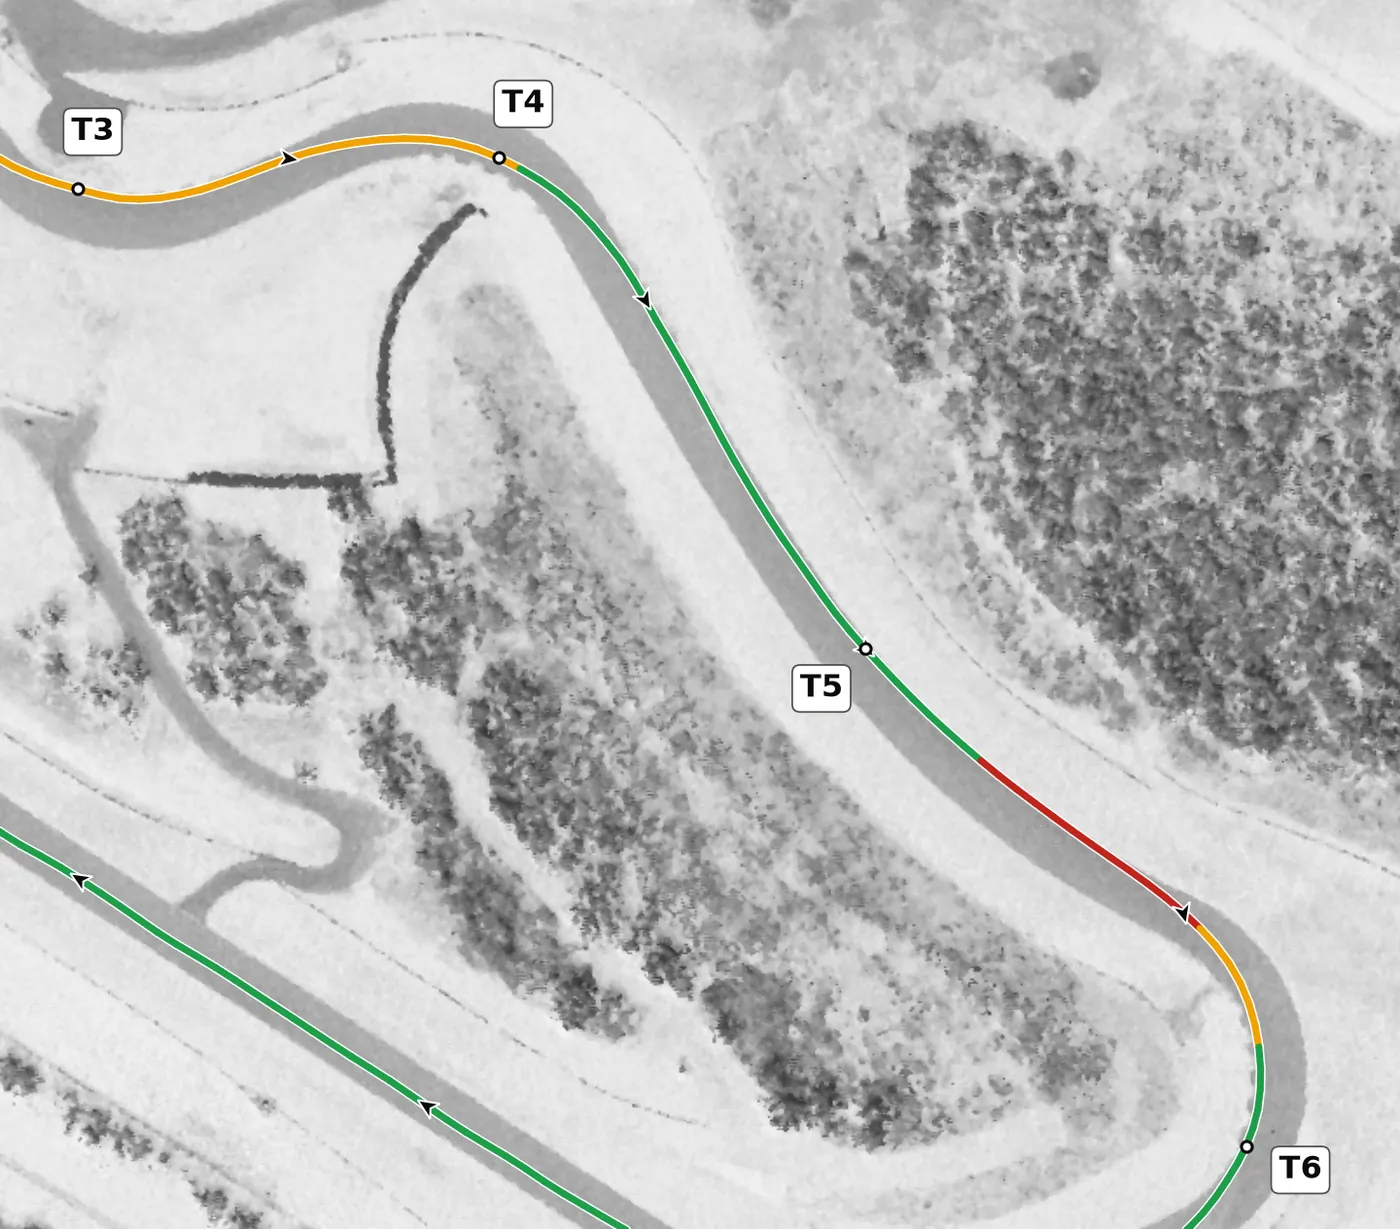
This left keeps falling steeply and has little camber, so it offers less support than T4. Treat it as a setup corner: hold a tight line so you can get the car back toward the left side of the road, then brake firmly in a straight line for the hairpin while the slope is easing. The mistake to avoid is braking late on the steep descent and arriving at the hairpin far too fast.
From the survey: Still falling at −8.9% through the apex, with little camber (+1.9%).
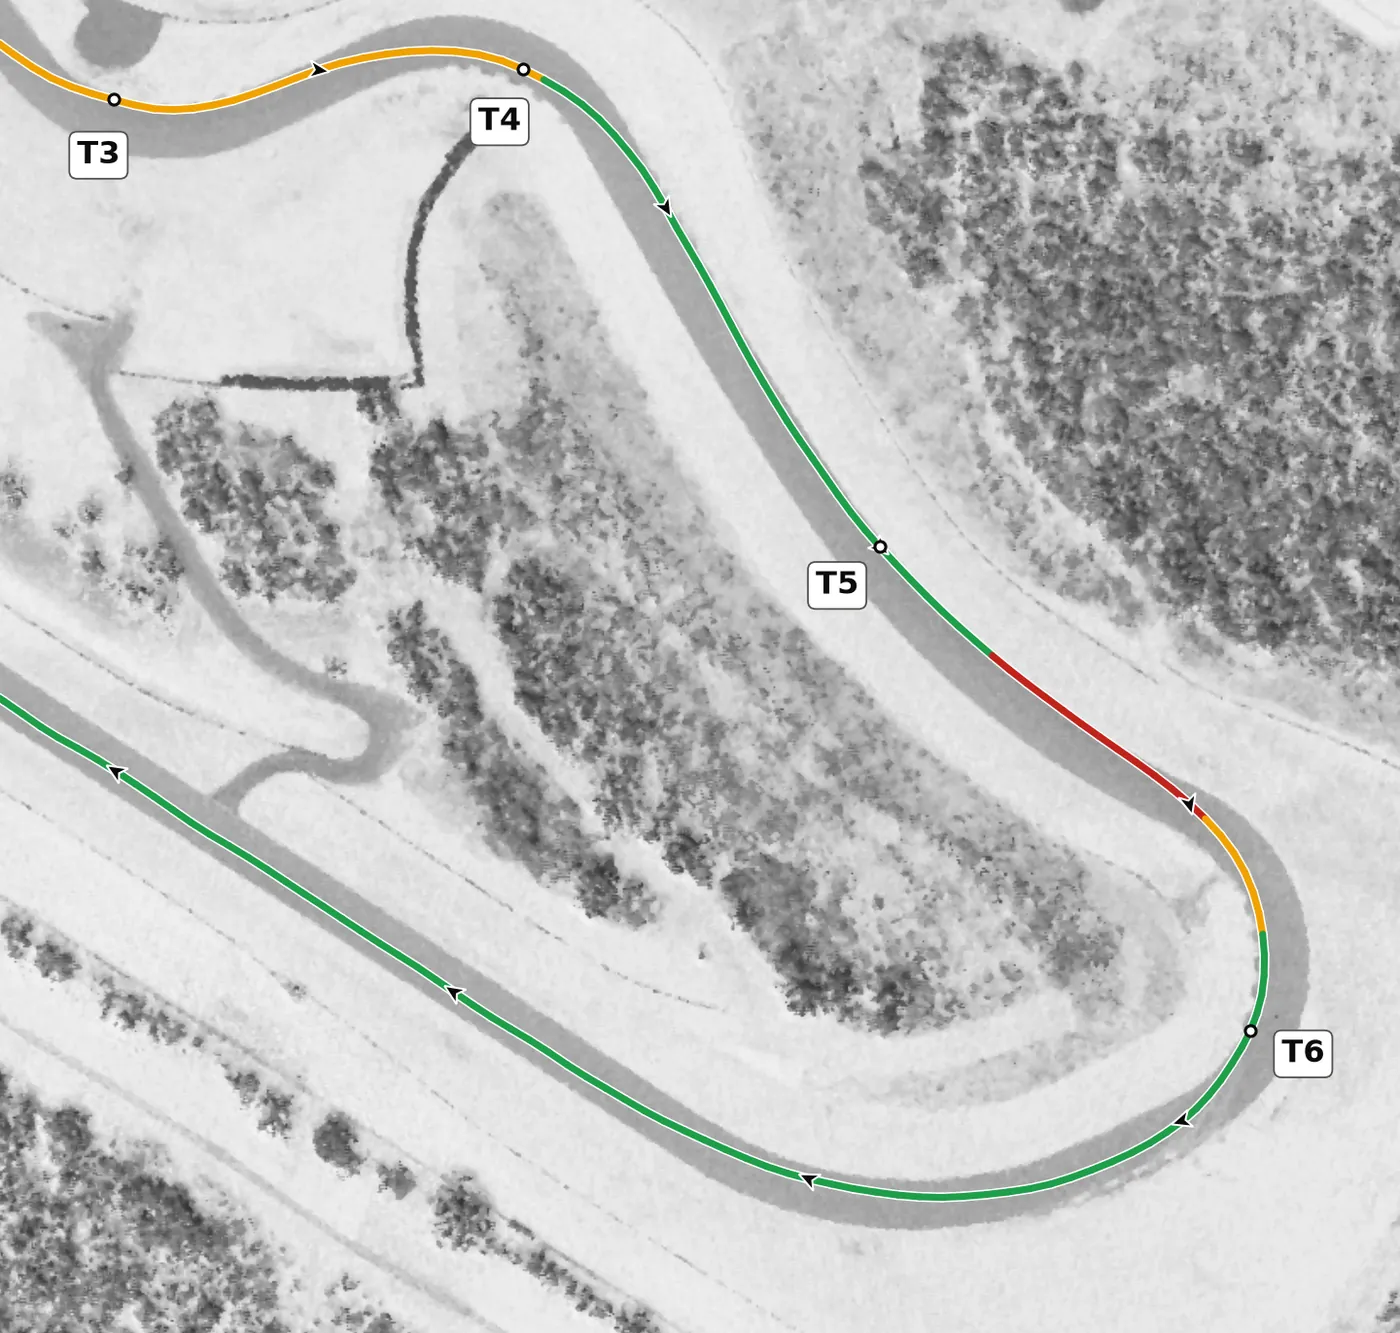
The hairpin at the bottom of the site is the lowest point on the lap, with a compression at the bottom followed by a steep climb of over 20 m on exit. Brake early, turn in late and aim for a late apex near the inside curb on the right, so you can drive hard up the hill. The mistake to avoid is an early apex, which forces you to lift on the climb and costs speed all the way up.
From the survey: The hairpin at the bottom: the lowest point on the lap, a compression, then the road climbs 21.6 m to the exit.
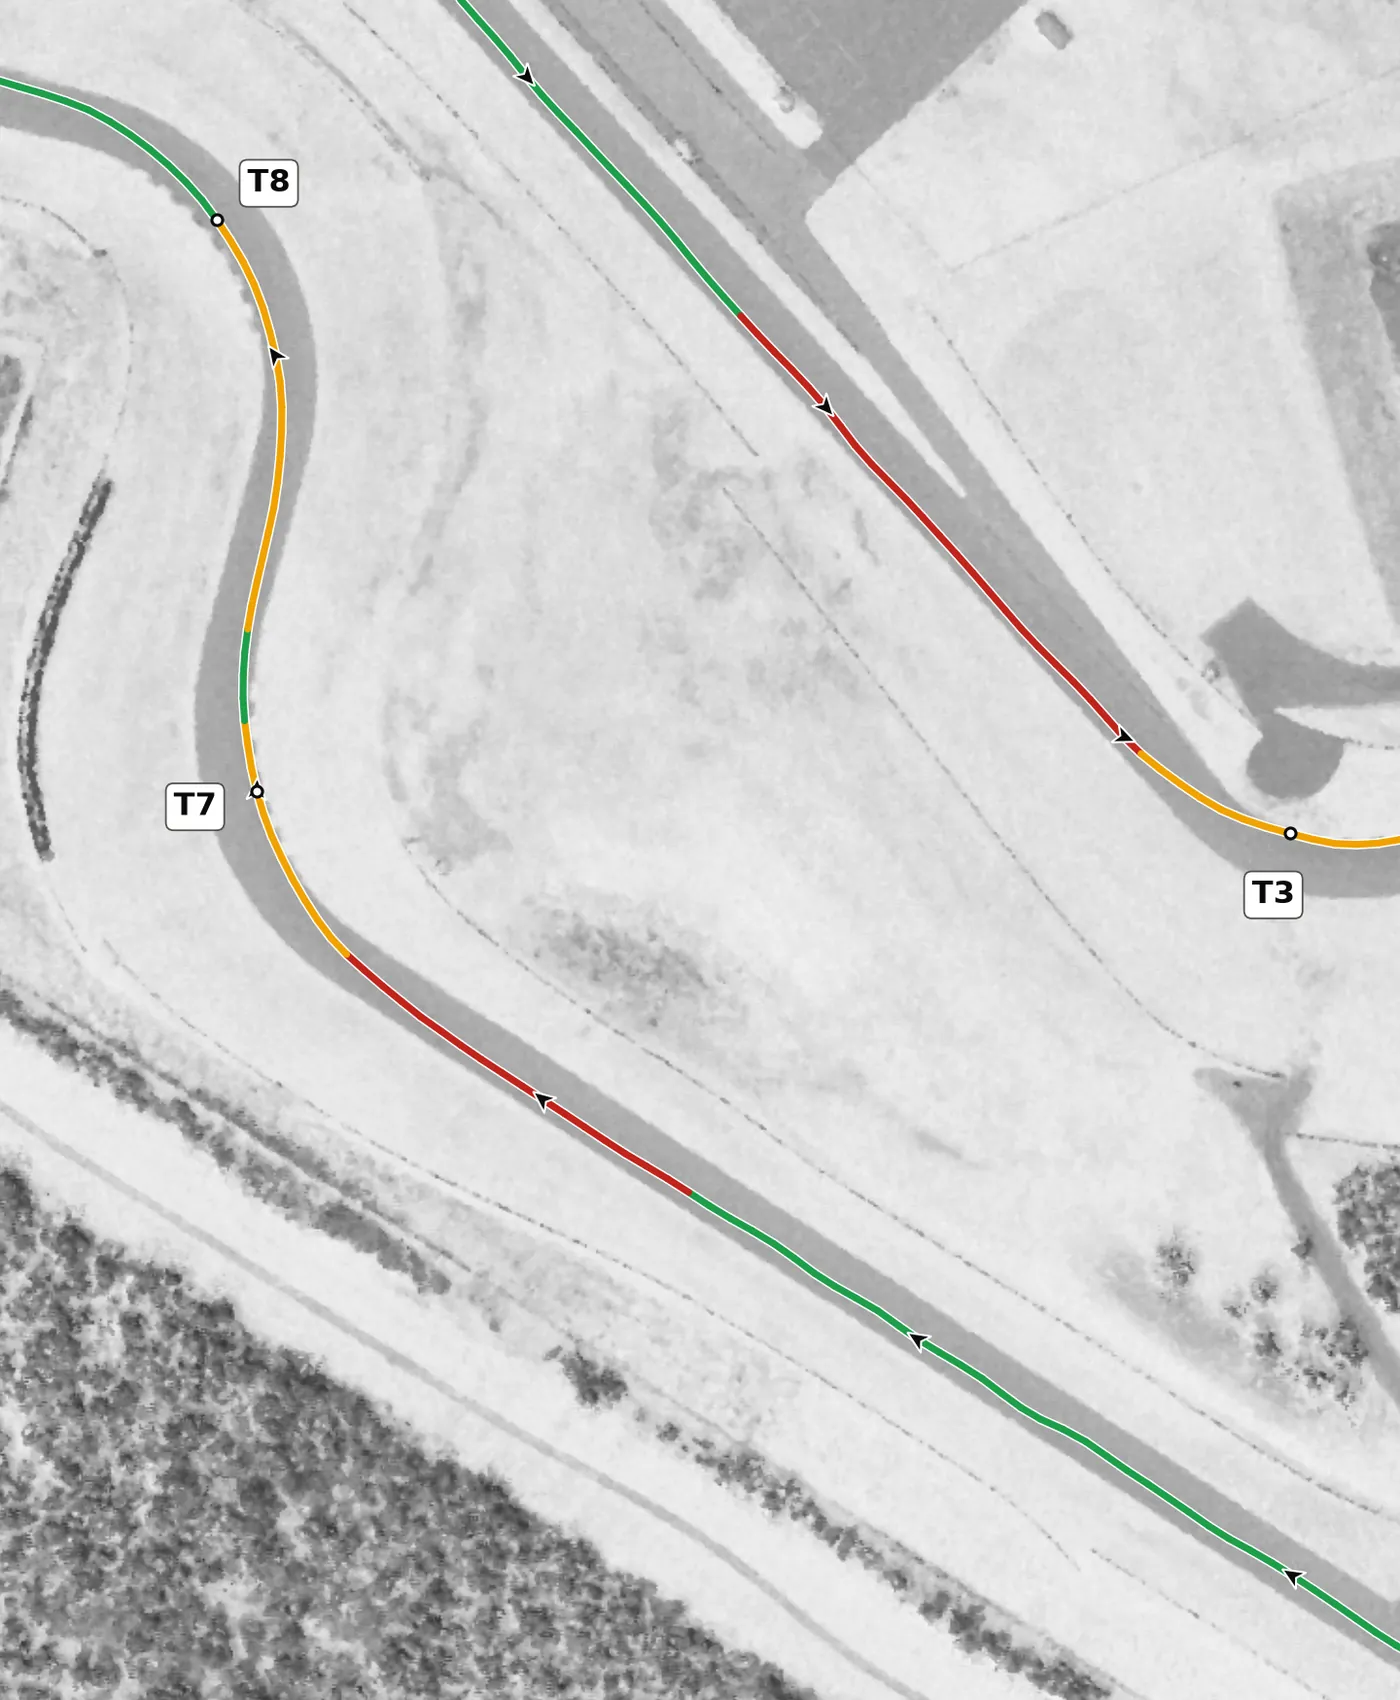
T7 is a banked right and the gatekeeper to the esses, so getting it right sets up everything through T11. Take a measured entry, a clean apex, and an exit that puts the car where you need it for the left at T8. The mistake to avoid is carrying too much speed into T7 and starting the esses off line.
From the survey: First of the esses, banked +4.2% at the apex.
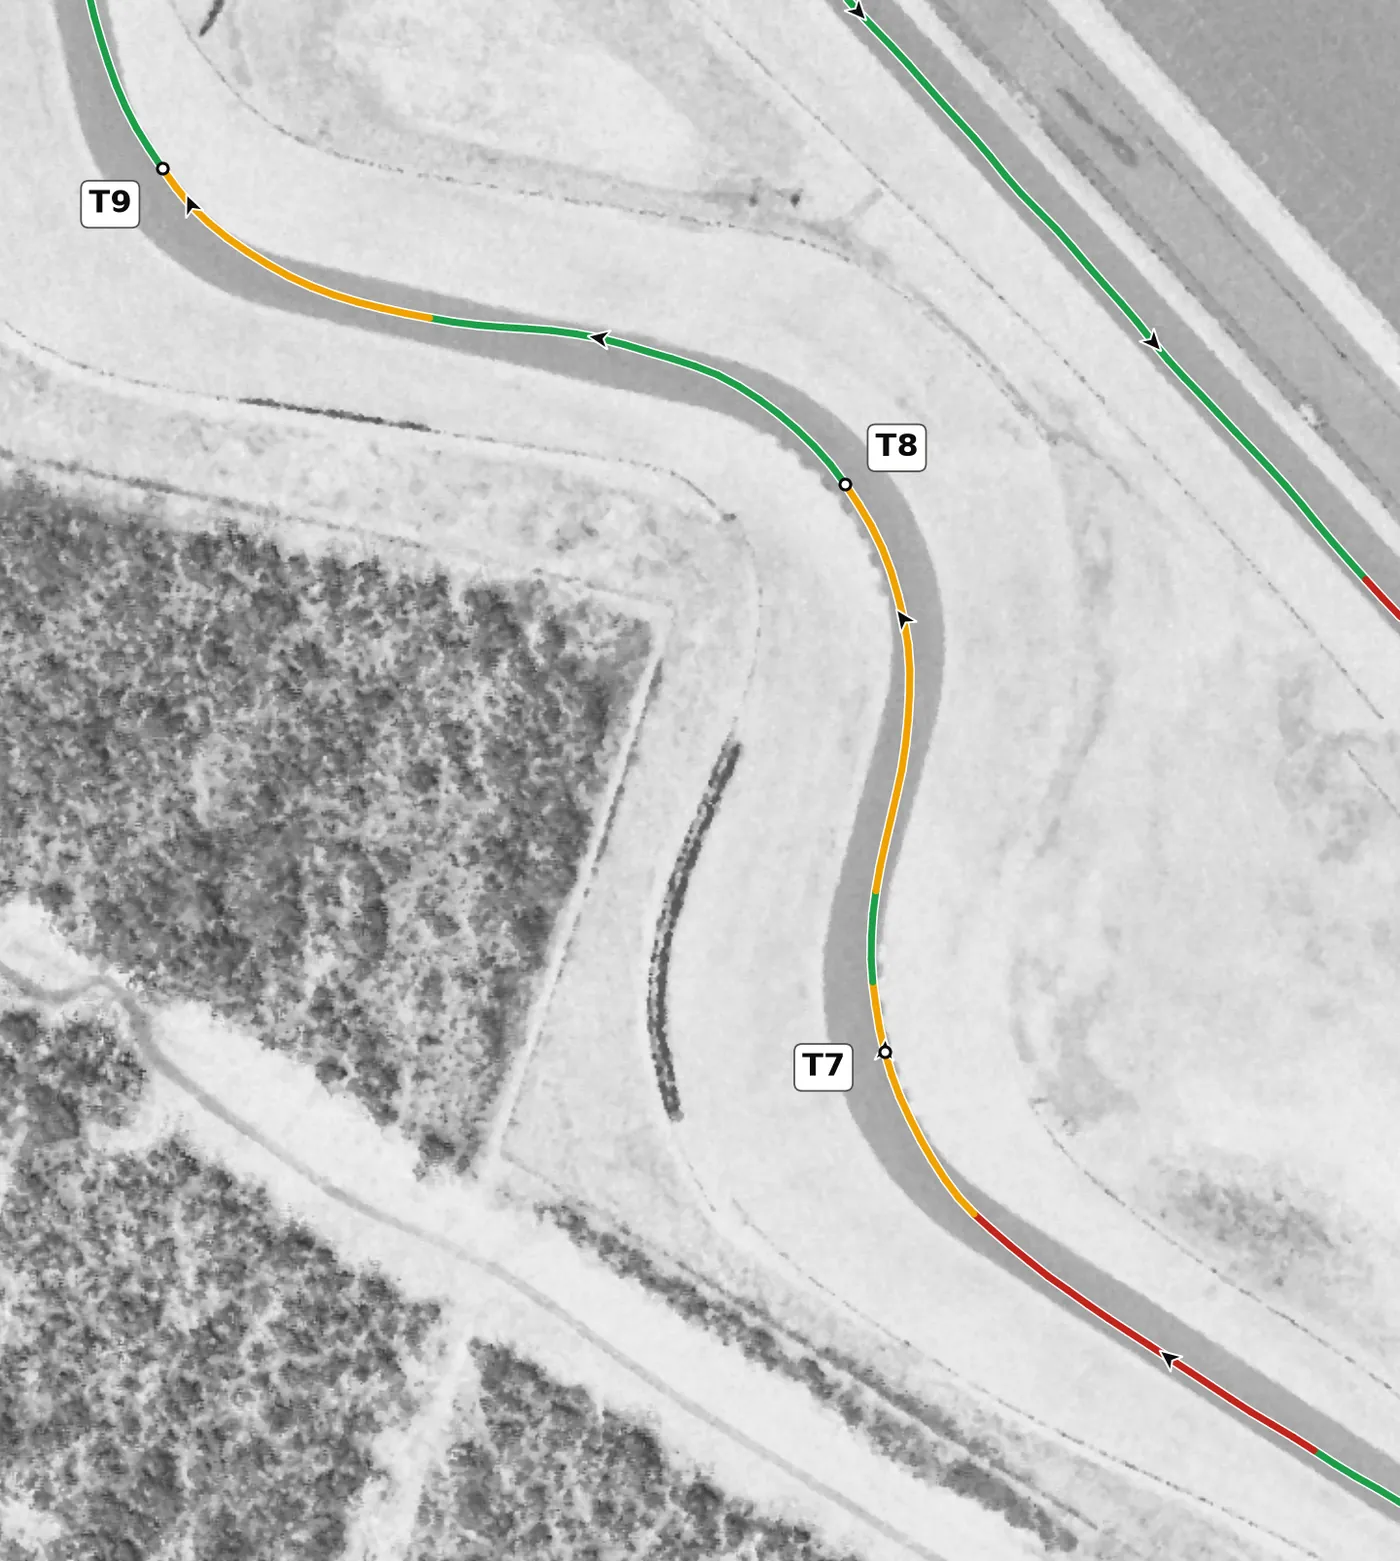
This banked left drops downhill toward the apex, so it carries speed well but needs a calm entry. Brake or lift in a straight line, take a smooth apex and keep the car settled for the uphill right that follows. The mistake to avoid is overdriving the entry and running wide, which ruins the rhythm of the esses.
From the survey: Downhill to the apex (−2.4 m), banked +4.2%.
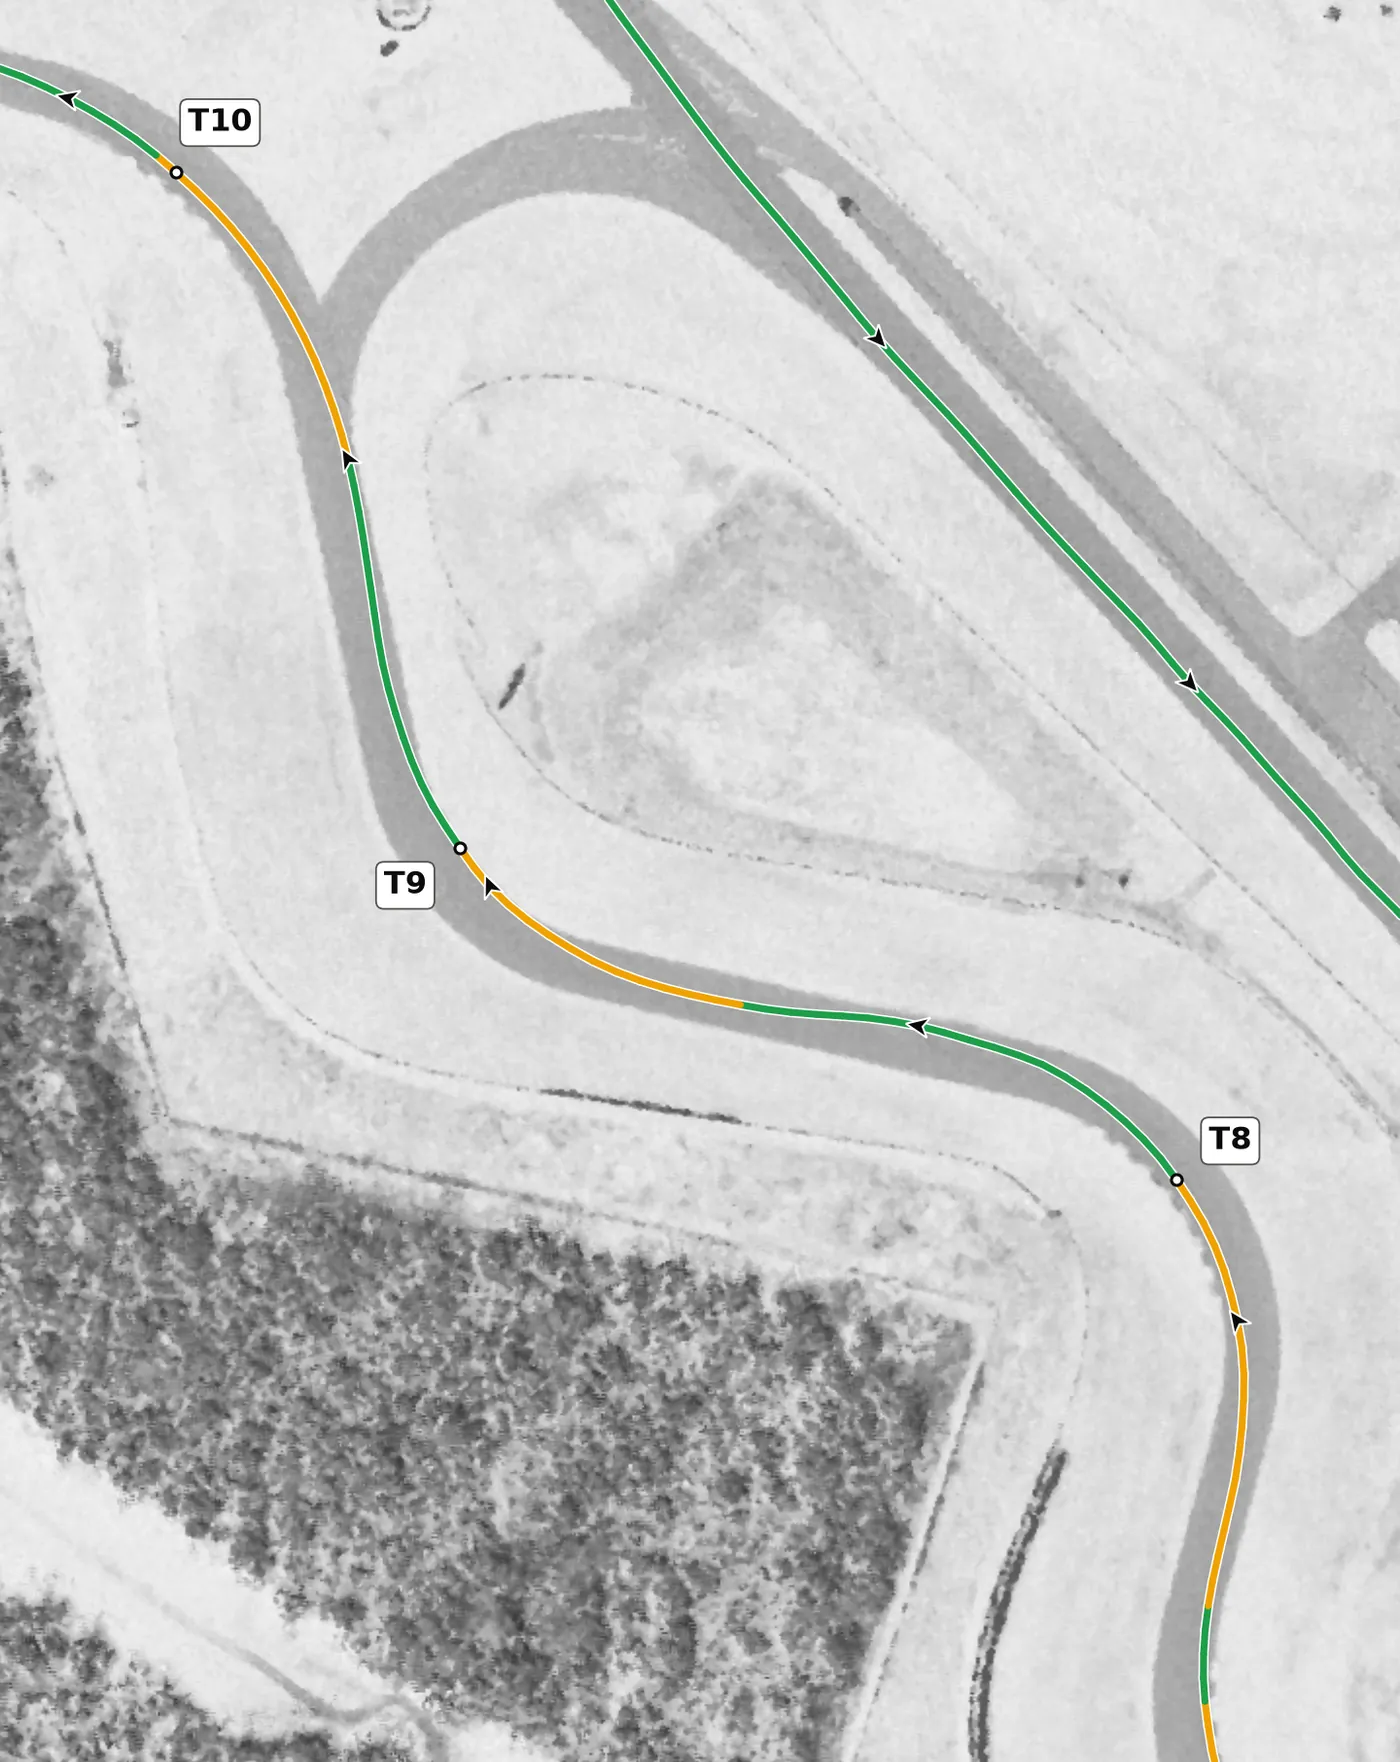
This right is uphill and on camber at the apex, so the climb helps you slow and the camber helps you turn. Carry a little more speed in than you think and get back to the throttle early to drive up the hill. The mistake to avoid is braking too much here: the uphill grade scrubs speed for you.
From the survey: Uphill (+4.3% at the apex) and on camber.
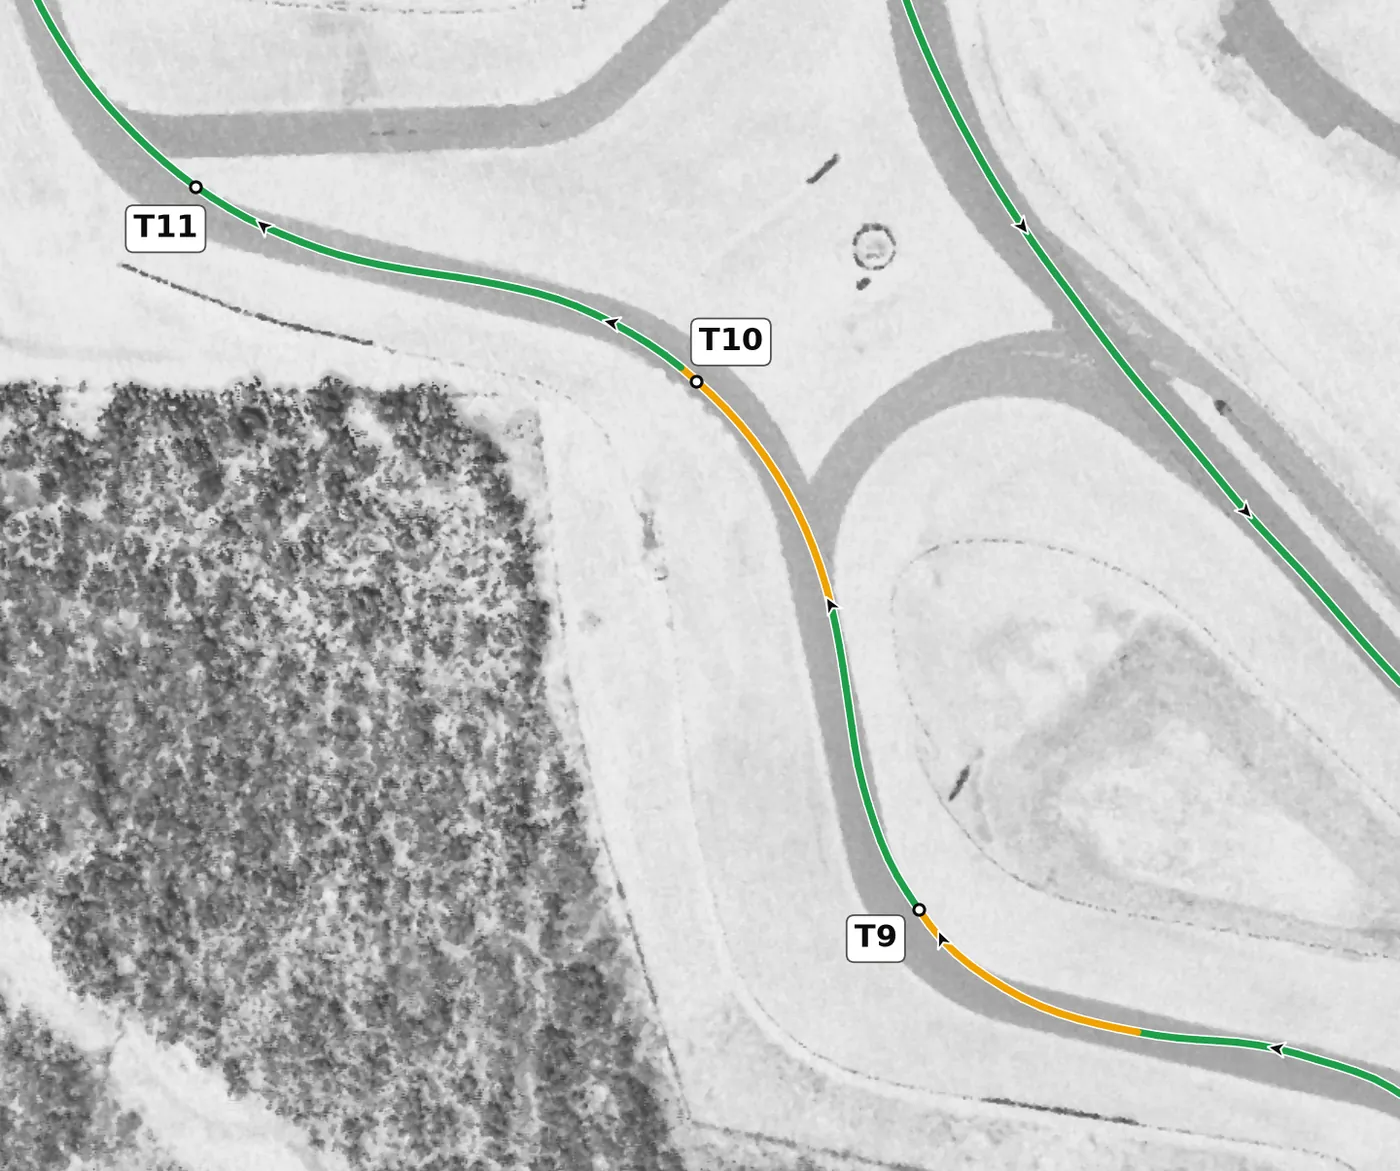
This left has little camber, and the road falls away on exit, so the car goes light just as you want to add power. Take a slightly late apex, keep your inputs smooth and don't ask for full grip on the way out. The mistake to avoid is turning in early and having to correct as the car gets light on the drop.
From the survey: Little camber (+0.9% at the apex); the road falls 3.6 m on exit.
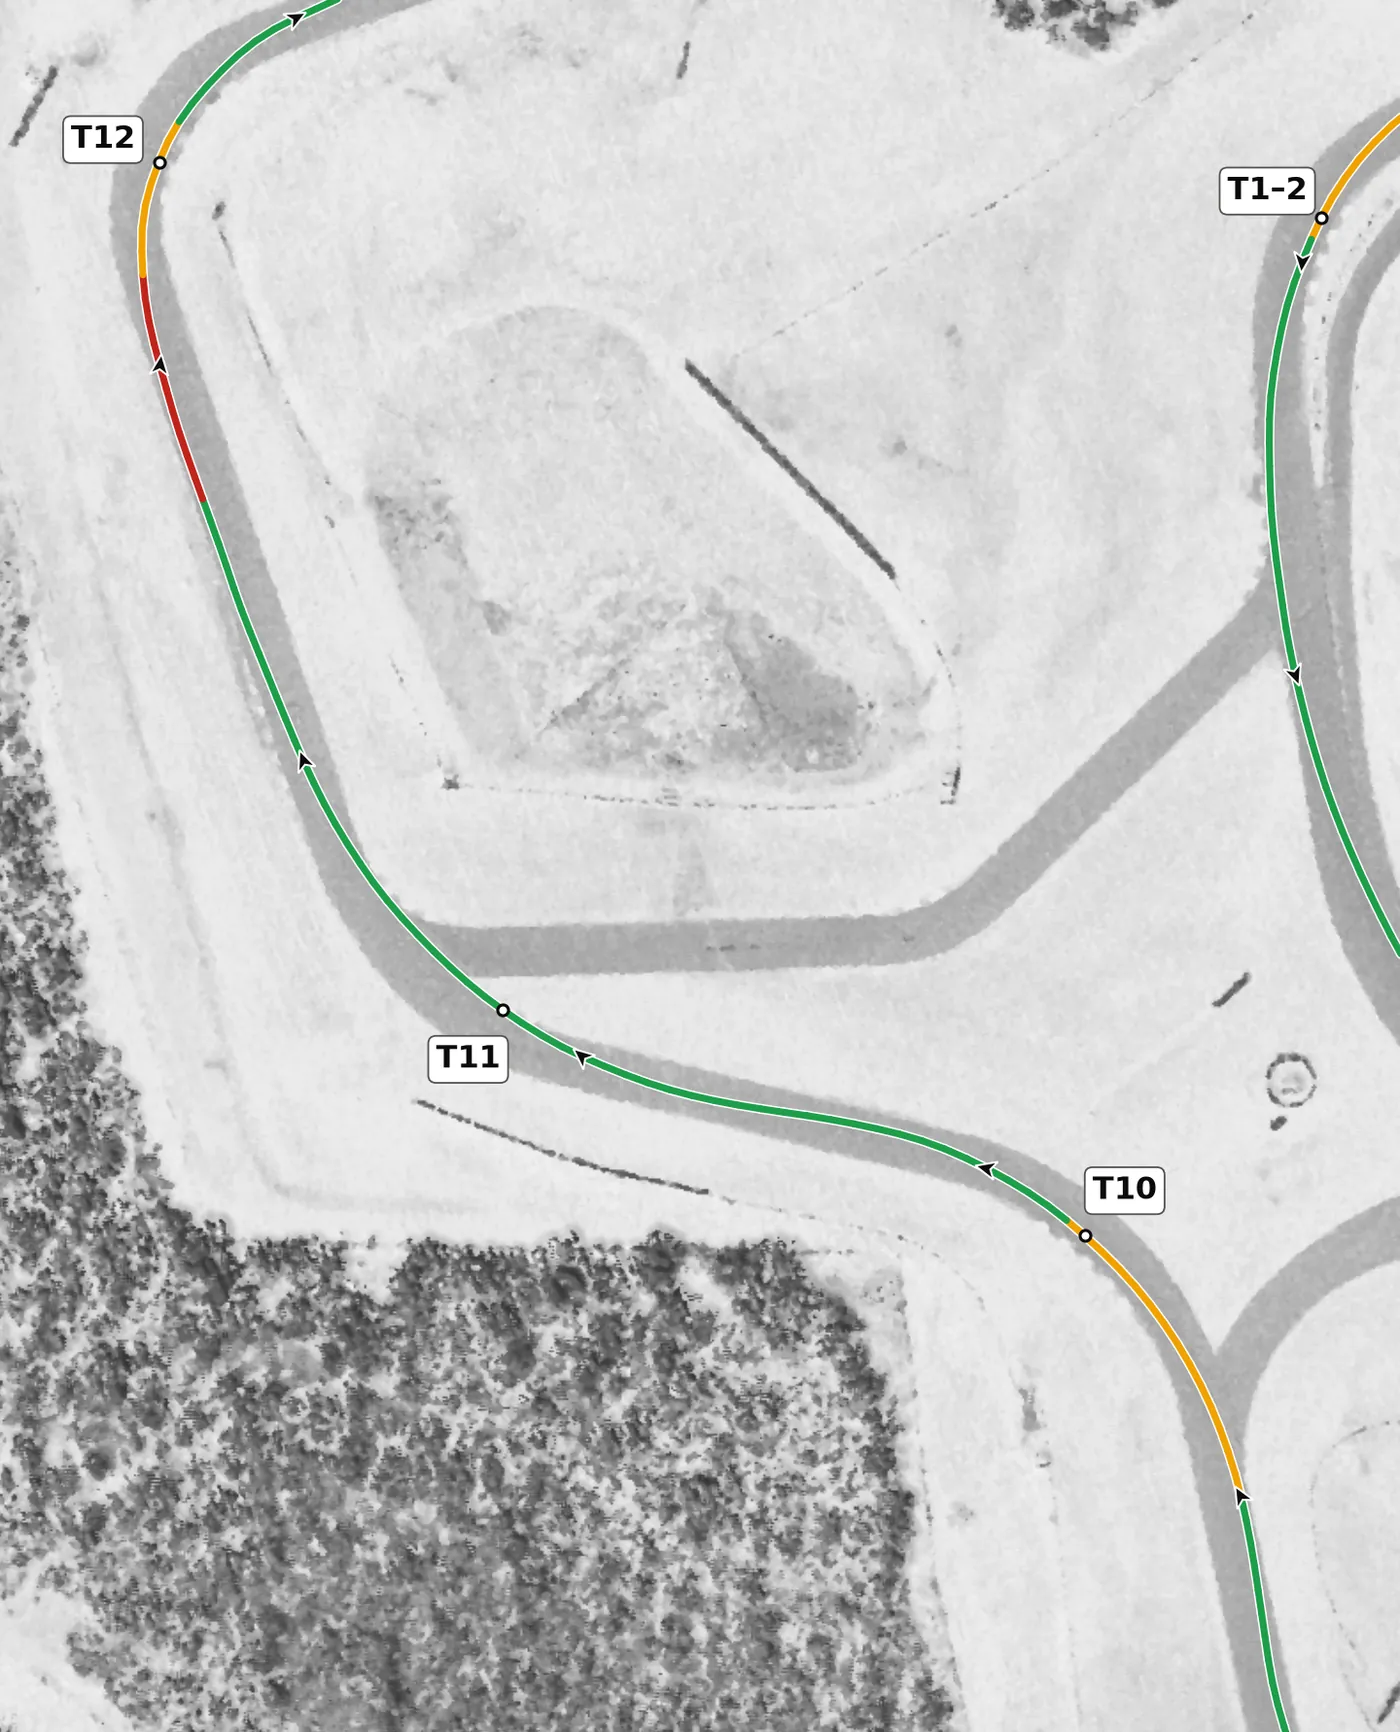
The last of the esses is a long, opening right with modest camber, more of a kink than a corner. Use a smooth line that lets the car open out on exit and keep the throttle steady. The mistake to avoid is pinching the line at the apex, which spoils the run up to T12.
From the survey: Last of the esses: long and opening, +2.1% camber.
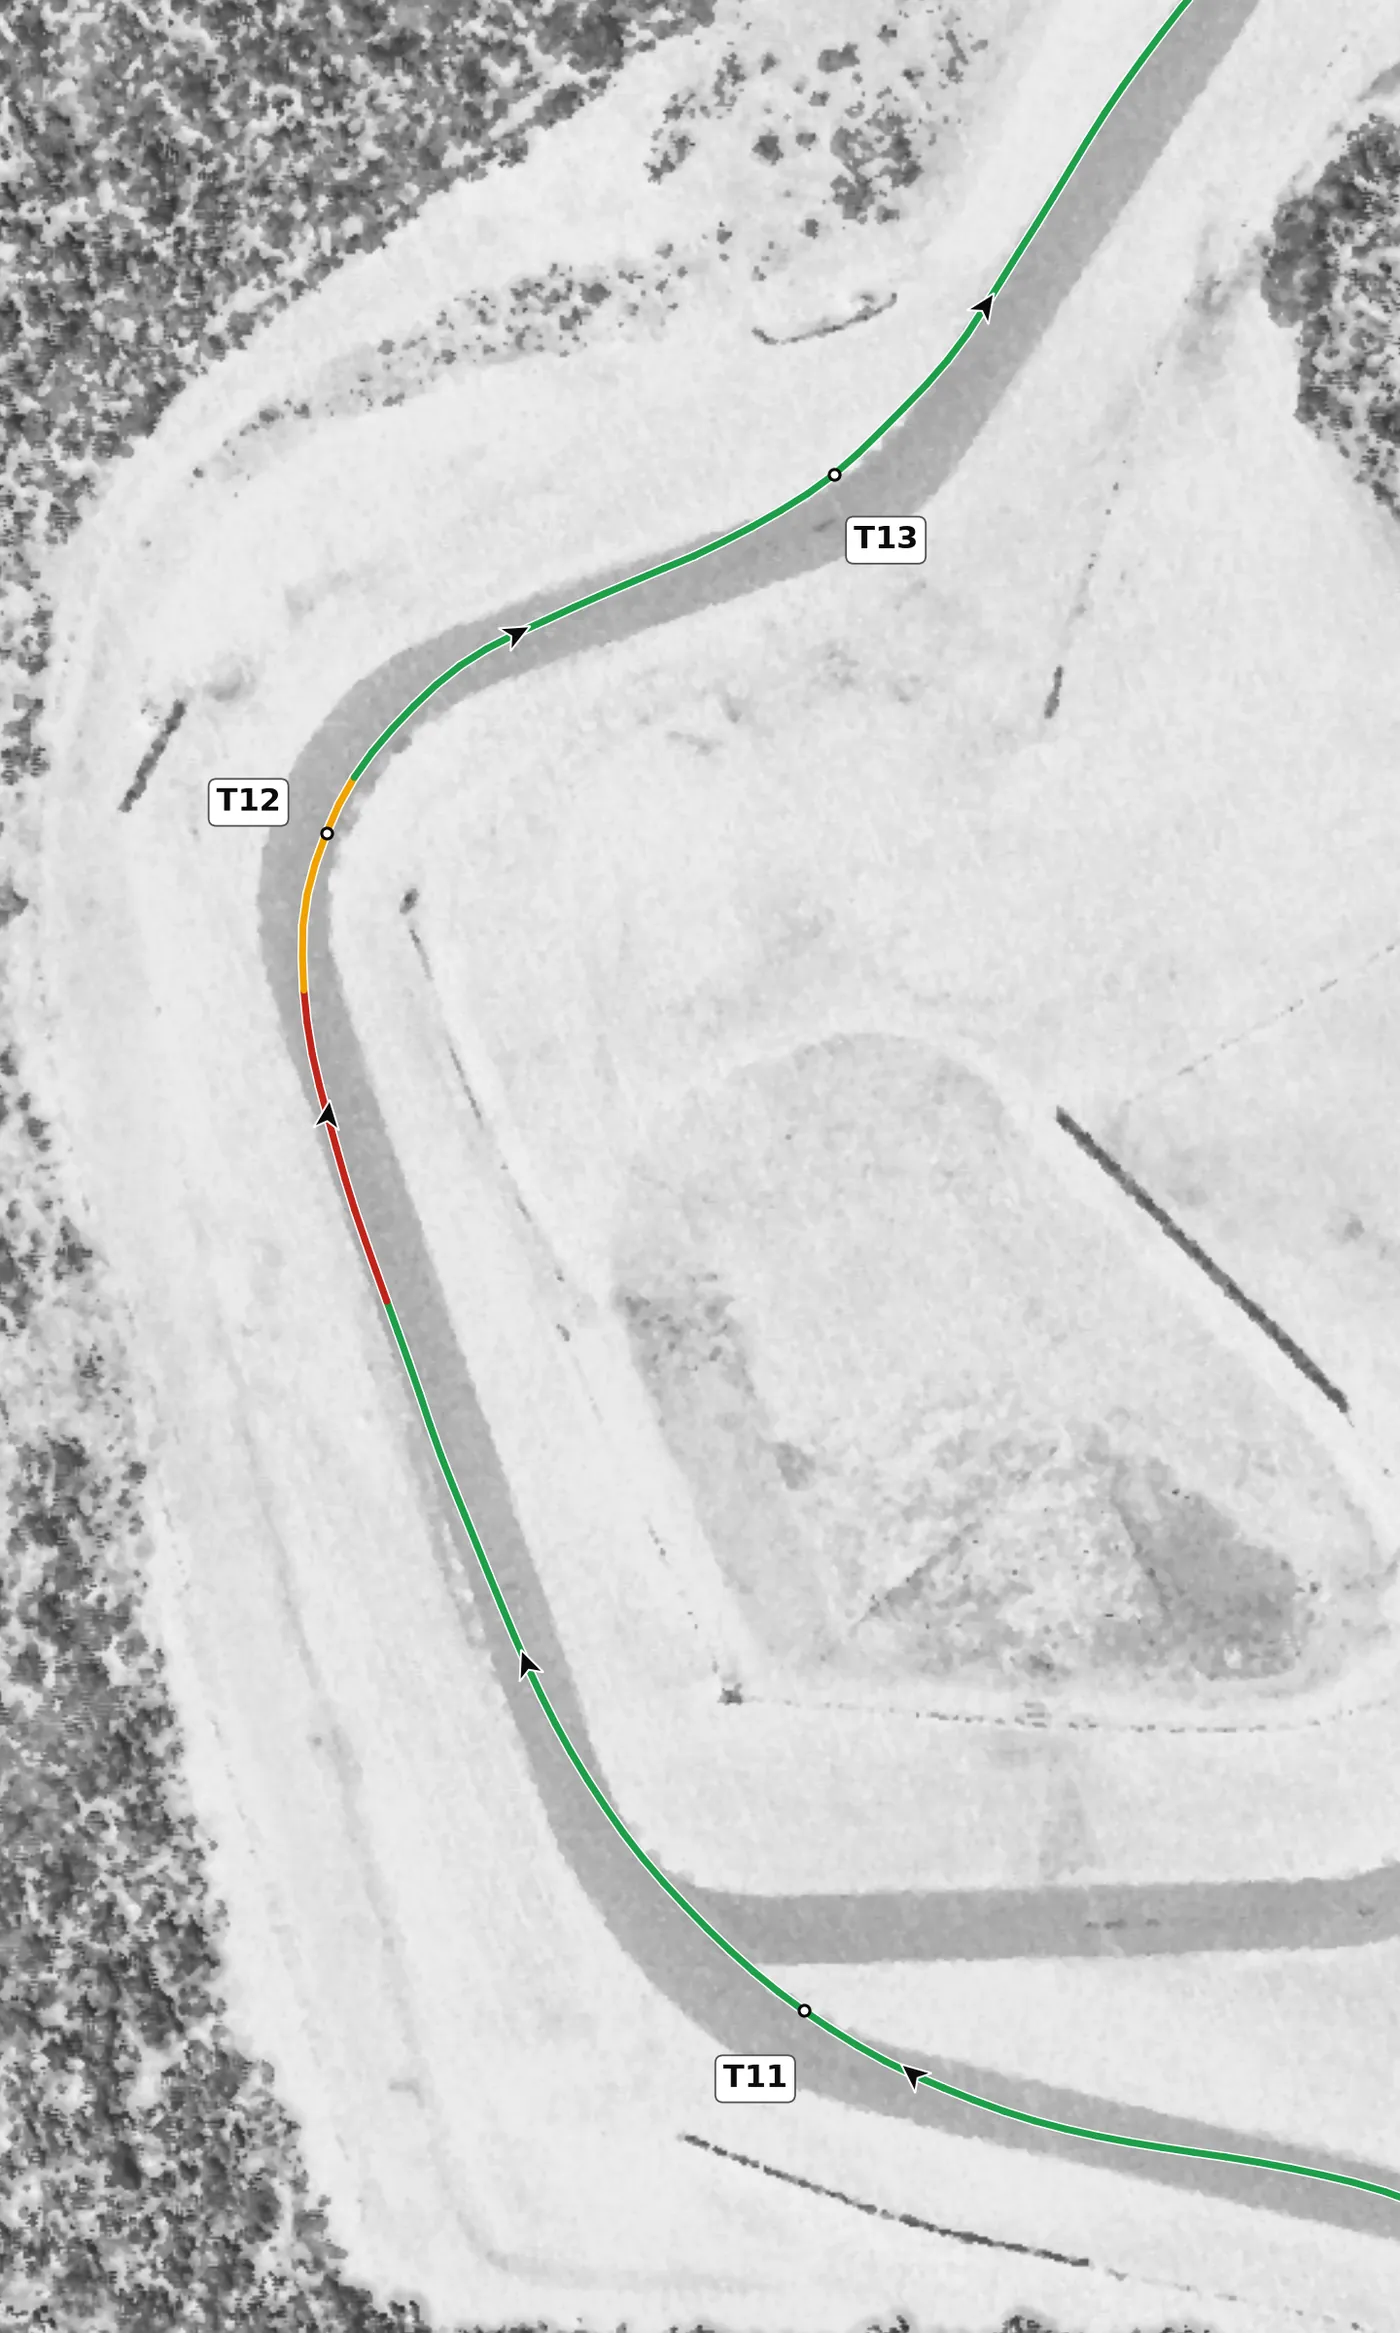
This right starts the climb to the highest part of the circuit, with a steep uphill grade at the apex. Use the hill to help slow the car, take a smooth apex and get on the power early. The mistake to avoid is a weak exit, because the climb punishes any lost speed all the way to T14.
From the survey: Starts the climb to the summit: +5.4% at the apex, rising 5.2 m to the exit.
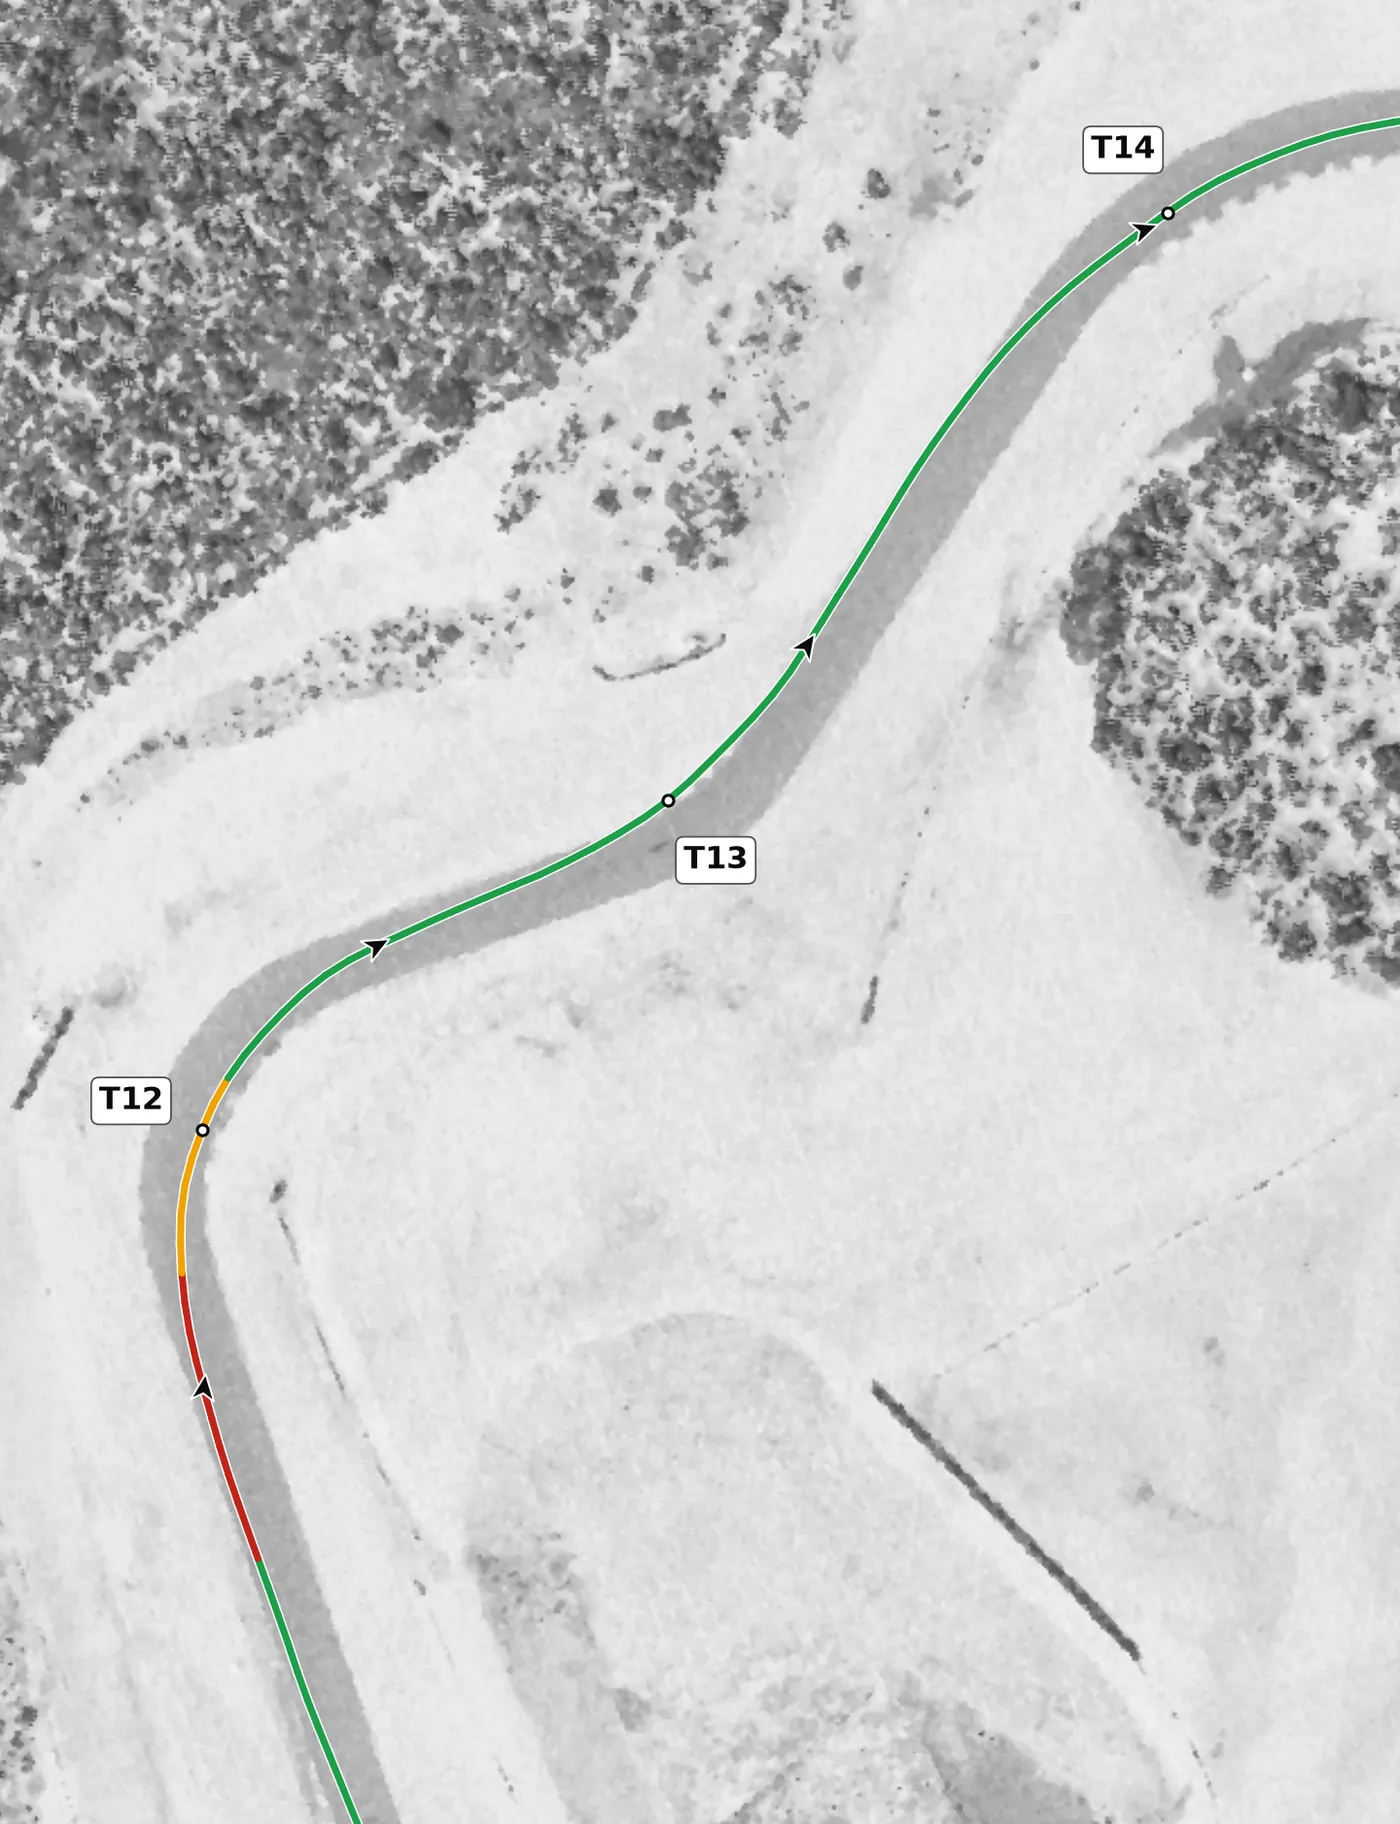
T13 is an uphill left with little camber, close to the highest point of the circuit, and it exists mostly to set up T14. Stay left through T13 so you are on the correct side of the road for the blind right that follows. The mistake to avoid is drifting to the right on exit, which leaves you badly placed for T14.
From the survey: Still climbing (+3.8% at the apex), with little camber.
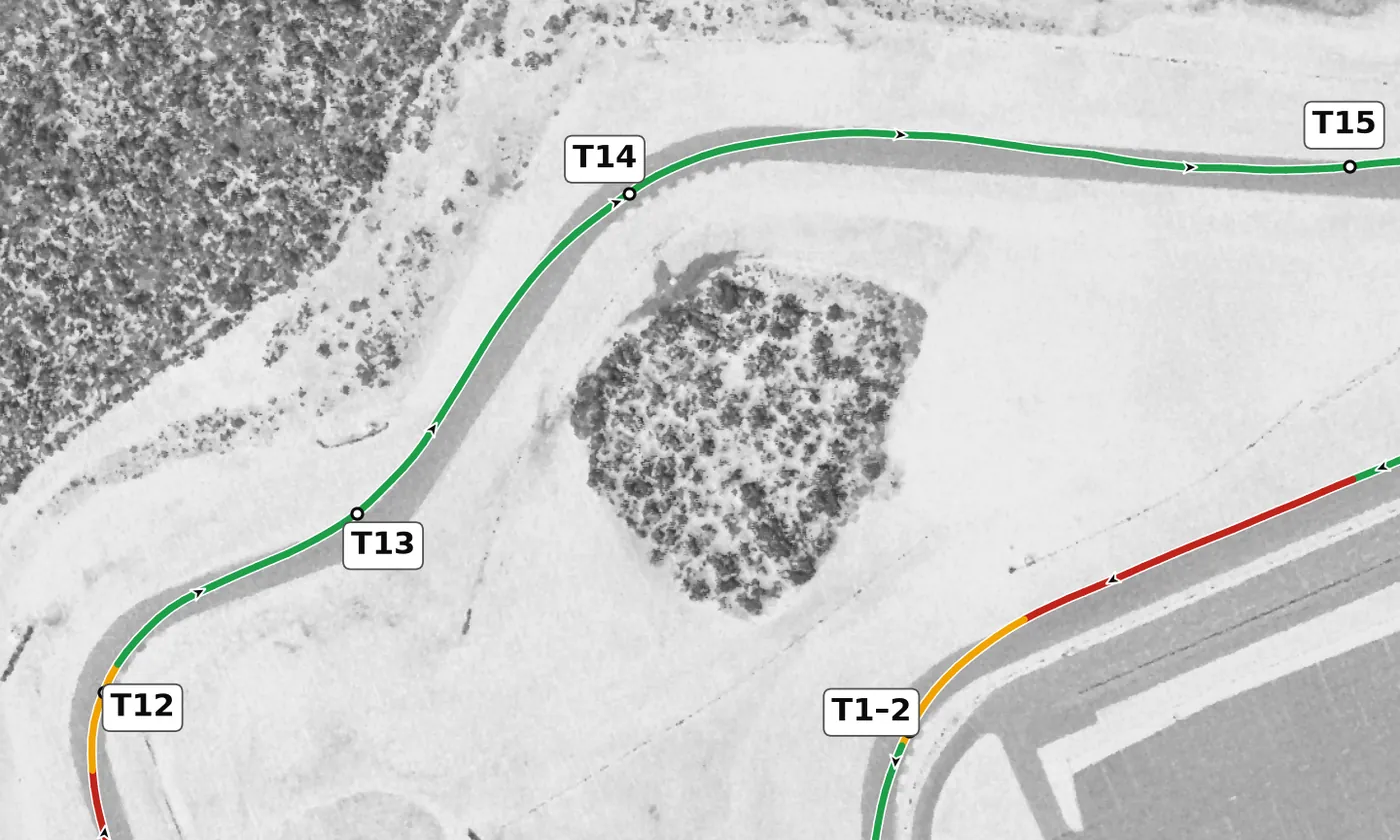
T14 is a blind right whose entry is the highest point on the circuit, over a crest where the car goes light, before the road drops onto the back straight. Set up from the left, settle the car before the crest, turn in at a fixed reference and let the car run wide on the drop onto the straight. The mistake to avoid is braking or turning hard over the blind crest; build up to it over several laps.
From the survey: Blind: its entry is the highest point on the circuit (372.5 m), over a crest, then the road falls 6.8 m.
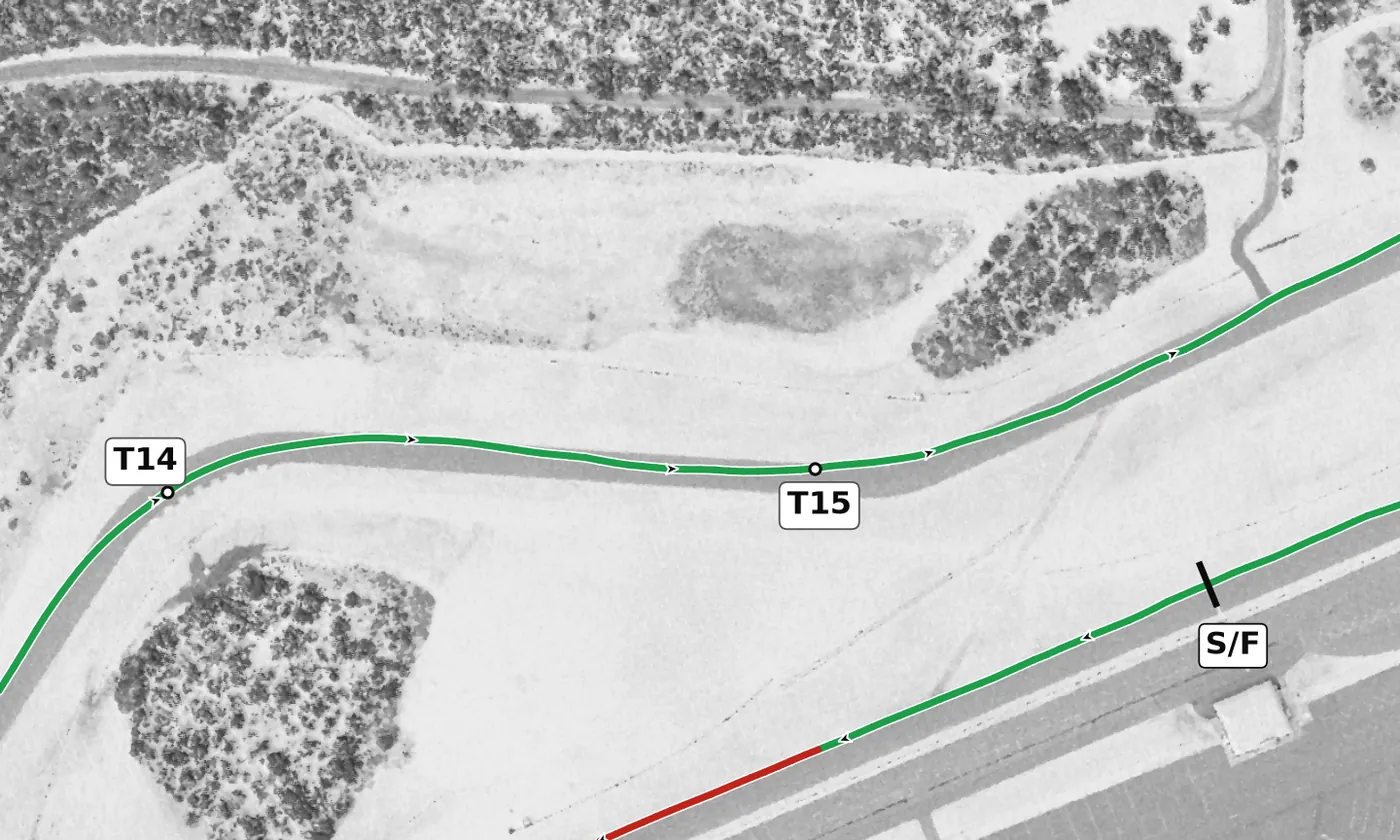
T15 is a fast, banked left kink on a downhill stretch. Keep the steering input small and smooth and stay on the throttle while you set up for T16. The mistake to avoid is a sharp steering input at speed, which unsettles the car before the fastest corner on the lap.
From the survey: Fast and downhill, banked +3.4%.
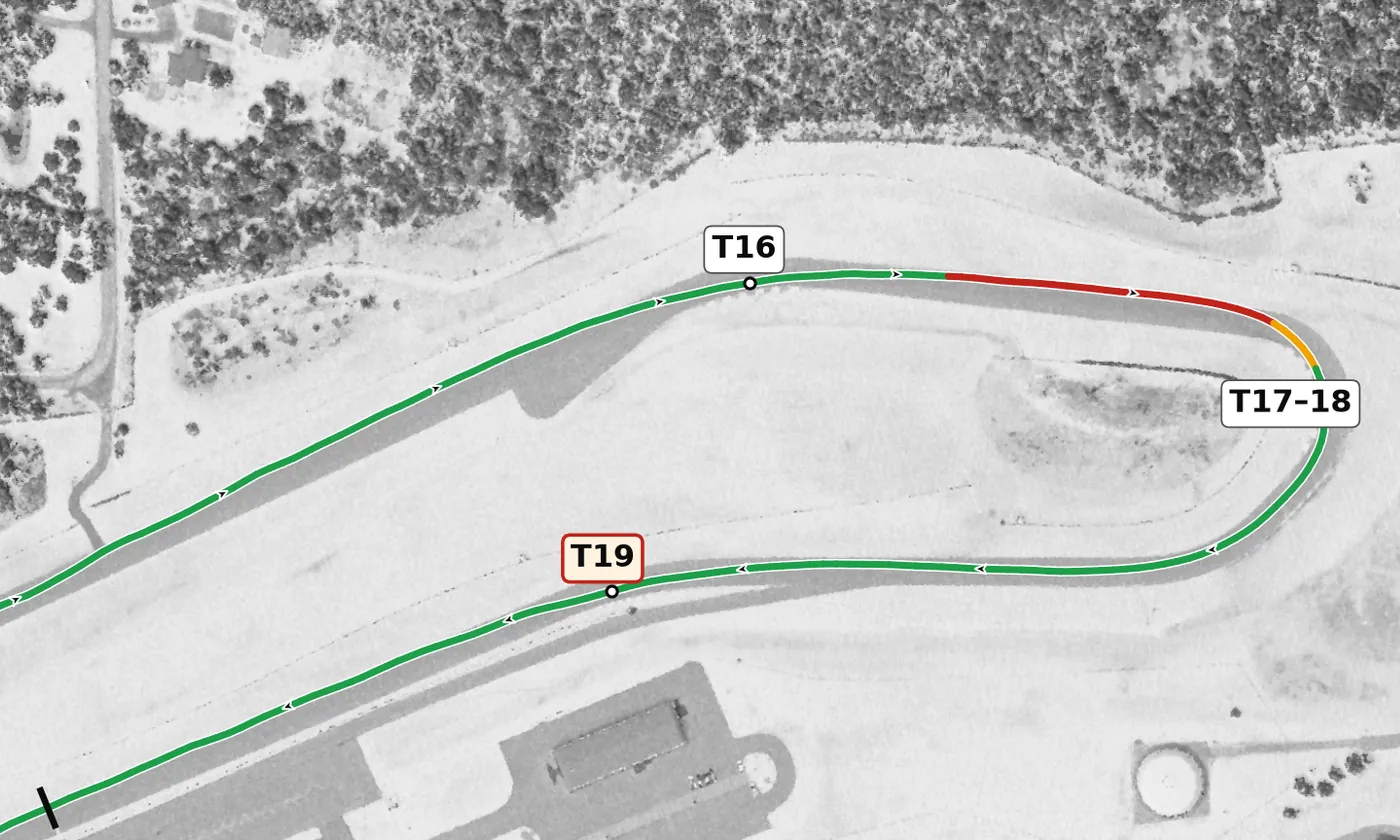
T16 is the fastest corner on the lap, a long, gently downhill right with useful banking. Look far ahead, take a smooth, single arc and keep the car settled, then prepare to brake hard for T17. The mistake to avoid is a late or ragged steering input at this speed: smoothness matters far more than the last bit of speed.
From the survey: The fastest corner on the lap: long, gently downhill, banked +2.8%.
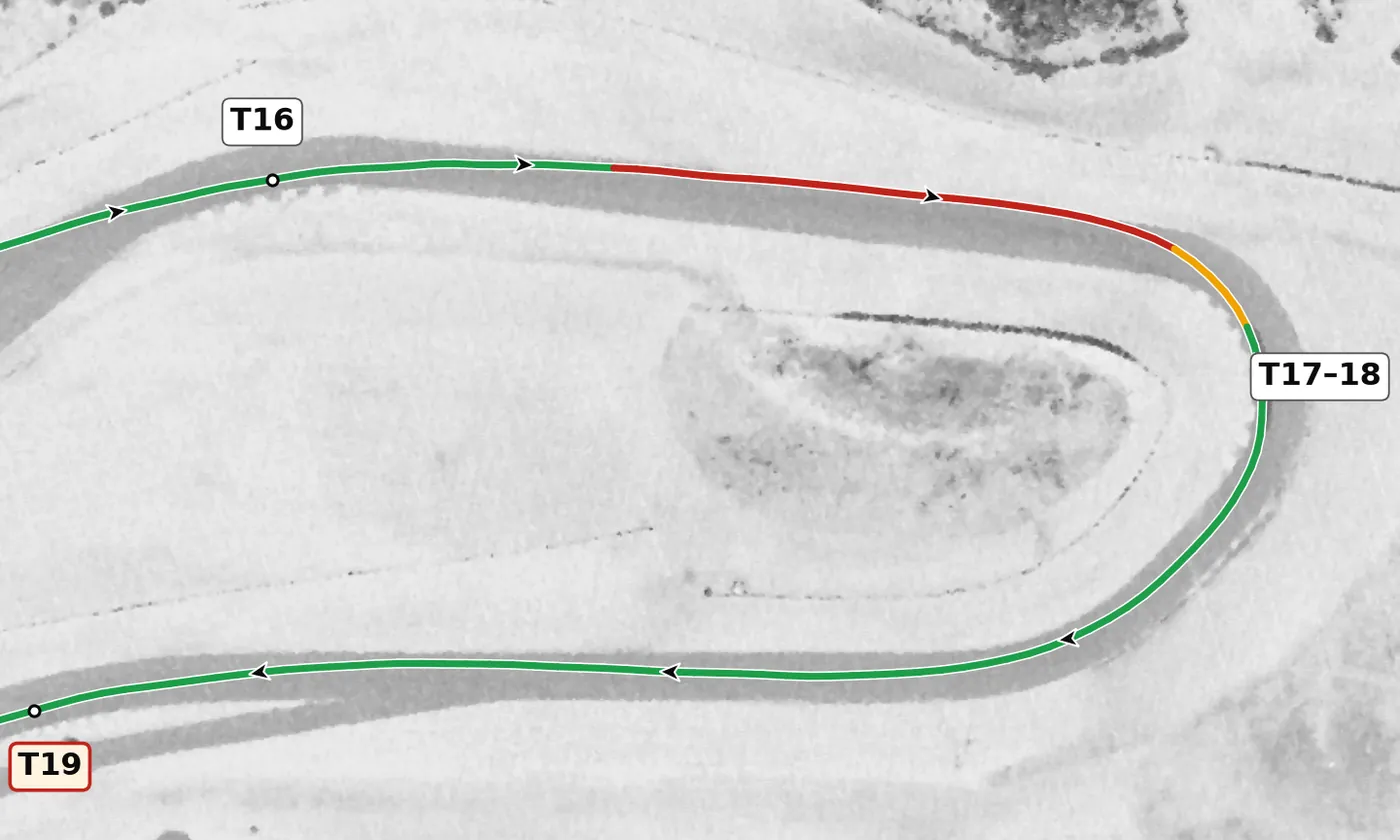
Chin numbers this as two corners, but it drives as one long right arc and is the slowest corner on the circuit, at the end of a fast section and climbing about 7 m to the exit with plenty of banking. Brake hard and early in a straight line, turn in for an apex in the middle to late part of the curb, and hold one steering input as the radius opens up the hill, feeding in the throttle. The mistake to avoid is arriving too fast: this braking zone is one of the most dangerous on the circuit, so brake early.
From the survey: The far hairpin, two Chin numbers and one corner, climbing 7 m to the exit with up to +6.1% of banking.
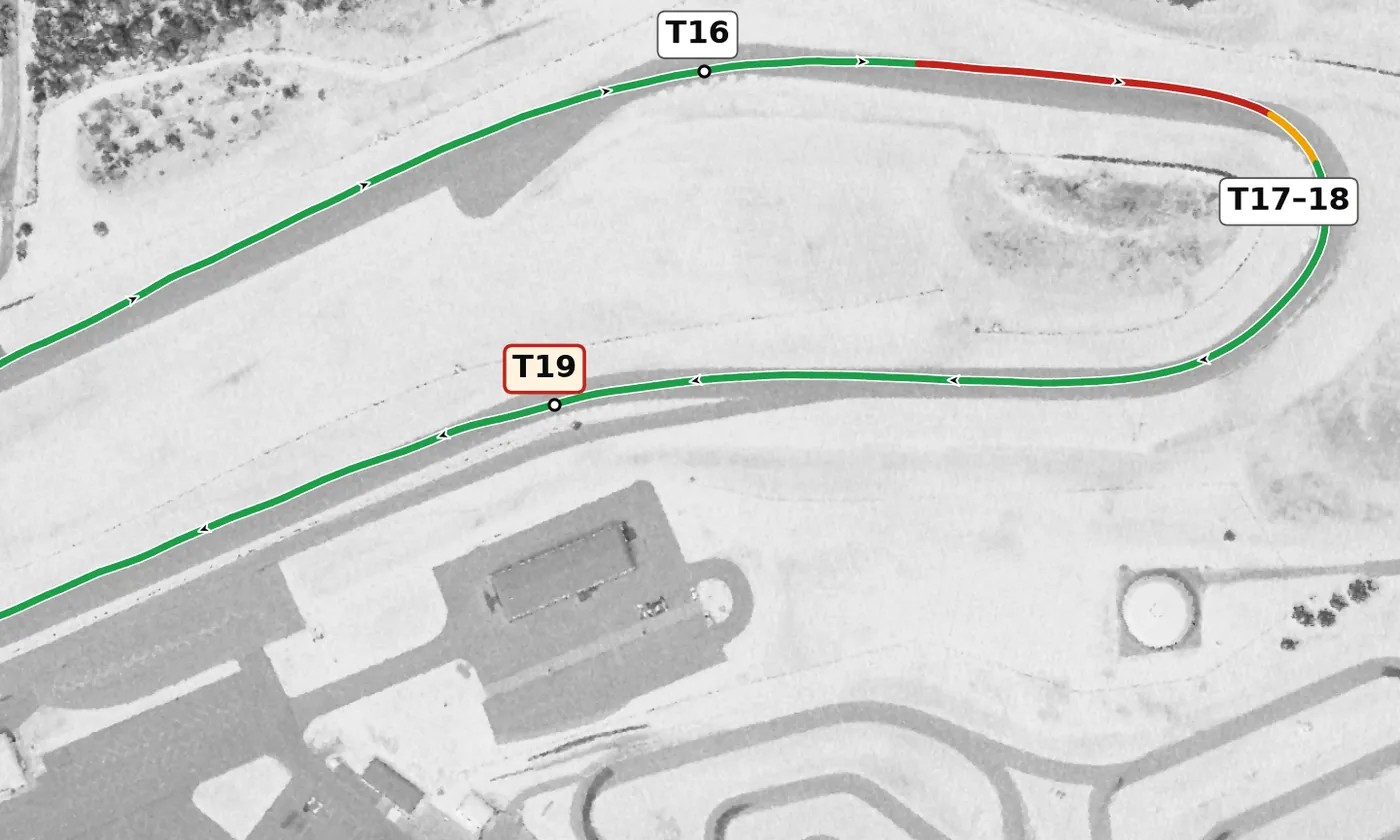
T19 is the only off-camber corner on the circuit, a left onto the front straight. Keep the steering smooth, don't ask for more grip than the surface has, and let the car track out to the right as you go to full throttle. The mistake to avoid is a fast entry that slides wide on the off-camber exit.
From the survey: The only off-camber corner on the circuit: −0.7% at the apex, −2.5% at worst, onto the front straight.
Version history
- v1.1 · 2026-10-01 — Speeds and braking points rebuilt at a typical quick HPDE pace and checked against published brake boards: braking starts about 25 m later at T1–T2, 20 m later at T3 and T7, and 5 m later at the T6 hairpin and T17–T18. The line now goes straight from throttle to brake, with no coasting in between. Version history and feedback contributors added.
- v1.0 · 2026-10-01 — First version.
Feedback contributors
Drivers and instructors whose feedback has improved this line. Thank you.
- Mike M — no coasting between throttle and brake; braking points (v1.1)