Road Atlanta — Race Line
Bill's own lap: '22 BMW Z4 M40i, 1:40.17 (his Road Atlanta best), September 27 2026, 25 Hz GPS (about a metre). A real road-car line on street tires.
Heads up: A fast line, not a safe one to copy blindly. This is the car and the driving style of Bill's September 2026 Turn 7 crash. Study the shape and build your own margin into it.
- Throttle
- Coast / partial
- Braking
- Apex
- T4Off-camber corner
Arrows show the direction of the lap. The grey basemap is USGS LiDAR: dark = asphalt, light = grass. Tap any map for the full-size image.
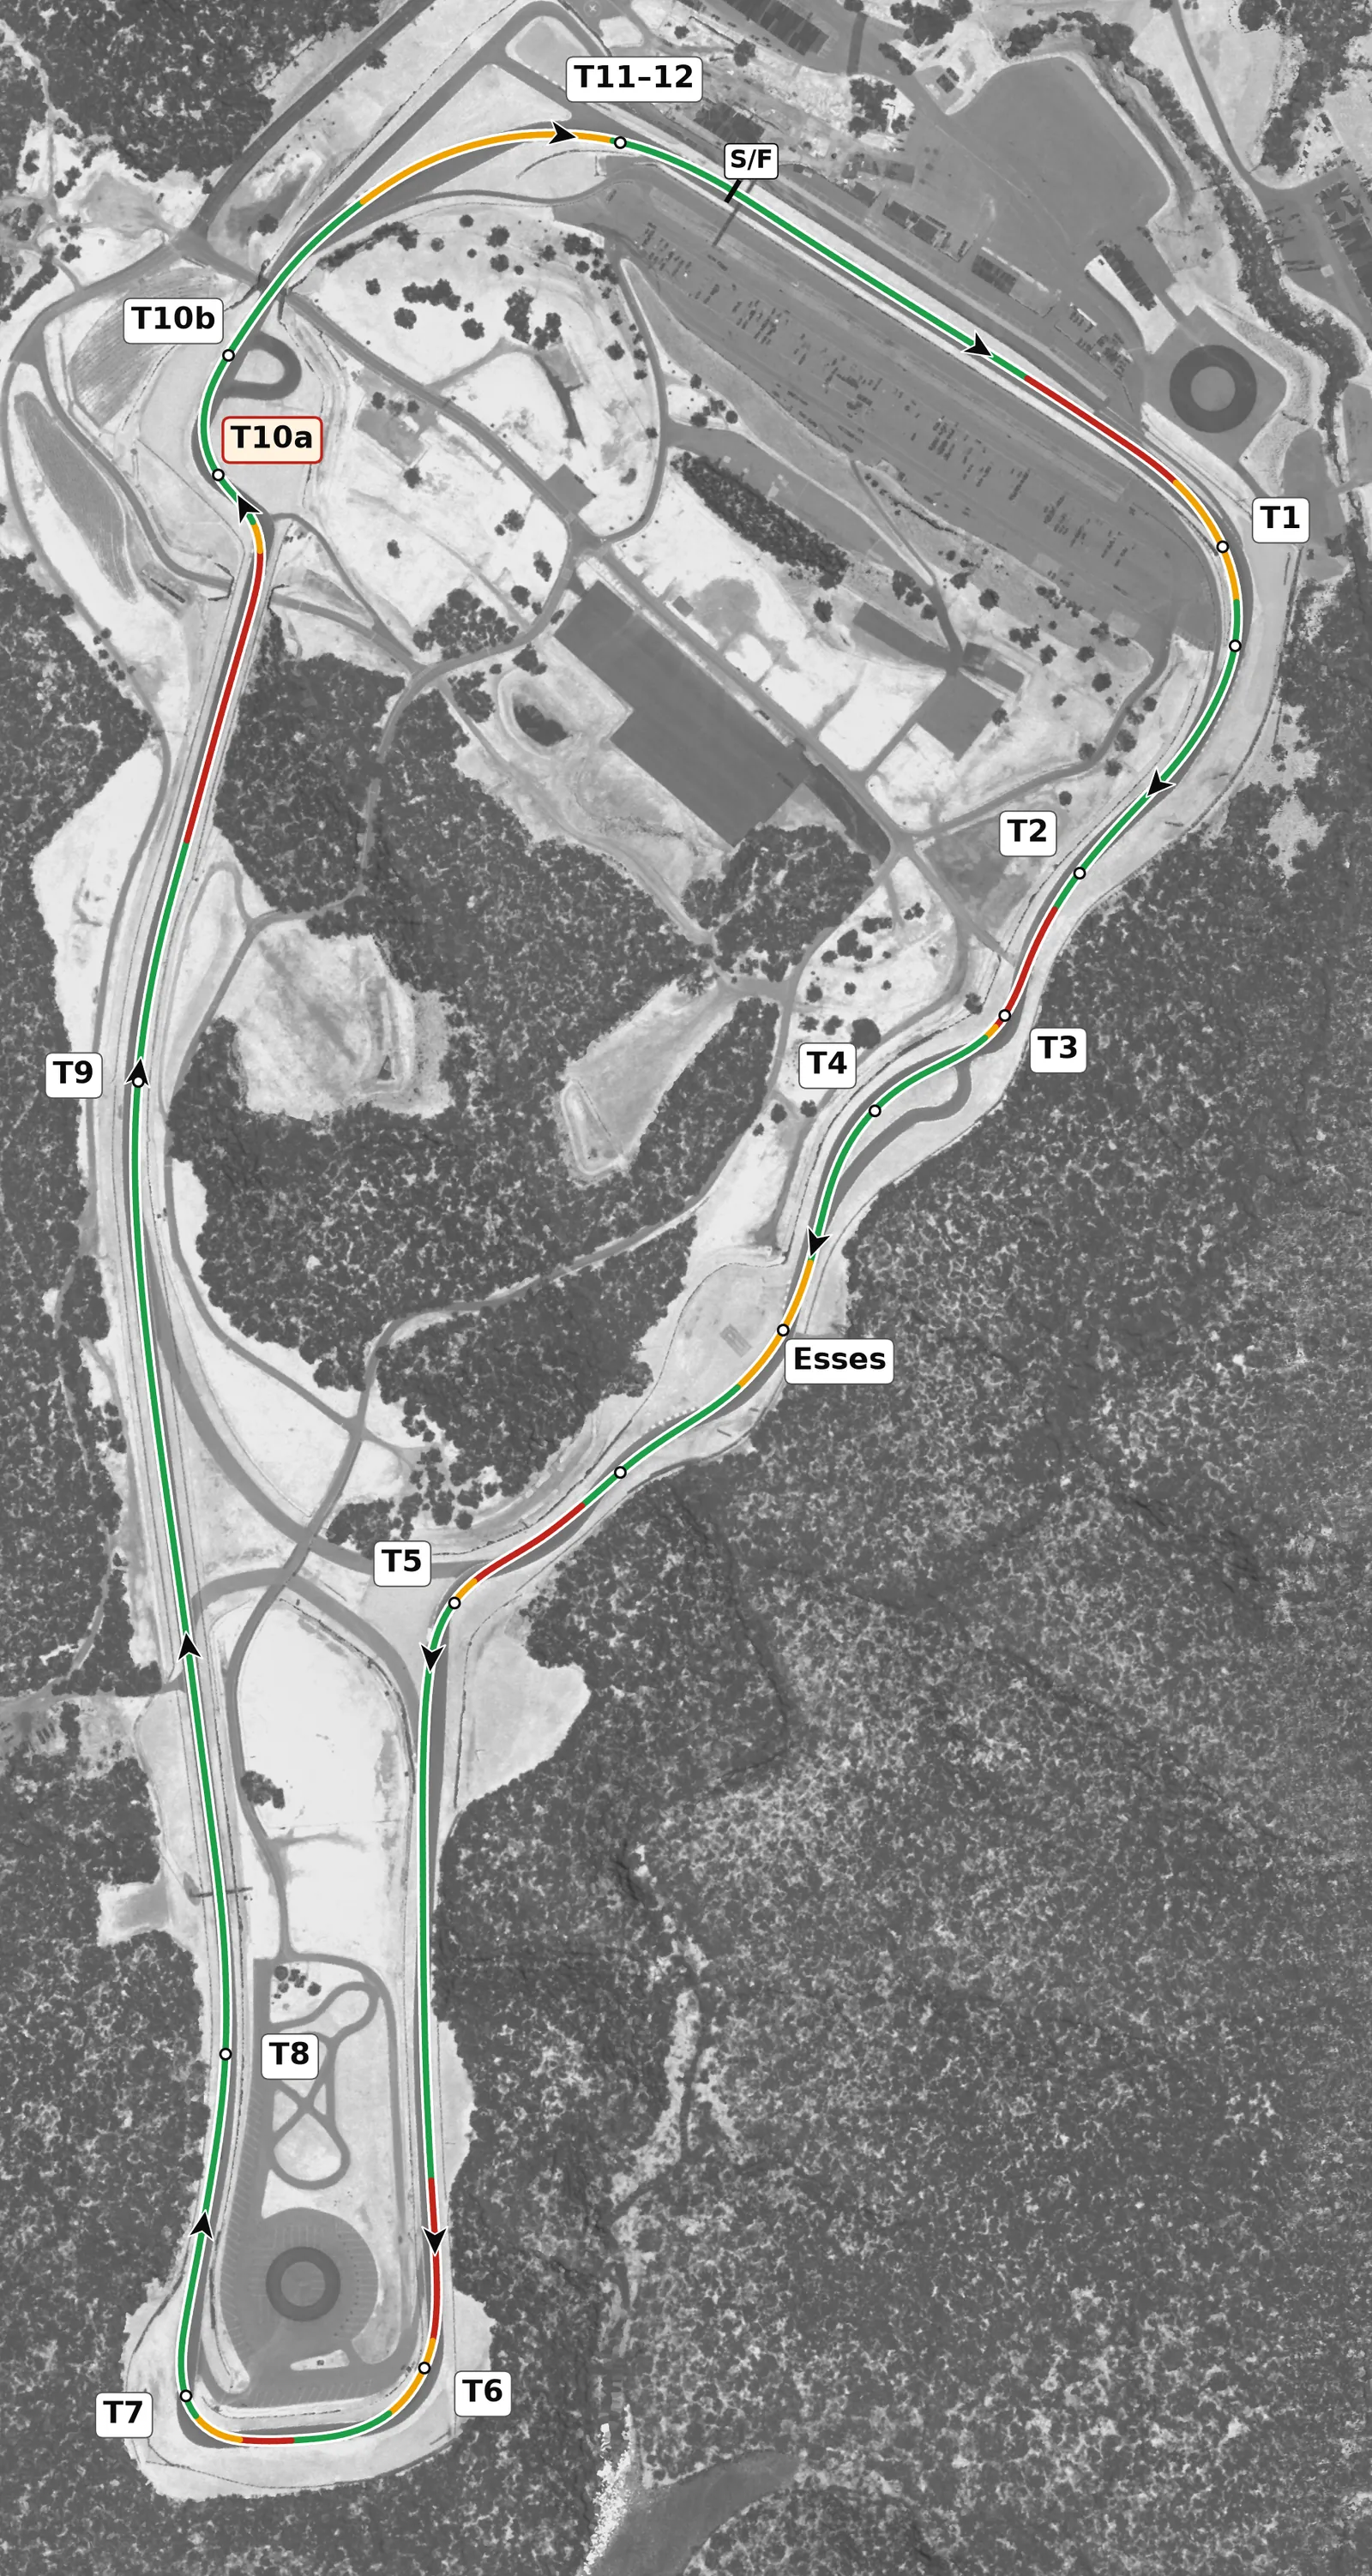
Road Atlanta rewards commitment through the fast, hilly first sector and patience at the two corners that open long straights: T7 onto the back straight and T10b toward the front straight. Almost every corner is on camber and helps you, but the elevation never stops, so the car goes light over T2, T5 and the chicane crest and is pressed down at the bottom of the Esses; make your braking and steering inputs while the car is loaded, not while it is light. Treat the blind sections (T3, the Esses entry, T10b and T12) as places to build speed over several laps, never to find the limit on lap one.
Sectors
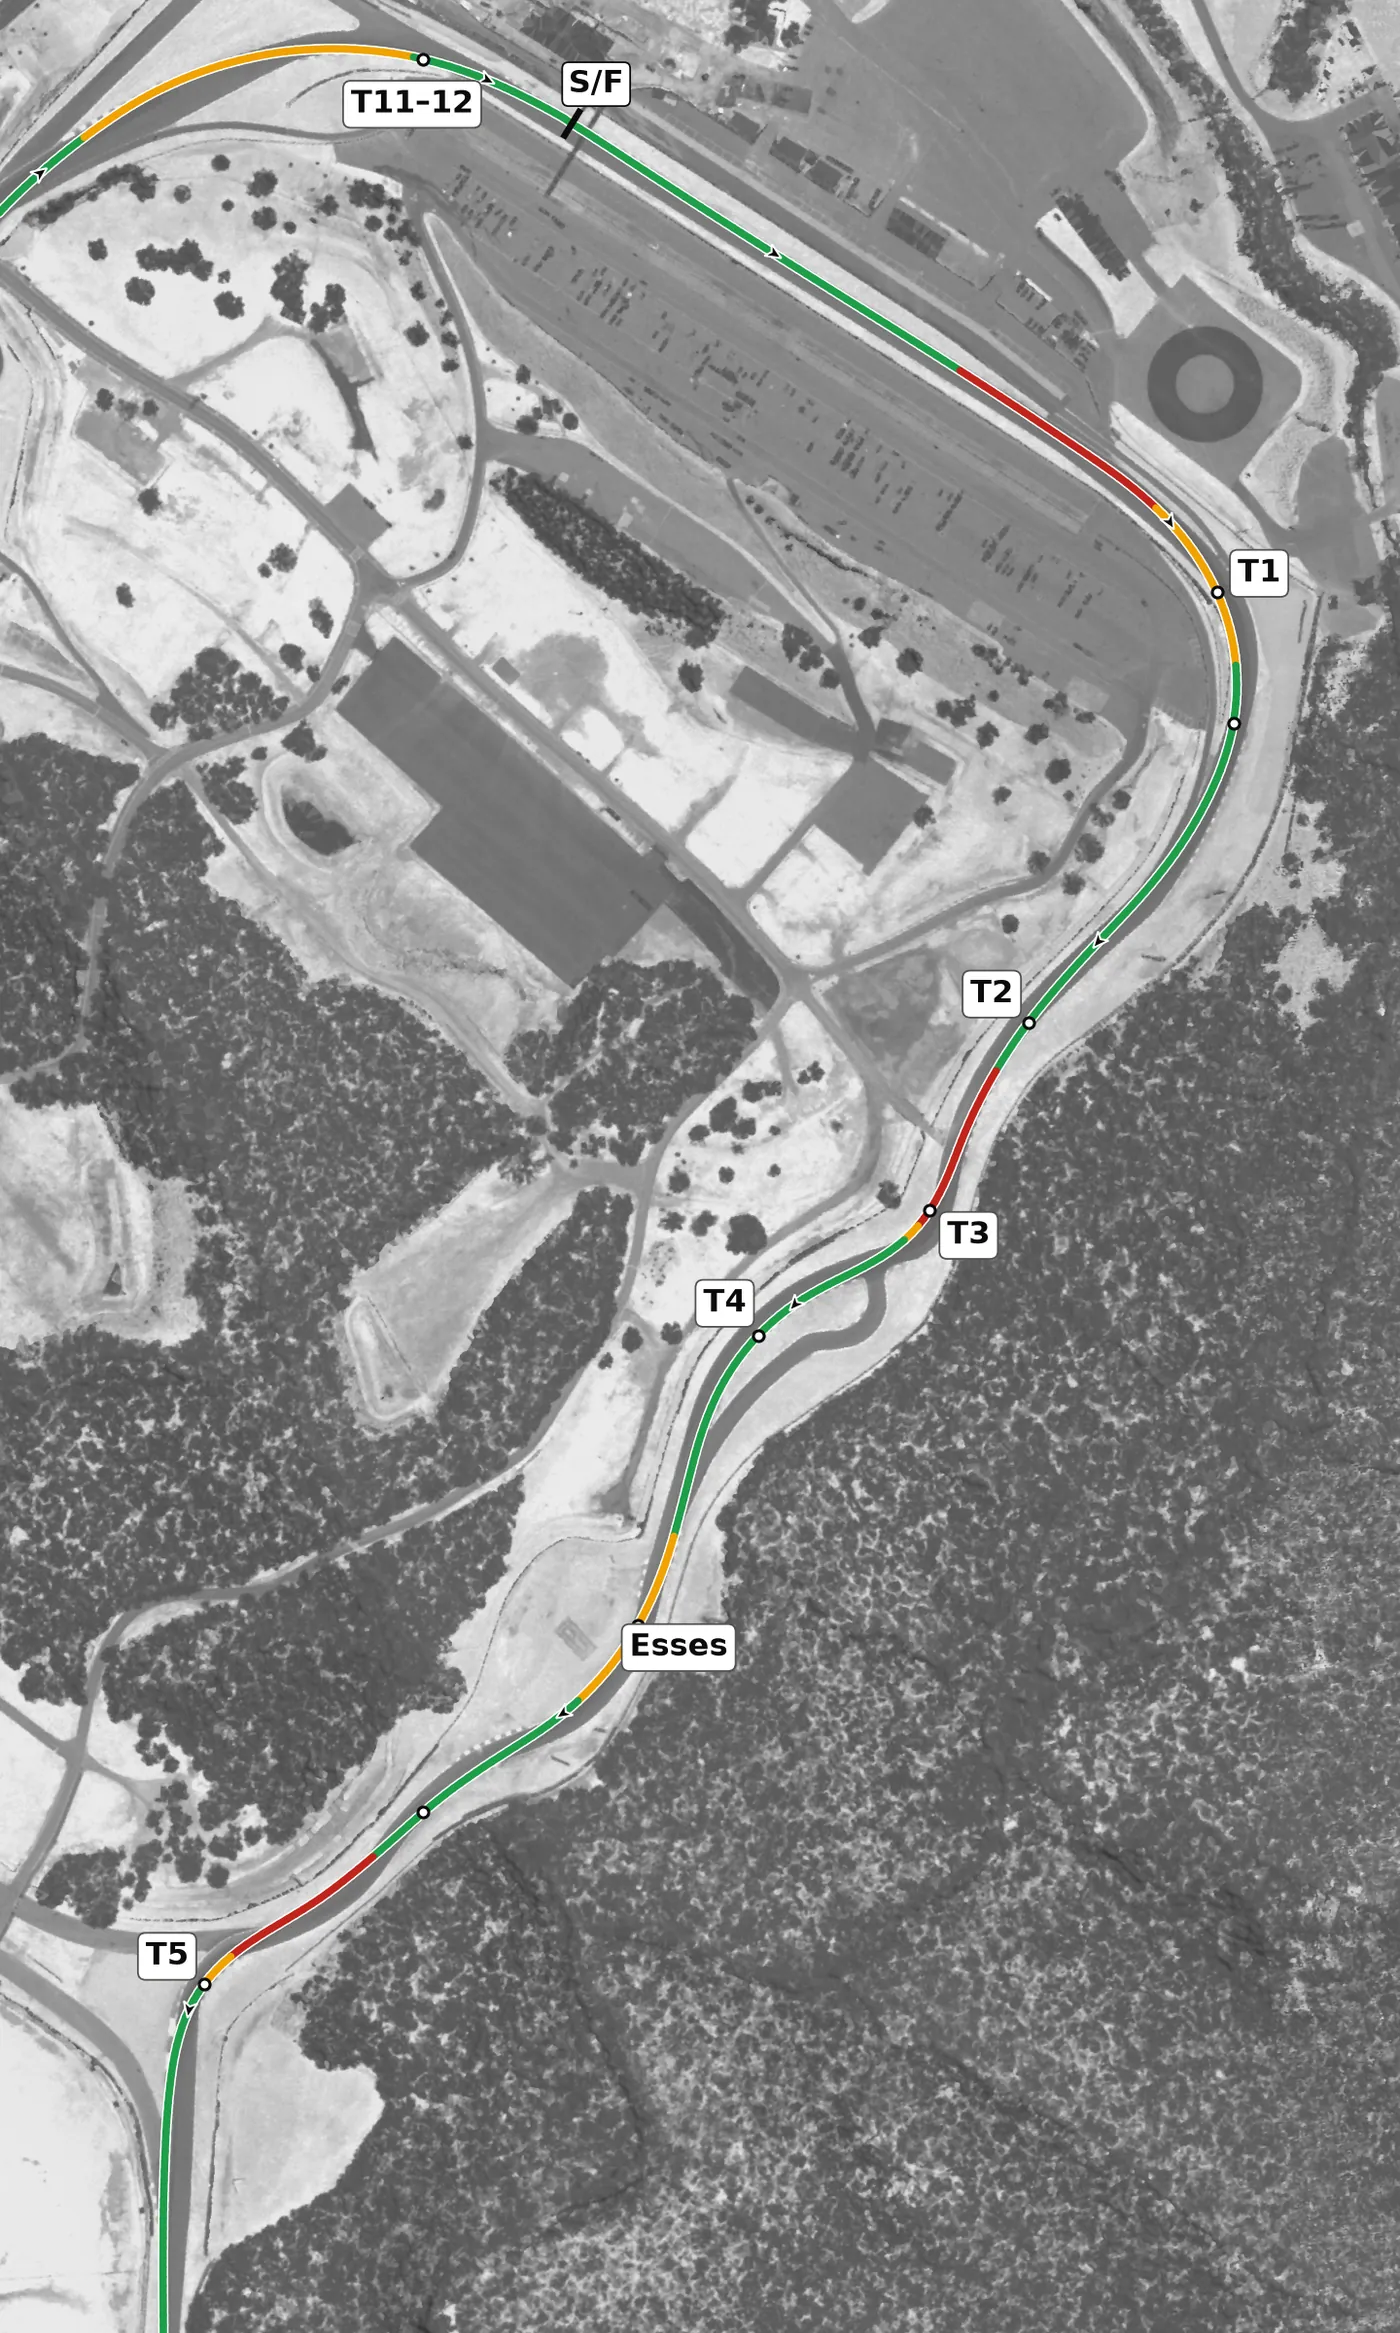
From a downhill brake into T1 the road climbs hard to the blind left at T2, whose only job is to put the car straight and on the left for the short brake into T3. T3 and T4 set up the Esses, a steep downhill right into the compression at the lowest point of the track and then an uphill left, and the sector ends climbing through the T5 left. A tidy T3 exit is what makes the whole sequence flow; a scruffy one costs you all the way to T5.
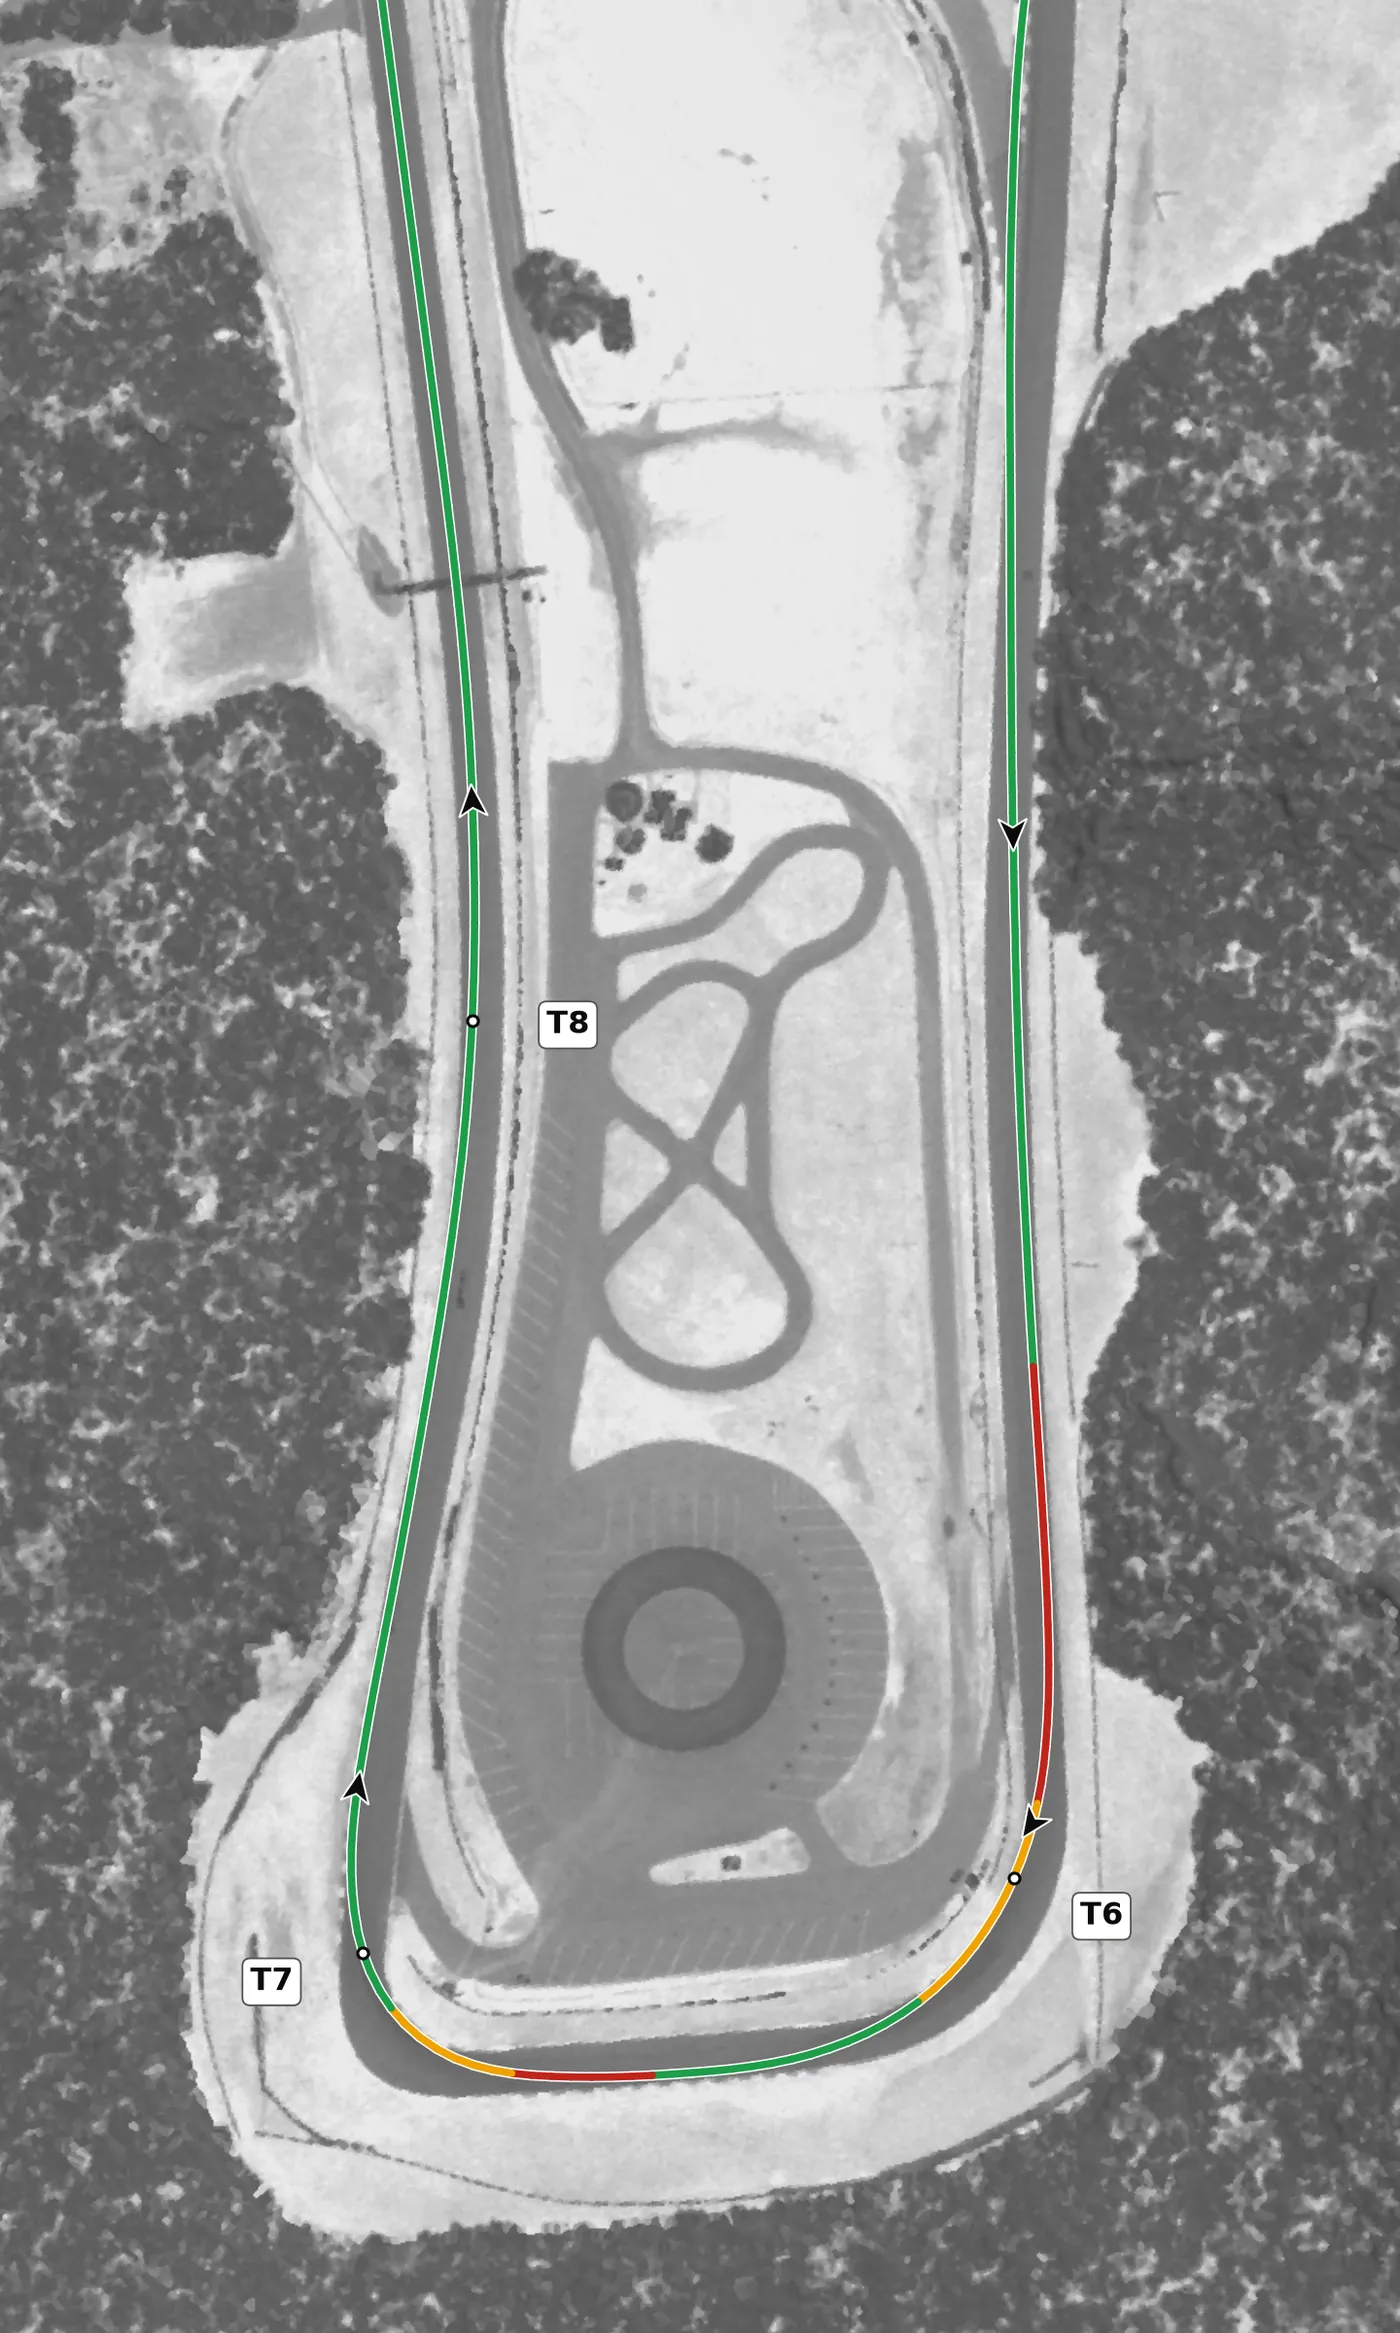
T6 is the most heavily banked corner on the lap and rewards a smooth, early brake release and speed carried in, while T7 asks for the opposite: a straight-line brake, a late turn-in and patience. The T7 exit decides your speed down the whole back straight, and T8 on that straight is a gentle left bend rather than a corner, so concentrate on getting the car straight and accelerating smoothly.
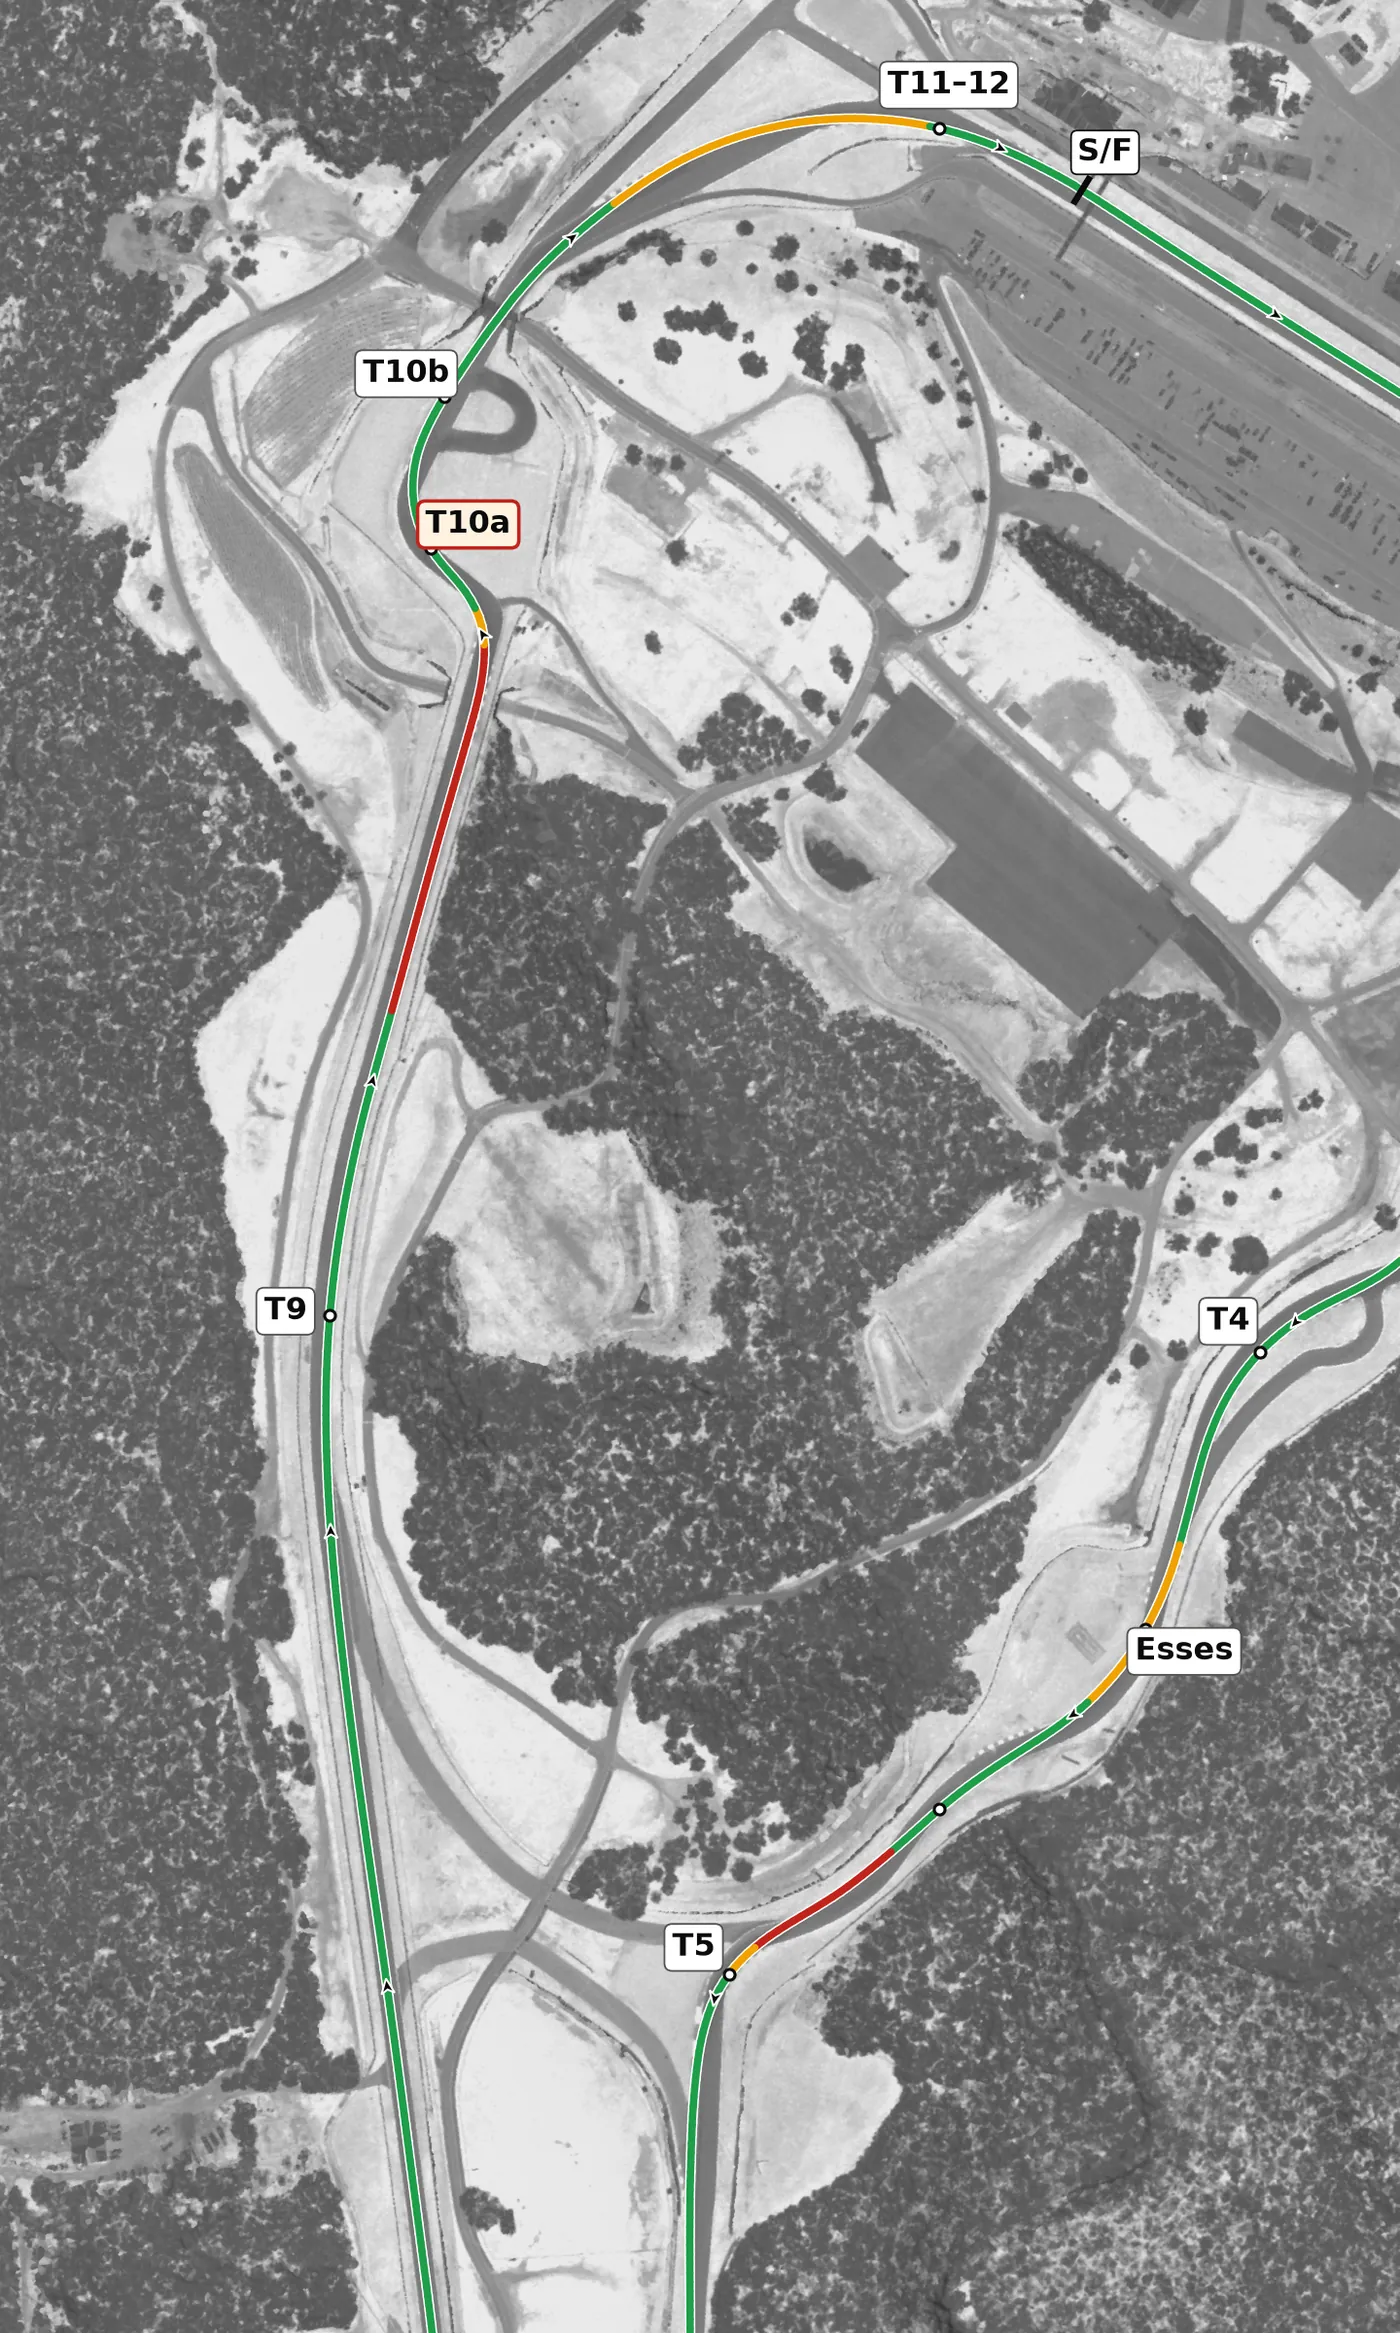
T9 is a fast right bend on the back straight; the road then runs downhill, bottoms out, and you brake hard as the brake zone climbs into the T10a left, the only off-camber corner on the lap. Treat T10a as the setup for T10b, which climbs over a long crest where the car goes light before the road drops steeply under the bridge into the fast downhill T11–T12 onto the front straight. Over the crest and down the hill, keep the wheel steady and avoid sudden braking.
Corners
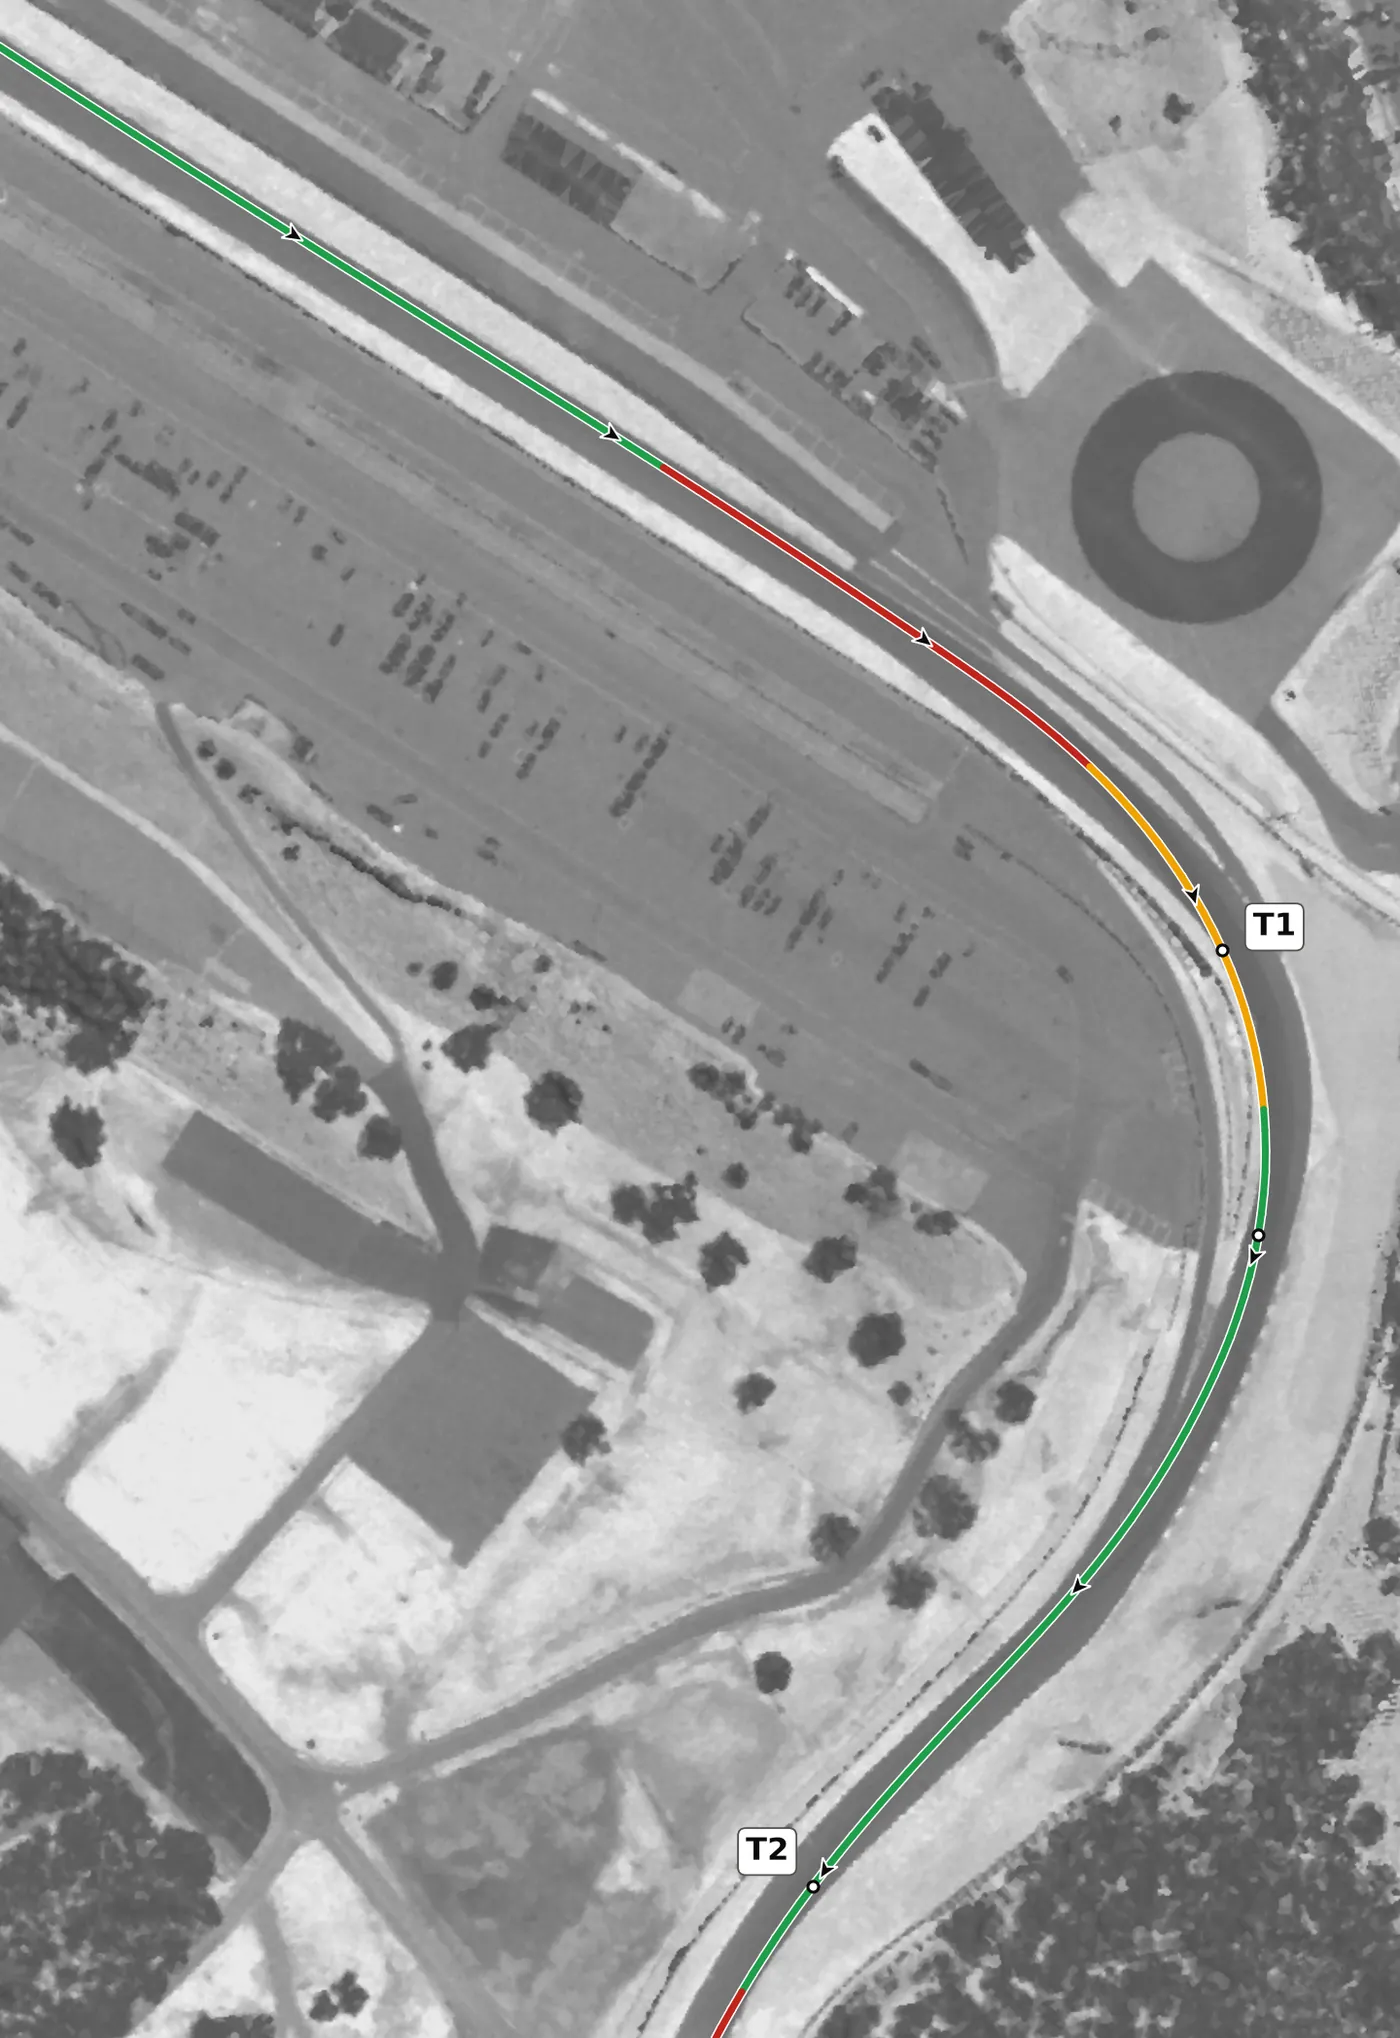
Brake in a straight line on the downhill approach, release the pressure smoothly as you turn in, and let the banking support the car to the apex at the bottom of the hill. Track out to the left as the road starts climbing hard toward T2. T1 is a momentum corner, but it is a real stop from top speed: brake firmly and briefly, and avoid over-slowing on the way in.
From the survey: Banked (+2.65% at the apex). Brake downhill, then the road climbs hard to T2.
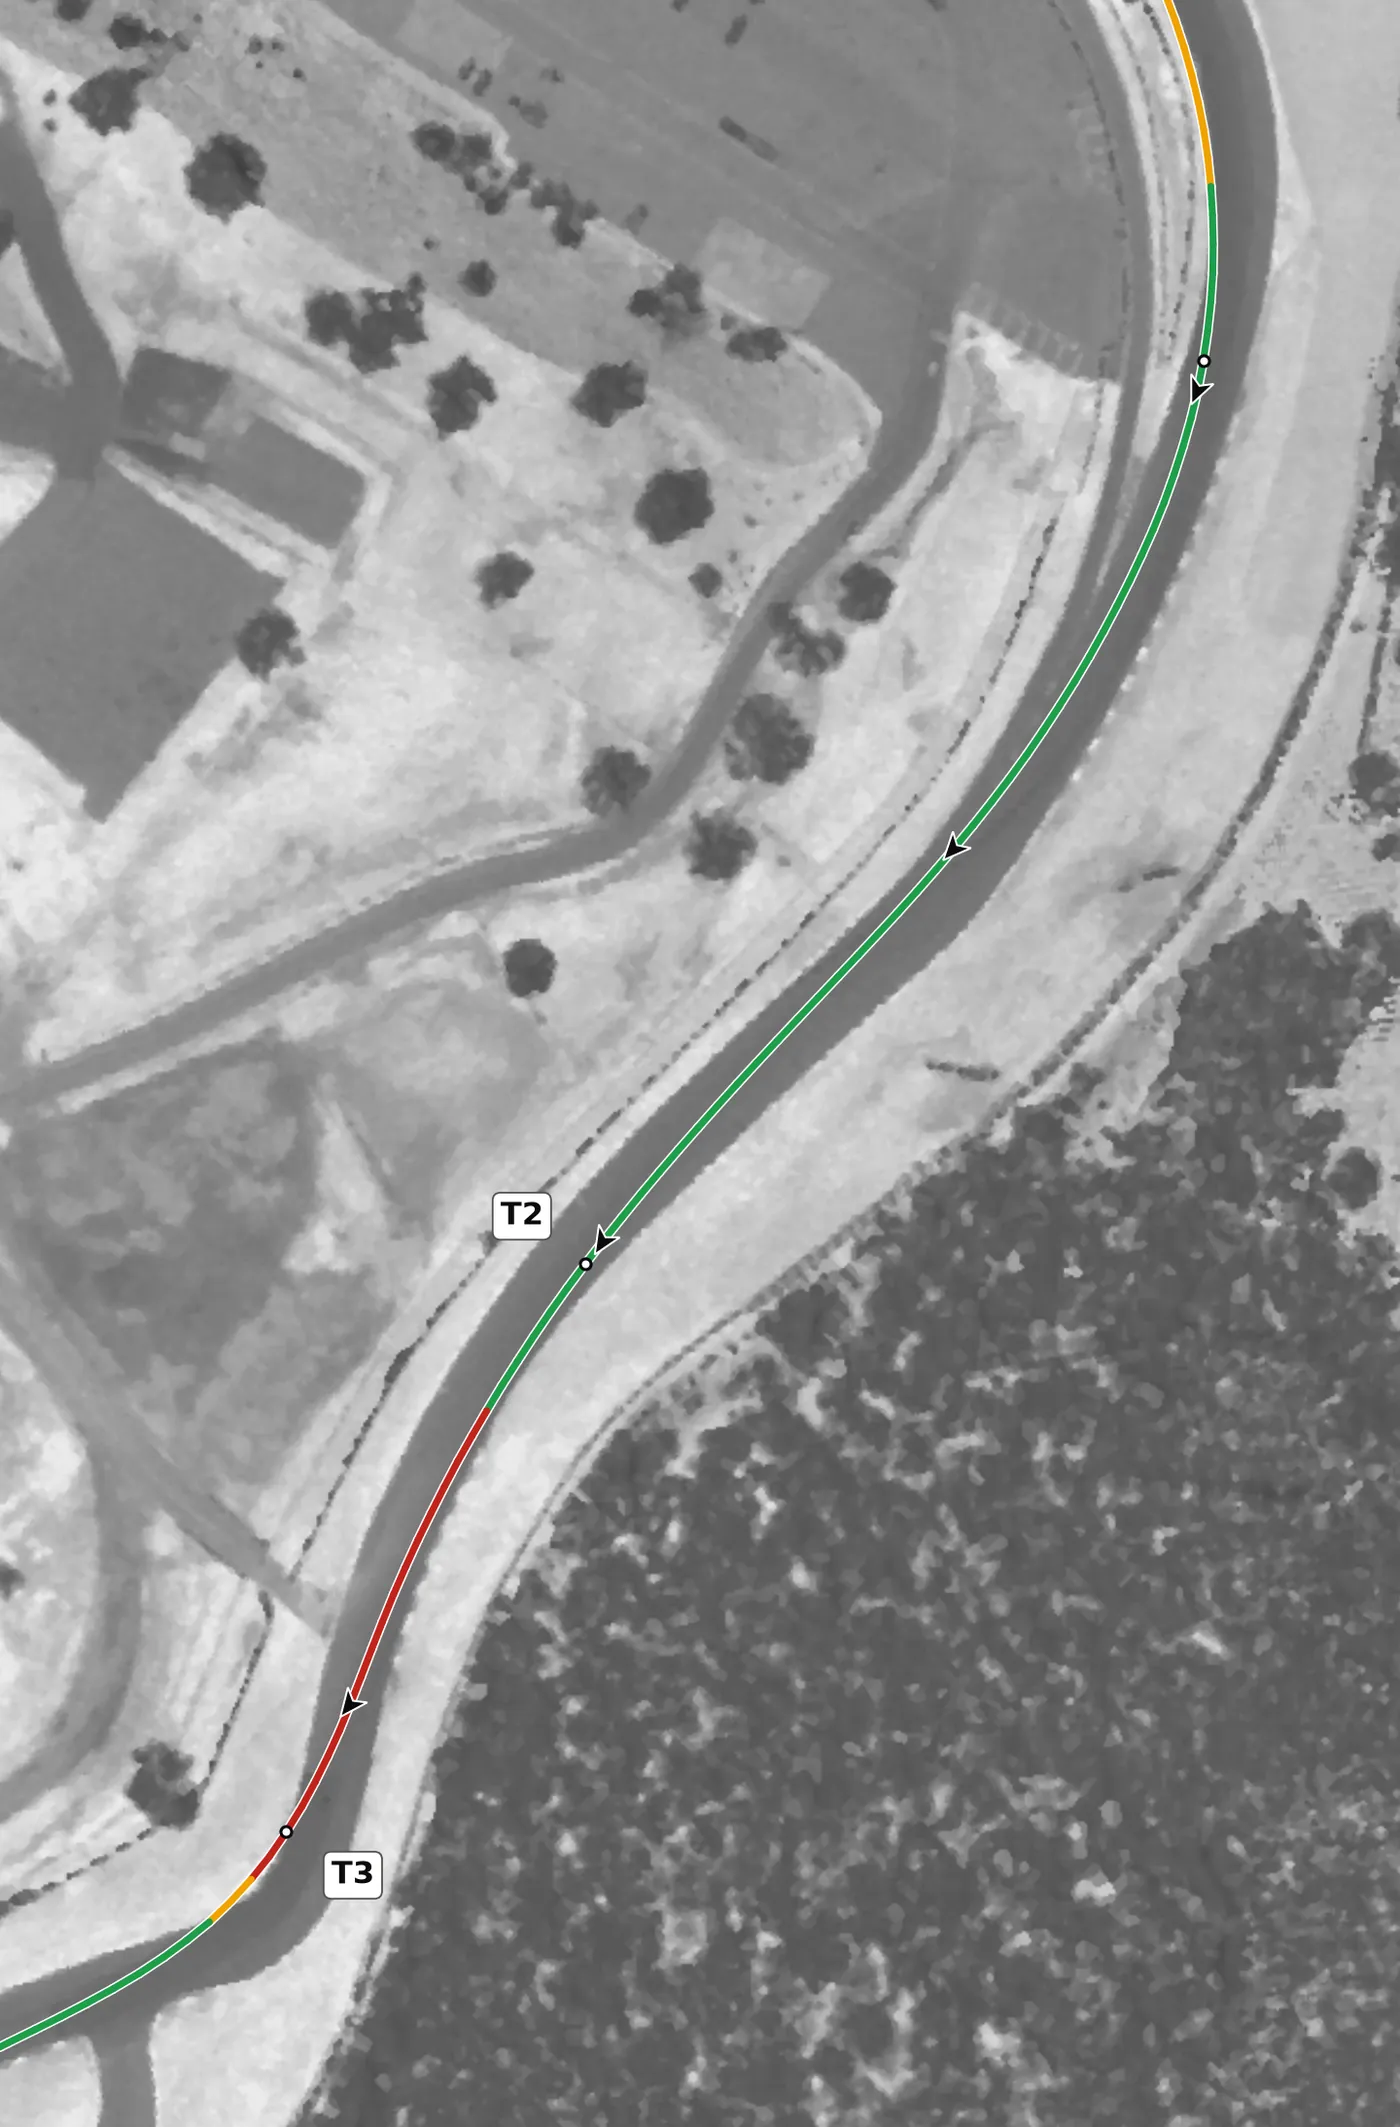
Climbing out of T1, the road crests at this left and you cannot yet see T3, so use T2 to get the car to the left edge and as straight as possible rather than as a corner to attack. The car goes light over the crest, so keep your steering small and smooth. The mistake to avoid is still turning when you reach the T3 brake zone, which makes the light car easy to spin.
From the survey: Blind, over a crest.
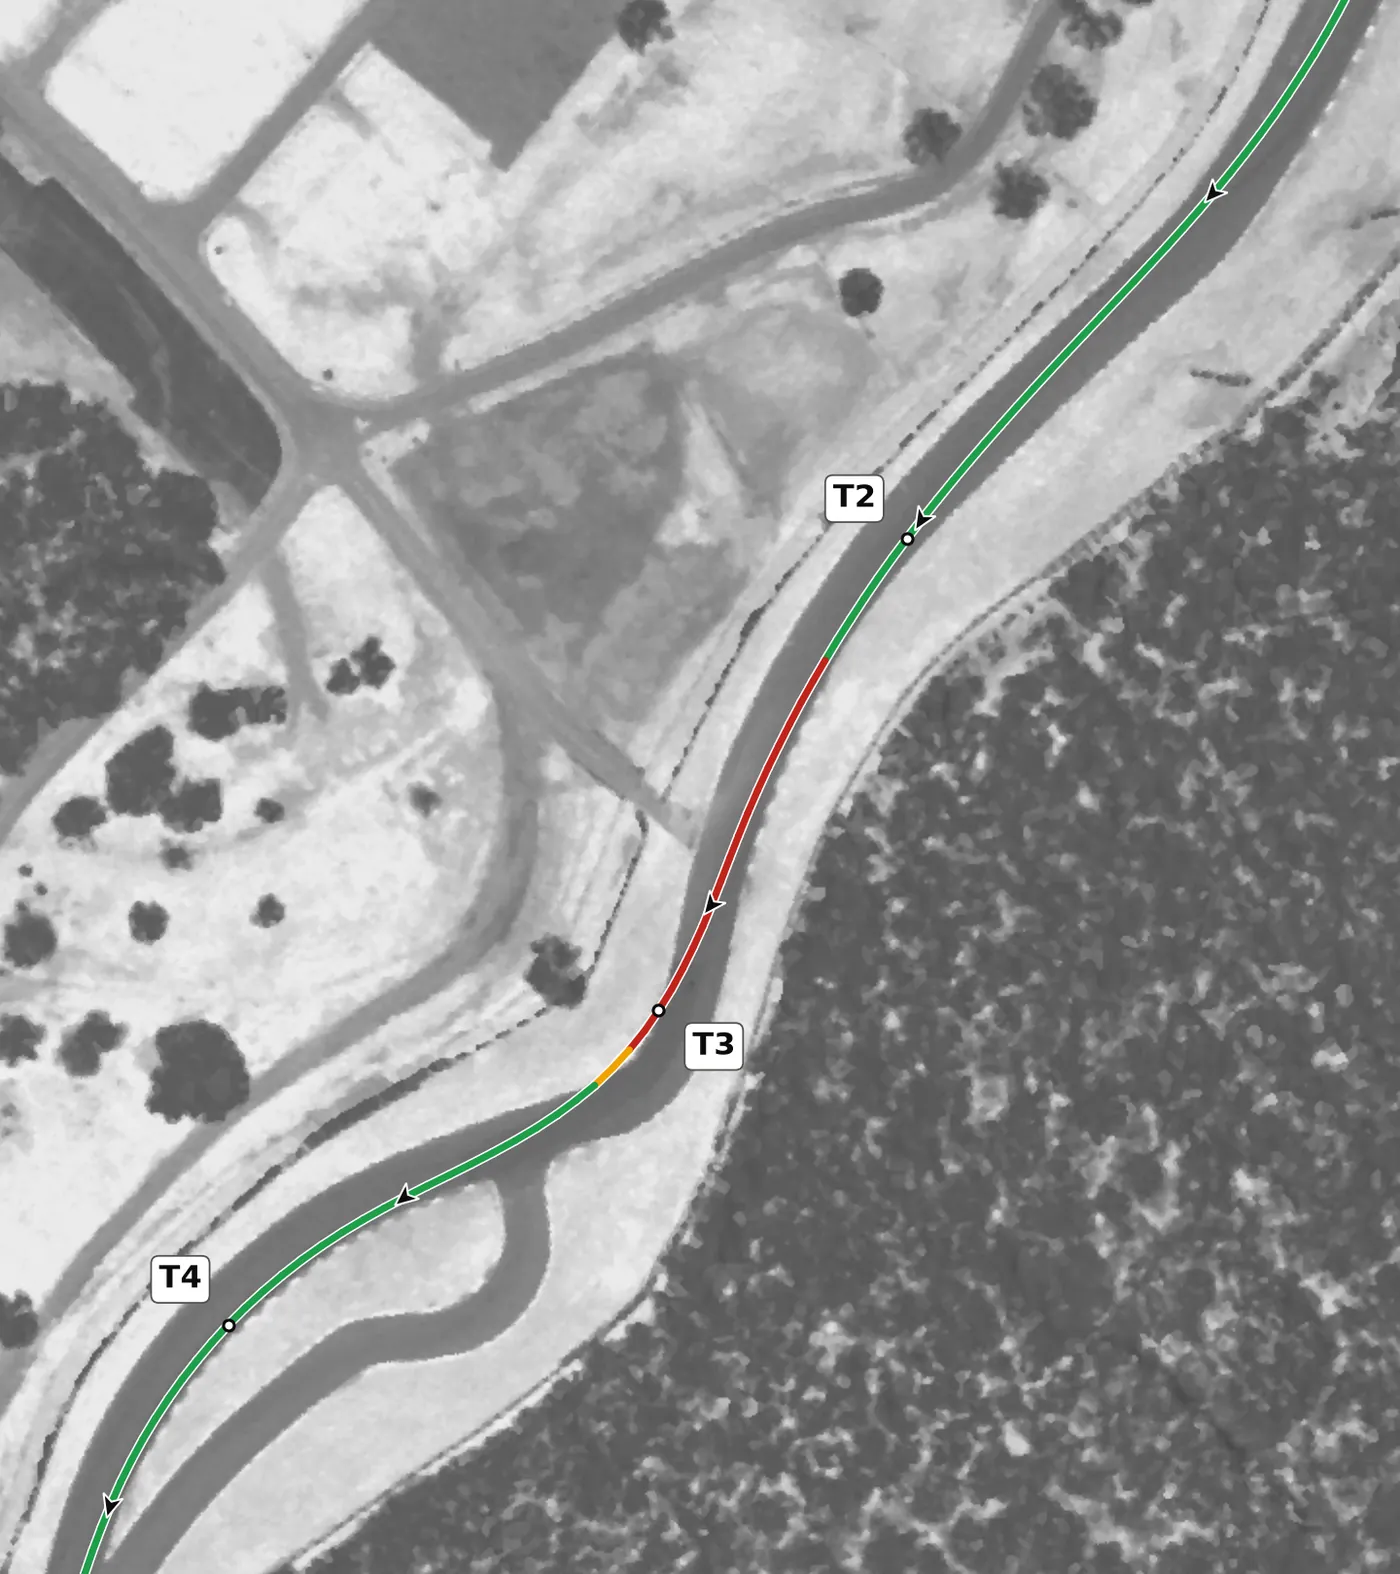
Brake firmly but briefly with the wheel straight, because the car is still light from the T2 crest, then turn in from the left edge to this right, which is sharper than it looks. Aim for the inside kerb without hitting the big kerb hard, and track out to the left to set up T4. The mistake to avoid is braking while turning, which is the classic spin here; build your speed up over several laps.
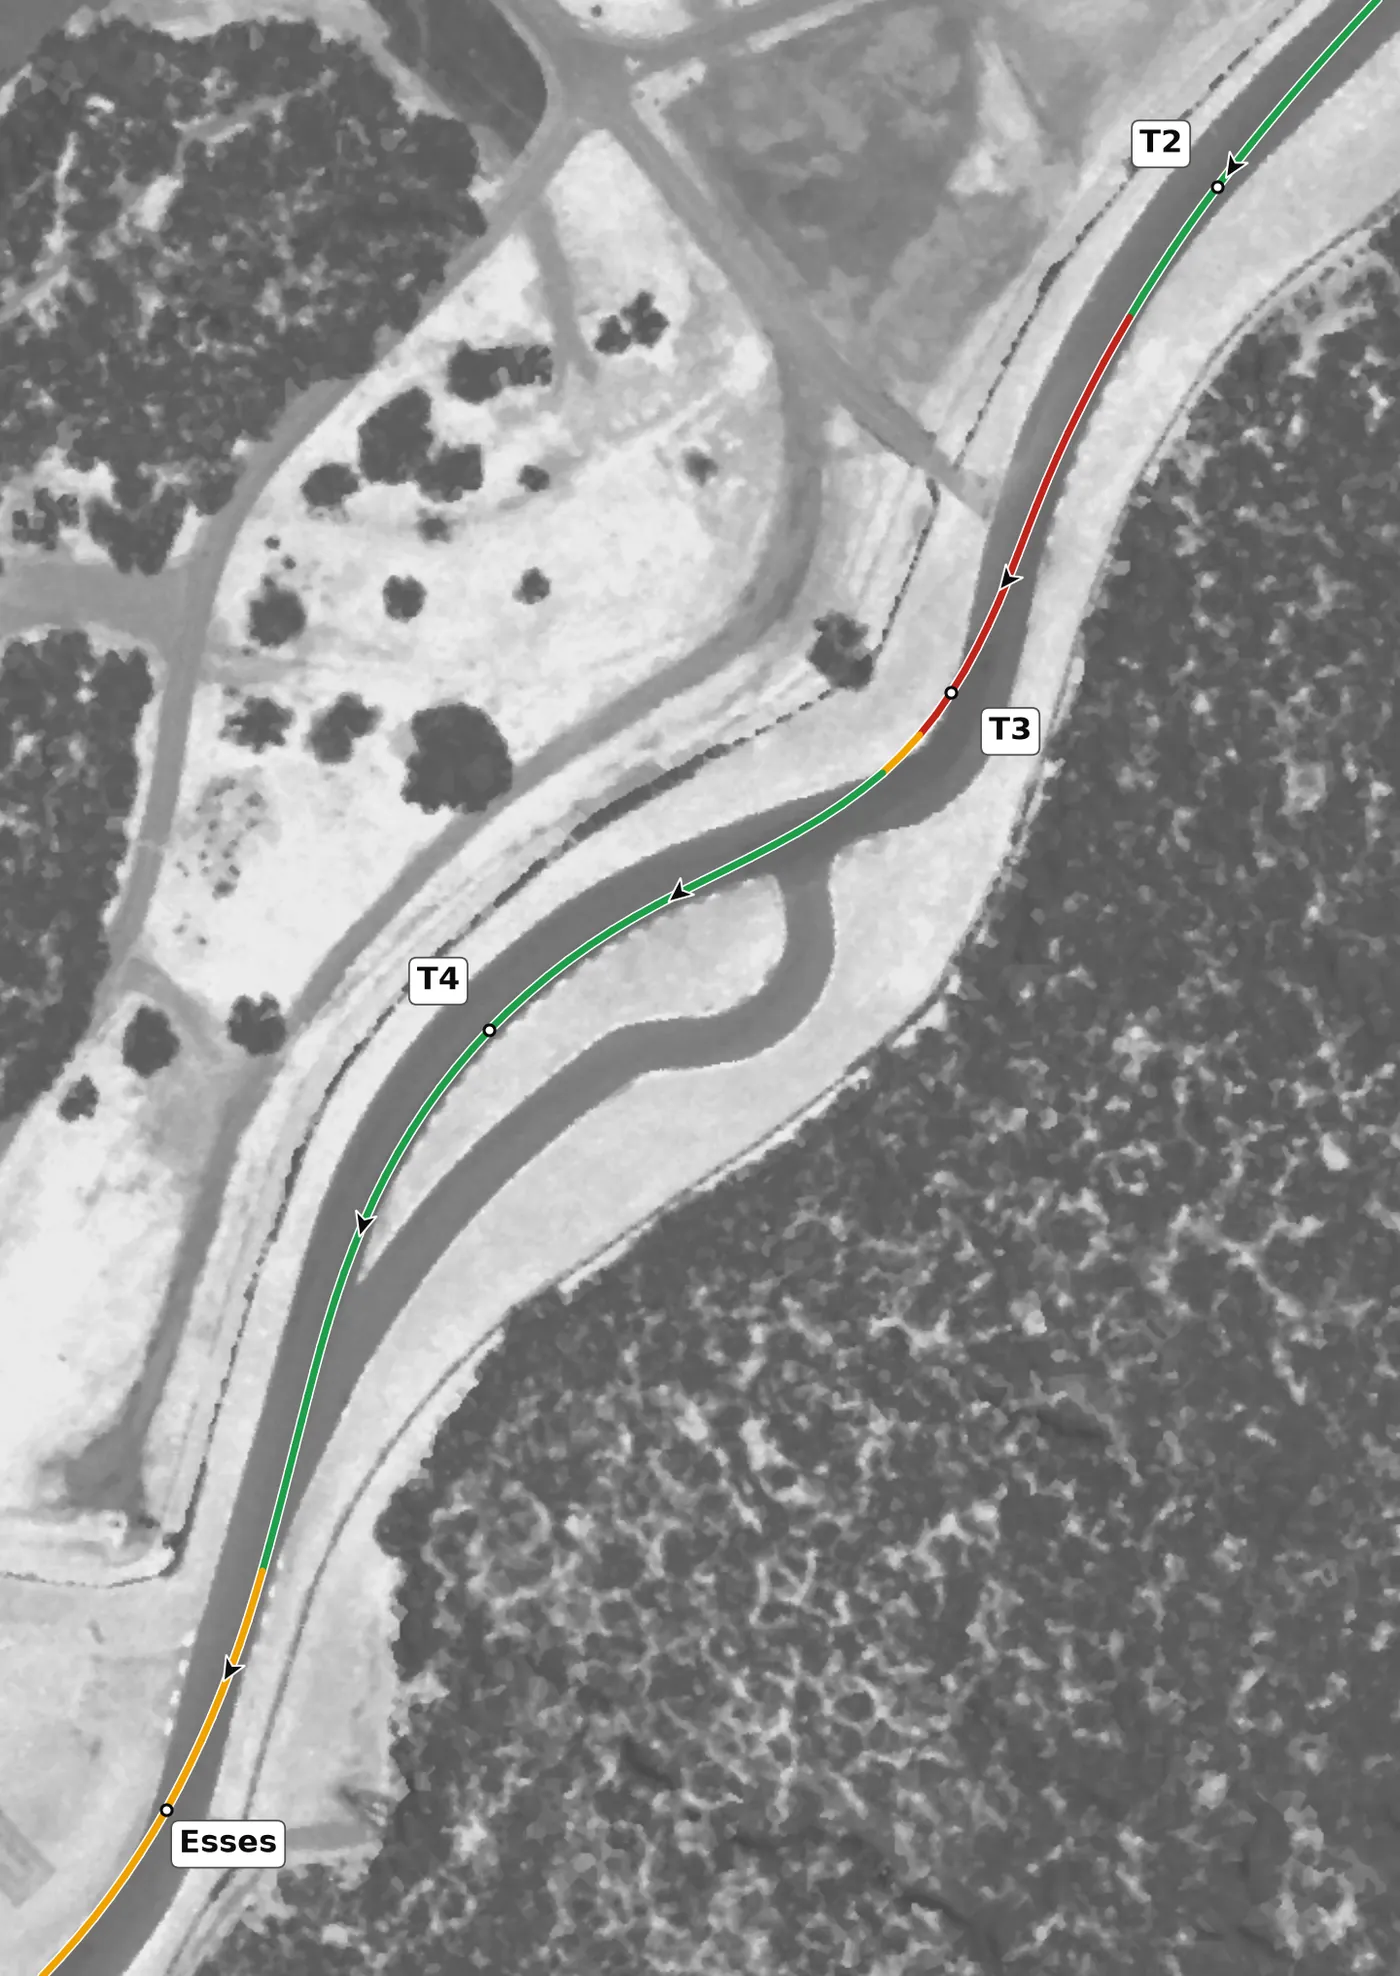
T4 is a long, on-camber left that runs downhill and is taken mostly on the throttle, hugging the inside kerb. Do not run all the way out to the right on exit, because the Esses start with a right-hander and you want to arrive on the left. The mistake to avoid is a wide T4 exit that leaves you on the wrong side for the Esses.
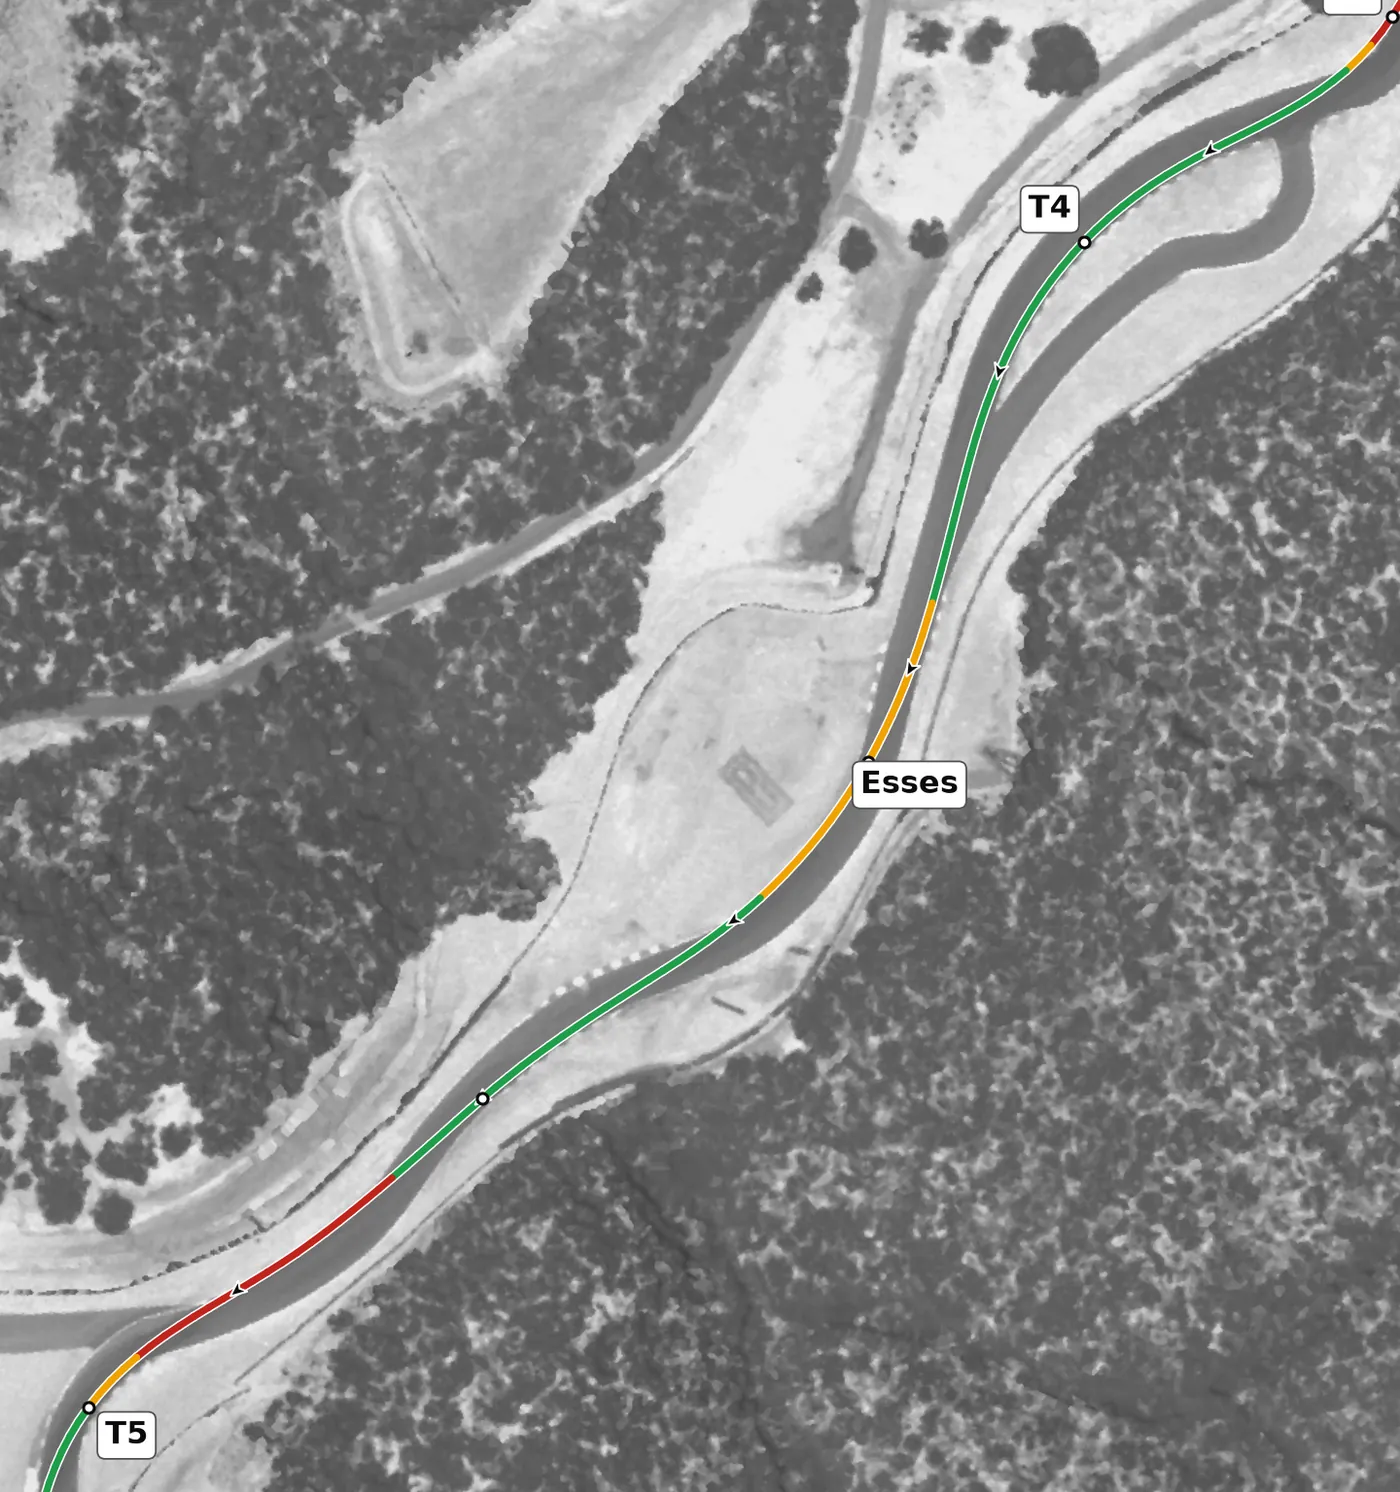
The road falls away steeply into the first right, so make an early, slow turn-in and aim for the middle of the right-hand kerb, then let the compression at the bottom plant the car as you change direction into the uphill left. Keep your hands smooth and the throttle steady through the transition; the grip is there at the bottom, less so at the top on the way in. The mistake to avoid is a fast, sharp turn-in while the car is light at the top, which pushes you off line for everything that follows.
From the survey: The bottom is the lowest point on the track, a +0.37 g compression.
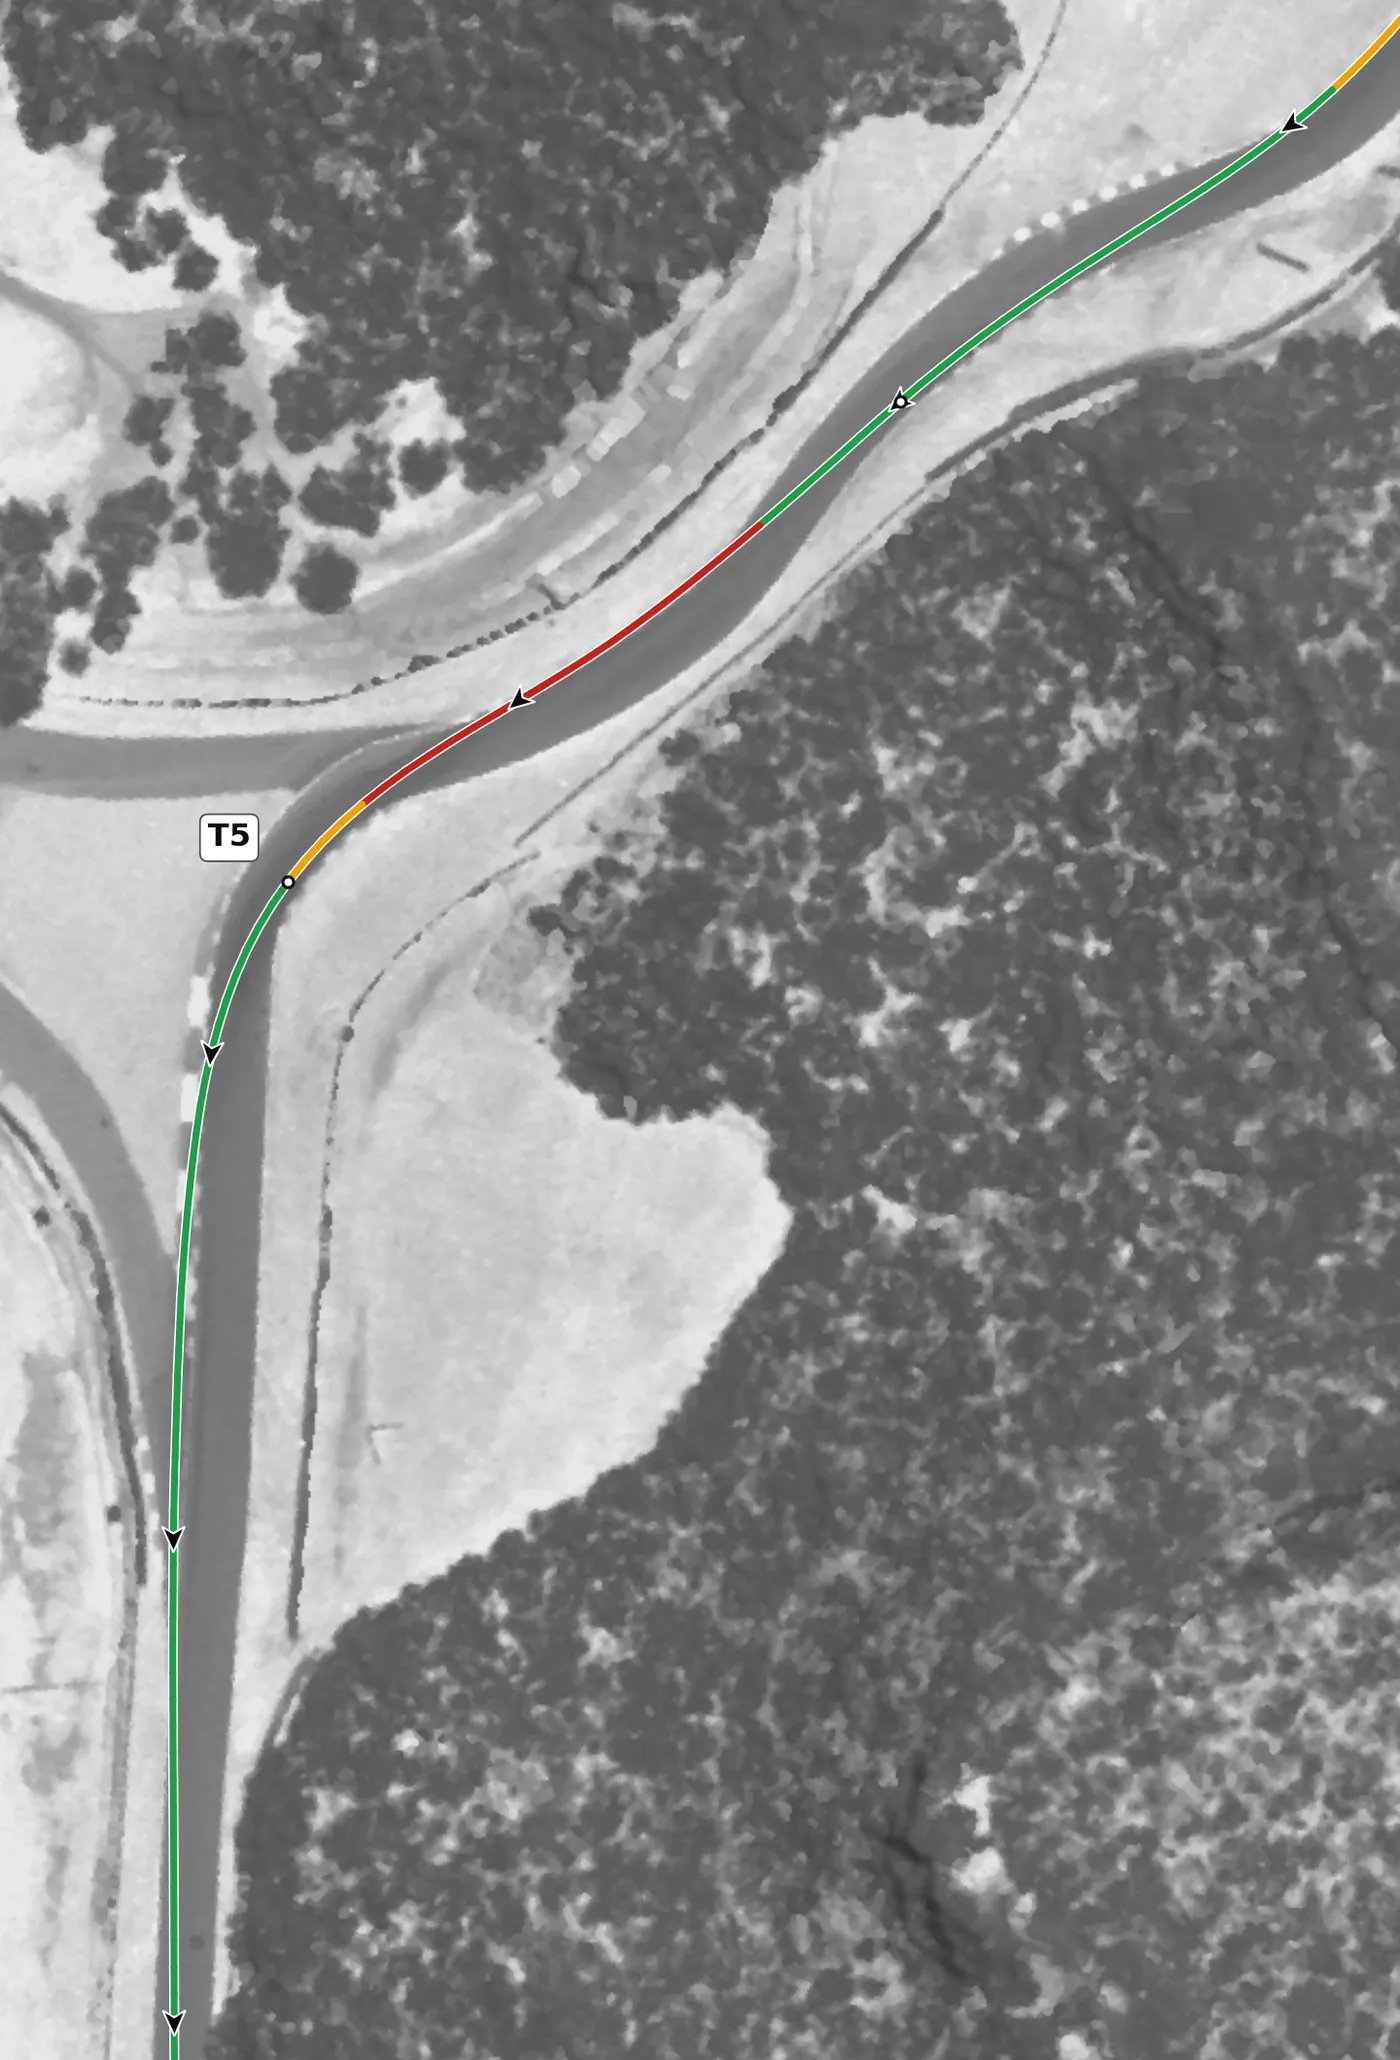
T5 is a left that climbs steeply out of the Esses; brake firmly in a straight line, because the car arrives fast from the Esses, then turn in late and pick up the throttle at the apex. Over the top, straighten the wheel and run straight toward the T6 brake zone. The mistake to avoid is turning back to the right too early after the Esses, which brings you to T5 too fast and off line.
From the survey: Climbs at 11%.
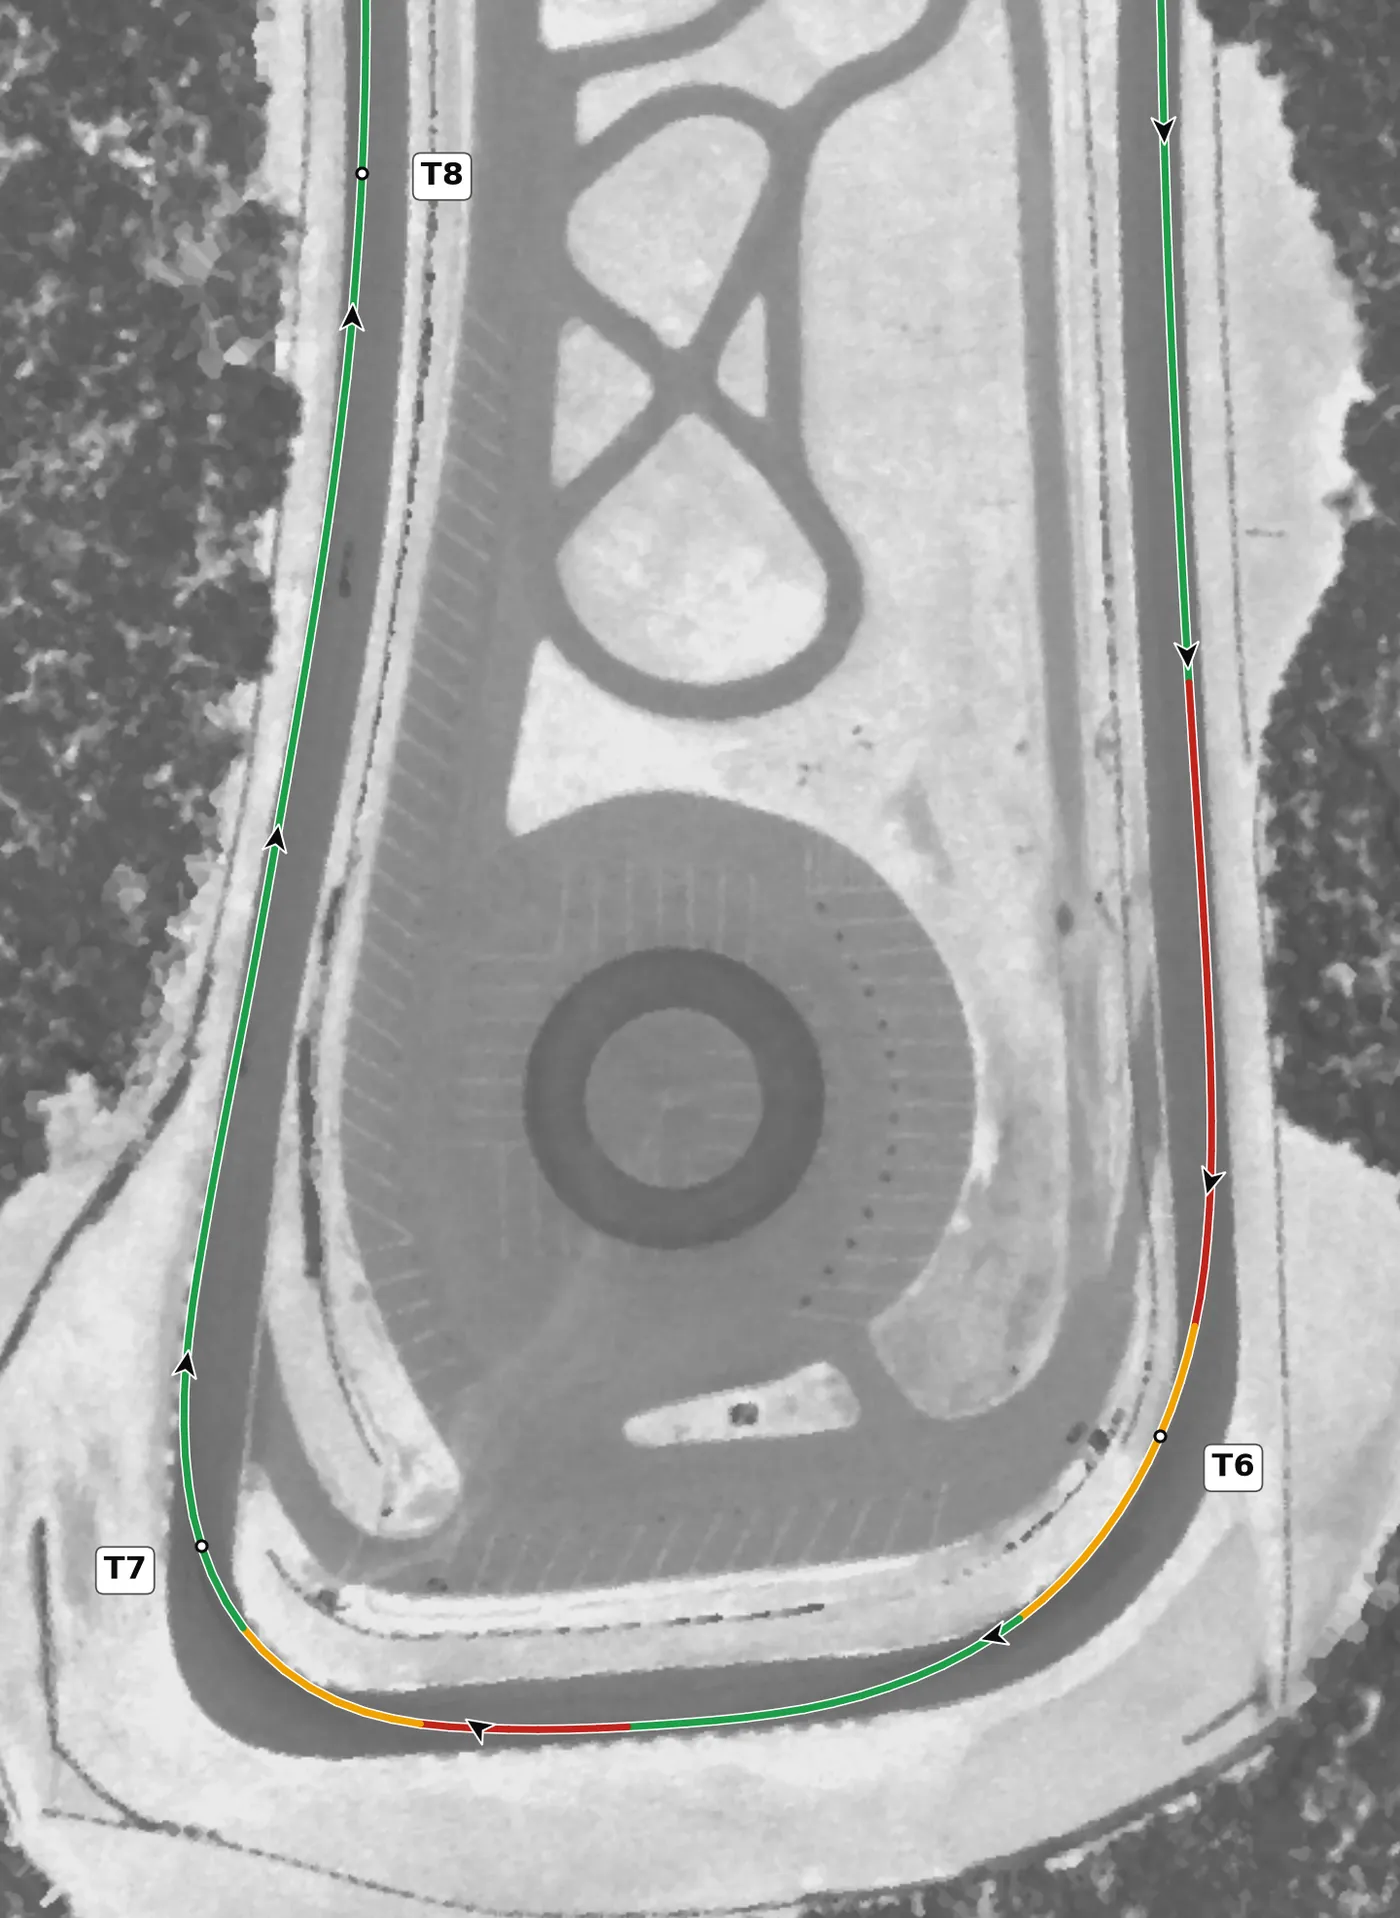
T6 is the most heavily banked corner on the lap, so it rewards entry speed: brake in a straight line, release the brakes early and smoothly, and let the banking carry the car to the apex. Track out to the left, which is where you want to be for T7. The mistake to avoid is over-braking and coasting in, because this is a corner where time is won on the way in.
From the survey: The most banked corner on the lap, +8.55% at the apex.
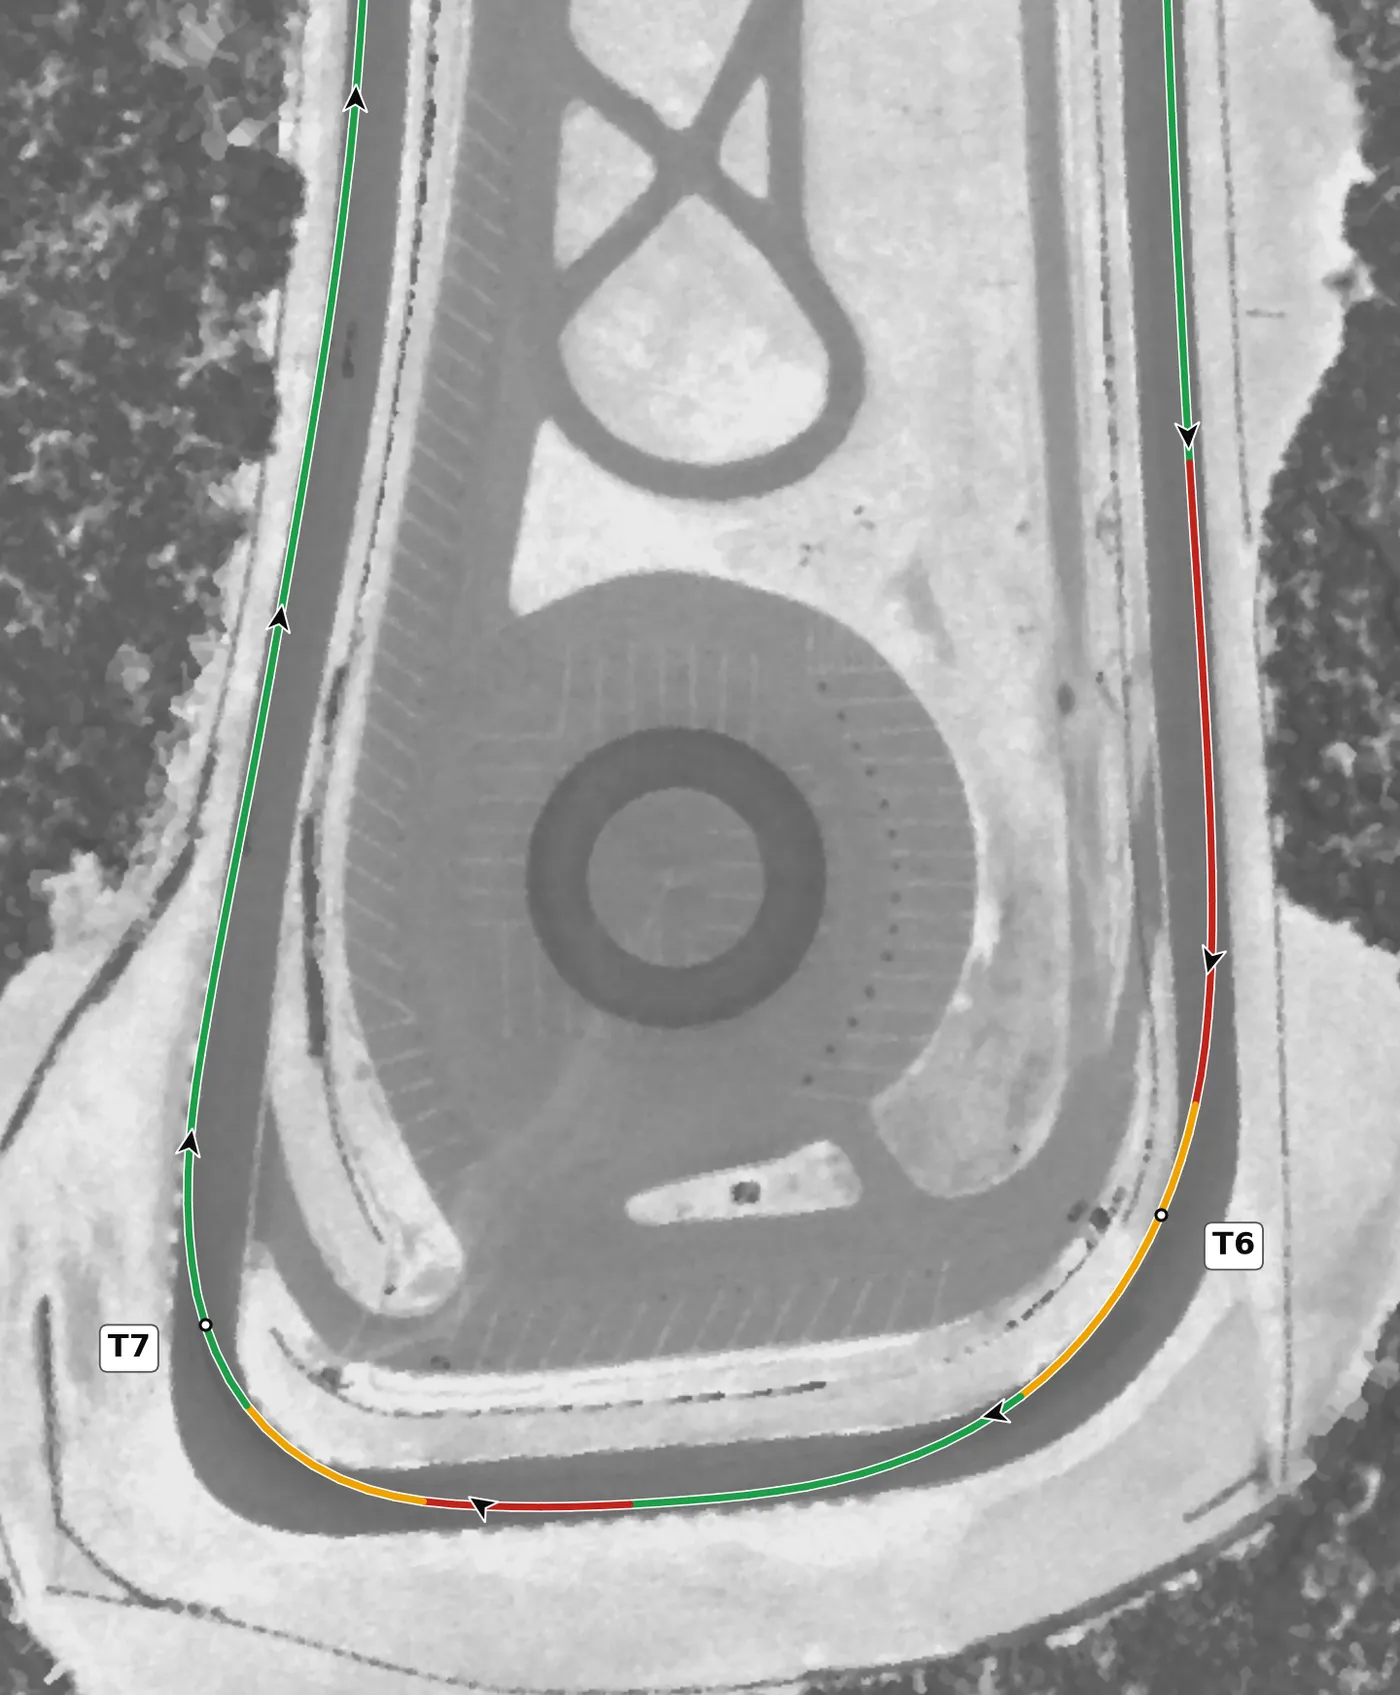
Brake firmly in a straight line from the left side, turn in later than feels natural because the corner is tighter than it looks, and aim for a late apex at the right-hand kerb. Unwind the steering first and add throttle as the wheel straightens: applying power while the car is still at full cornering load is what slides or spins it here, so save full throttle until the wheel is nearly straight. Your exit speed carries all the way down the back straight, so a patient exit beats an aggressive one.
From the survey: Onto the back straight. Unwind the wheel before full throttle.
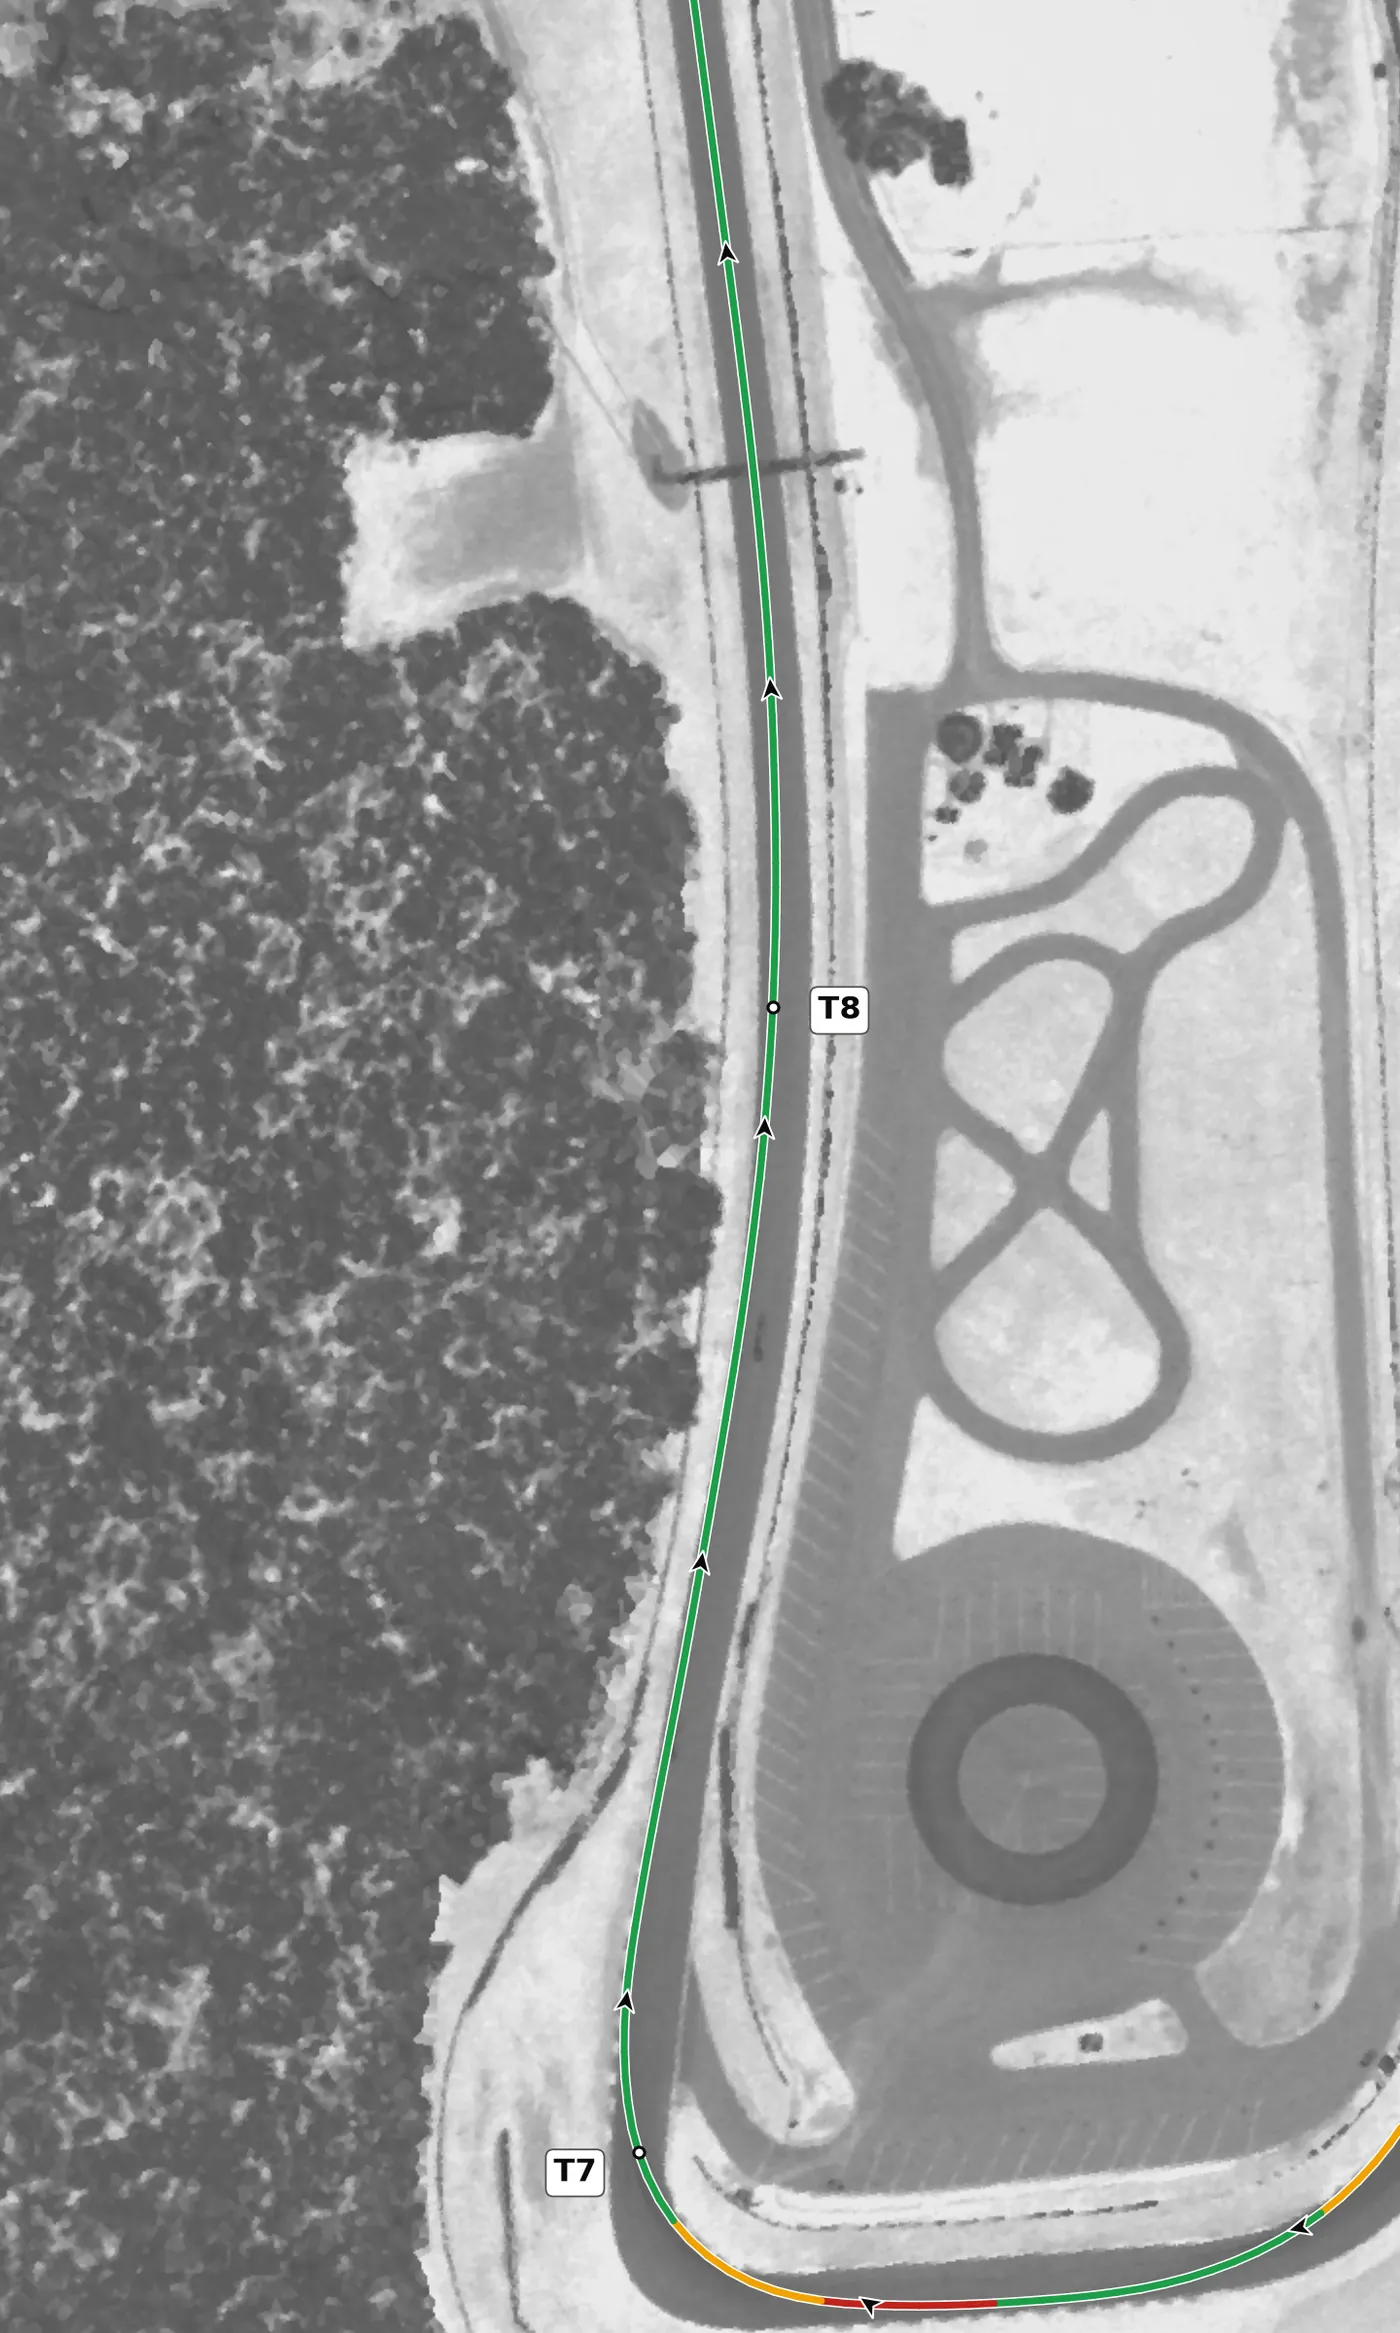
T8 is a gentle left bend on the back straight, taken flat out, so the only job is to keep the car straight and accelerating with the wheel barely turned. Let the car settle from the T7 exit before the bend and look ahead to T9. The mistake to avoid is a lift or a steering correction caused by a messy T7 exit.
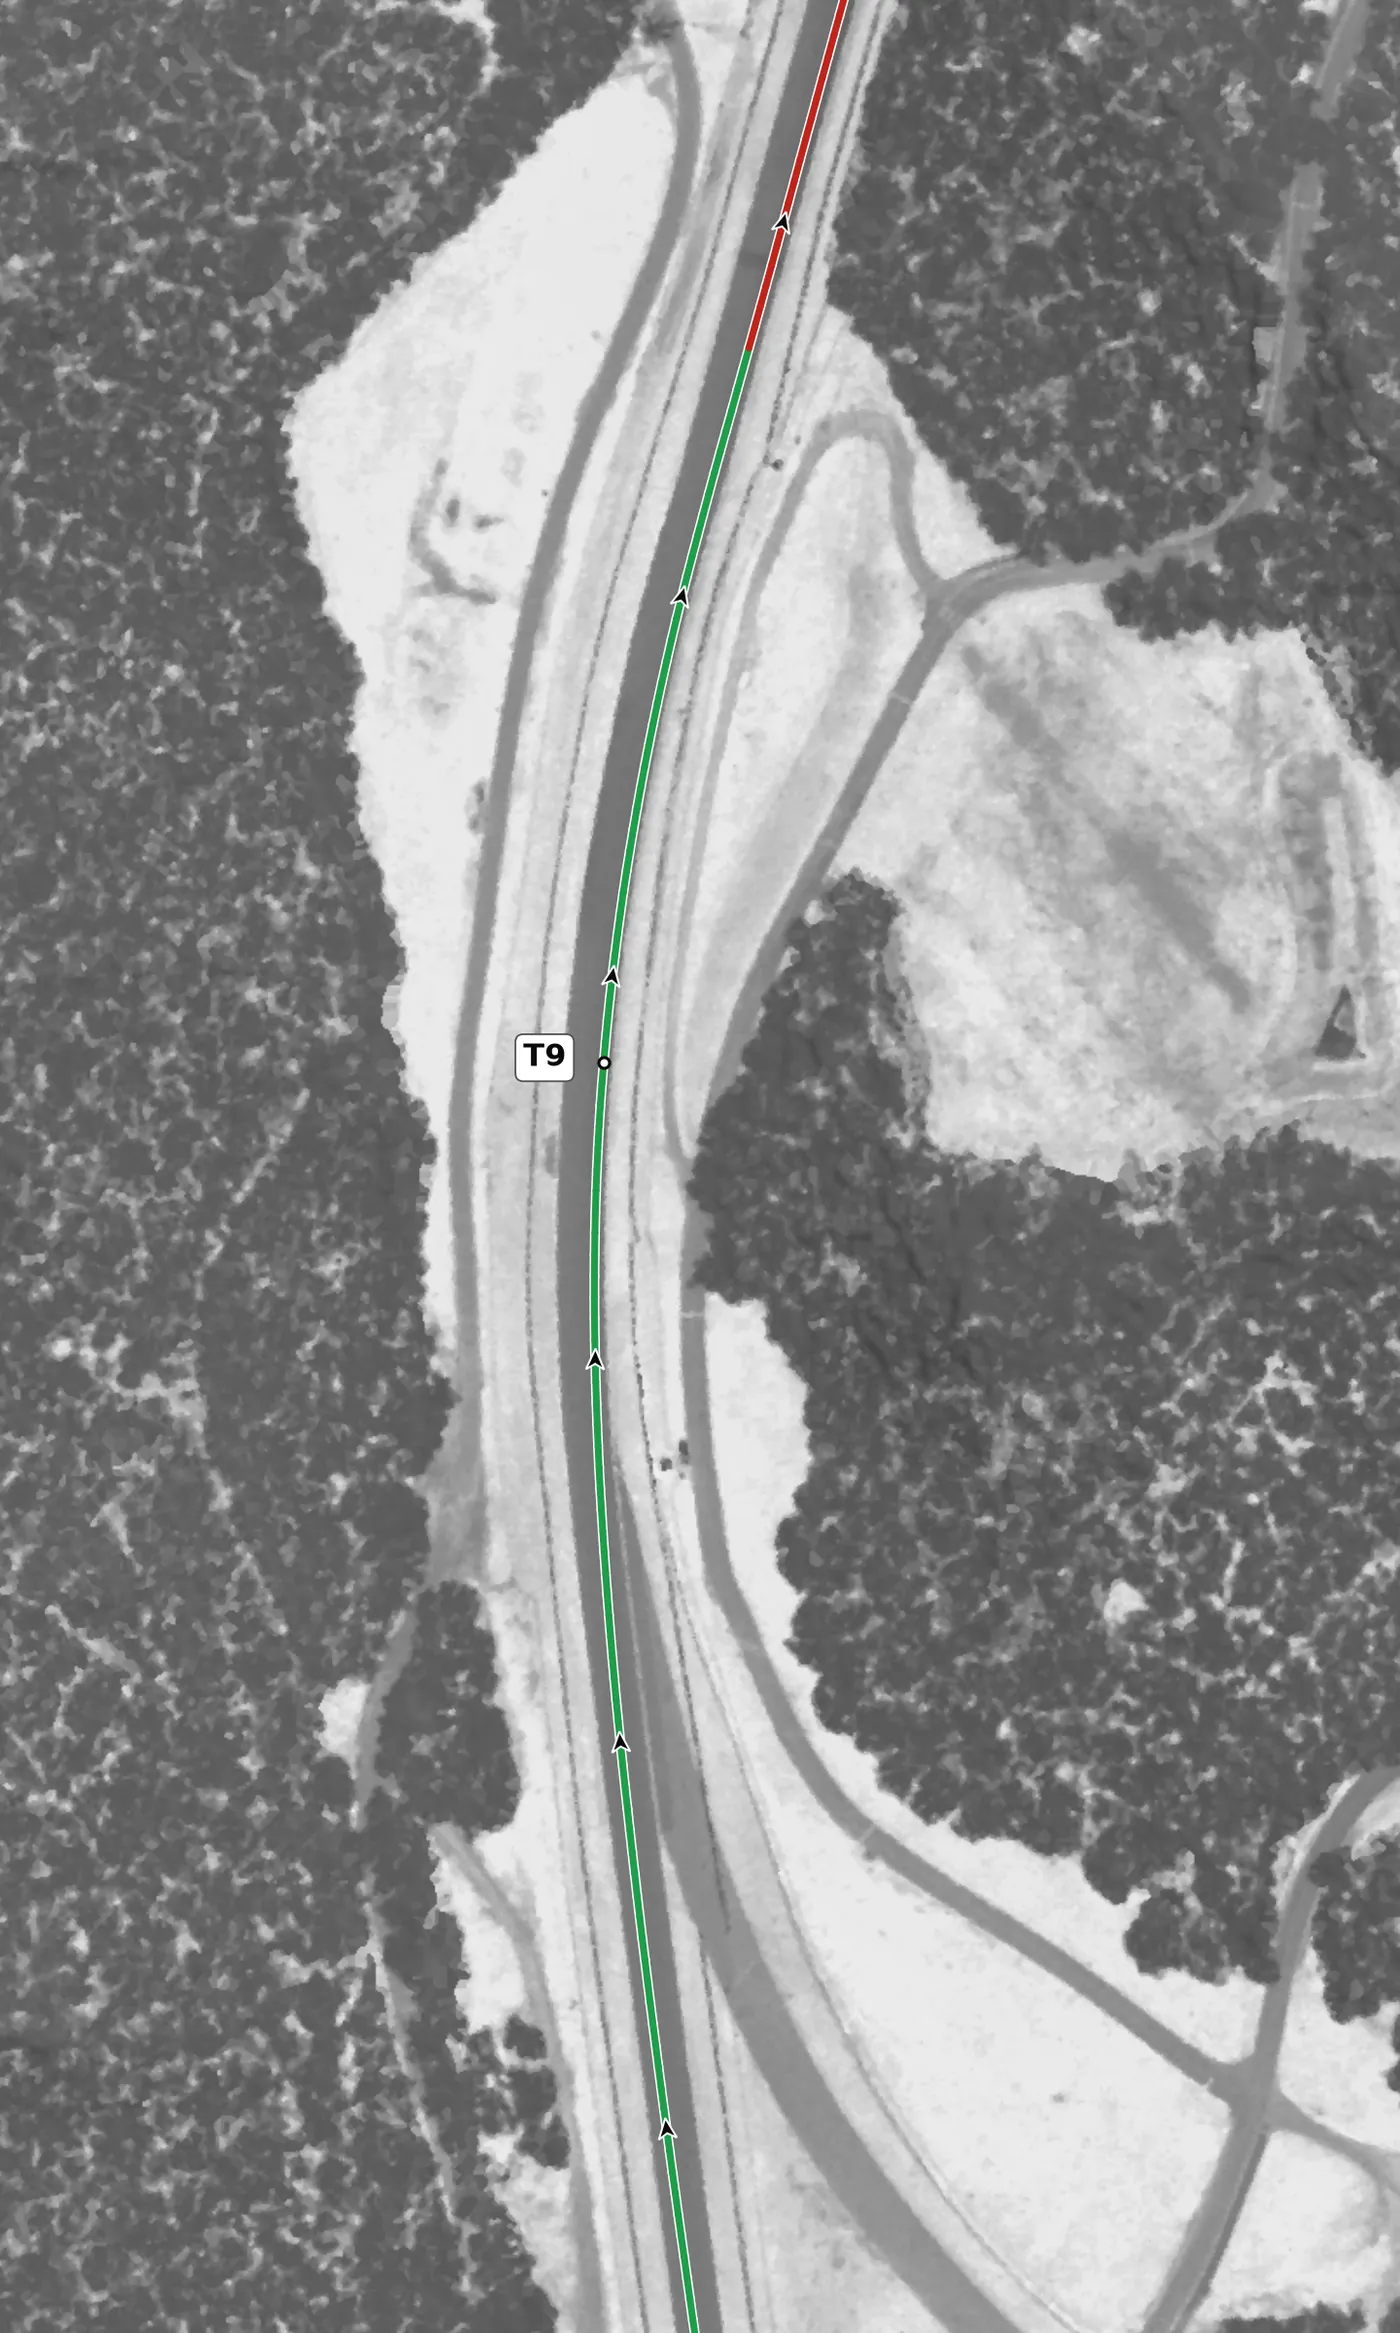
T9 is a fast, banked right bend where you move the car from the left side toward the right in preparation for the T10a brake zone. Keep the steering smooth and the throttle steady; it can feel unnerving at speed, so build up over several laps. The mistake to avoid is staying on the left over the hill, which puts you in the wrong place to brake for T10a.
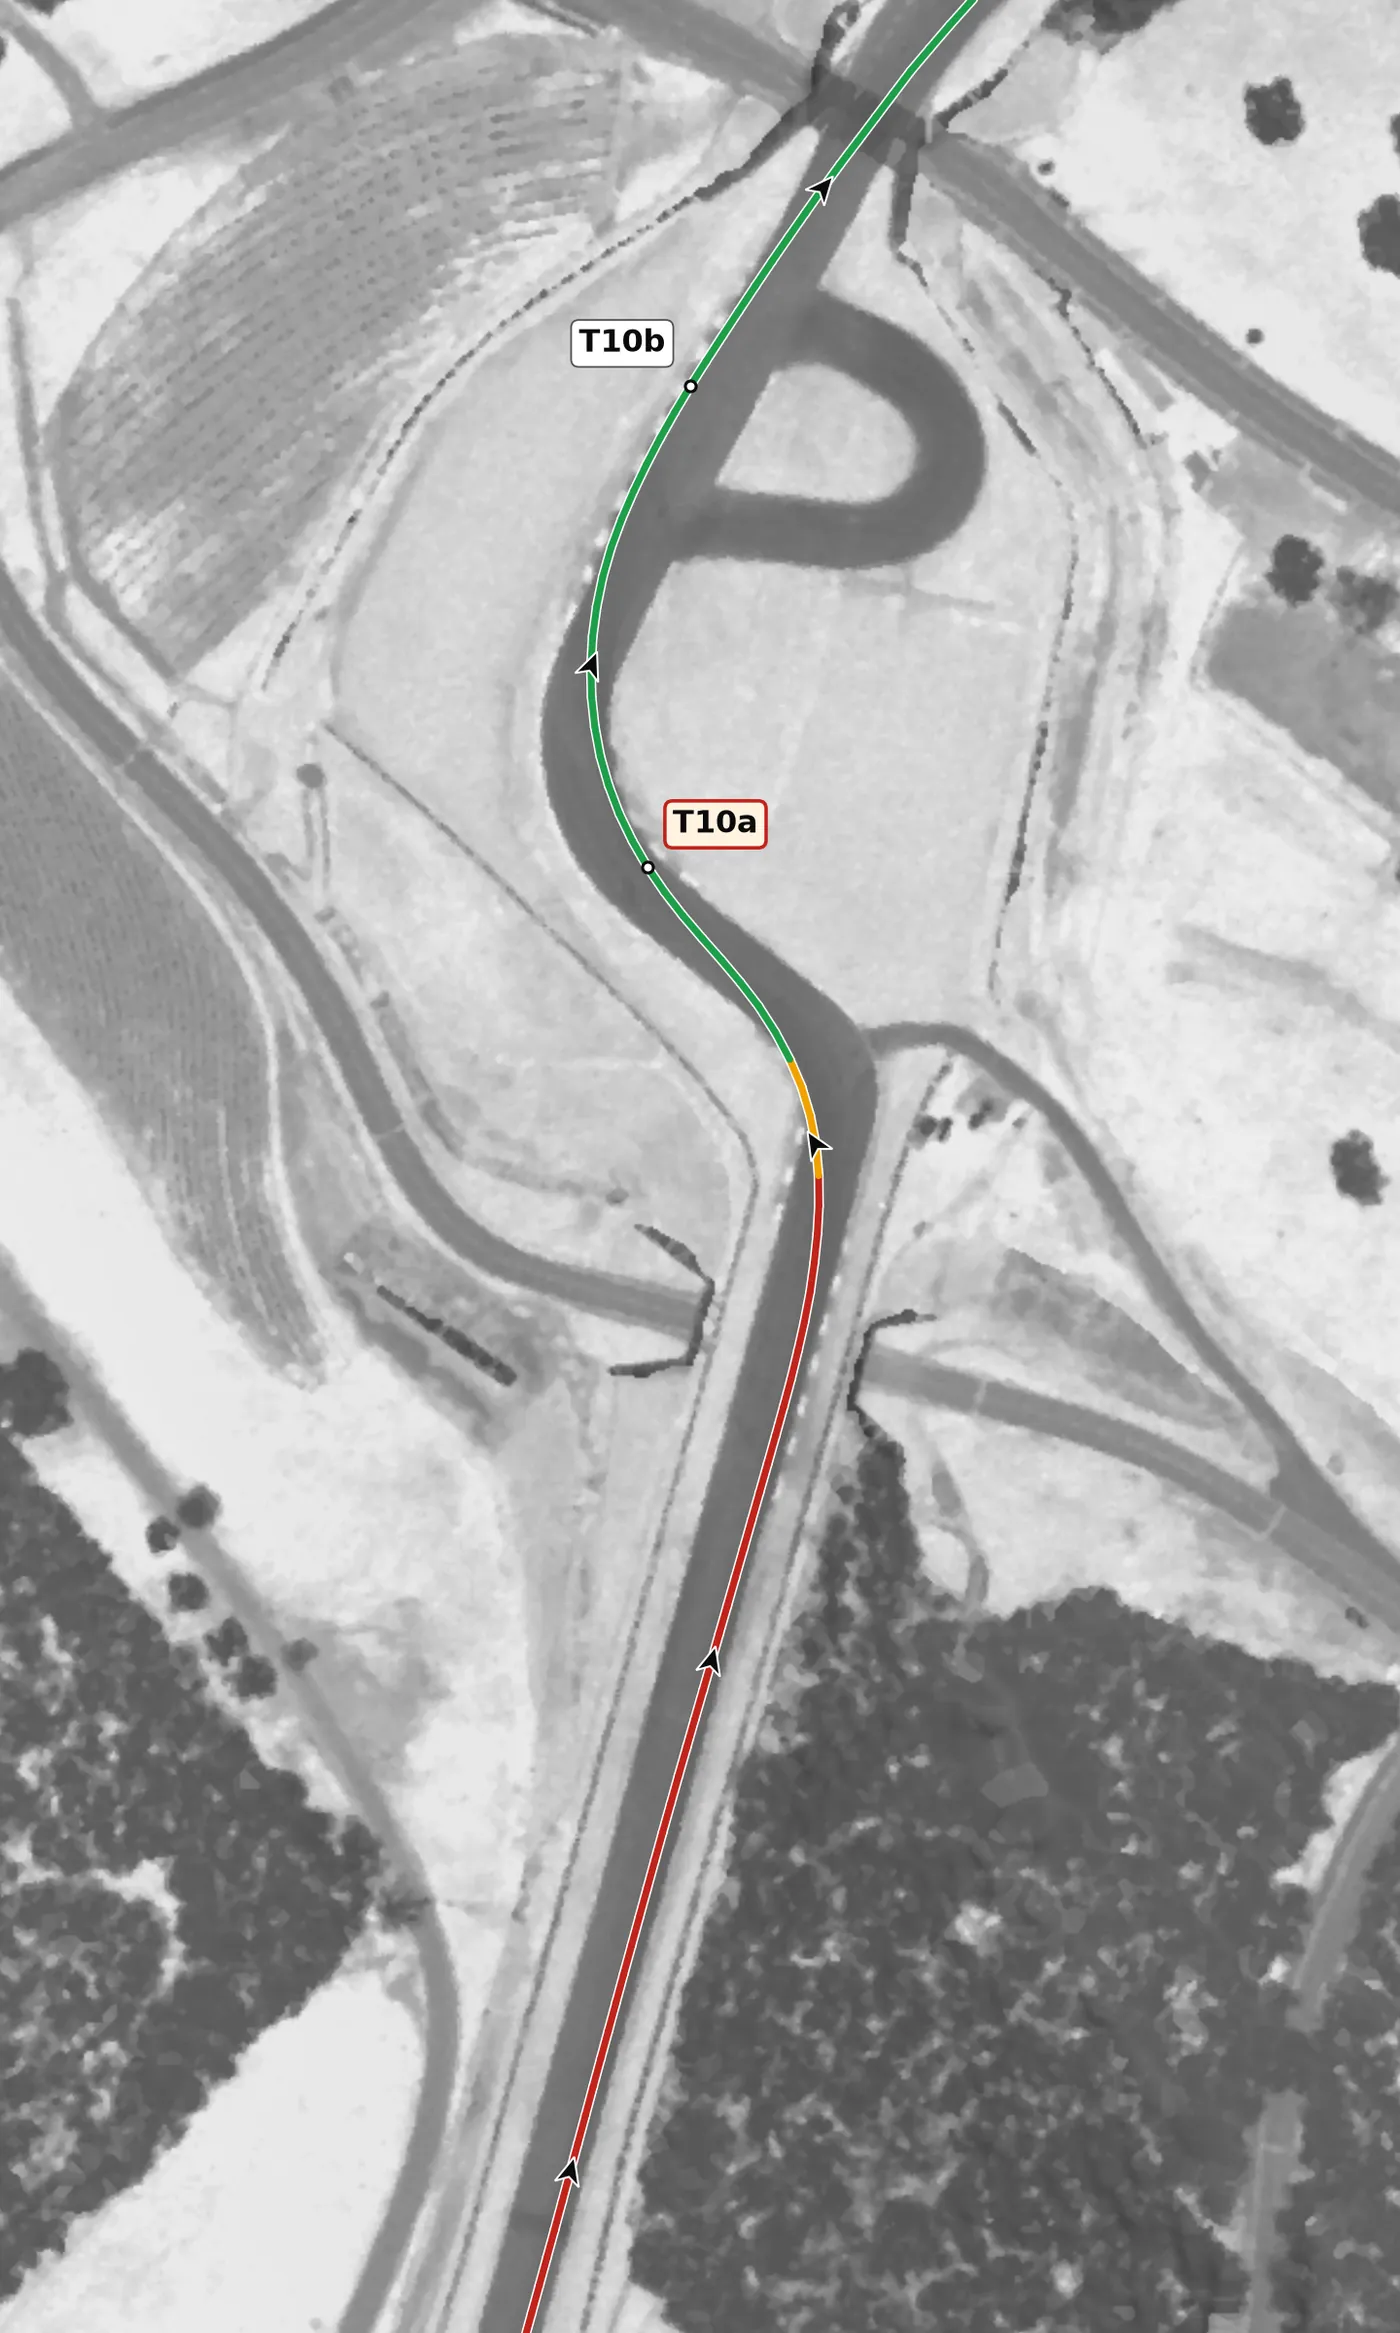
Stay on the right as the road runs downhill from T9, and brake hard in a straight line once the car bottoms out; the brake zone then climbs to the corner. This is the only off-camber corner on the track, so ease off the brakes gradually as you turn in and accept a slower entry. Treat it as a setup corner: the mistake to avoid is charging in, missing the apex and ruining T10b.
From the survey: The only off-camber corner, and the longest brake zone, braking uphill at +4.5%.
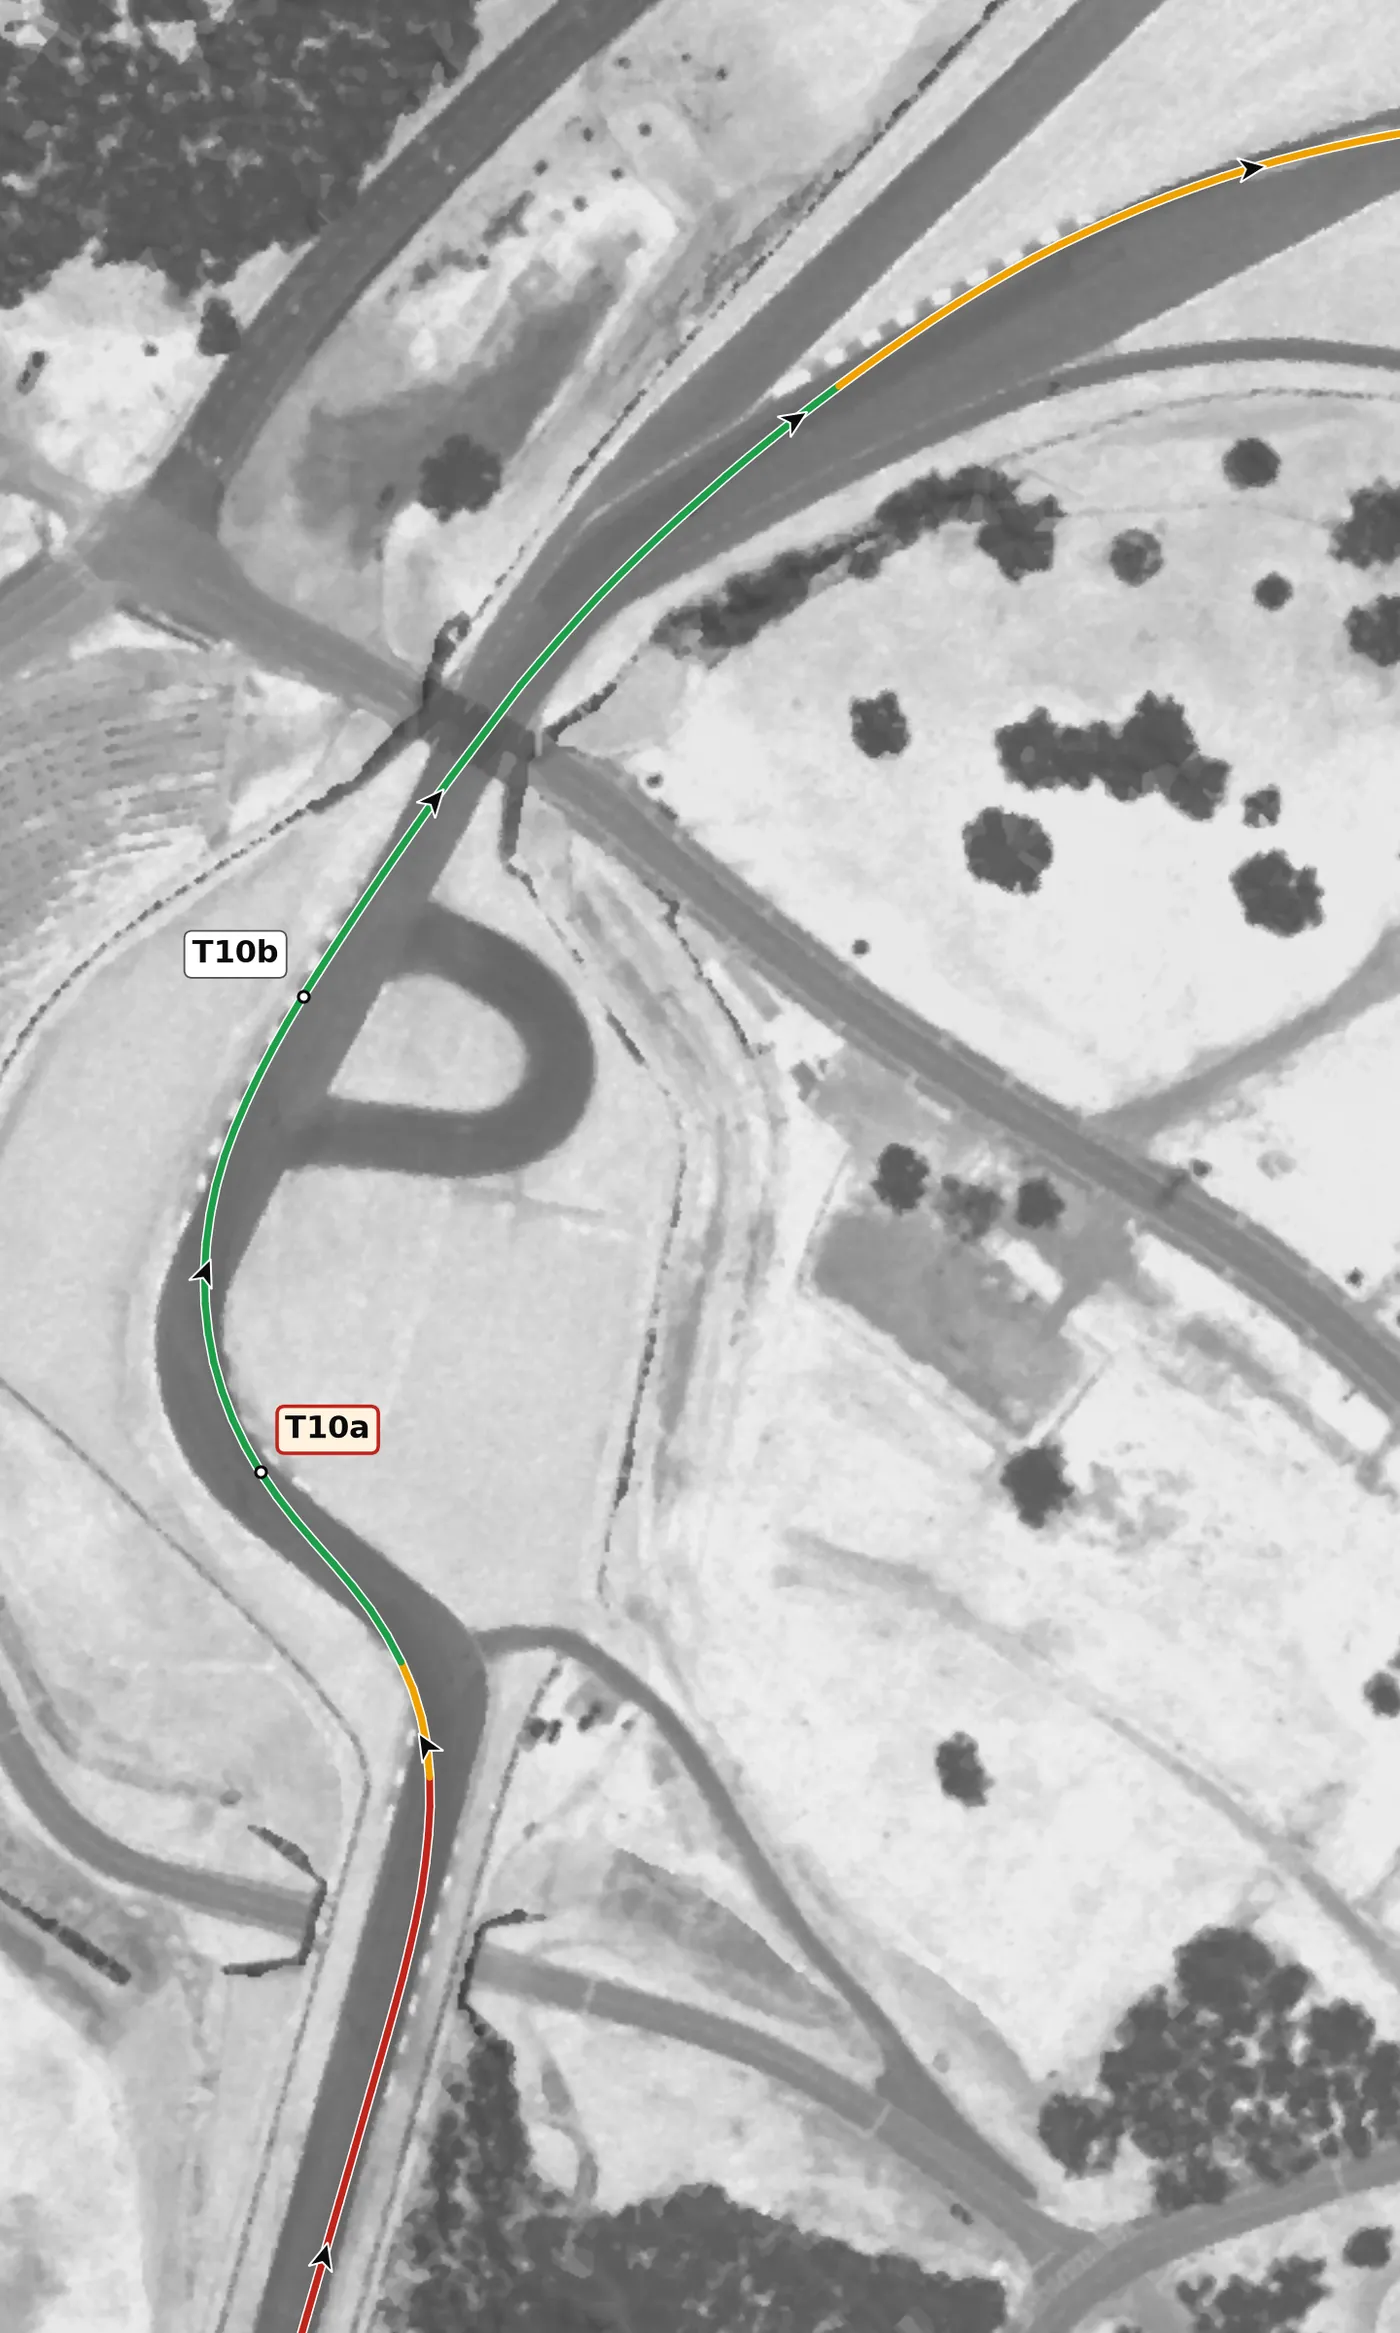
Cross from the T10a apex to a late apex at this right so you can straighten the wheel early, because the road climbs over a long crest where the car goes light and then falls steeply toward the bridge. Get the car straight before the crest and keep the wheel still while it is light. The mistake to avoid is turning or braking over the crest; this exit feeds the run all the way to the front straight.
From the survey: The car goes light over the crest (−0.32 g).
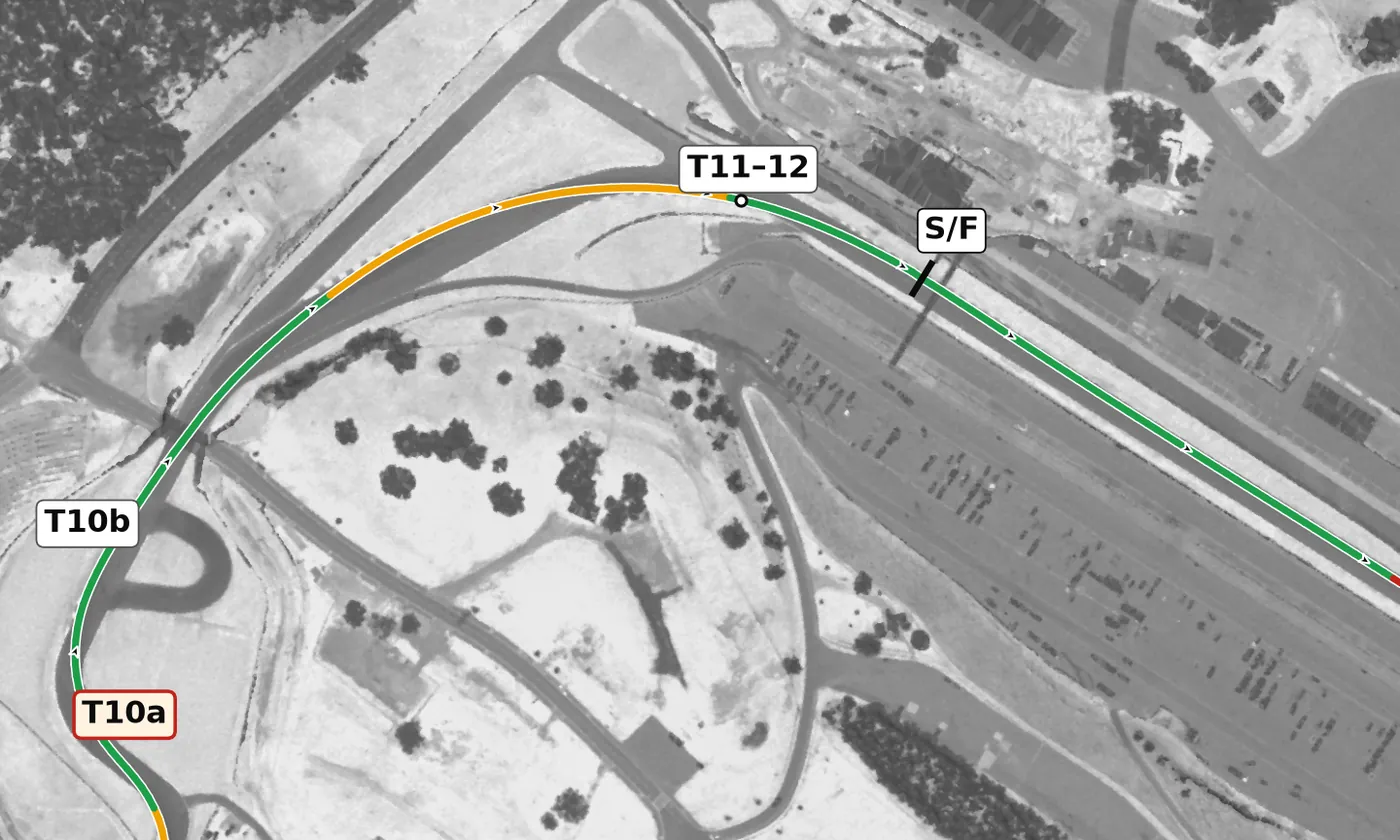
Under the bridge the road drops steeply, and T11 and T12 drive as one fast downhill right onto the front straight. You should not need the brakes: settle the car with a small lift if needed, keep your eyes looking through the corner toward the straight, and feed in throttle toward a late apex while staying off the apex kerb. The mistake to avoid is turning in early and running out of room toward the wall on the outside of the exit; build up speed here gradually.
From the survey: 40 m after the crest the road falls away at −17%, under the bridge.
Version history
- v1.1 · 2026-10-01 — The line now goes straight from throttle to brake: the 15–30 m of coasting drawn before each brake zone (T1, T3, T5, T6, T7 and T10a) is gone. The braking points are my own and stay where they were. Corner notes for T1, T3 and T5 now say these are firm stops, which is what the data shows.
- v1.0 · 2026-10-01 — First version: my own Z4 M40i lap (25 Hz).
Feedback contributors
Drivers and instructors whose feedback has improved this line. Thank you.
- Mike M — no coasting between throttle and brake; braking points (v1.1)