Roebling Road — Race Line
Estimated from data not in trackdays.ai. The line, speeds and braking points come from cars lapping at a typical quick HPDE pace, cross-checked against published brake markers. If you have data you would like to contribute, please send it to upload@trackdays.ai to help improve our estimates.
Heads up: This is an estimate of a typical quick HPDE line, not any one car's lap. Braking points are a starting point, not a target: start a little earlier and work later in small steps. The line goes straight from throttle to brake; amber only marks where you really lift or hold part throttle. Roebling is nearly flat, so the corners are about the line, not the camber.
- Throttle
- Coast / partial
- Braking
- Apex
- T4Off-camber corner
Arrows show the direction of the lap. The grey basemap is USGS LiDAR: dark = asphalt, light = grass. Tap any map for the full-size image.
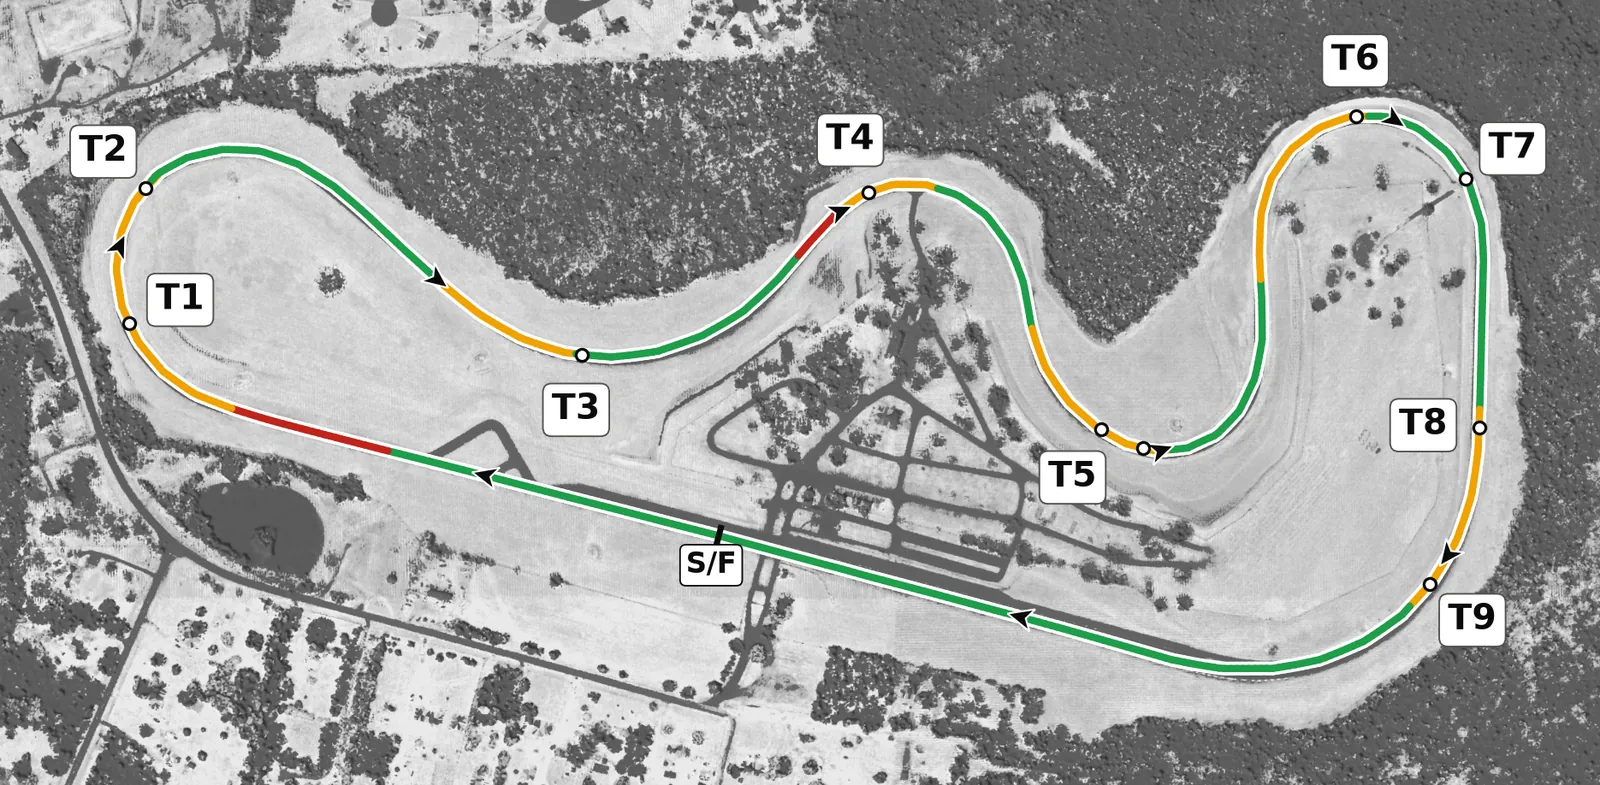
Roebling is a fast, nearly flat track of sweepers where momentum and smooth hands matter far more than braking skill; T5 is the only genuinely slow corner and almost everything else is taken at high speed. With very little banking or elevation to help, the tires are all you have, so be patient on entry, favour late apexes and get on the throttle early and smoothly. The one wall on the circuit is at the exit of T9 onto the front straight, so treat that corner with the most respect.
Sectors
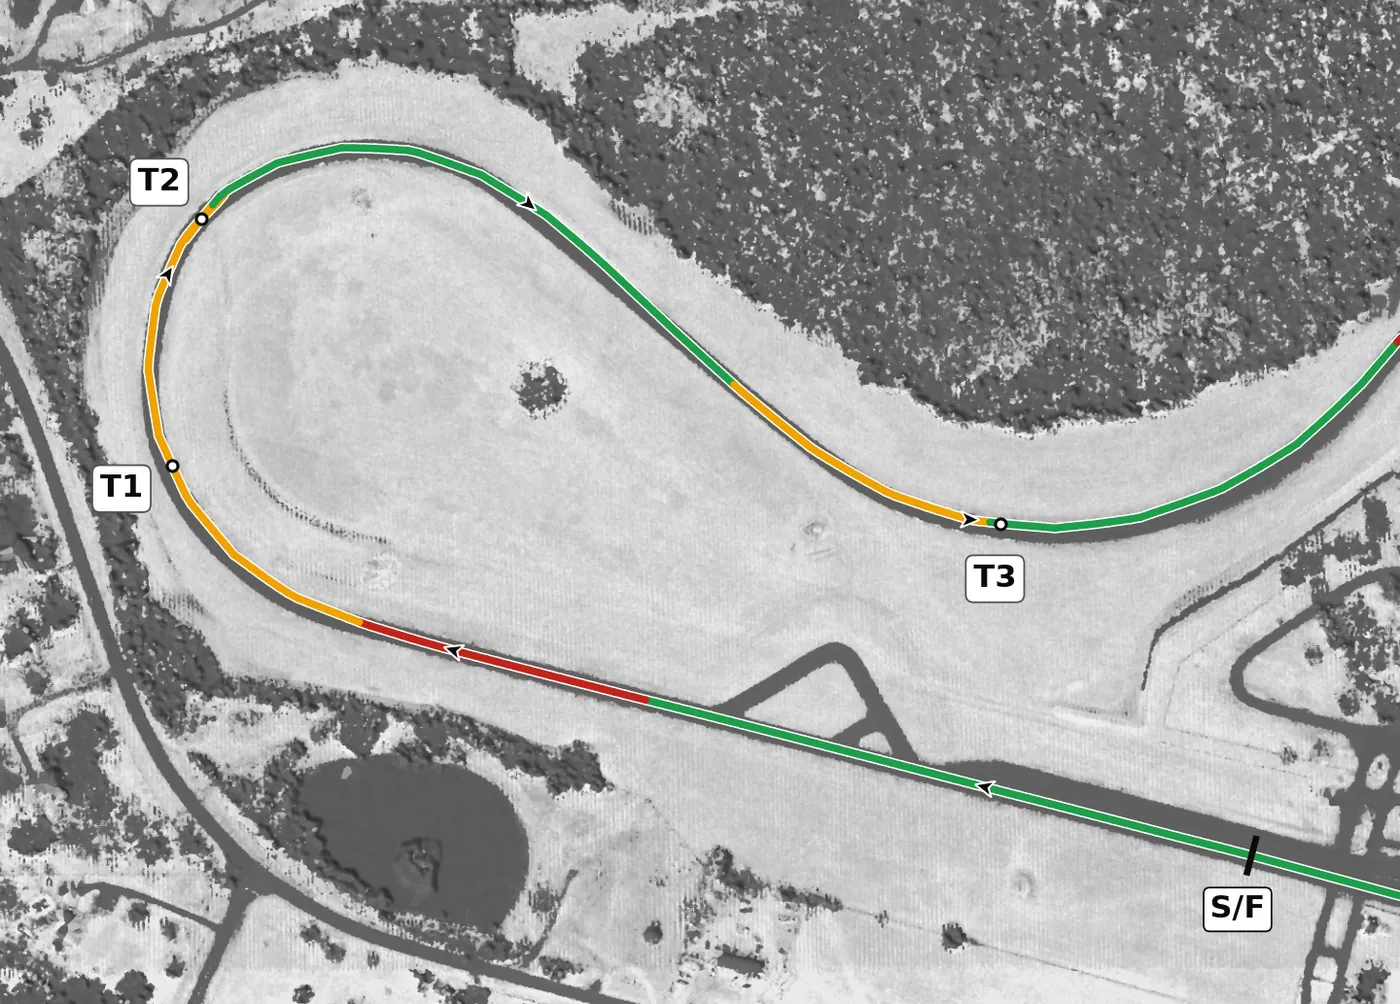
After the long front straight, T1 is a very fast, tightening right that runs straight into T2, so brake firmly, release smoothly and drive the pair as one long right. Take a late apex at T2 and get on the throttle early, because the exit feeds the run to T3.
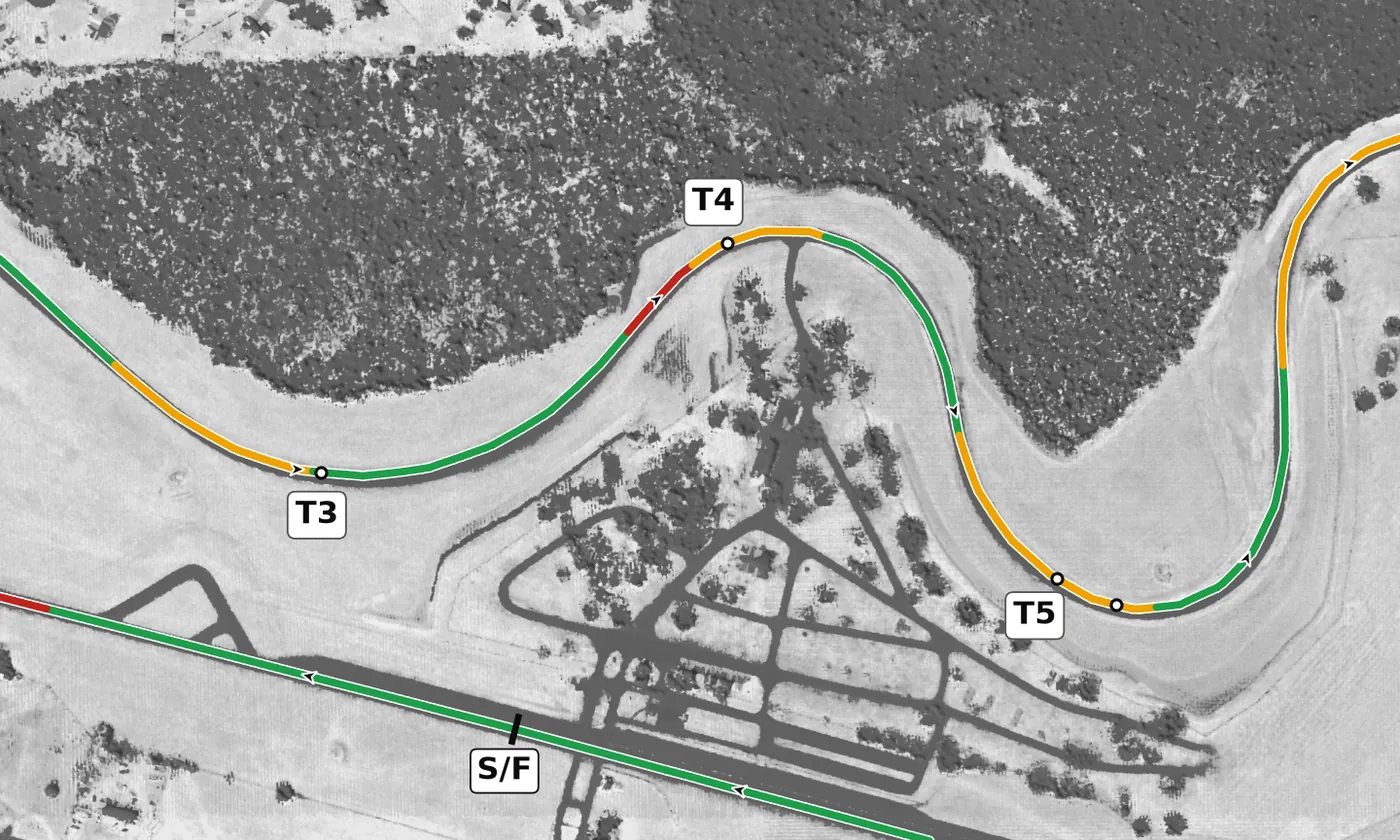
T3 is a fast left sweeper that is all about vision and smooth hands, followed by the hard brake for the tighter T4 right, where the surface is slippery and a late apex and a settled car pay off. T5 is the slowest corner on the lap, a long left of nearly 180 degrees with no banking to lean on, so be patient, apex late and focus on the exit.
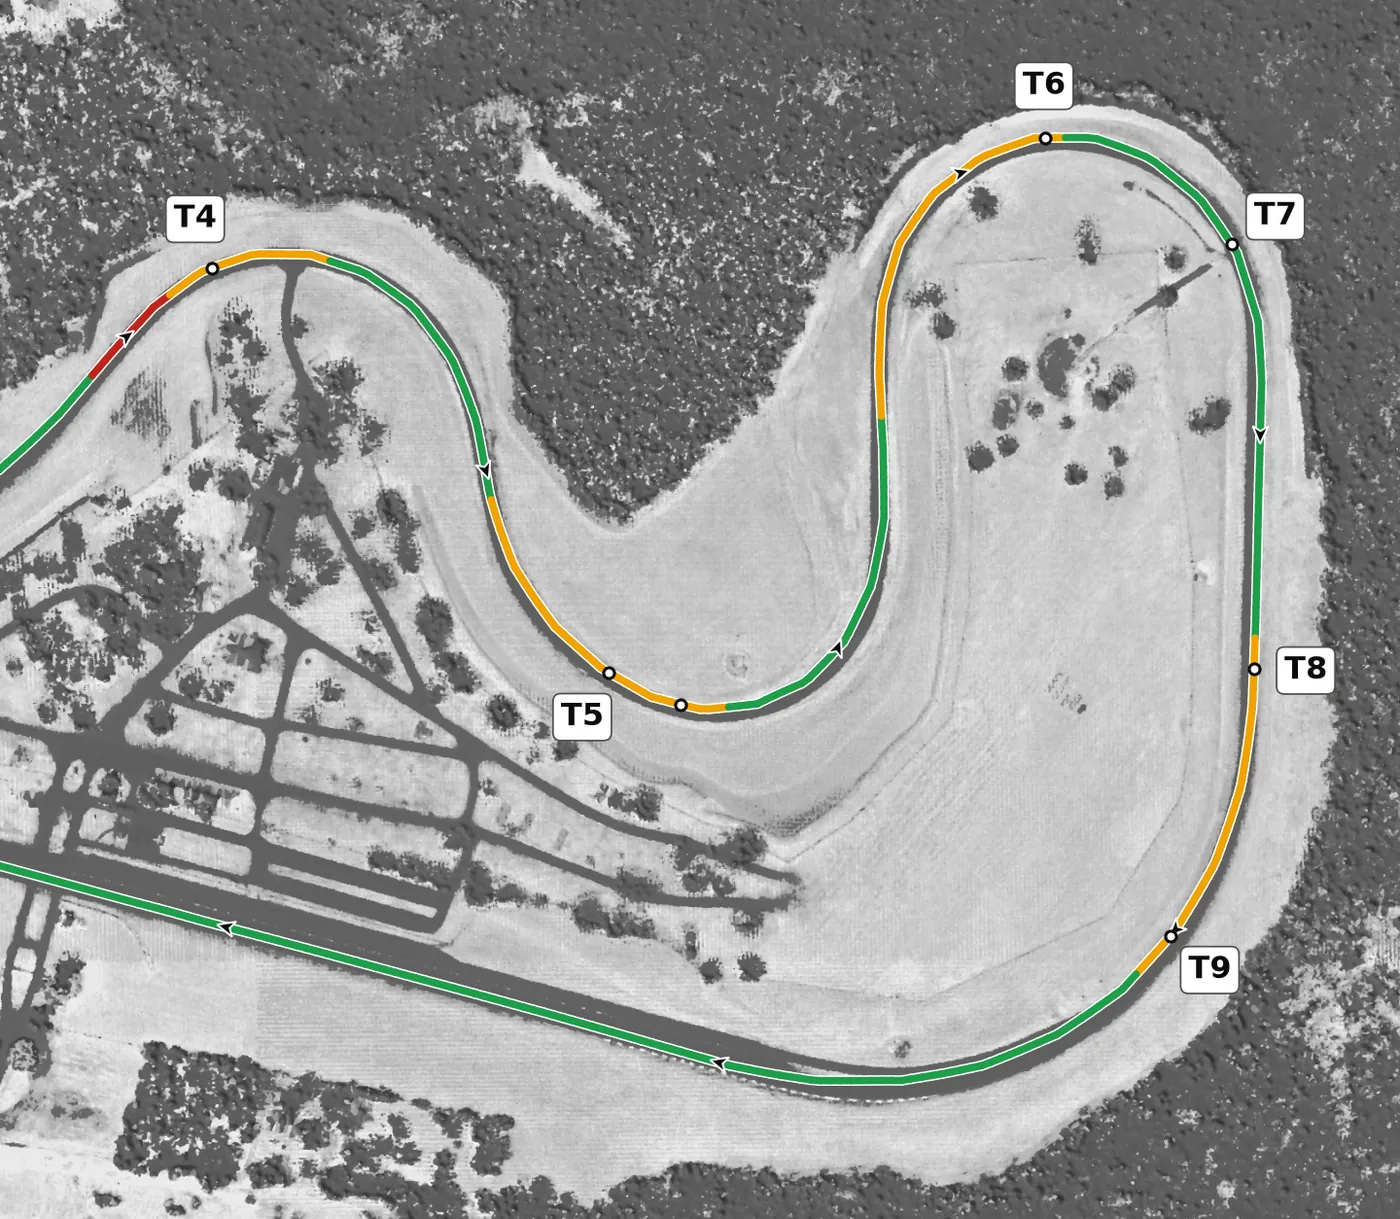
T6 and T7 are linked rights: T6 drops gently downhill on entry and T7 climbs back out from the lowest point on the track, so turn in to T6 late enough to stay on the throttle through T7. T8 and T9 are two more rights that drive as one sweep onto the front straight, and T9 has the only wall on the track at its exit, so unwind the wheel before full throttle.
Corners
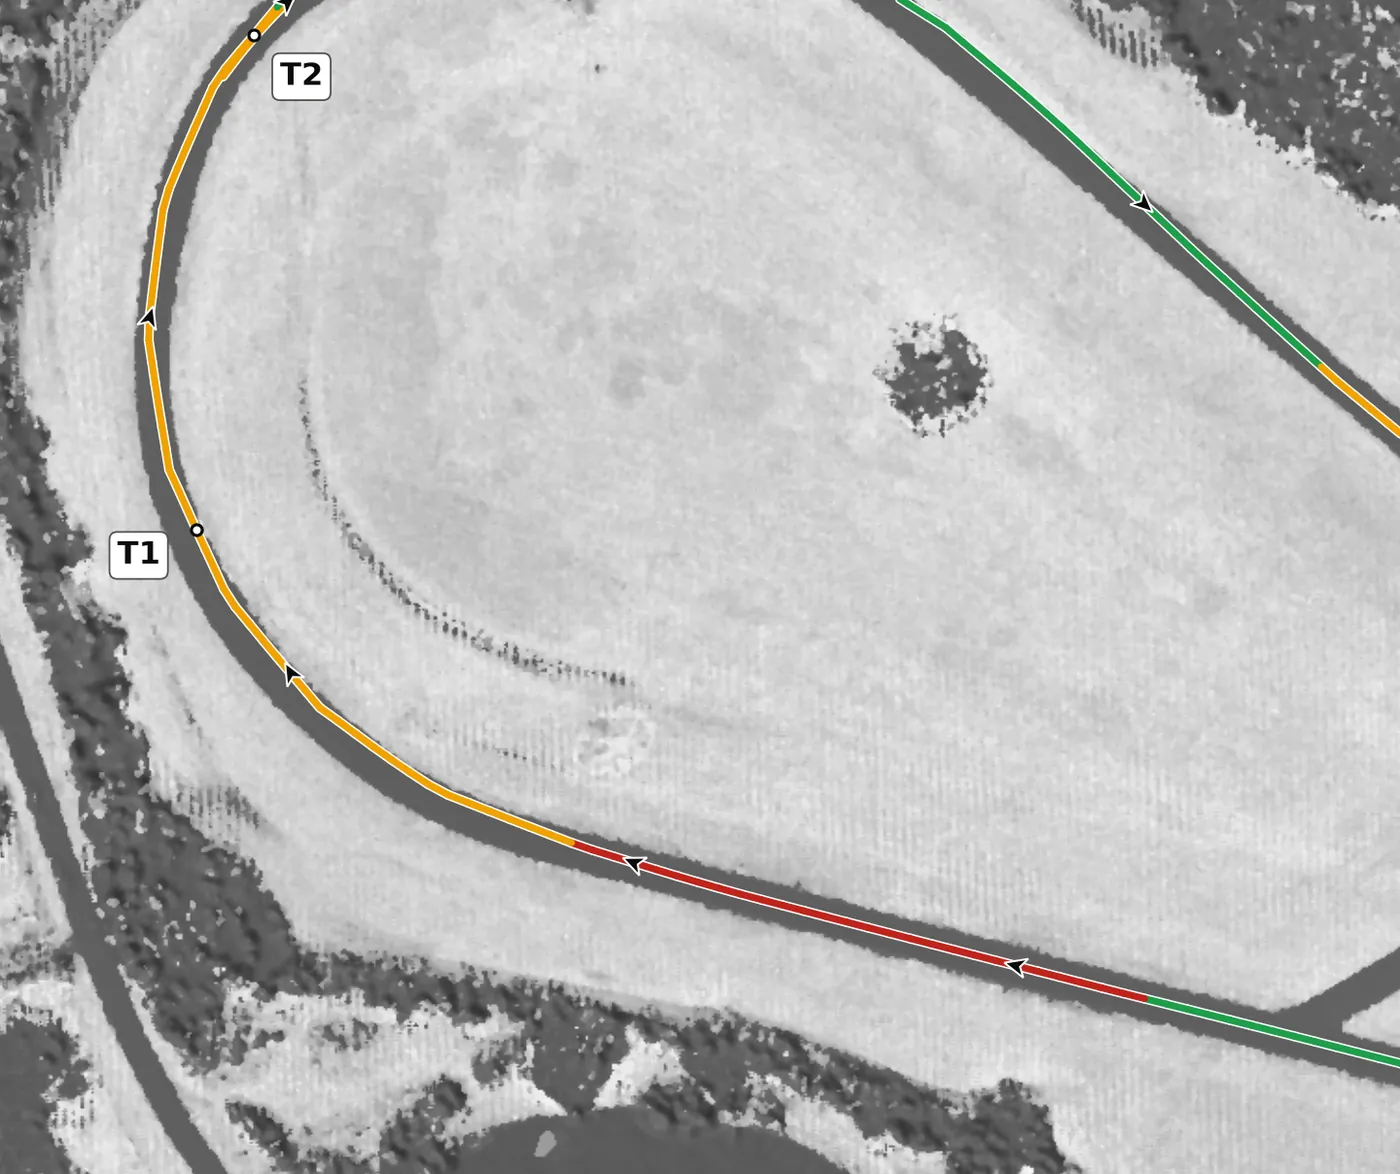
Brake firmly from the left side of the track (the boards count down in 100 ft steps, and turn-in is at the 1 board), release smoothly, and turn into this very fast right, which tightens as you go. Keep a little in reserve, because T2 follows straight away. The mistake to avoid is braking too late and arriving too fast, which forces a big lift or a slide between T1 and T2.
From the survey: T1 and T2 are one long right around the western loop.
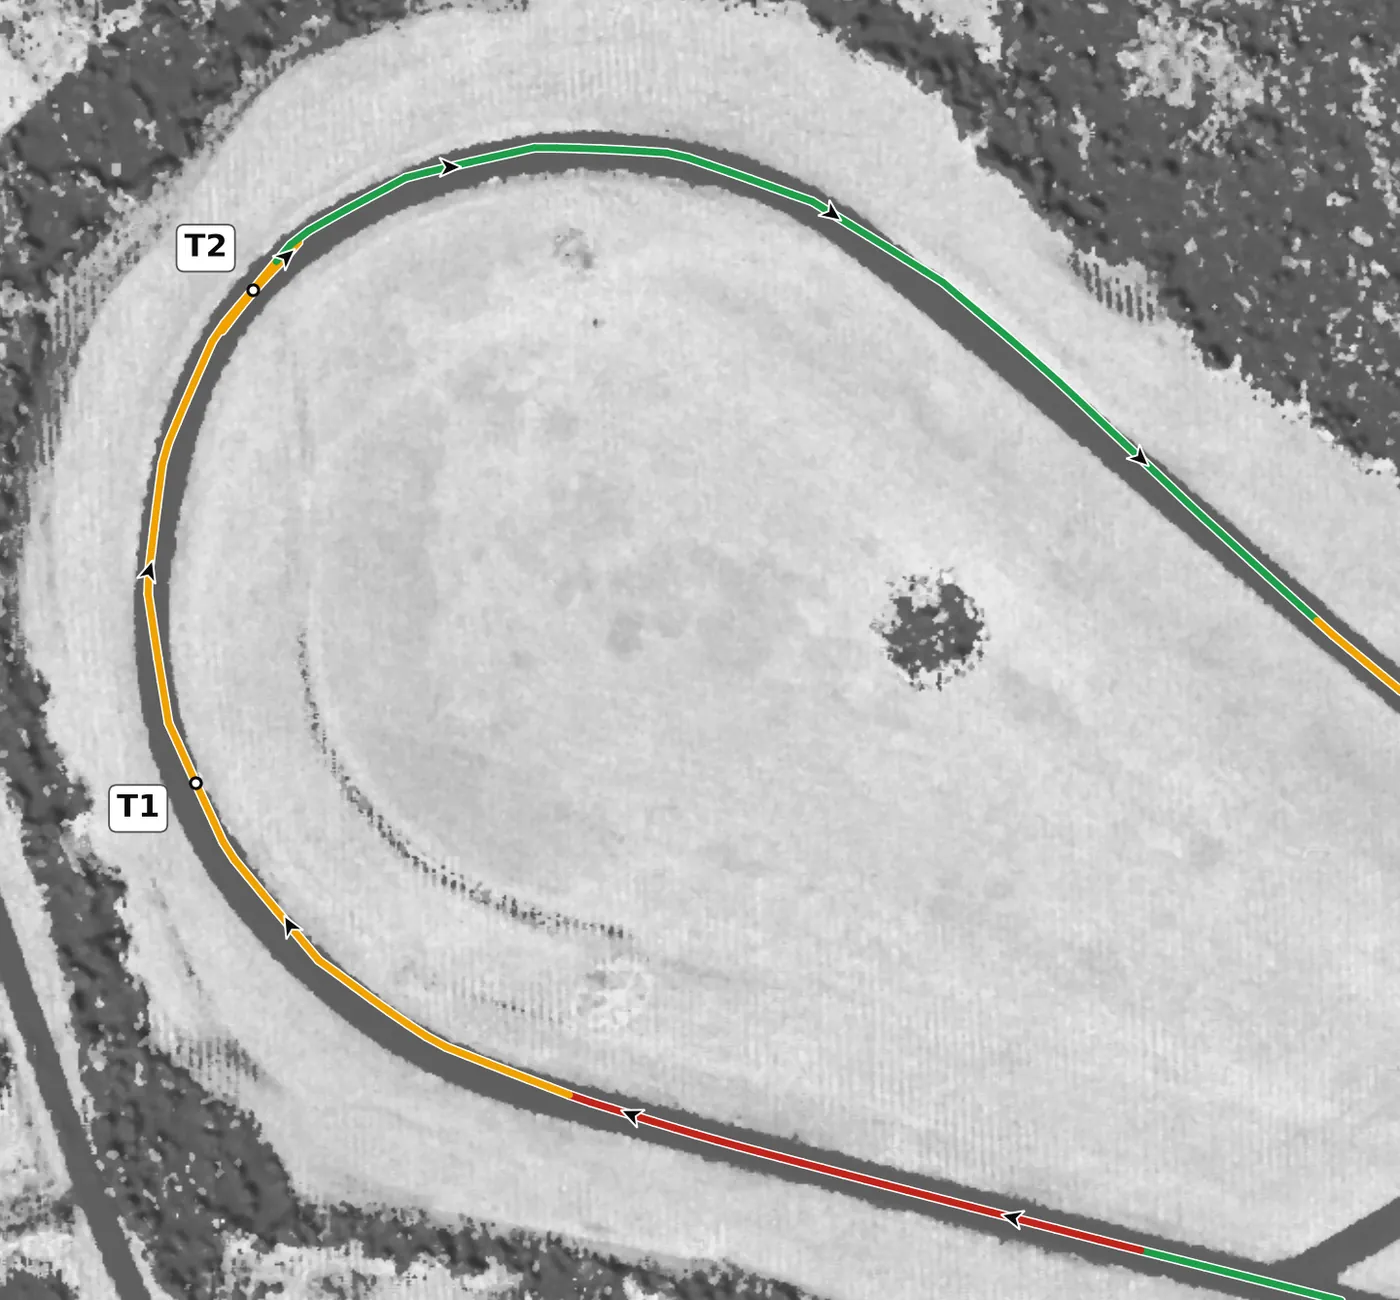
Treat T2 as the second half of one long right: turn in from left of centre, use a conservatively late apex and get to the throttle early. It carries the most camber on the track, so the car holds a little better than it looks, but let the corner come to you. The mistake to avoid is an early apex that runs you wide on the exit.
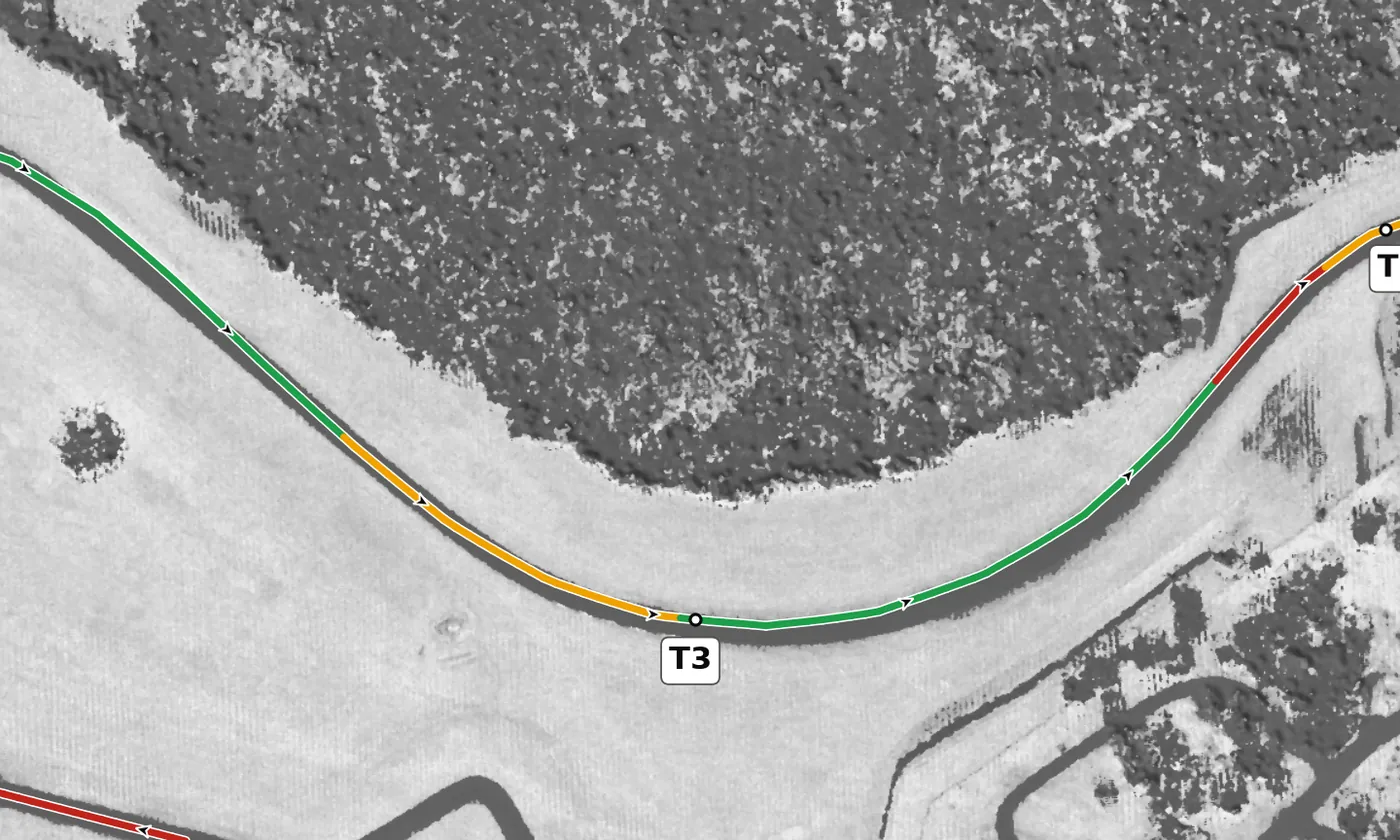
Set up on the right and begin turning in early for this fast left sweeper, looking far ahead through the turn. Keep your hands smooth, use one steady steering input and stay on the throttle: the car should be gaining speed through it, and only a slight lift on entry is ever needed. The mistake to avoid is scrubbing speed with jerky steering; it is a commitment corner, so build up to it over several laps.
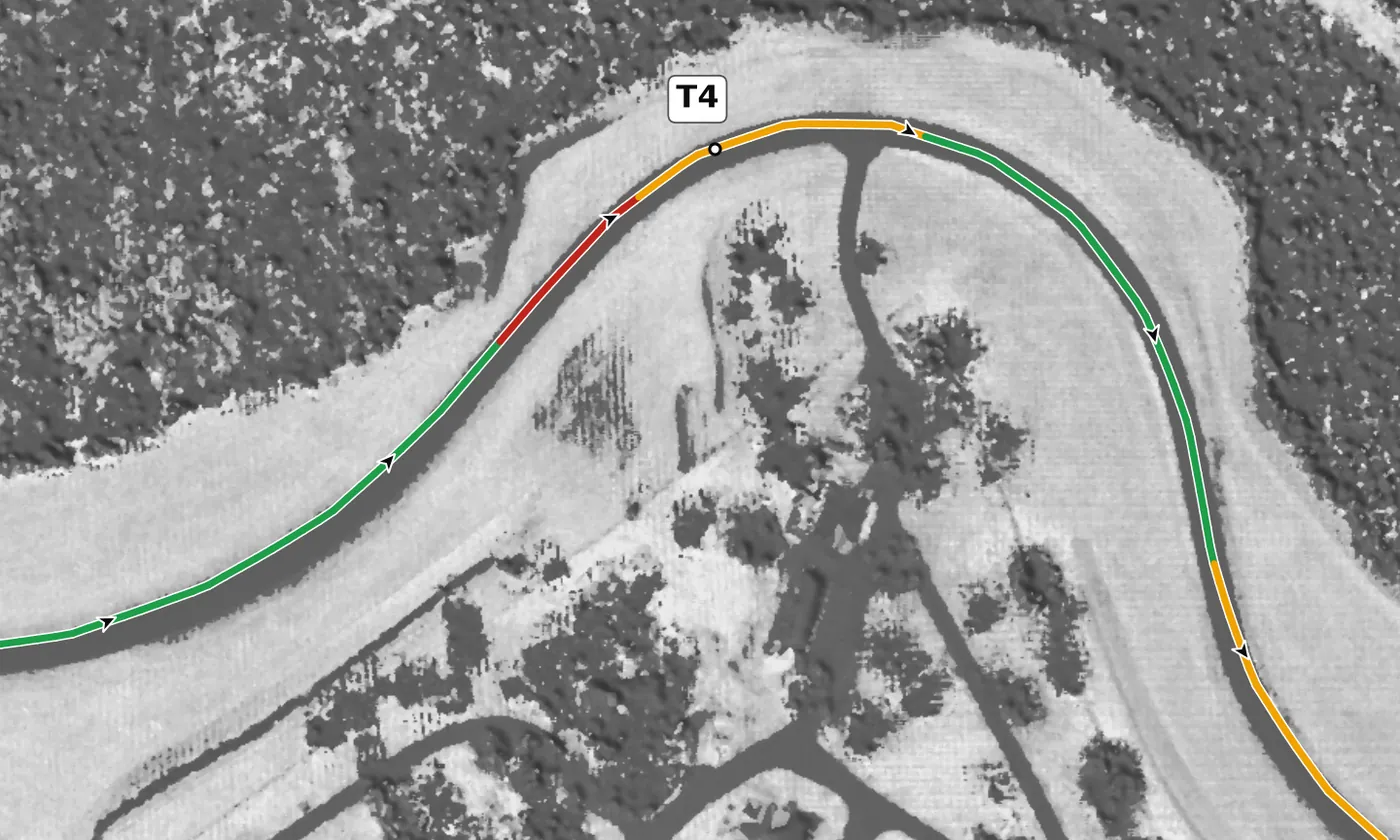
Brake hard in a straight line for this tighter right, whose surface is more slippery than the rest of the track, and worse the deeper you go into the corner. Turn in smoothly, aim for a late apex, and wait until the car is settled before adding throttle. The mistake to avoid is braking too deep and carrying too much speed in, which is how this corner earns its nickname, the Collector.
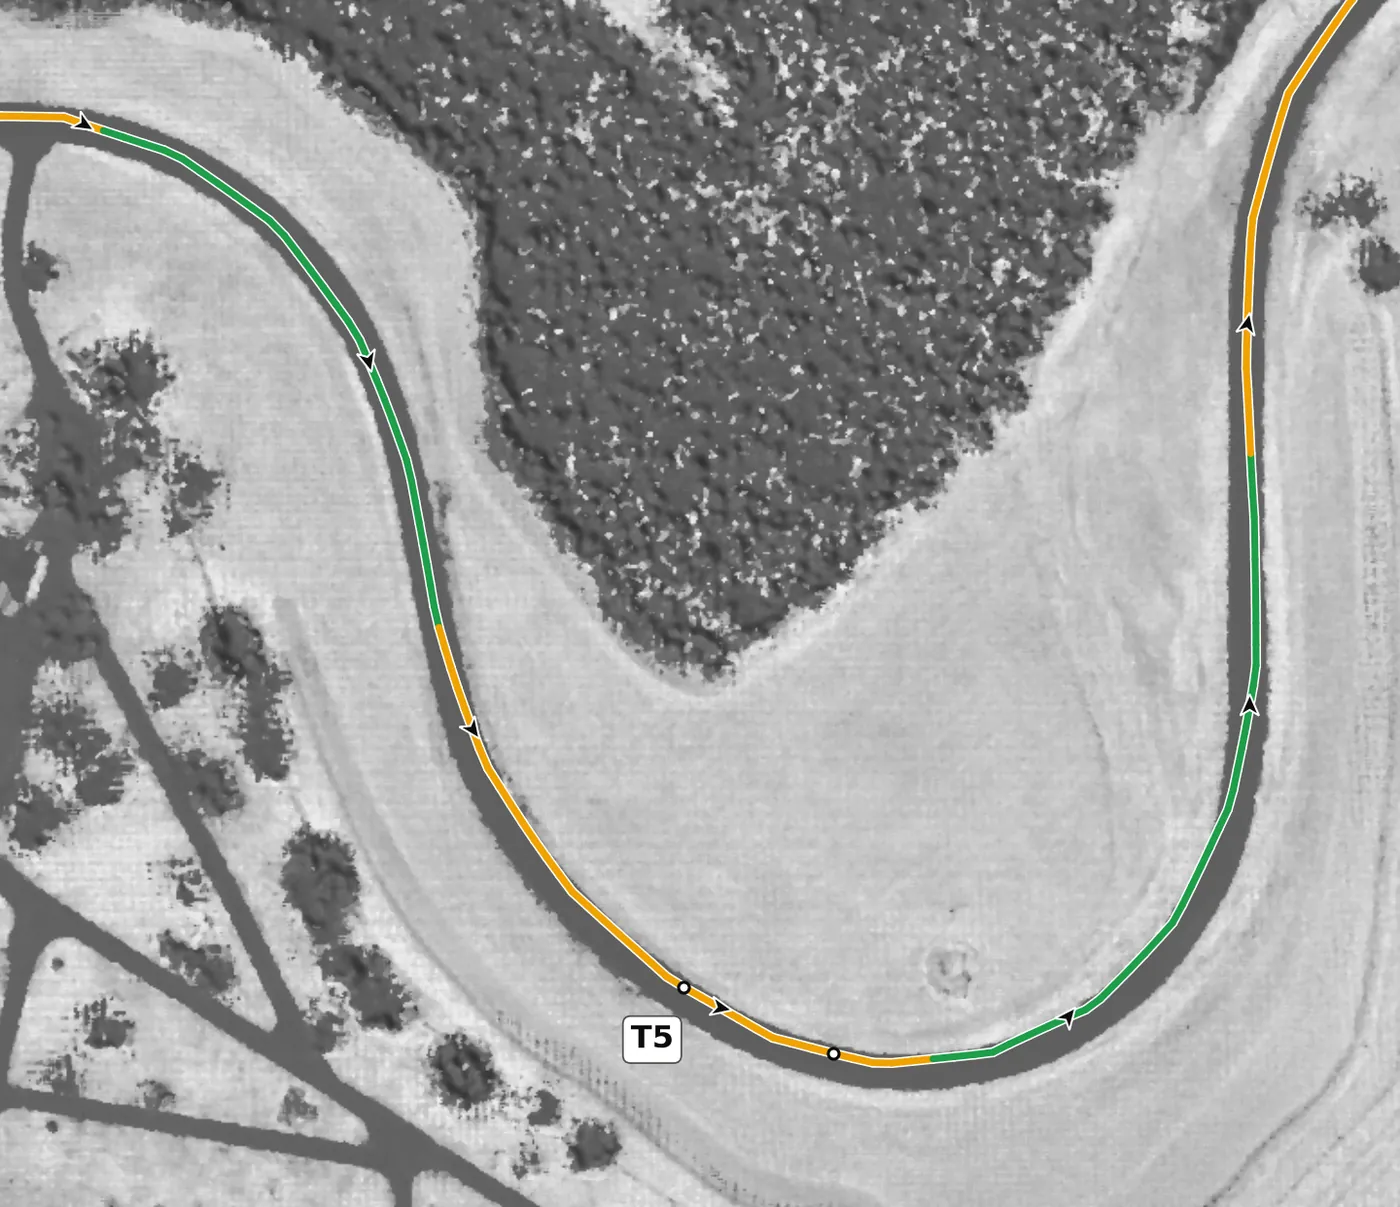
T5 is the slowest corner on the lap, a long left of nearly 180 degrees with no banking to help. Slow the car in a straight line (at HPDE pace a light brake or a firm lift), turn in late, and be patient through the long middle, adding throttle only when you can see the exit. The mistake to avoid is turning in early, which leaves you running out of road as the corner finishes; water can also collect here in the wet.
From the survey: One long left in two parts (5a and 5b), and the slowest corner on the lap.
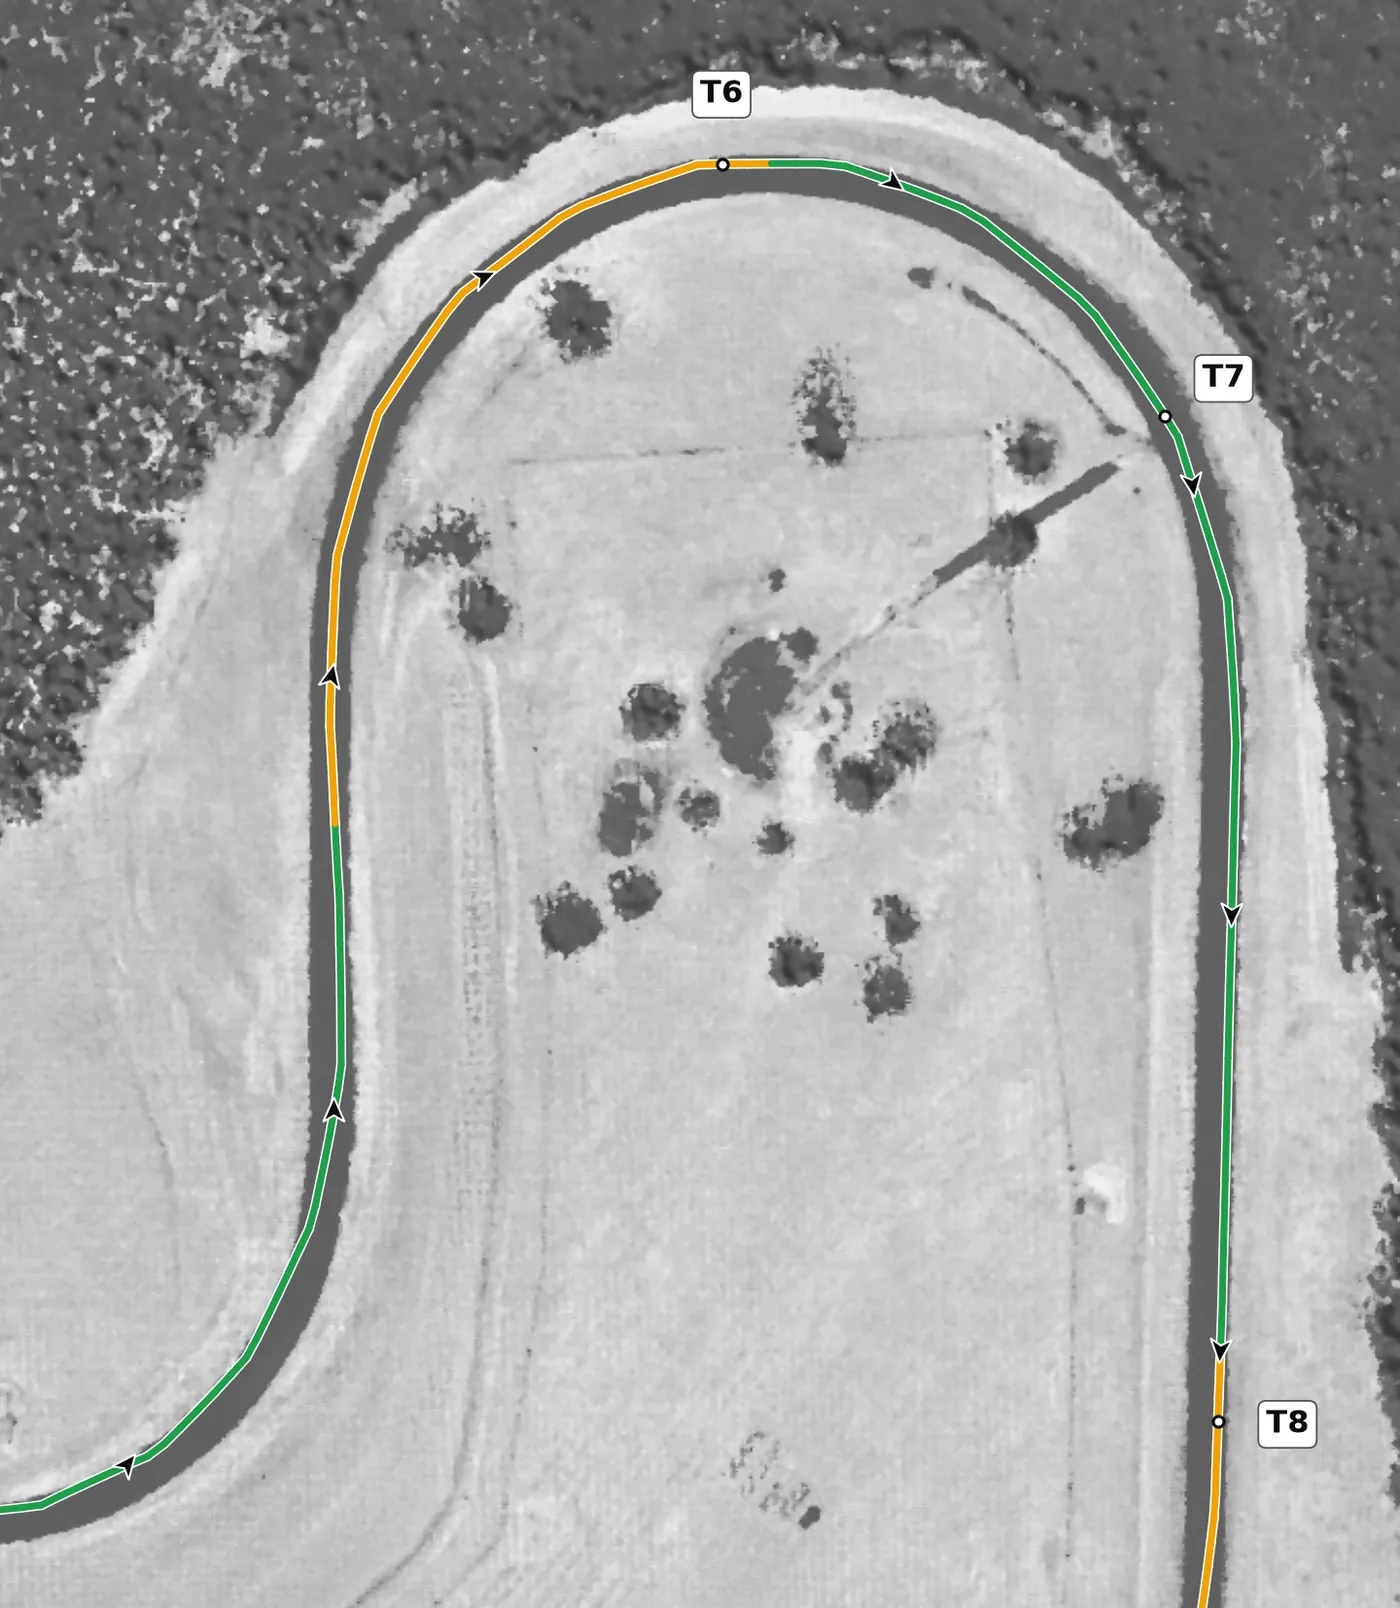
T6 is a right-hand sweeper with a gentle downhill entry, where the car is at its least supported on the lap. Turn in late enough that you can get on the throttle and stay on it through T7, but not so late that you unsettle the rear on entry. The mistake to avoid is an early turn-in, which runs you out of track at the exit of T7.
From the survey: A right-hand sweeper with the steepest descent on the lap on entry.
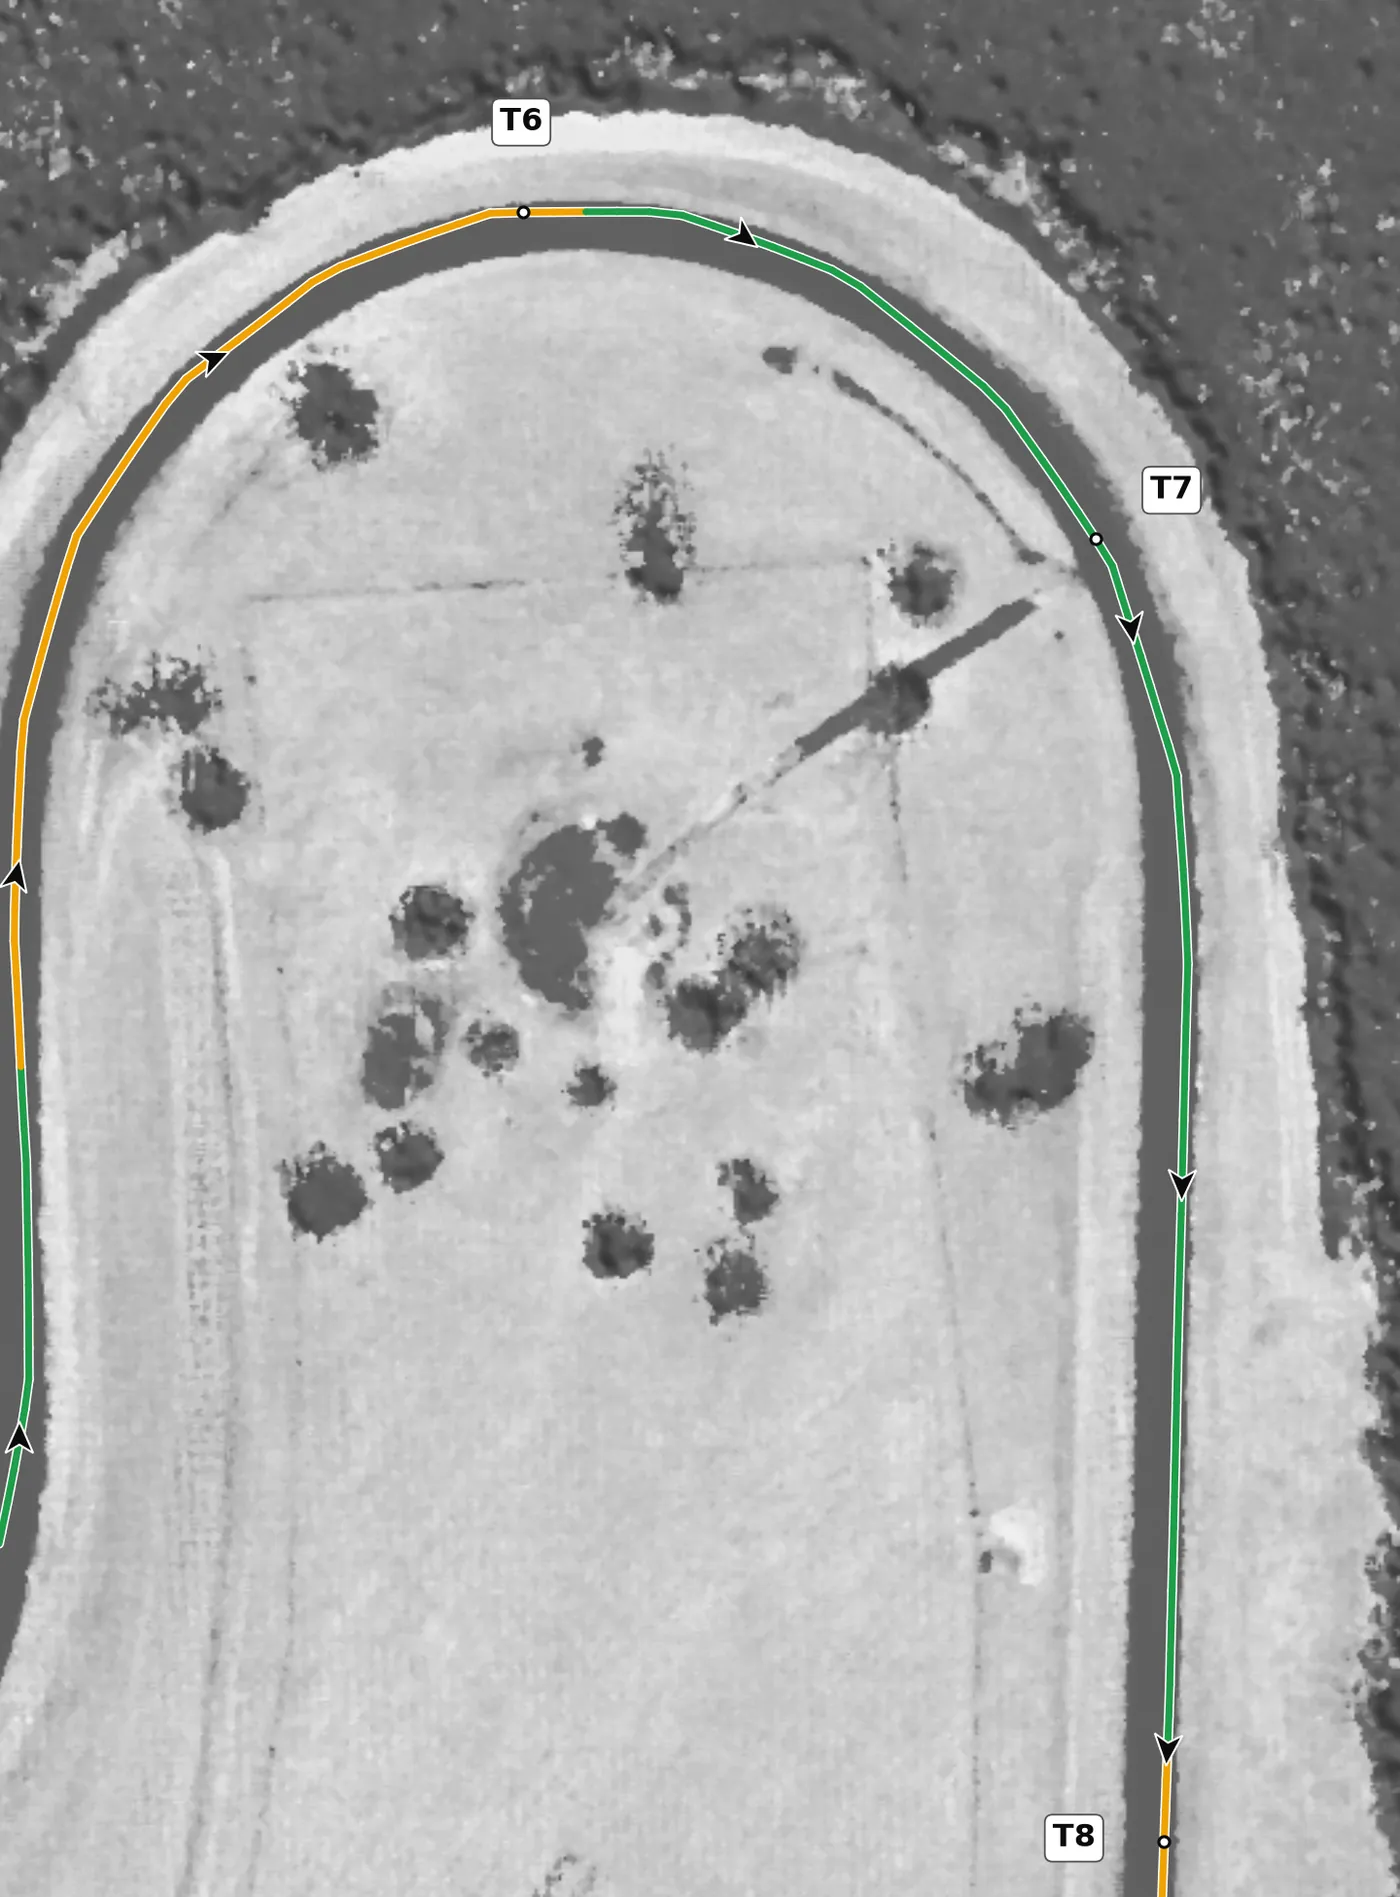
T7 is the uphill second half of the T6–T7 pair, starting from the lowest point on the track. If T6 was right, T7 is simply a matter of holding the throttle and tracking out as the road climbs. The mistake to avoid is an early apex that pushes you wide on the exit.
From the survey: The lowest point on the lap, with the climb straight after.
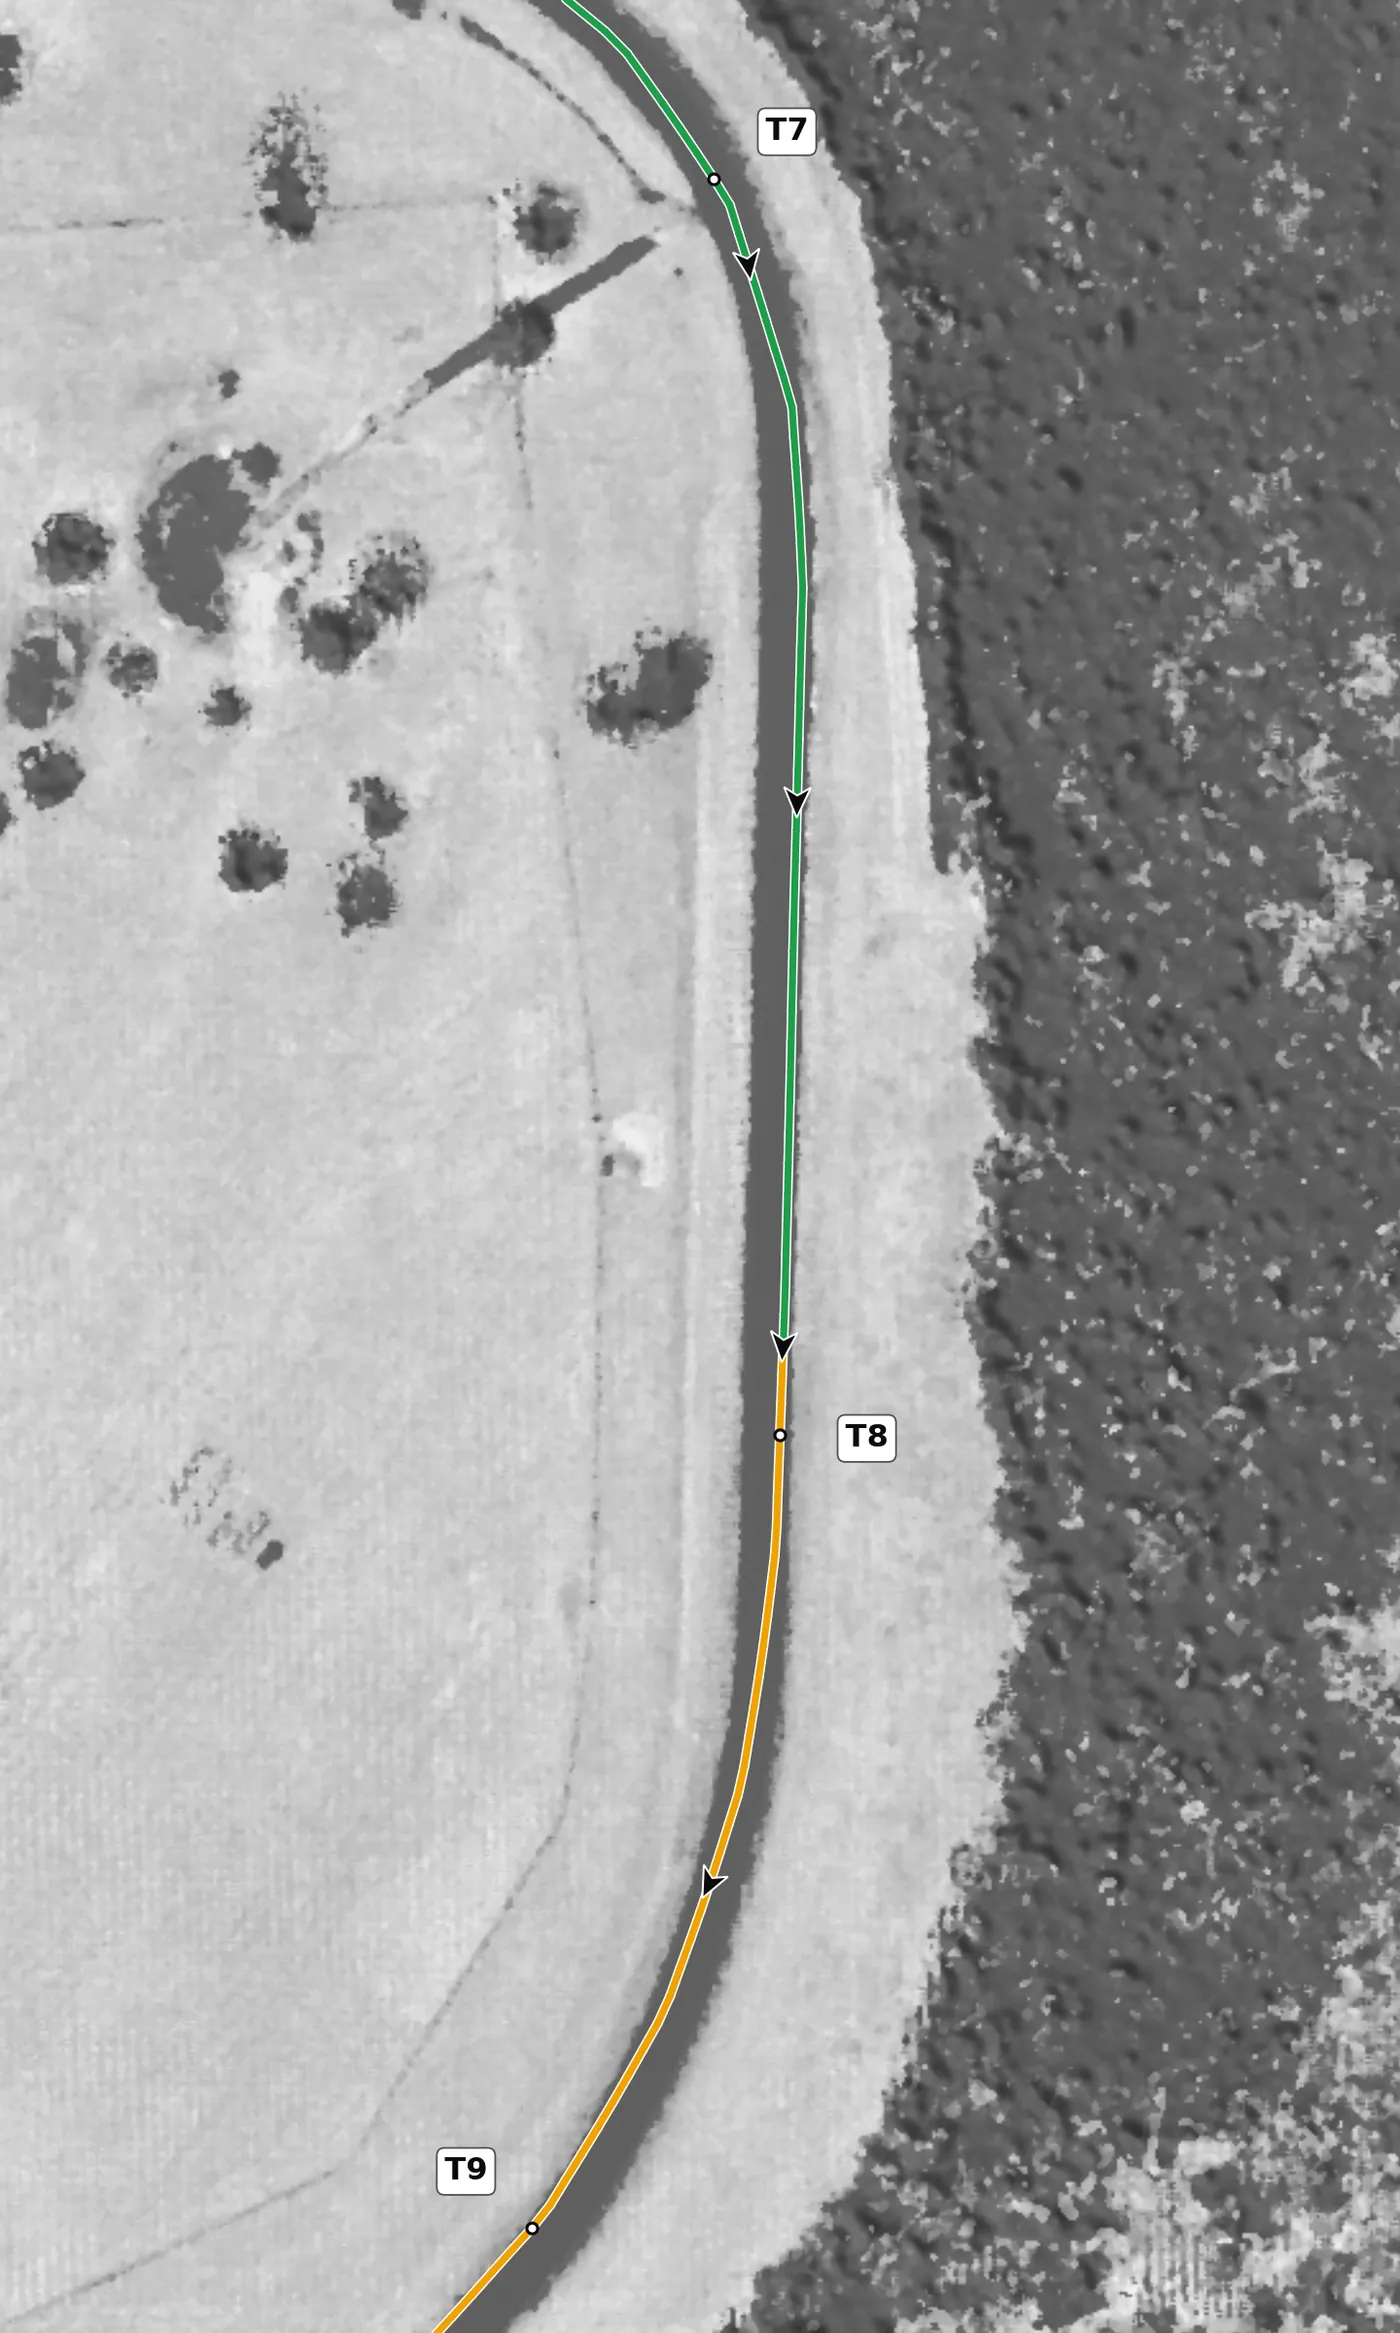
T8 is a slight right on a gentle rise; expect a small lift here that you hold into T9. Use it to place the car for T9, because the two drive as one sweep onto the front straight. The mistake to avoid is running wide at T8, which spoils your line into T9.
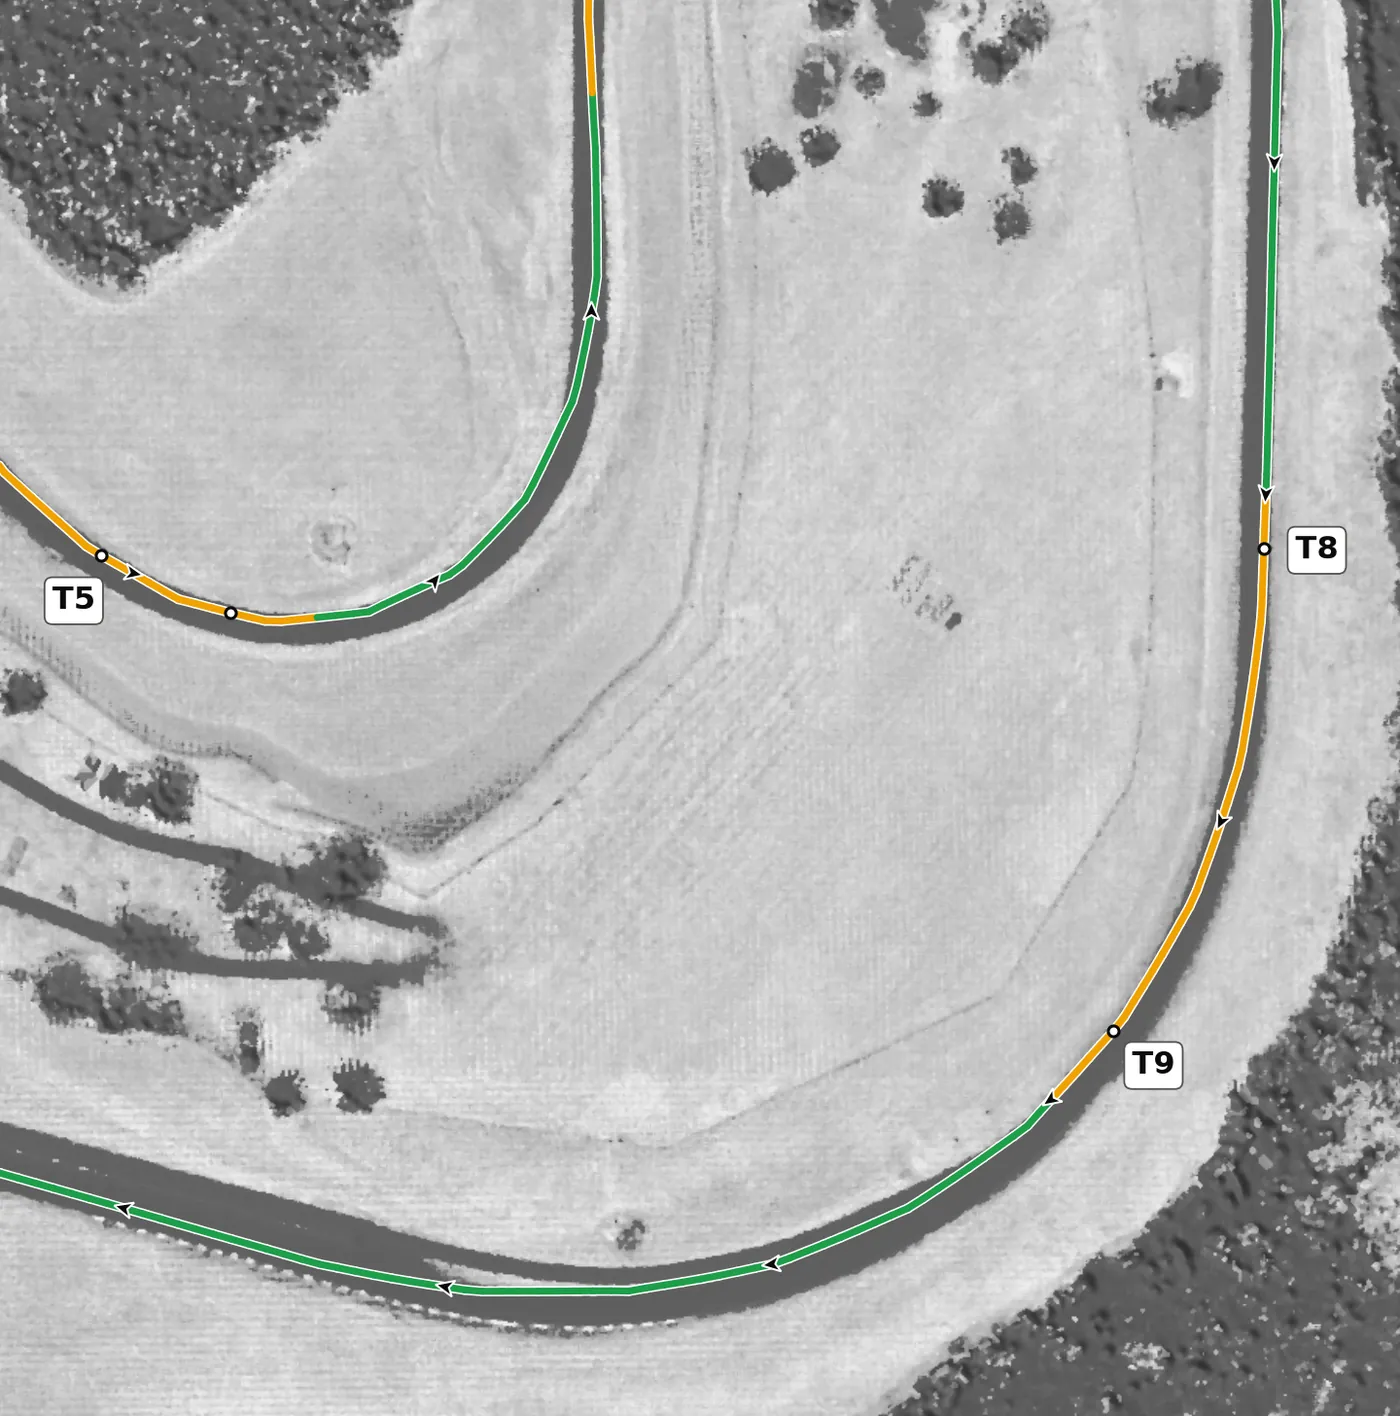
T9 is the last right before the front straight, with a slight dip at the apex that helps the car grip and the only wall on the track at the exit. Take a late enough apex to straighten the car early, unwind the wheel, and then go to full throttle. The mistake to avoid is going to full power with steering lock still on and running out onto the exit kerb toward the wall.
From the survey: Onto the front straight: the exit sets your speed all the way to T1.
Version history
- v1.2 · 2026-10-01 — T3 is now drawn on throttle from the apex: the car gains speed through the sweeper, so it is not a lift.
- v1.1 · 2026-10-01 — Speeds and braking points rebuilt from cars at a typical quick HPDE pace. Top speed on the front straight drops from about 215 to 199 km/h, T1 braking starts about 20 m earlier, at the 5 board, T4 about 15 m later, and T5 and T6 are now a lift or a light brake rather than a hard stop. The line now goes straight from throttle to brake, with no coasting in between.
- v1.0 · 2026-10-01 — First version.
Feedback contributors
Drivers and instructors whose feedback has improved this line. Thank you.
- Mike M — no coasting between throttle and brake; braking points (v1.1)
- Brian L — corners where the car gains speed are throttle, not a lift (v1.2)