Sebring — Race Line
Estimated from data not in trackdays.ai. The line, speeds and braking points come from cars lapping at a typical quick HPDE pace, cross-checked against my own Sebring laps and published brake markers. If you have data you would like to contribute, please send it to upload@trackdays.ai to help improve our estimates. Turn numbers are a shape match to Chin's map, not confirmed; unlabelled apex dots are bends with no number.
Heads up: This is an estimate of a typical quick HPDE line, not any one car's lap. Braking points are a starting point, not a target: start a little earlier and work later in small steps. The line goes straight from throttle to brake; amber only marks where you really lift or hold part throttle. Sebring is nearly flat (2.6 m of relief, no crests), so its corners are about camber and surface, not elevation.
- Throttle
- Coast / partial
- Braking
- Apex
- T4Off-camber corner
Arrows show the direction of the lap. The grey basemap is USGS LiDAR: dark = asphalt, light = grass. Tap any map for the full-size image.
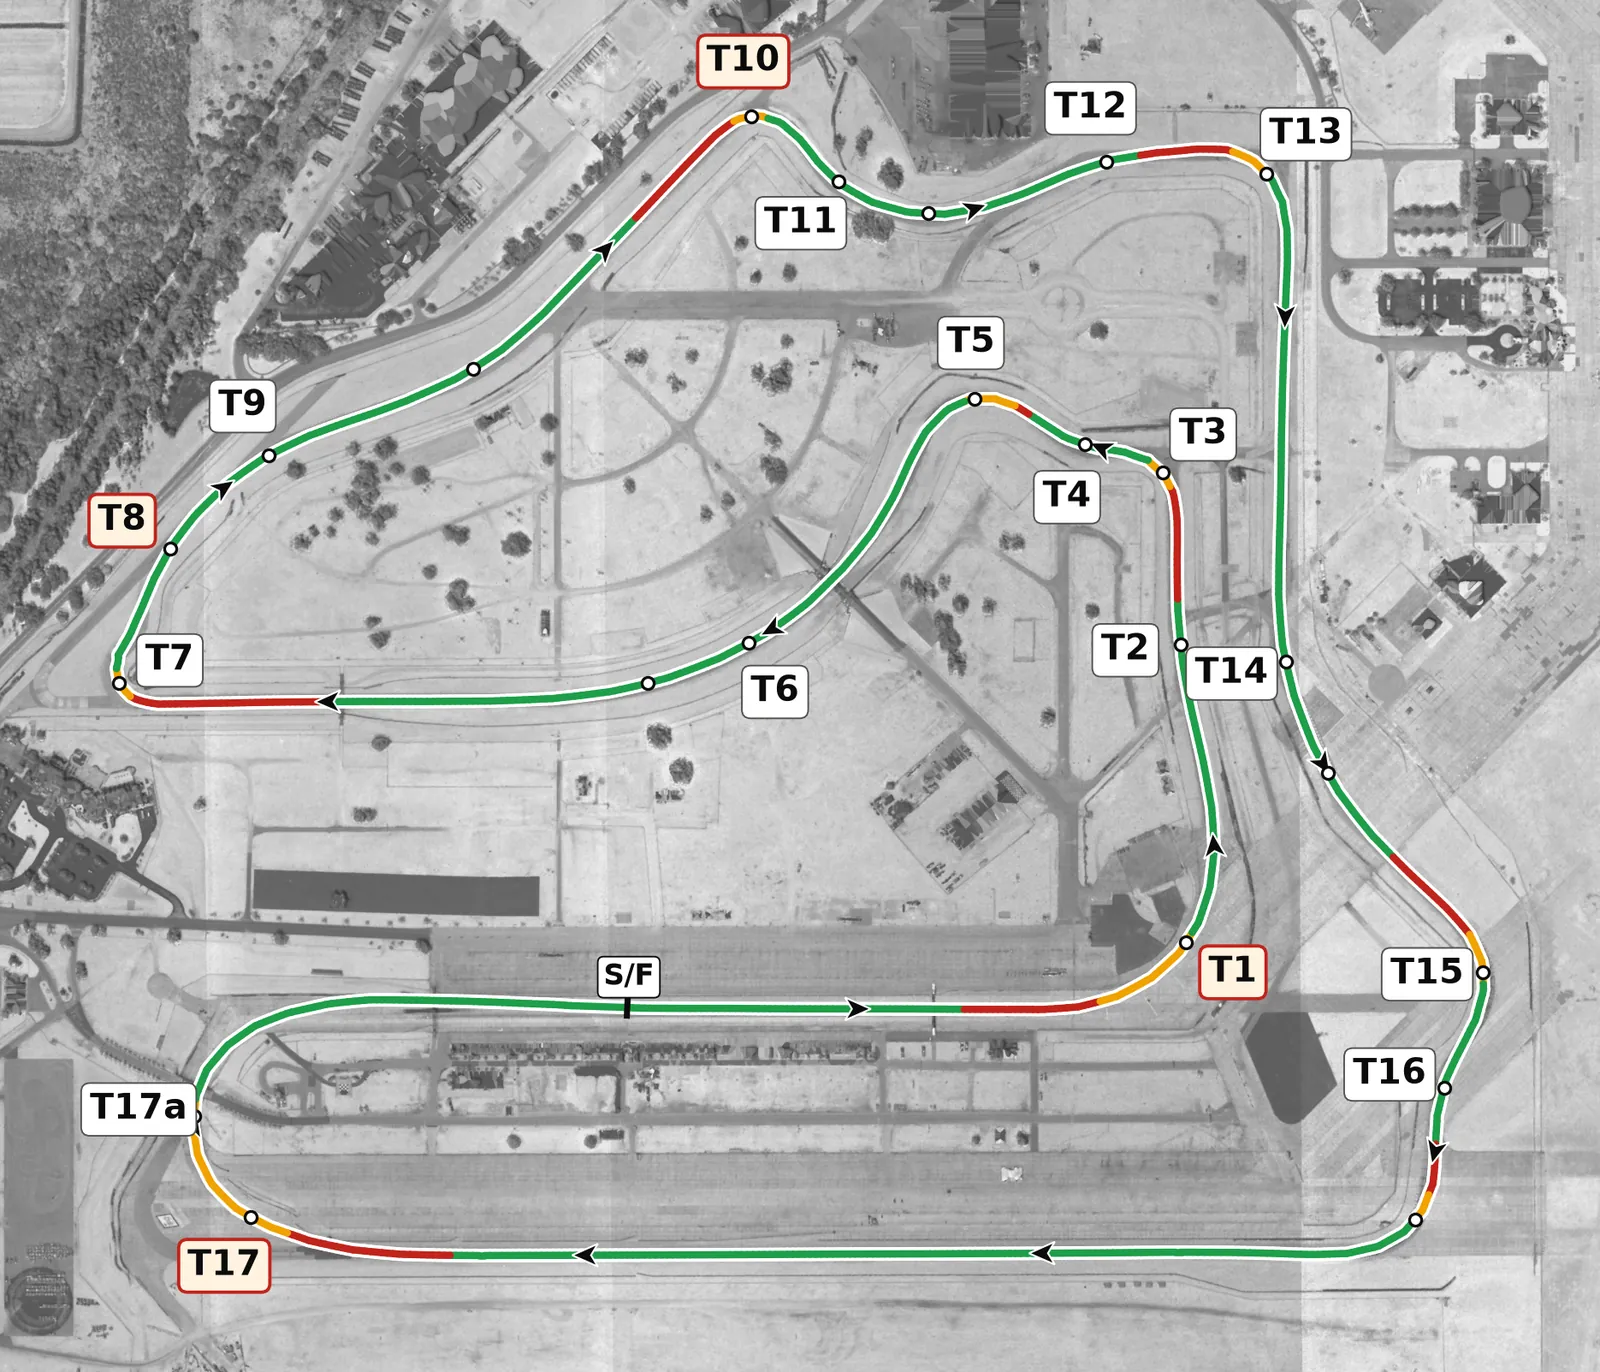
Sebring is almost perfectly flat, with under 3 m of total relief and no crests or compressions, so everything it does to the car comes through camber and pavement rather than elevation. Lap time comes from the exits onto the long straights after the Hairpin (T7), T16 and Turn 17, and from heavy, straight-line braking at the end of them, so be patient on entry and early with a smooth throttle. Several corners are slightly off camber, including T1, T10, the second half of Bishop's Bend and the right of T16, and the old runway concrete around Turn 17 and the front straight has joints you feel through the wheel, so keep your inputs smooth and do your braking in a straight line.
Sectors
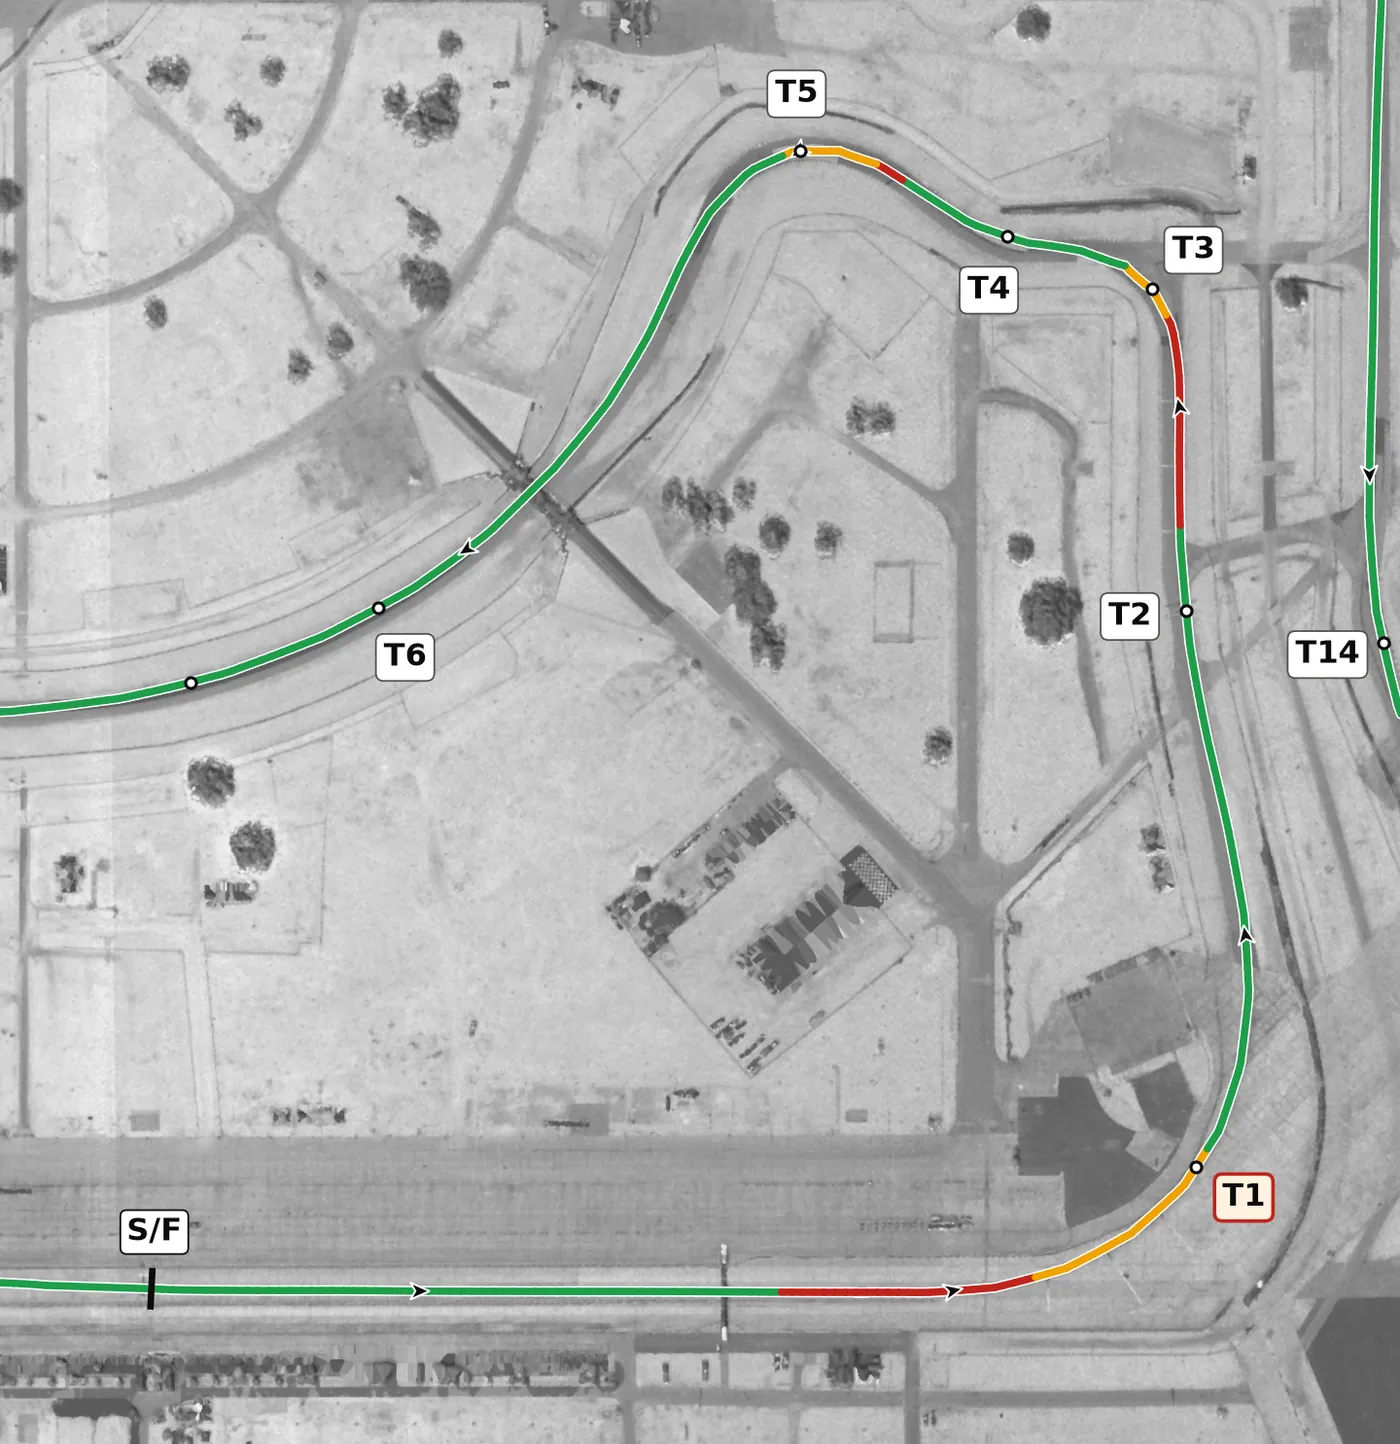
The lap opens on runway concrete with a fast, blind left at T1 and a flat-out kink at T2, then the tight T3–T5 rhythm section, where T4 is only there to set up a good exit from the long Carousel left at T5. T6 and the unnumbered fast right after it are the best-supported corners on the circuit, so keep the car on the right through them and then move across to the left for the Hairpin braking zone.
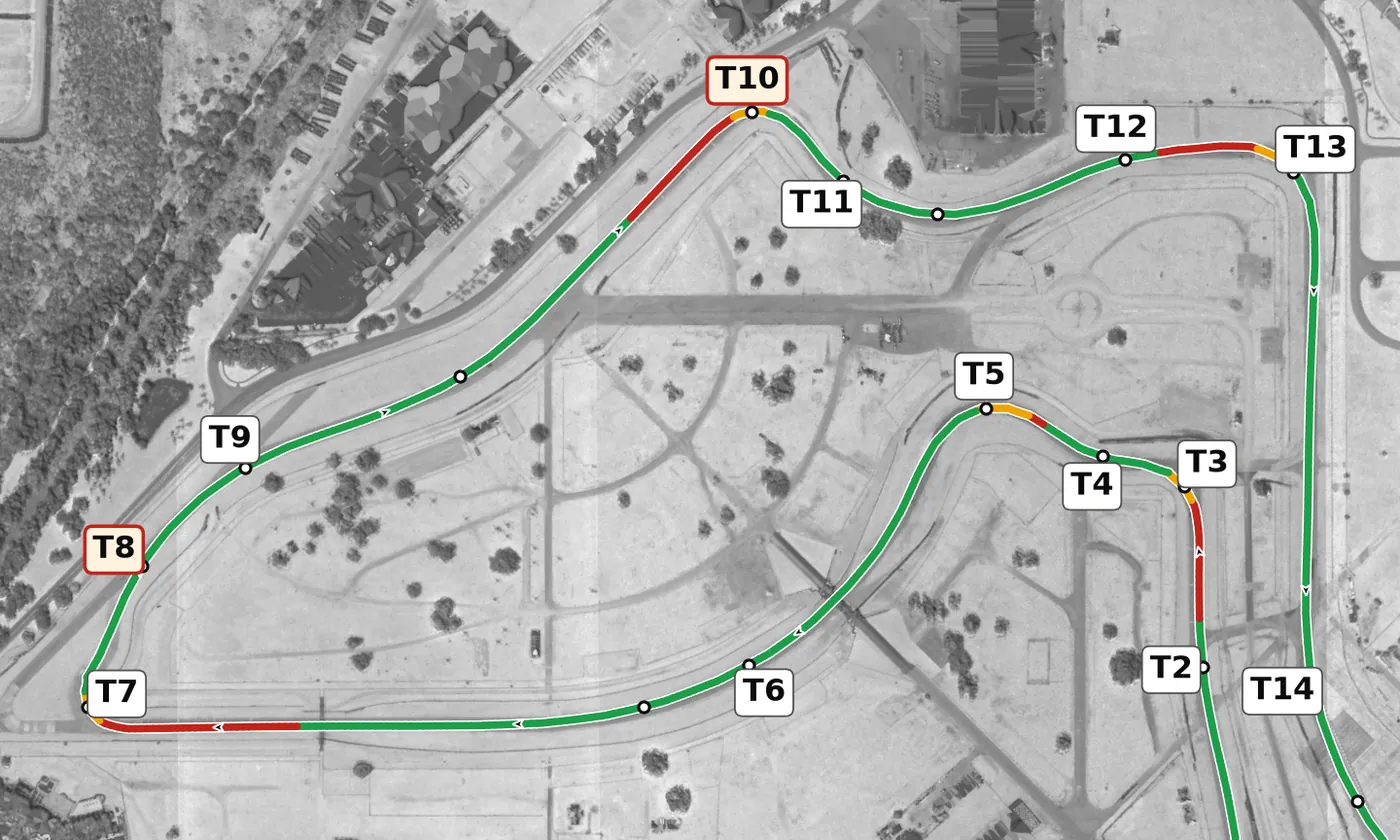
The Hairpin is the slowest corner on the lap and its drive out matters more than how late you brake into it. T8 and T9 follow as two rights and a fast left that you take smoothly on the shortest line, then T10 is a tight, off-camber right that rewards braking a little early. T11 is a long left in two parts and T12 a quick right kink; let the car run out to the left after T12 so you can brake straight for Tower Turn (T13), the steepest downhill apex on the lap.
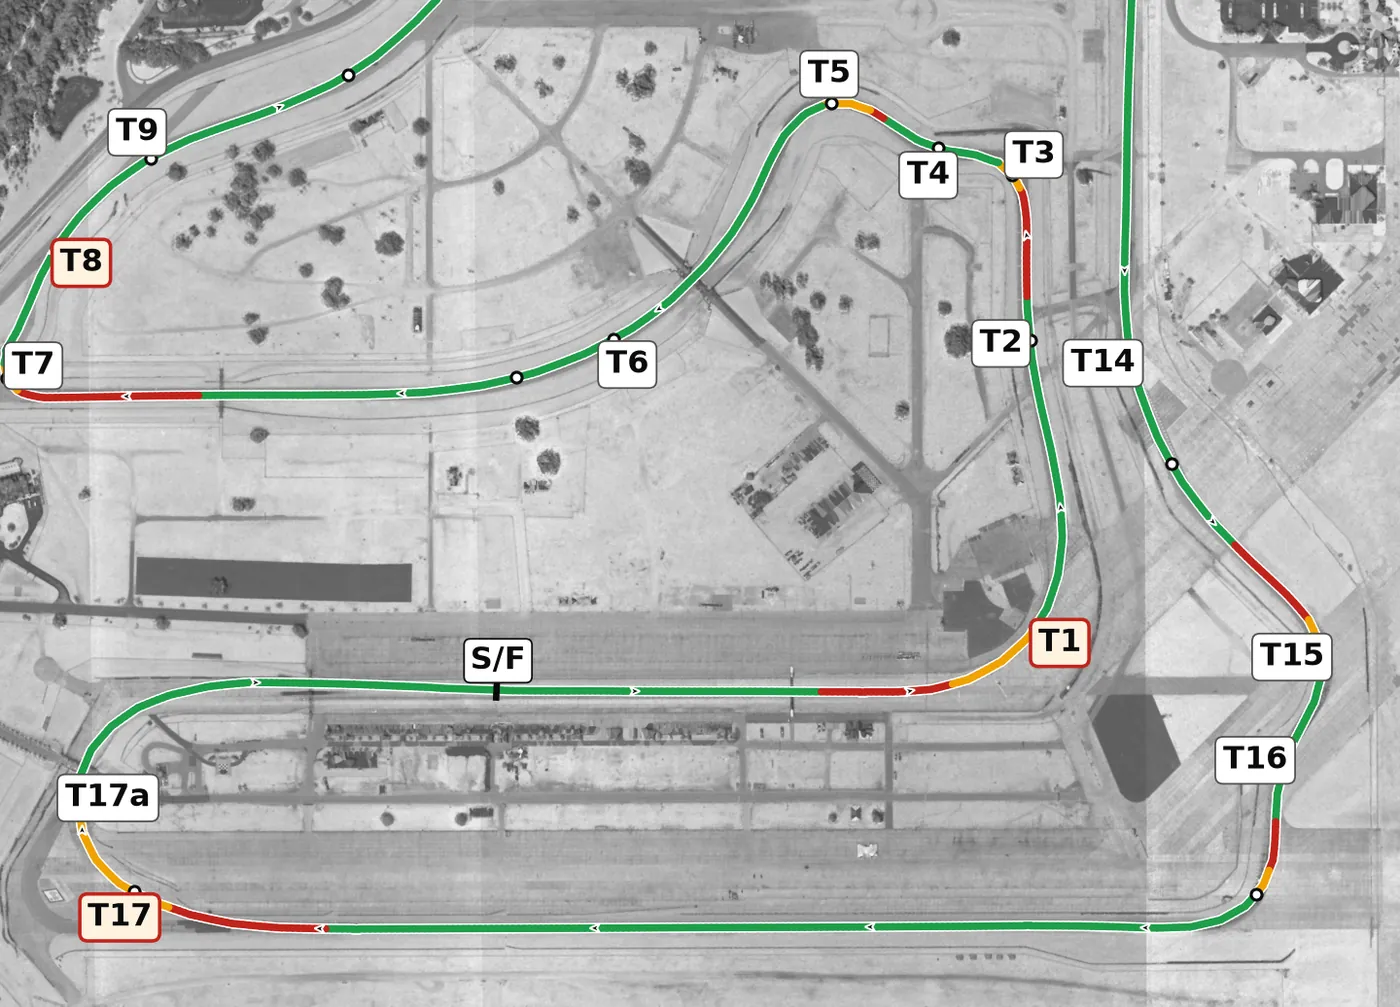
Bishop's Bend (T14) is the fastest and most intimidating corner on the circuit, and its second half is off camber and slightly downhill, so build up to it over several laps. T15 and the left–right of T16 are all about the exit onto the longest straight, and Turn 17, Sunset Bend, brings you back onto the bumpy runway concrete at the end of it; brake hard and straight, then use T17a, which is on camber and slightly uphill, to put the power down onto the front straight.
Corners
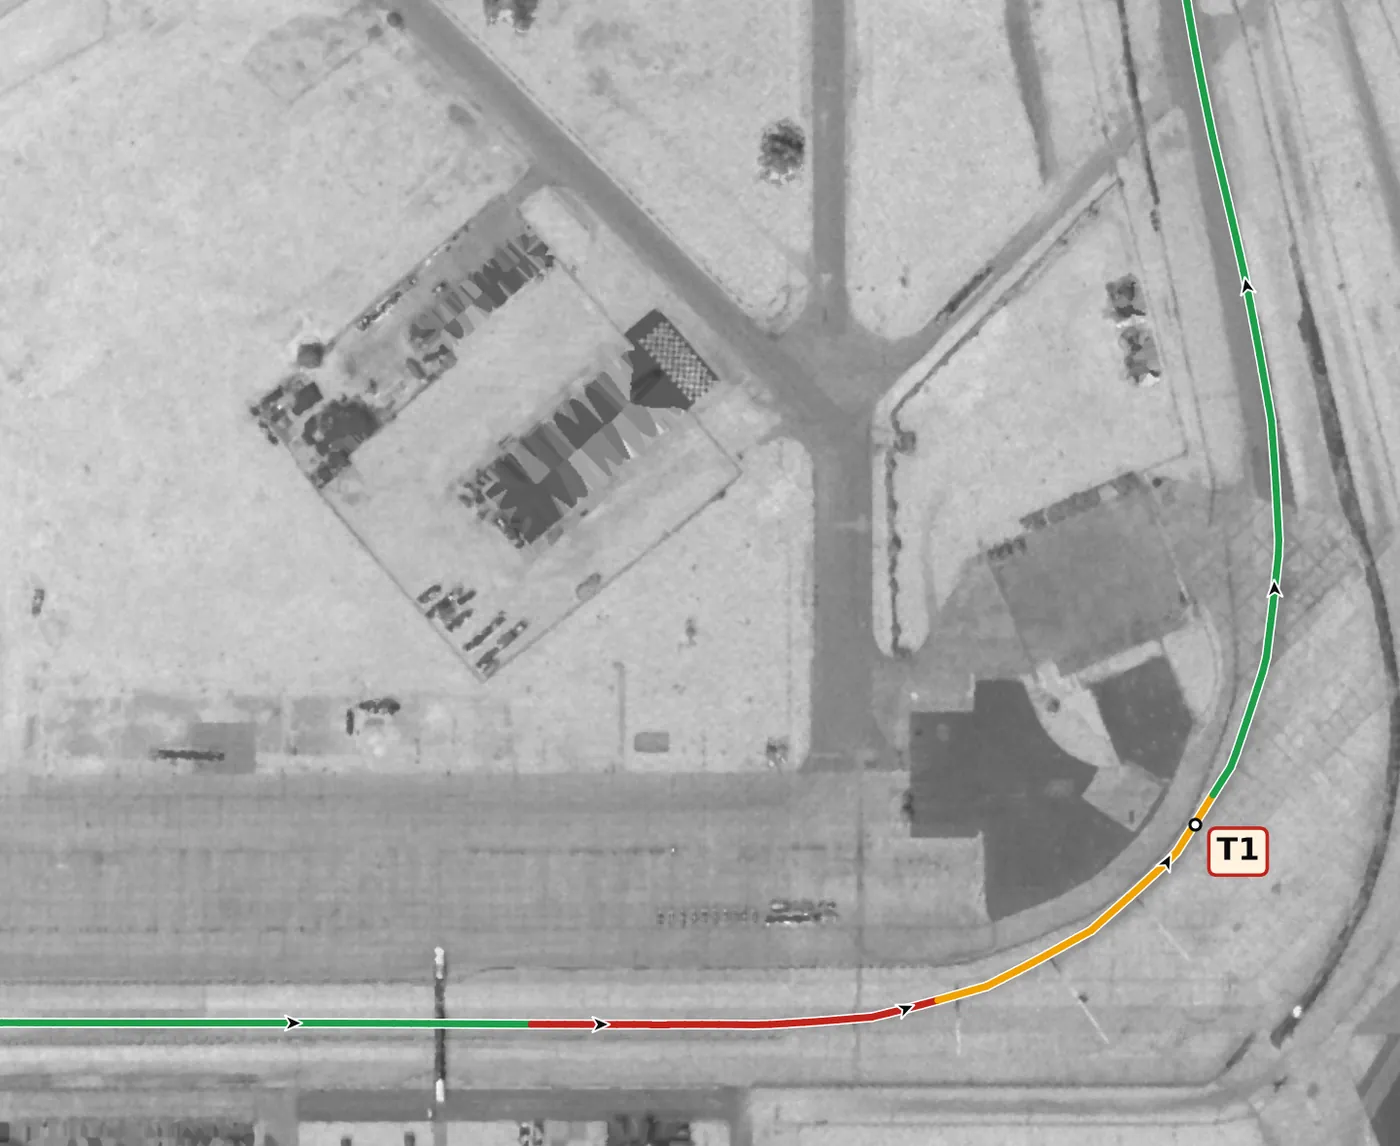
Come from the right side of the straight, brake in a straight line on the concrete, and turn in for a late apex on the left, then let the car use the whole track width on exit so you can run straight through the T2 kink. The apex is slightly off camber and the turn is blind and bumpy, so the surface gives you nothing extra. The mistake to avoid is turning in early and then adding steering lock to rescue the exit.
From the survey: Off camber at the apex (−0.6%).
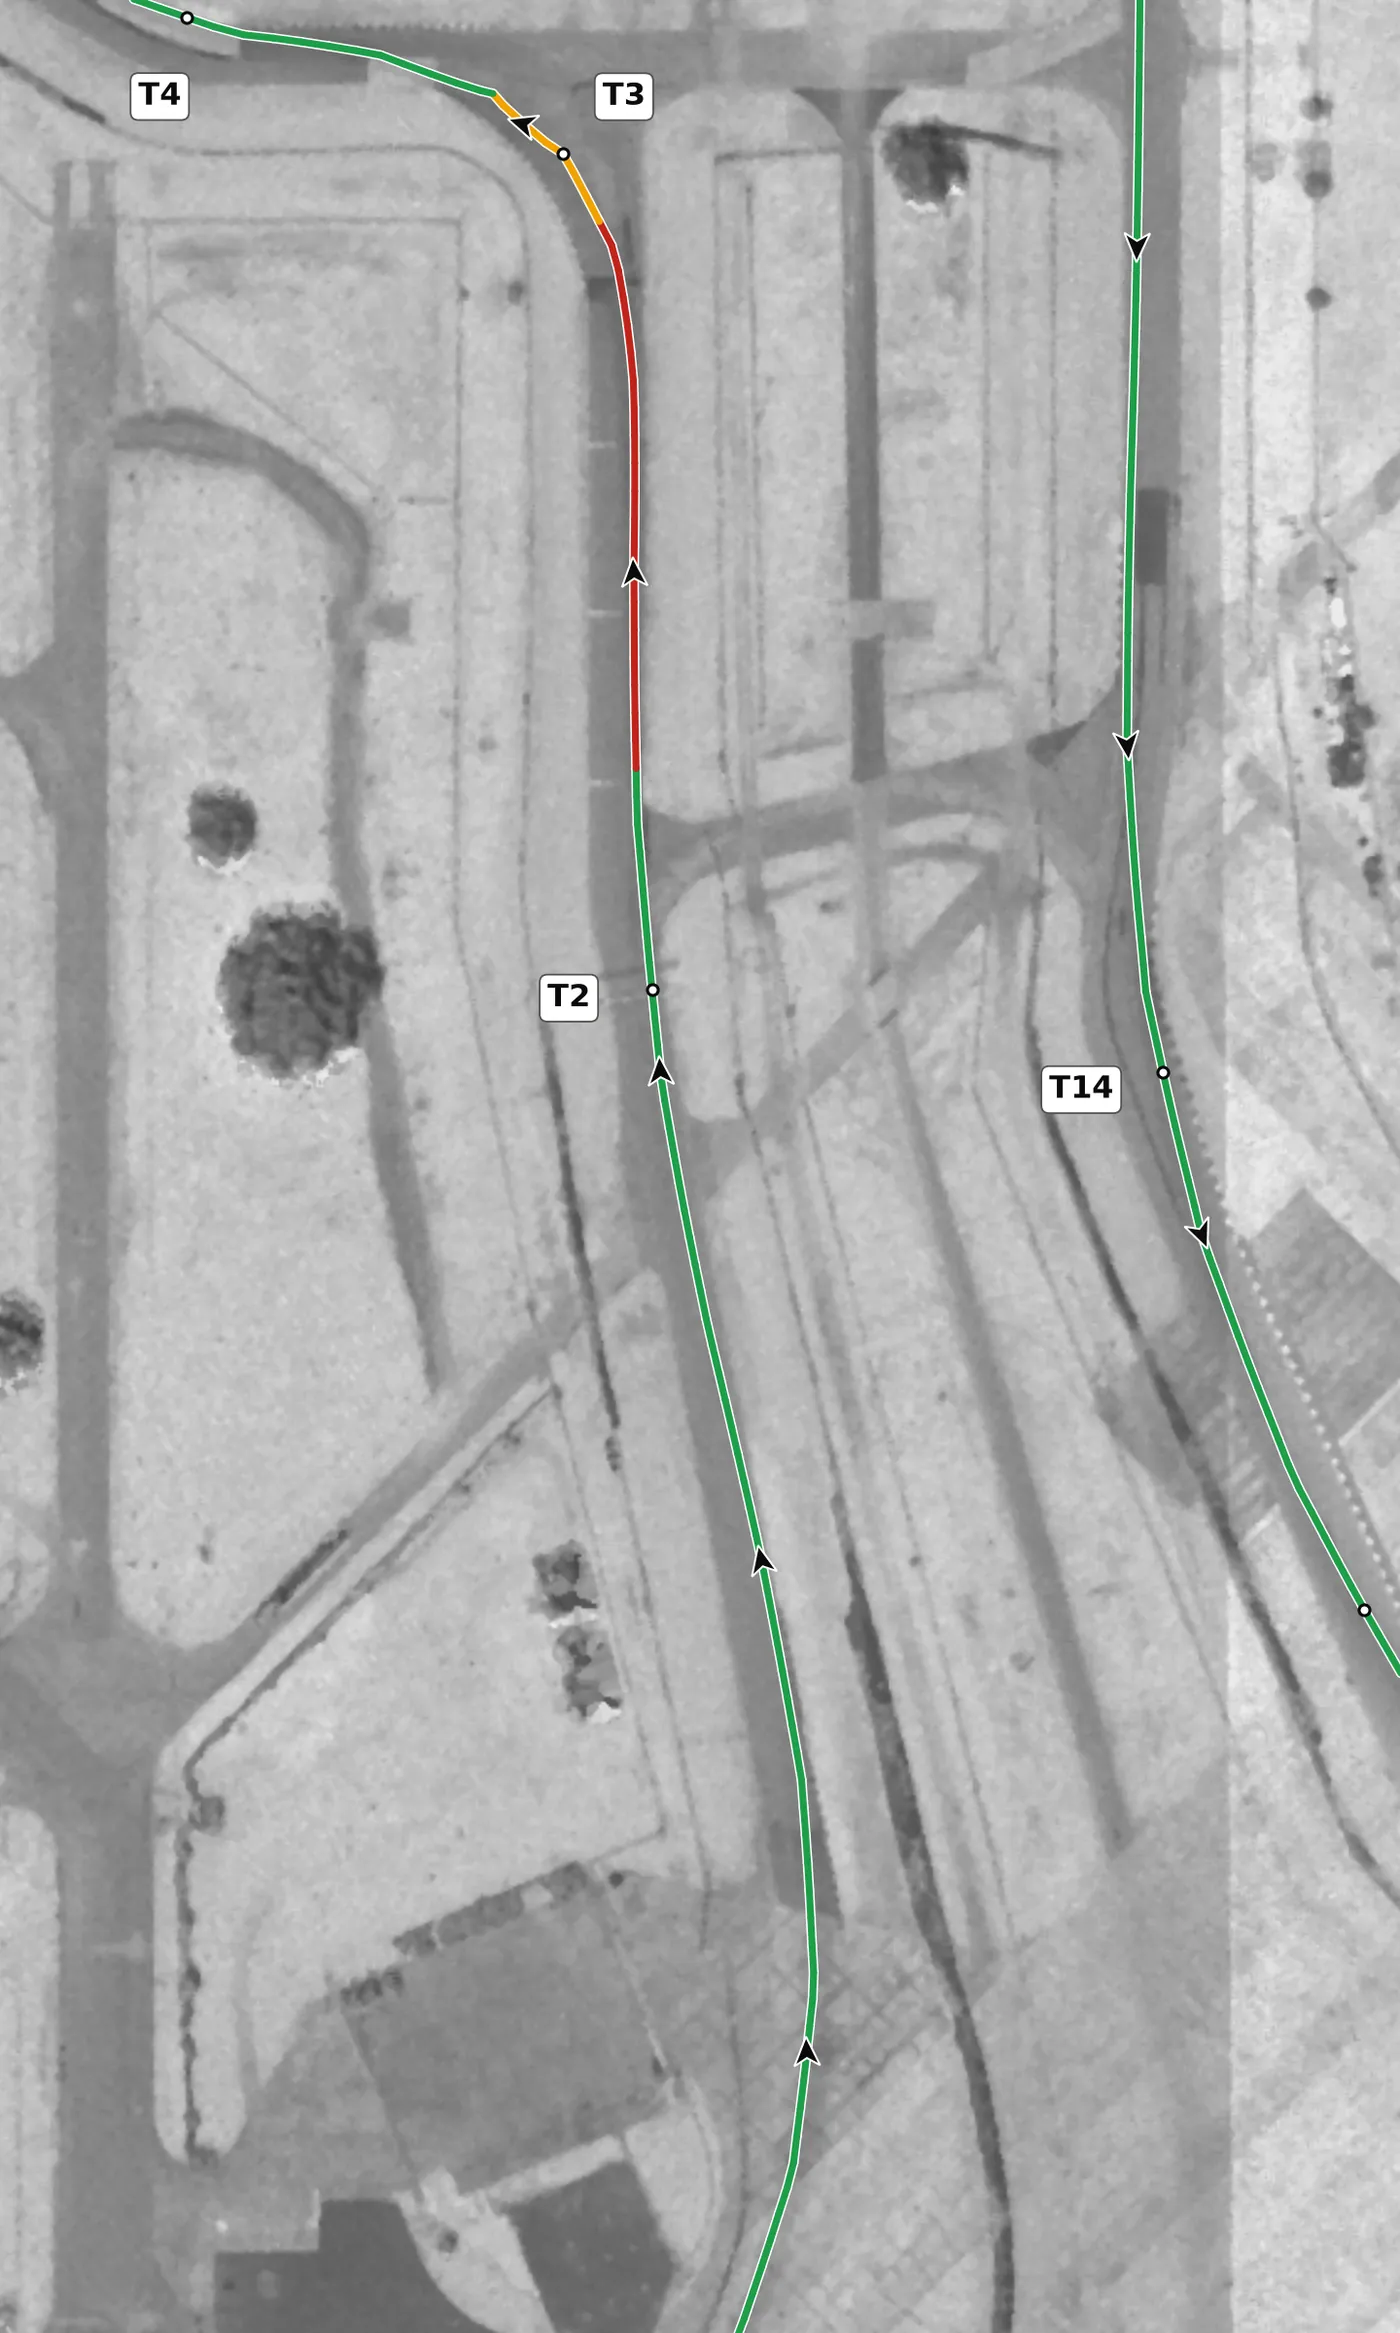
This is barely a corner, a gentle right that is taken flat out from the T1 exit, and the camber helps slightly as you go through. Keep the steering inputs small and look ahead to the braking zone for T3. The mistake to avoid is a ragged T1 exit that has you fighting the car through here instead of driving straight.
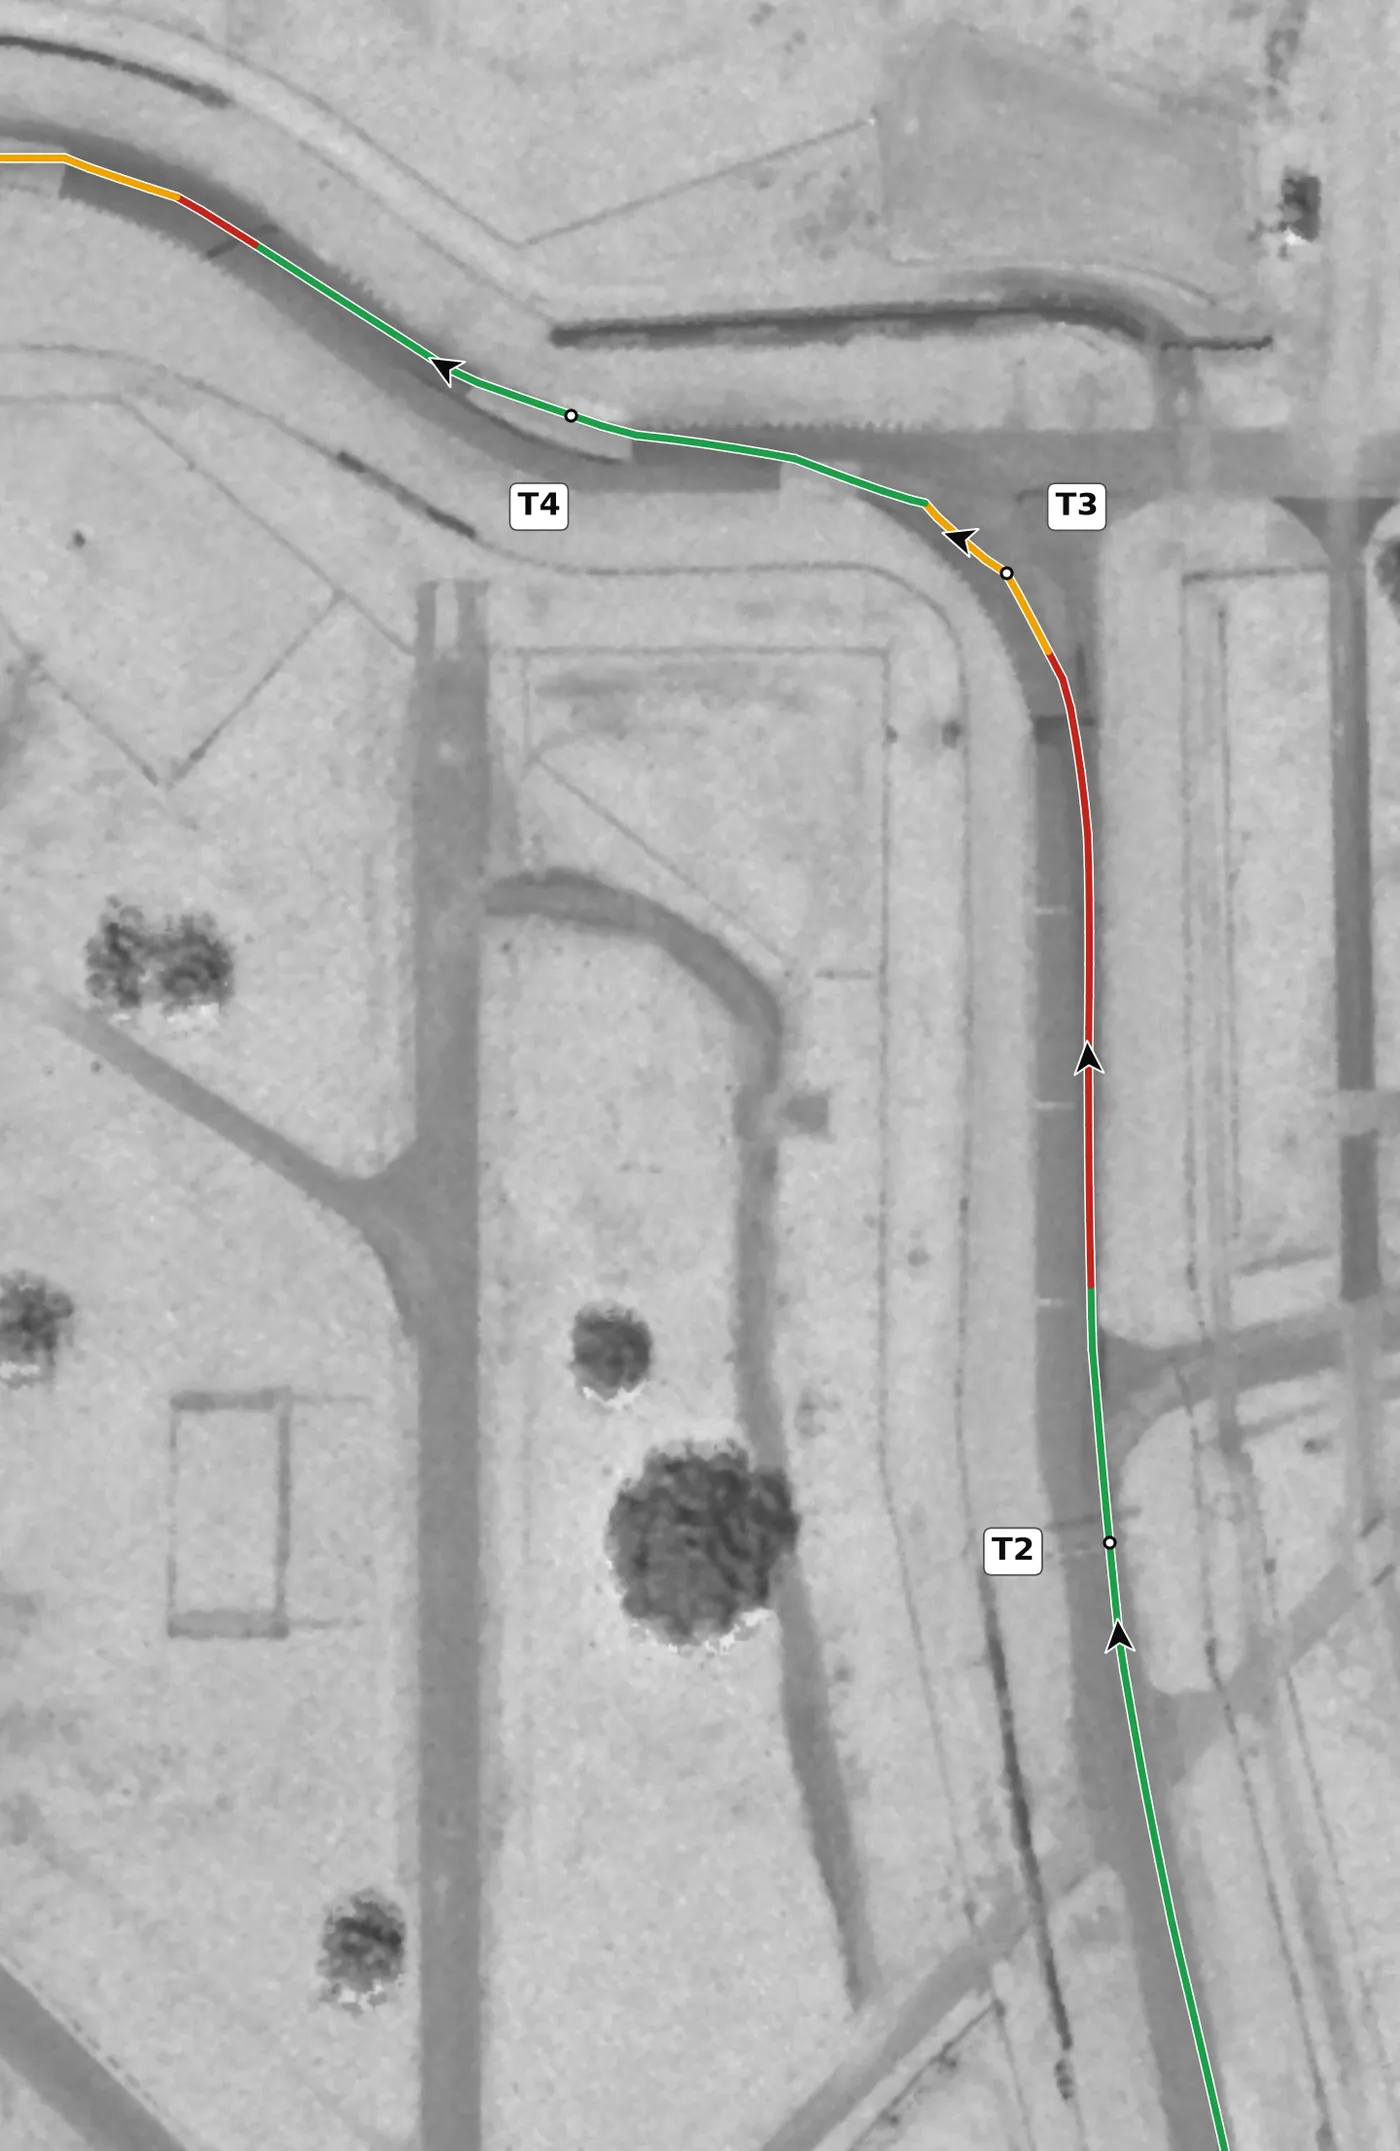
Brake hard for this tight left, the slowest of the infield corners, and turn in near the end of the curbing on the right, aiming for an apex at the end of the inside curbing. The camber changes through the corner, so let the slight uphill at the apex settle the car before you add throttle to flow into T4. The mistake to avoid is carrying too much speed into the turn-in and missing the apex, which throws away the whole rhythm section.
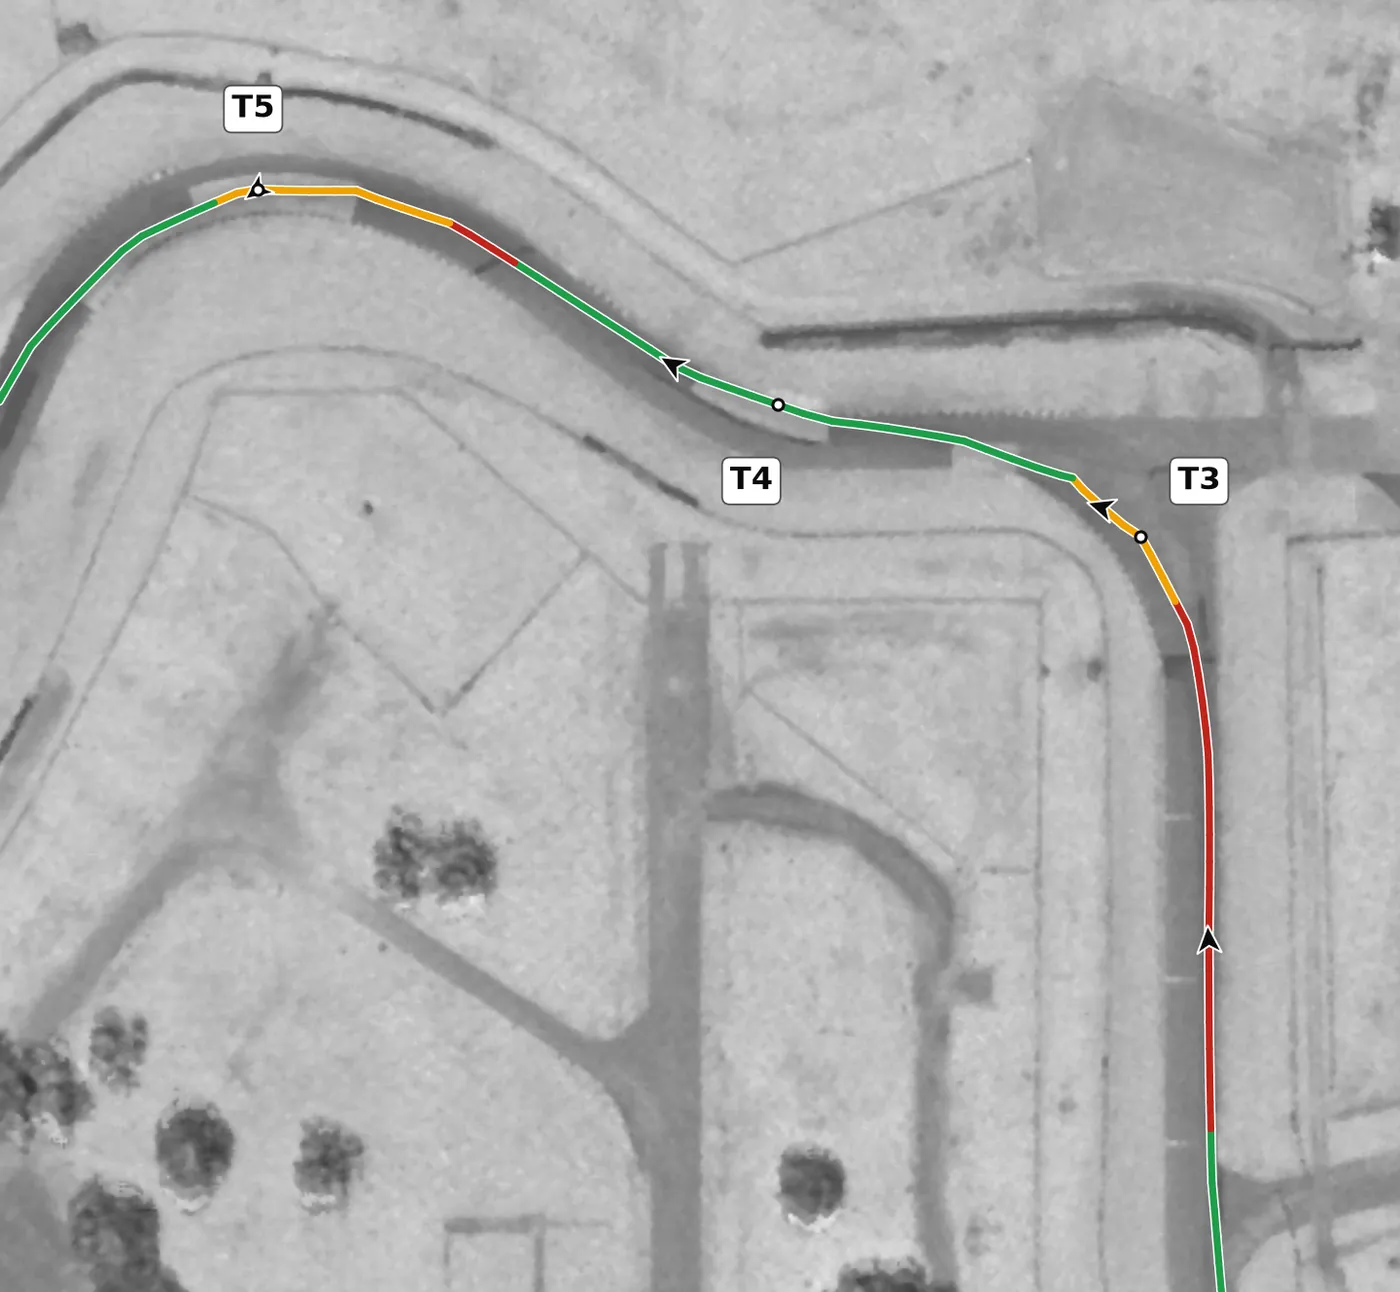
Treat this banked right as a throwaway corner: its only job is to set up the Carousel, so stay toward the right side of the track rather than taking a classic apex. The banking gives real support here, so you can stay on the throttle. The mistake to avoid is running out to the left on exit, which leaves you on the wrong side of the track for T5.
From the survey: Banked: +2.8% at the apex.
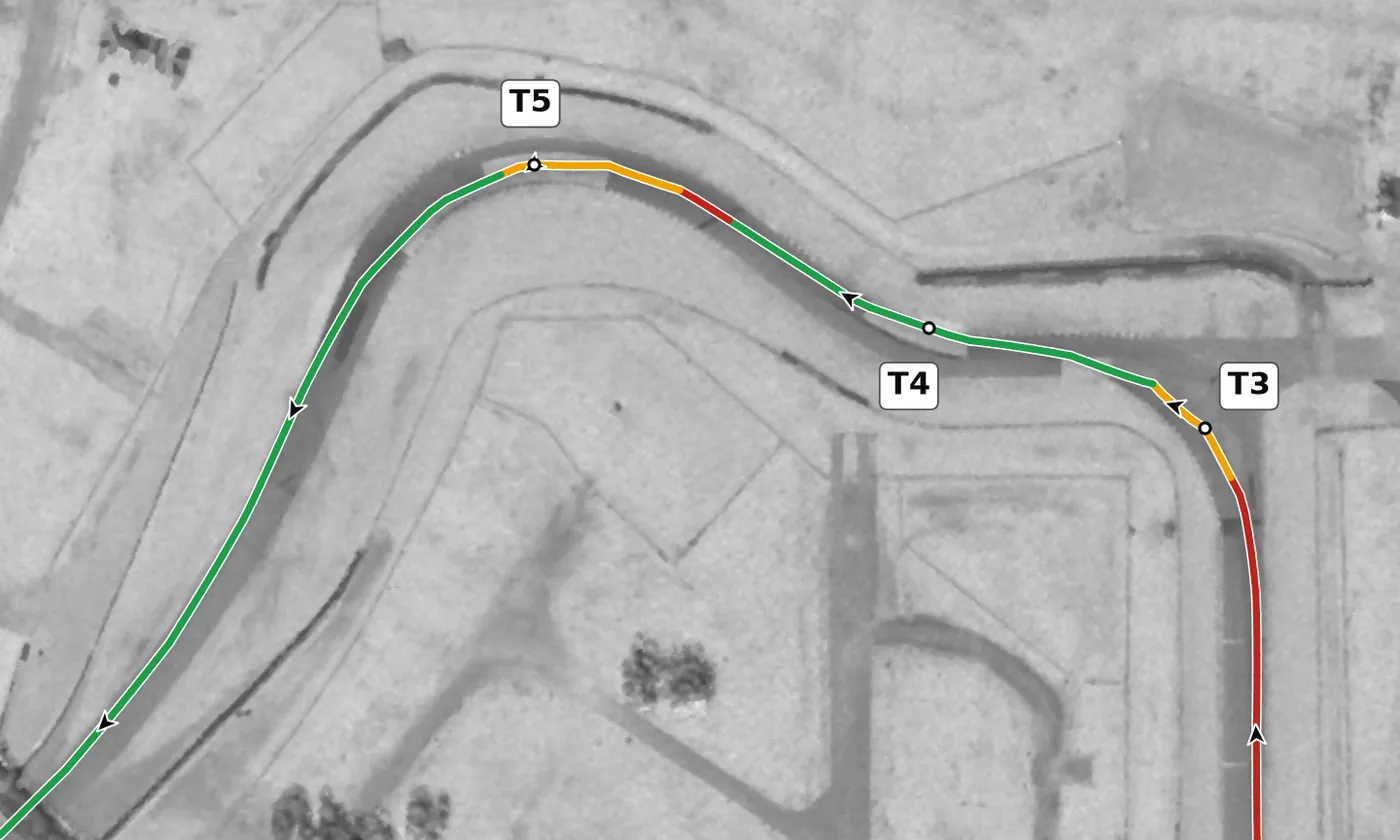
The Carousel is a long, level left that leads onto a fast section, so give up a little entry speed for a clean late apex. Lift, or at most brush the brakes, to settle the car at turn-in, trail off gently toward the apex, and let the car track out to the right on exit. The mistake to avoid is turning in early and having to lift or add lock on the way out.
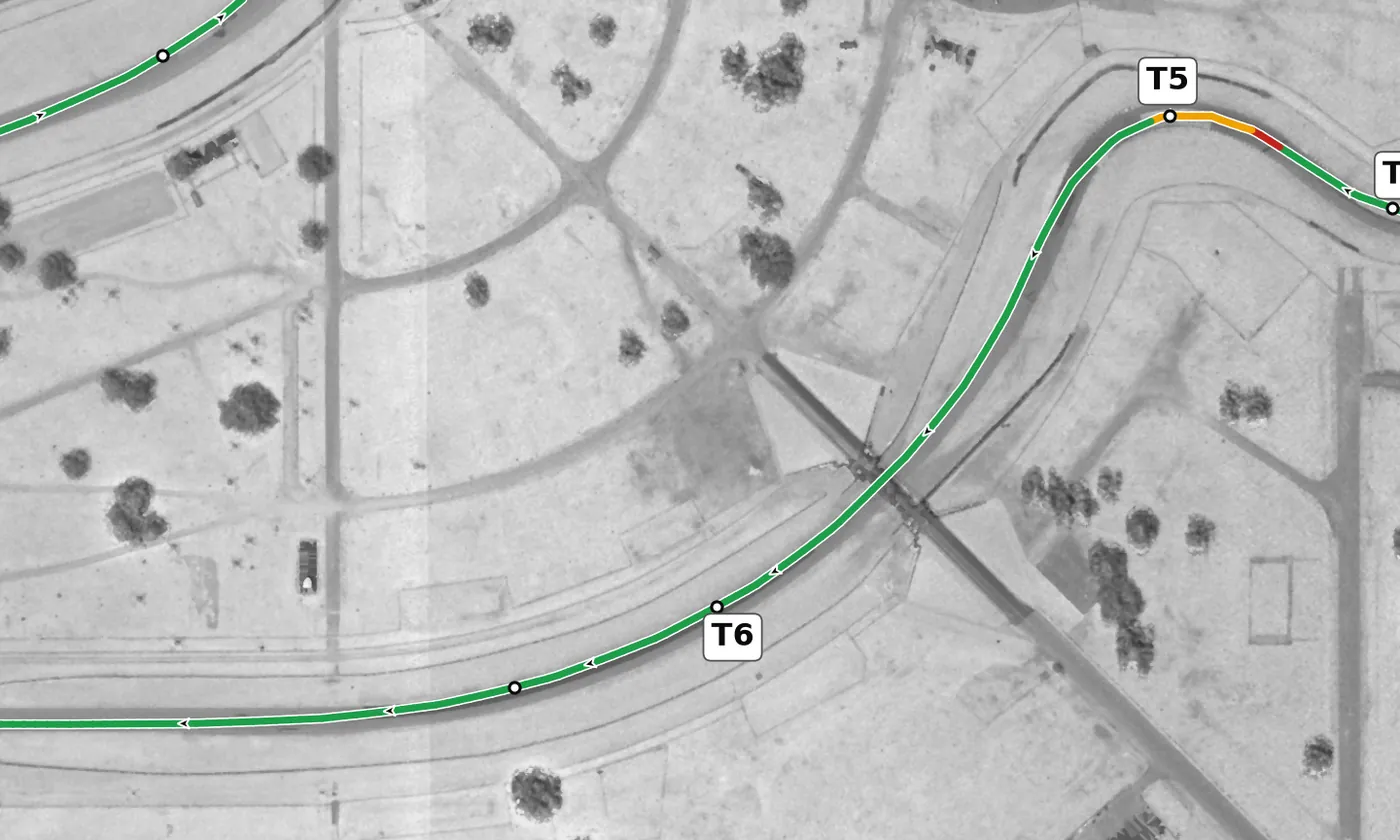
This fast right is the most banked apex on the lap, and the unnumbered right that follows is banked too, so the surface really does help a fast car here. Keep the car on the right, inside edge through both to take the short way around, and only drift left once the road straightens toward the Hairpin. The mistake to avoid is moving across to the left too early, which lengthens the line and costs speed all the way down the straight.
From the survey: The most banked apex on the lap (+3.0%). The fast, unnumbered right after it is banked too (+2.7%).
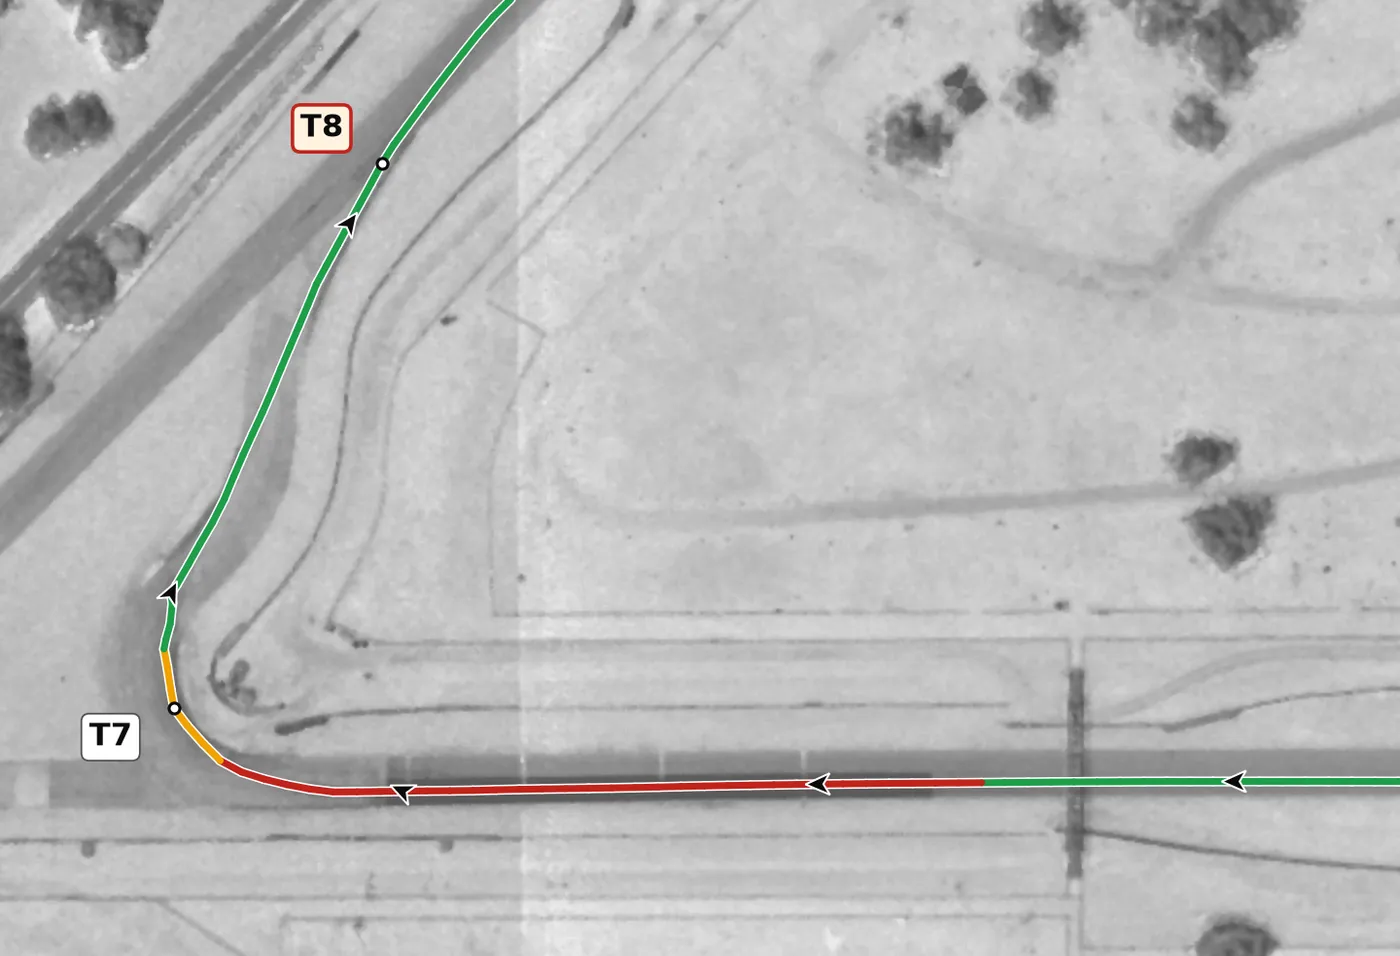
The Hairpin is the tightest, slowest corner on the circuit and the lowest point on the lap. Approach from the left, brake hard and in a straight line with a fixed reference, then trail off toward a late apex on the right and drive out with the slight uphill helping you put the power down early. The mistake to avoid is braking too late and over-slowing the car in the middle of the turn: the drive out matters far more than the entry.
From the survey: The Safety Pin: the tightest corner, and the lowest point on the lap (17.5 m).
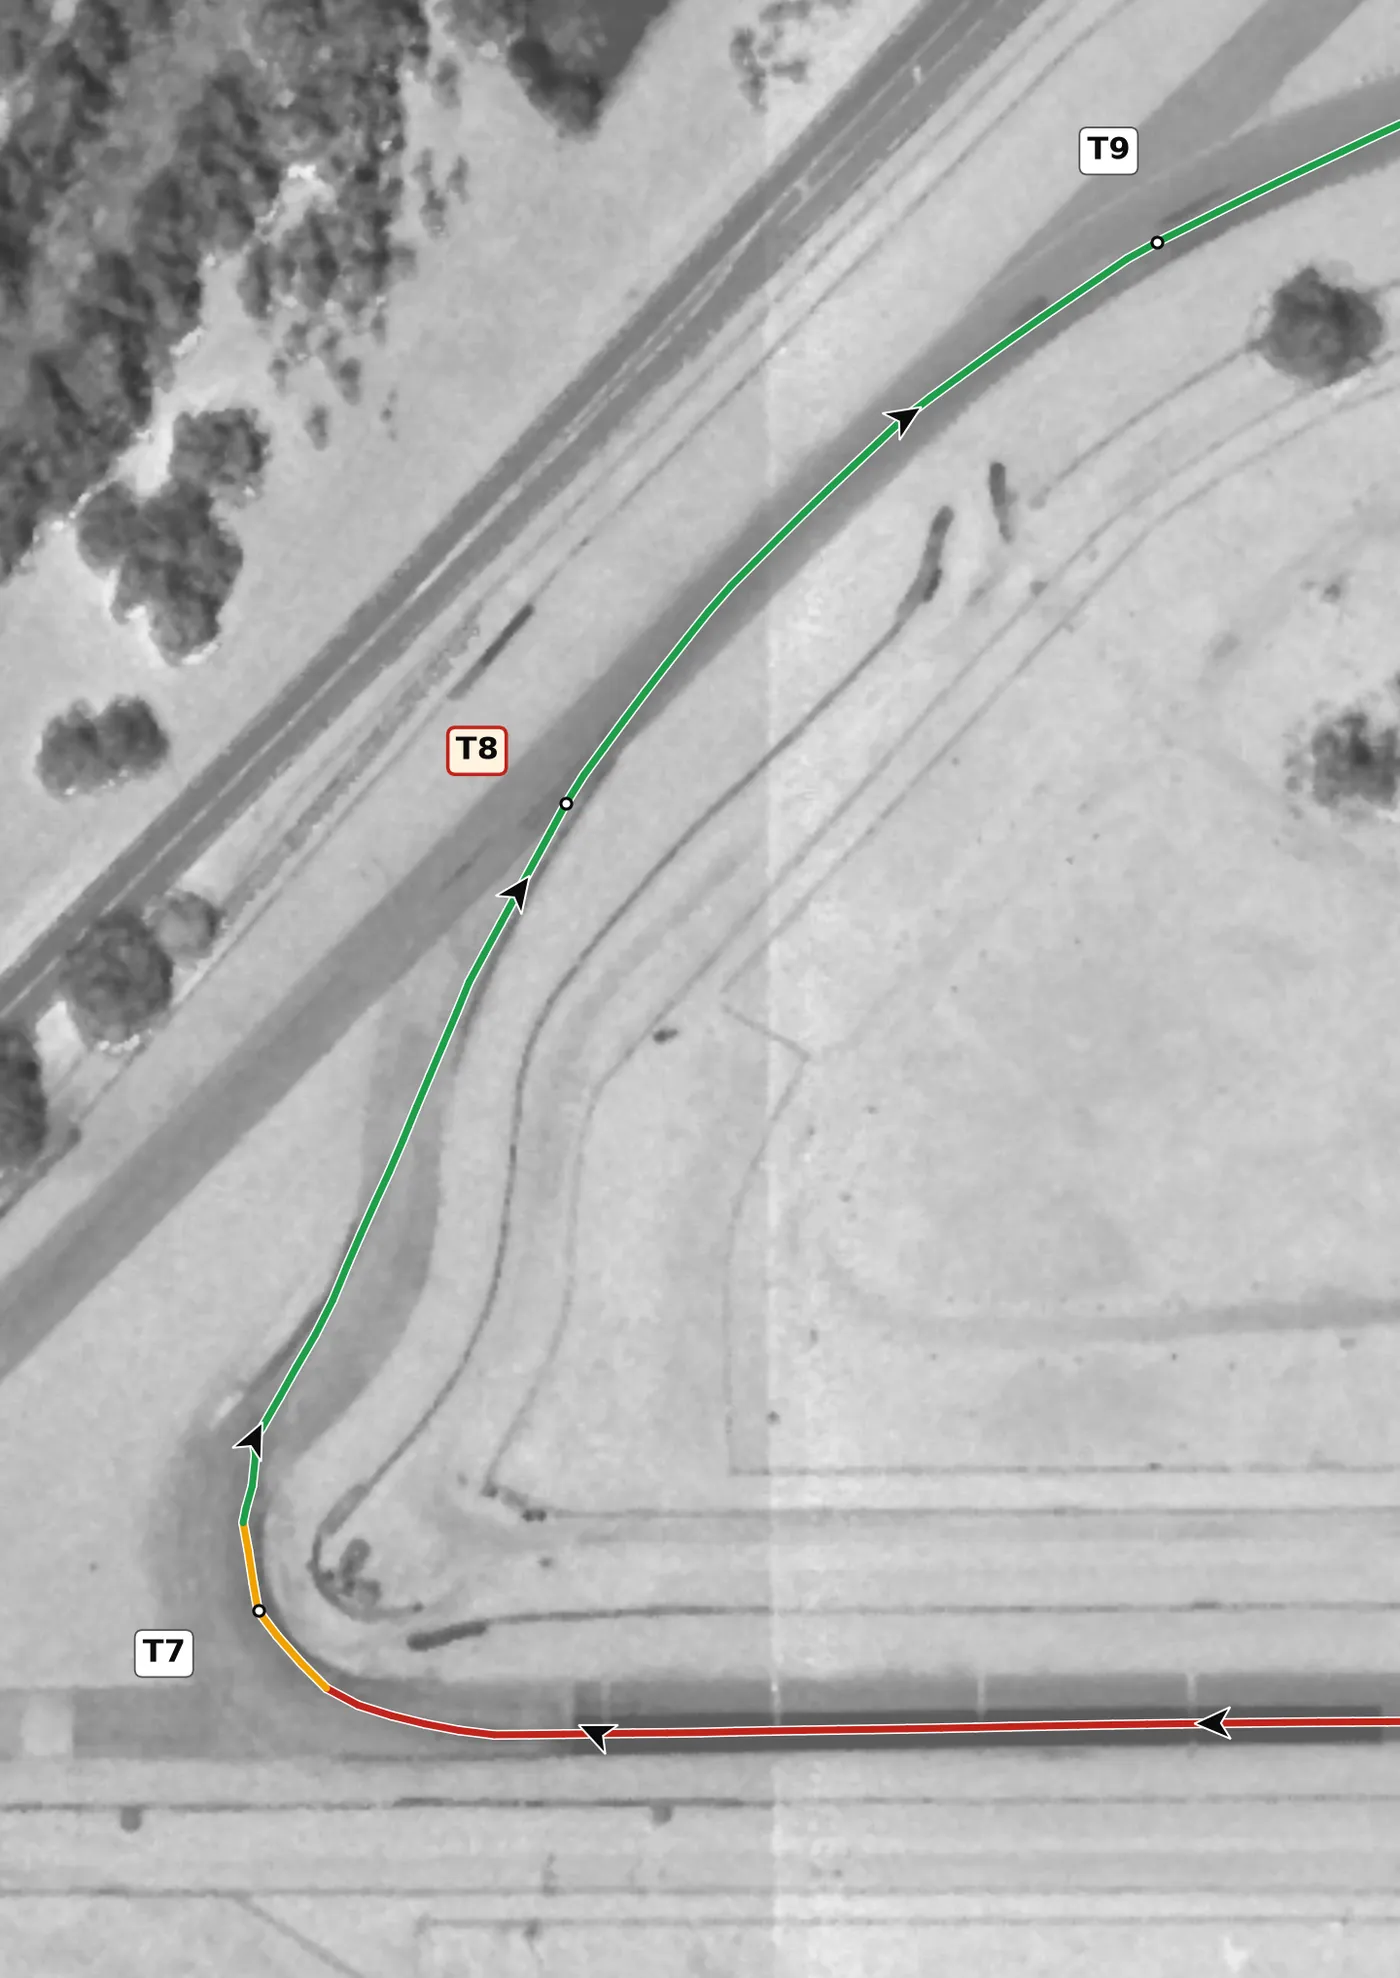
This right comes almost straight out of the Hairpin while you are still building speed, and its apex is slightly off camber. Keep the steering smooth and squeeze the throttle in rather than stabbing it, because the car is already working hard. The mistake to avoid is a sudden throttle or steering input that unsettles the car on the unsupportive surface.
From the survey: Off camber at the apex (−0.3%).
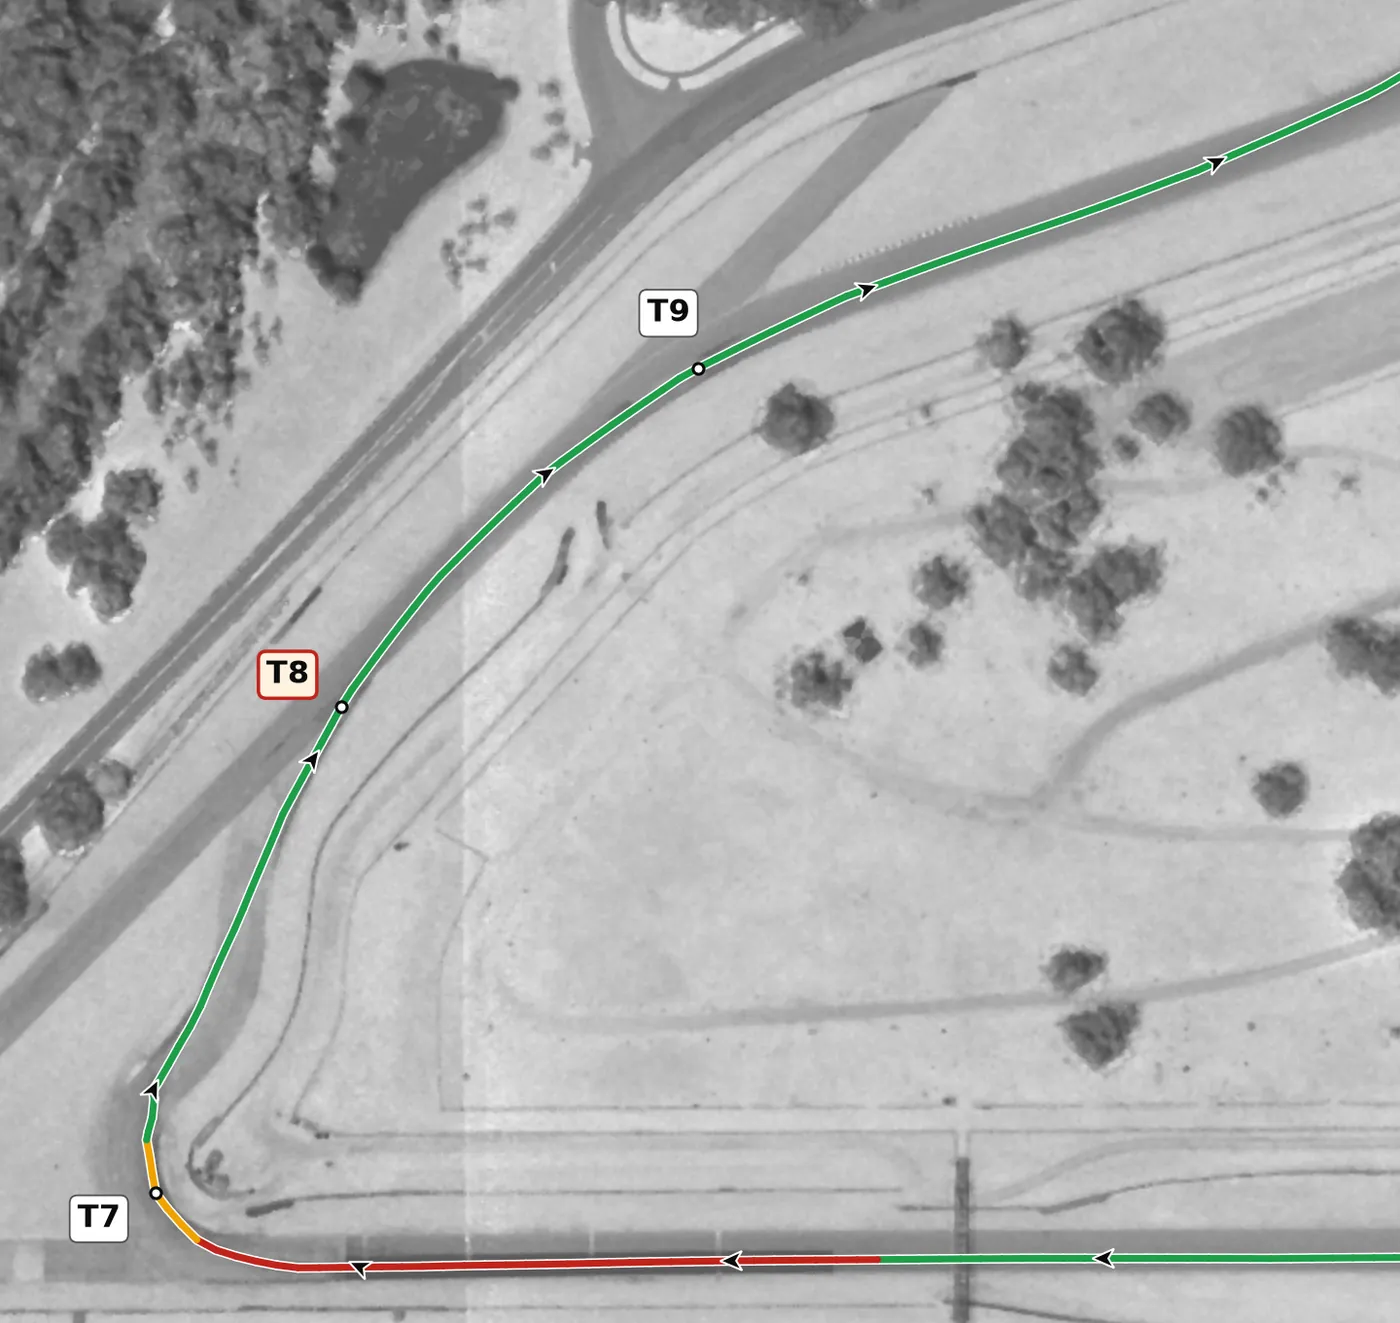
This right is on camber and slightly uphill, so it is a place to be greedy with the throttle, and it leads straight into a fast unnumbered left. Use the shortest line through both bends with small, smooth steering inputs. The mistake to avoid is erratic steering that scrubs speed off the front tires through this fast section.
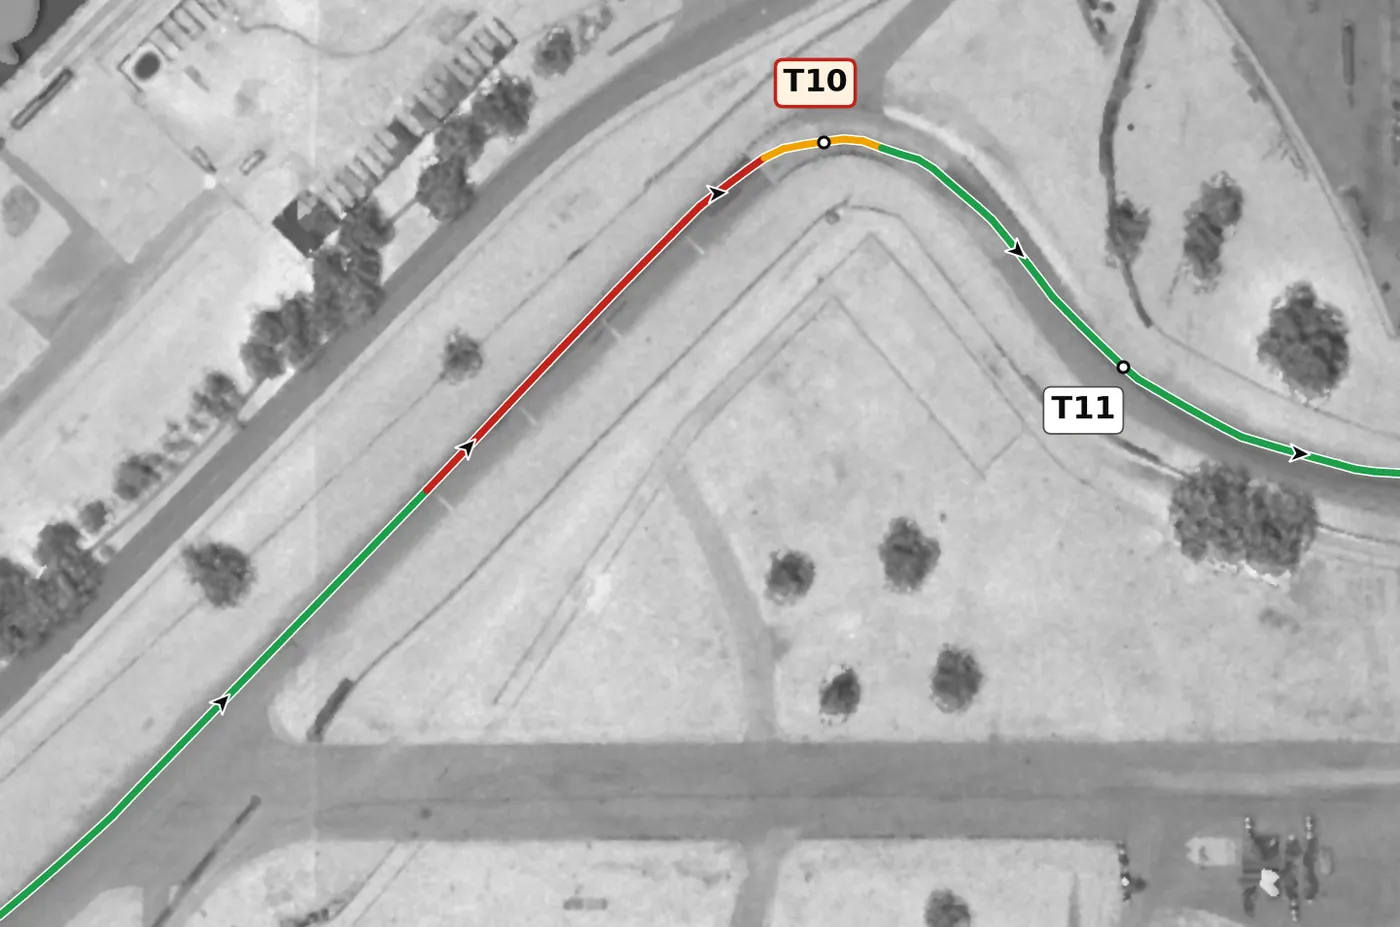
This tight right is the most off-camber apex on the circuit, so brake a touch earlier than feels necessary and keep enough rolling speed without asking too much of the tires. Turn in with patience, aim for a late apex, and let the car track out to the left. The mistake to avoid is unwinding the wheel and adding power early, because the front will run wide onto a surface that won't hold it.
From the survey: The most off-camber apex on the lap (−0.9%).
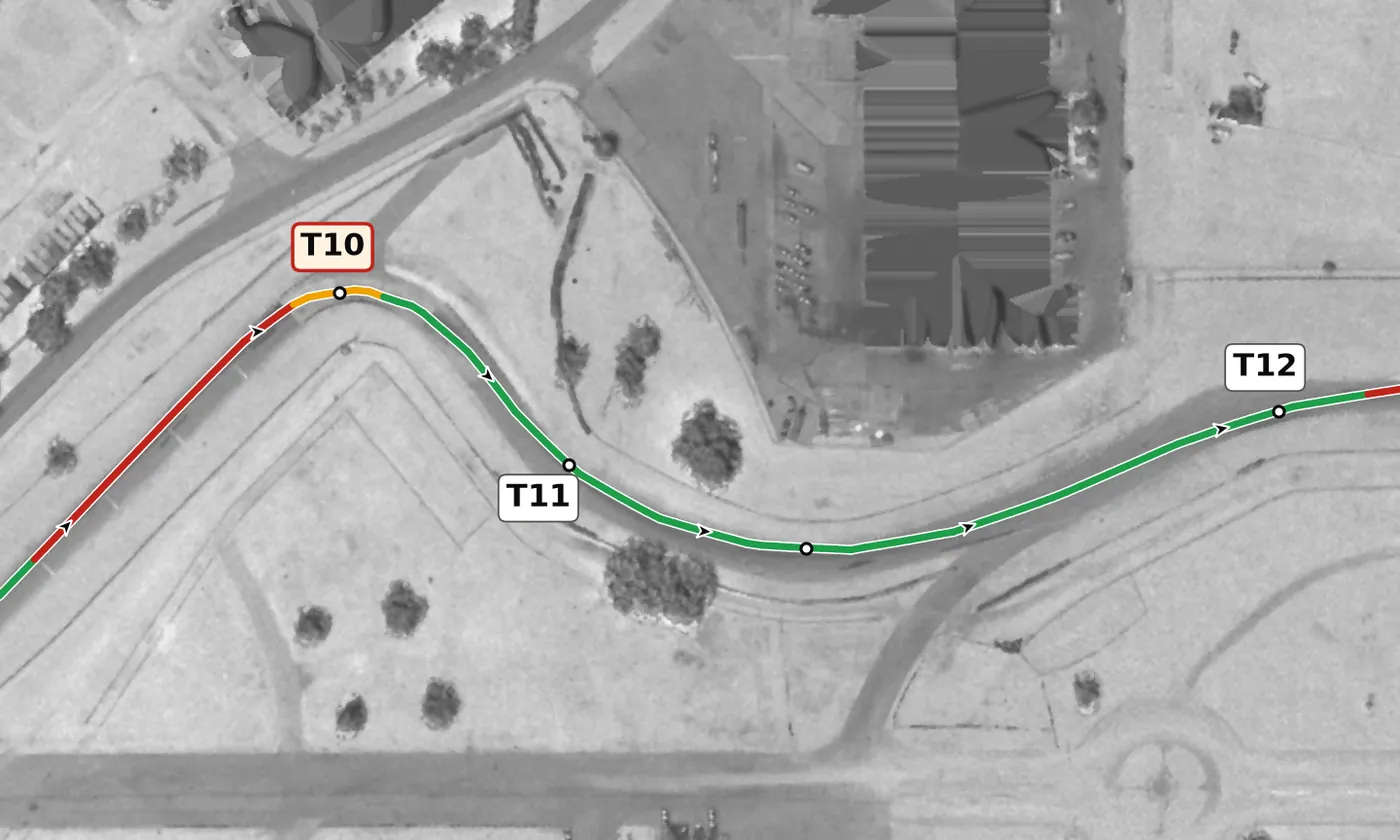
T11 is a long, level left in two parts, so treat it as one smooth arc and look well ahead through both apexes. Let the car drift out to the right on exit to set up the quick right kink at T12. The mistake to avoid is tightening the line at the first apex, which pinches the second and costs speed onto the short run that follows.
From the survey: Two apexes. The exit of the second is the highest point on the lap (20.0 m).
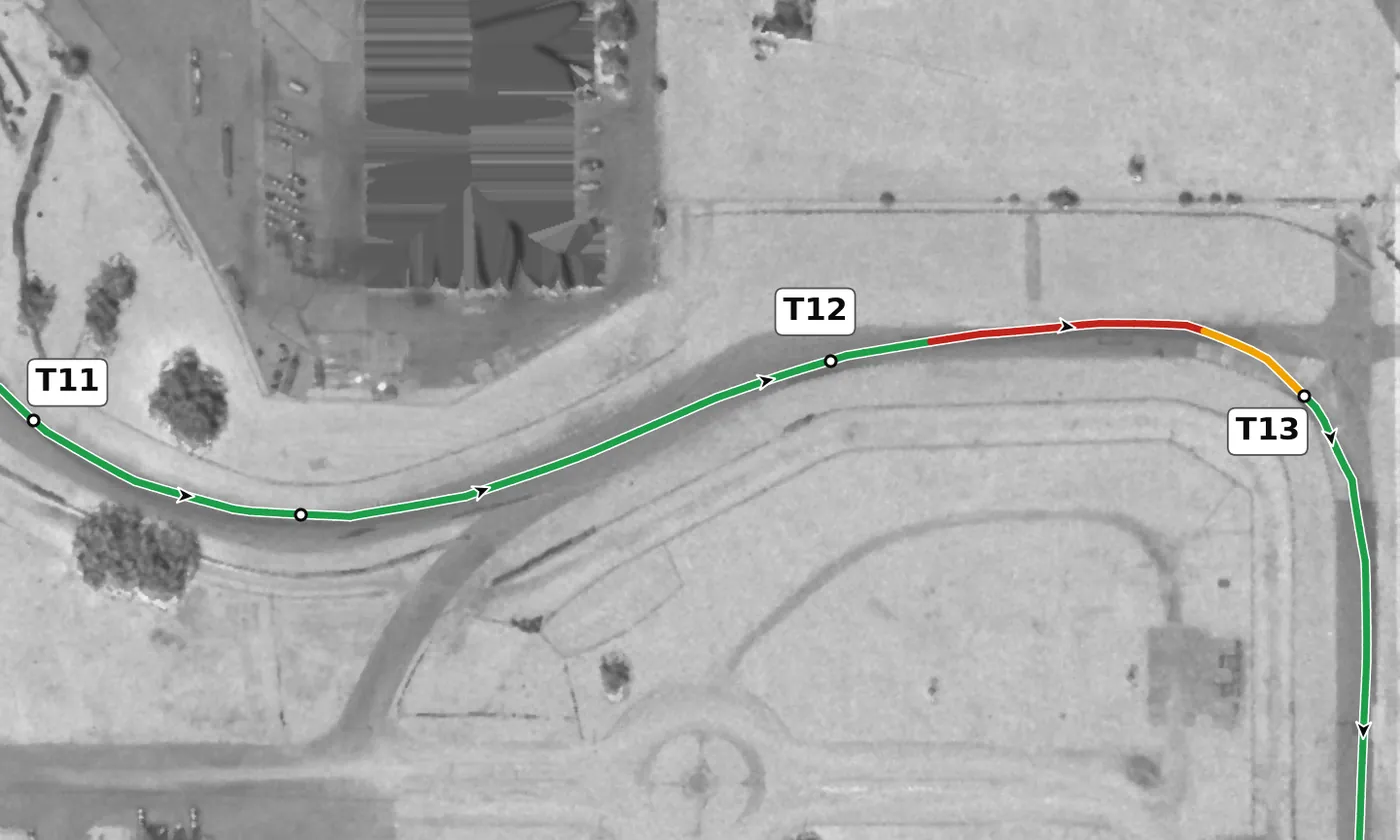
This short right kink is on camber and slightly downhill, and it leads straight into the hard braking zone for Tower Turn. Clip it, then let the car run to the left side of the track to open up the entry to T13. The mistake to avoid is hugging the right after the kink, which leaves you braking and turning at the same time for the next corner.
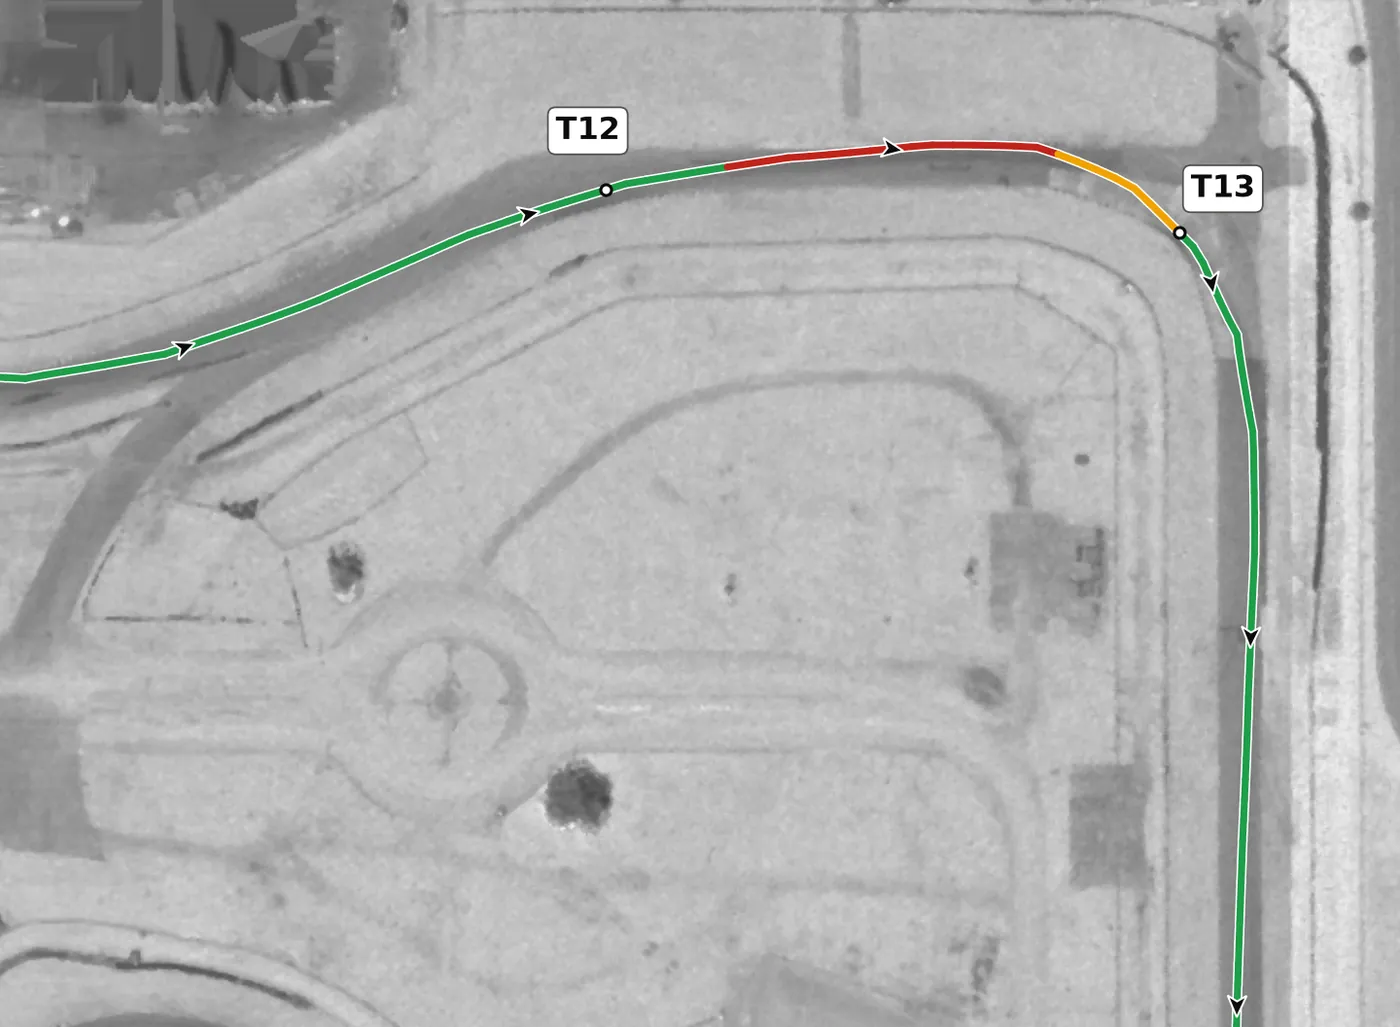
Tower Turn is a medium right with almost no camber and the steepest downhill apex on the lap, so finish most of your braking in a straight line and turn in with the brakes nearly released. Coast in smoothly, get close to the inside kerb without riding it, and keep a smooth arc for a consistent exit. The mistake to avoid is trail-braking hard into the downhill apex, which overloads the front tires and causes understeer.
From the survey: Tower Turn: the steepest downhill apex on the lap (−0.8%).
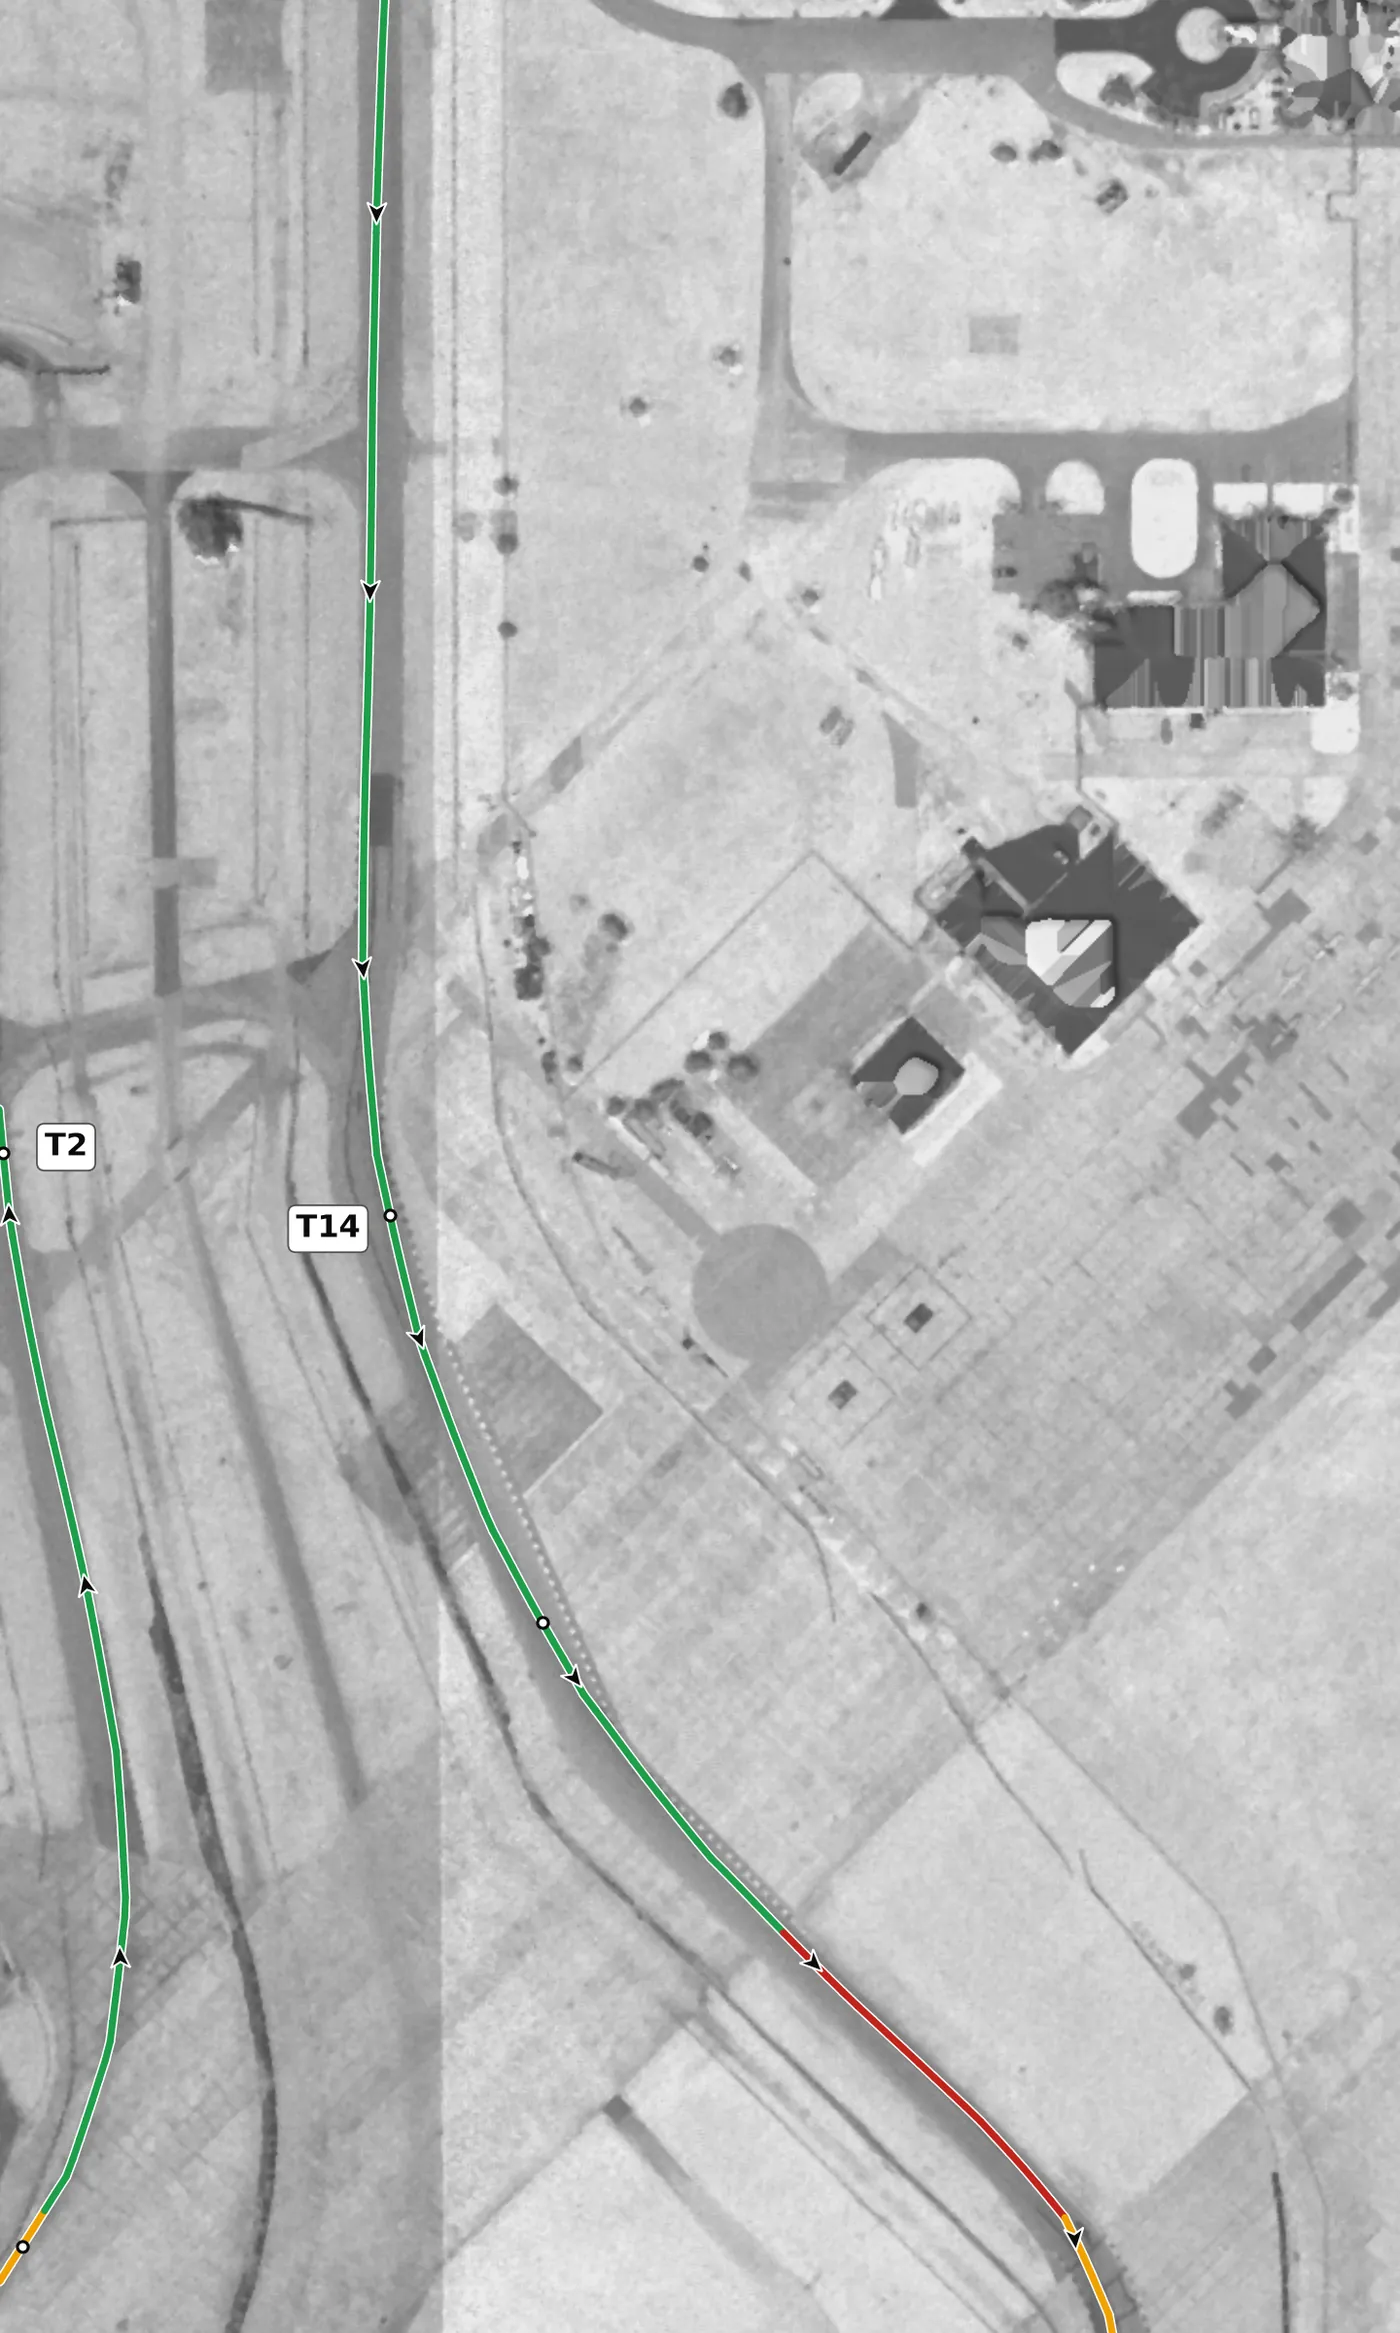
Bishop's Bend is a fast left in two parts, and the second part is off camber and slightly downhill, making it the fastest unsupported point on the circuit. Build up to it over several laps, clip the inside, and use only as much width as you need to stay smooth, keeping the car toward the left on exit so you can brake straight for T15. The mistake to avoid is arriving too fast: if you do, straighten the wheel and brake lightly rather than trying to steer through.
From the survey: Bishop's Bend, in two parts: the second is off camber (−0.4%) and downhill.
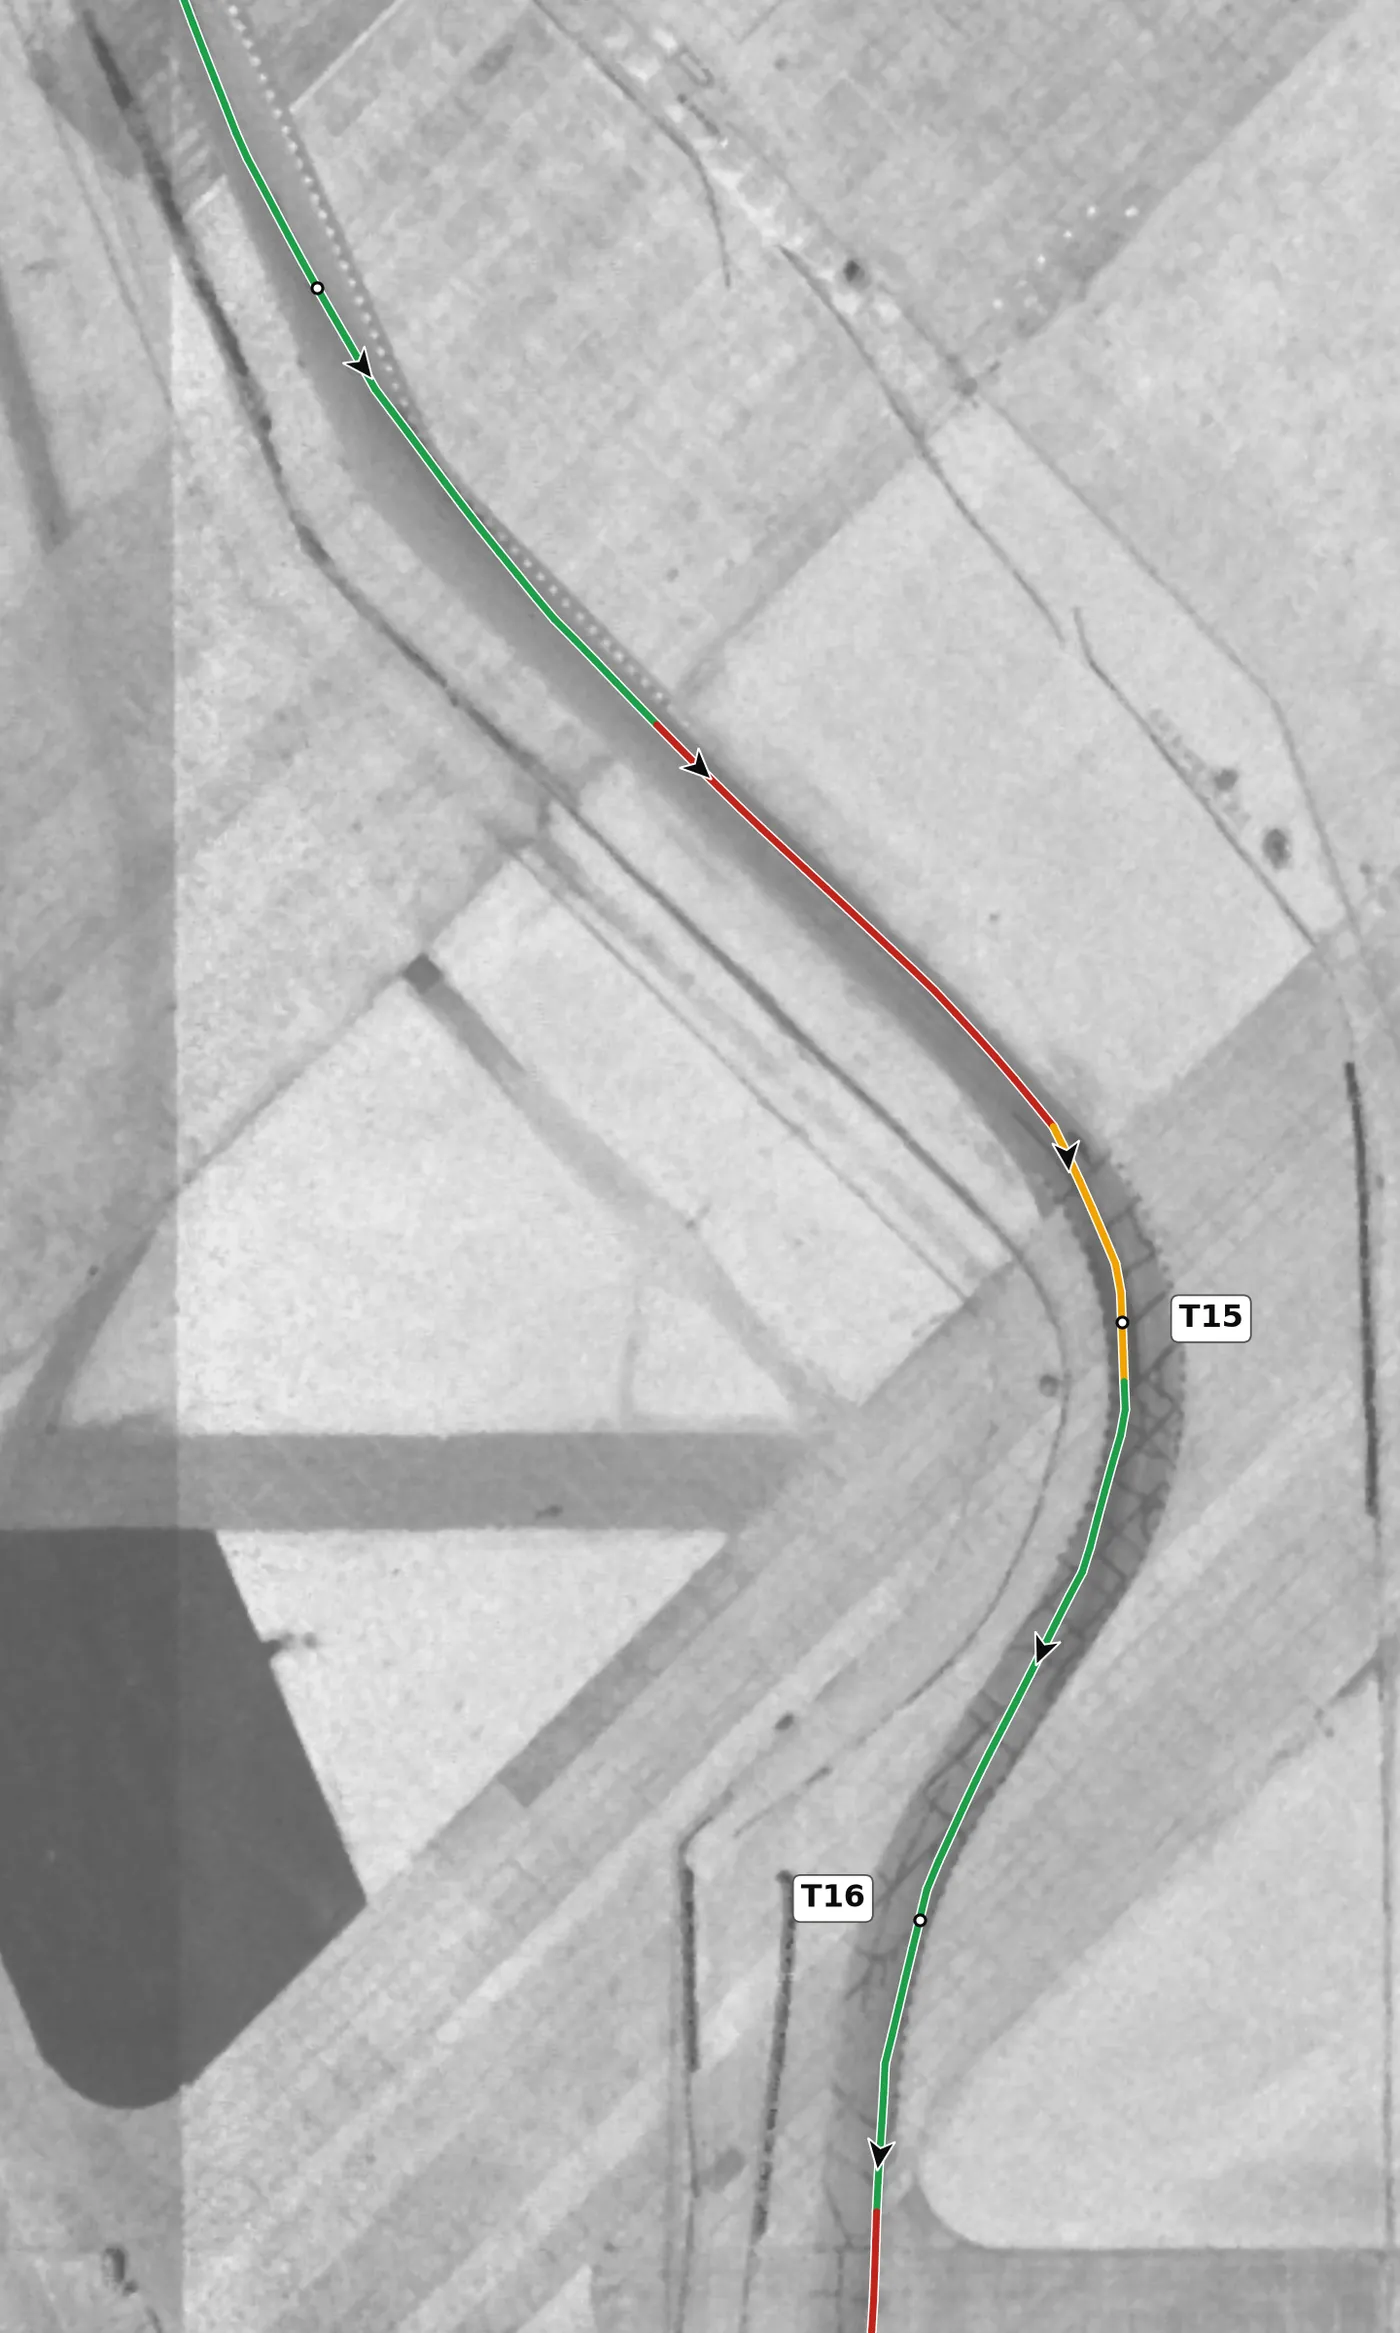
Brake in a straight line from Bishop's Bend for this right, which is mildly on camber and has the steepest uphill apex on the lap, so the surface helps you slow and turn. Turn in early enough to use that support, then let the car run out toward the left on exit to set up the T16 left. The mistake to avoid is overdriving the entry, which spoils the exit and the setup for the most important corner on the lap.
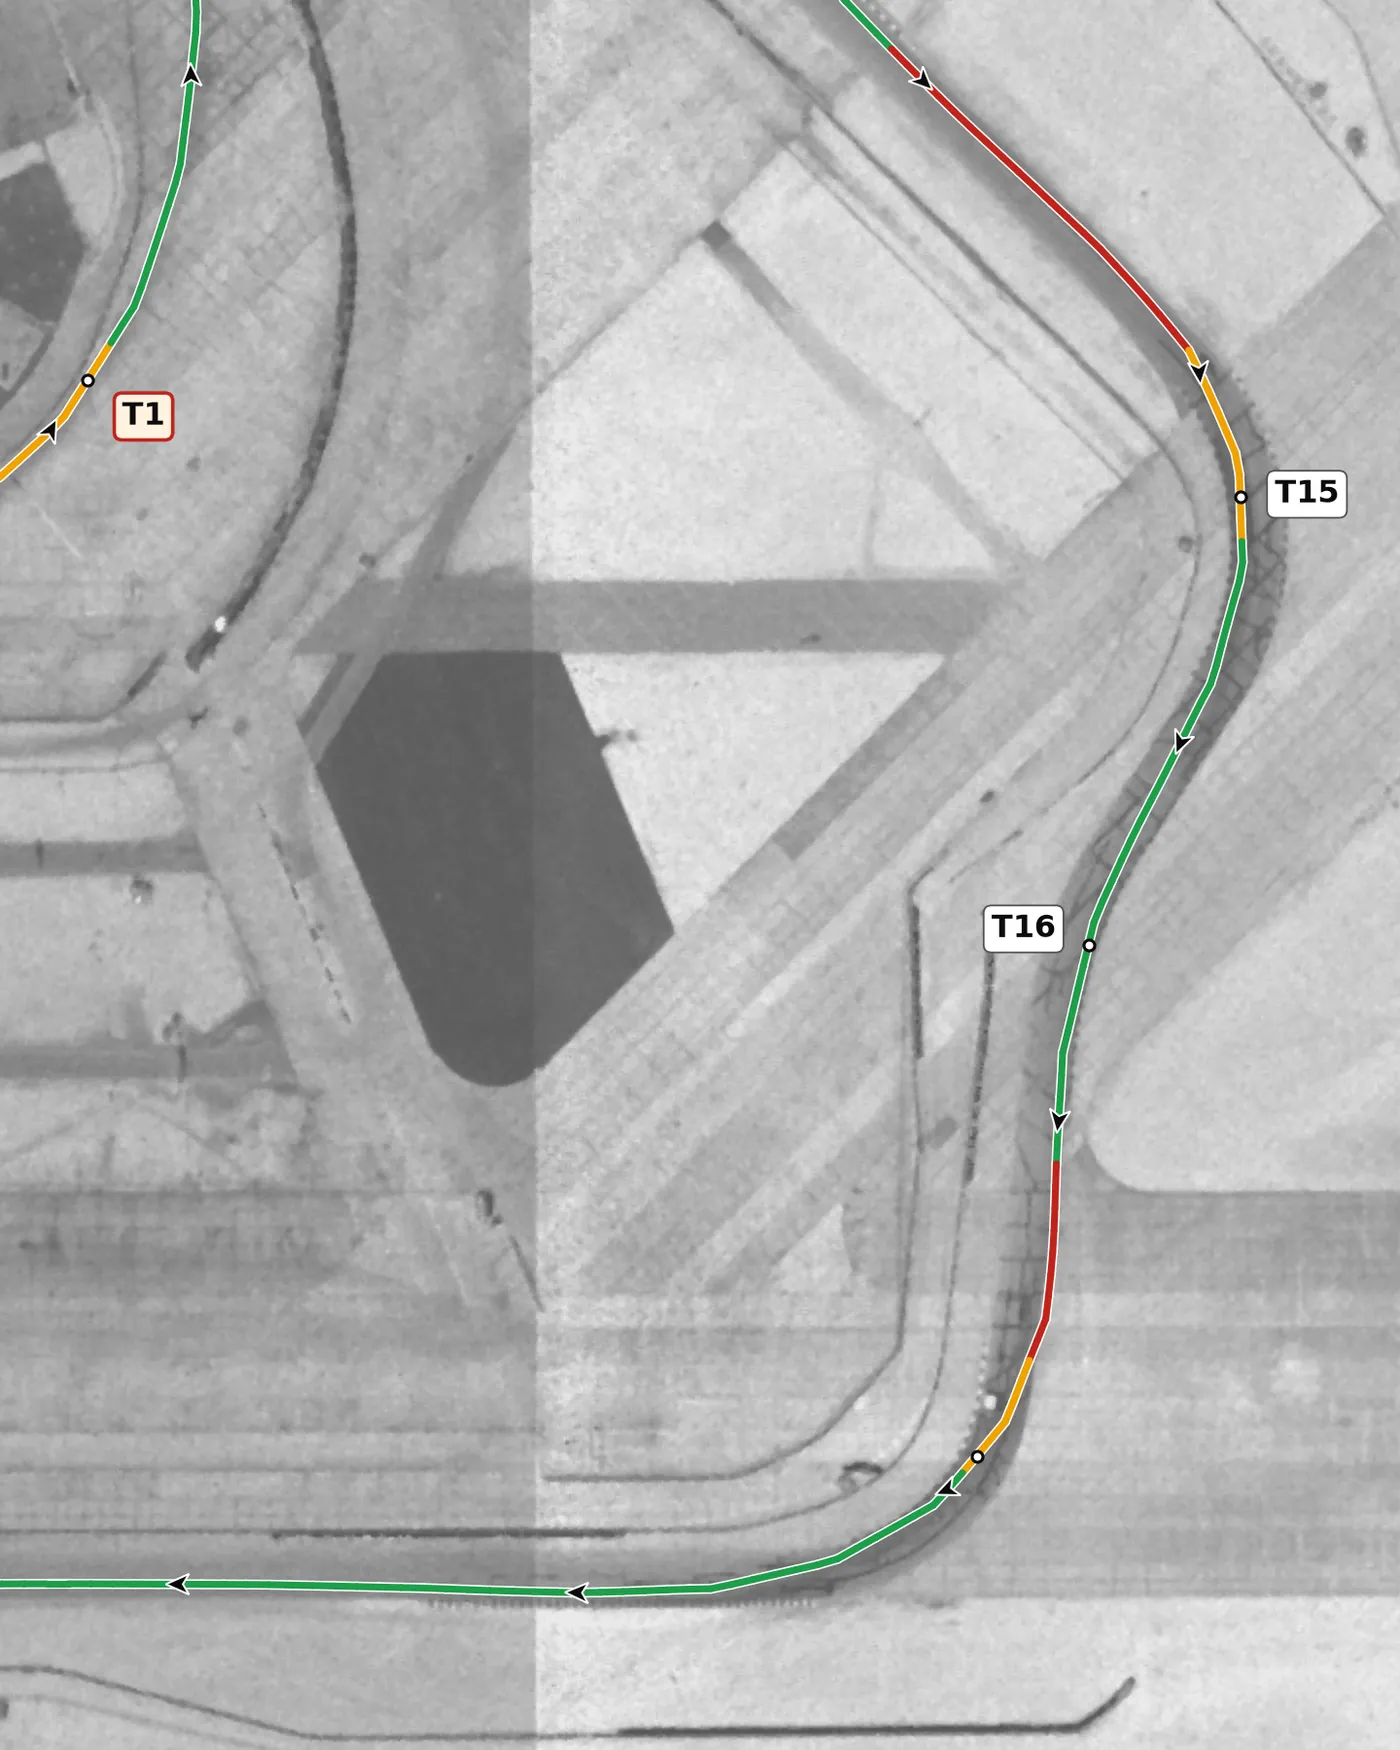
T16 is a left followed by an off-camber, slightly downhill right that opens the longest straight on the circuit, so it is the most important exit on the lap. Be conservative on entry, flick the car through the left to set up the right, then take a late apex and get the car straight early so you can use full throttle. The mistake to avoid is a fast entry and an early apex, which leaves you waiting for grip on the off-camber exit.
From the survey: A left, then a right: the right is off camber (−0.6%) and opens the longest straight on the lap.
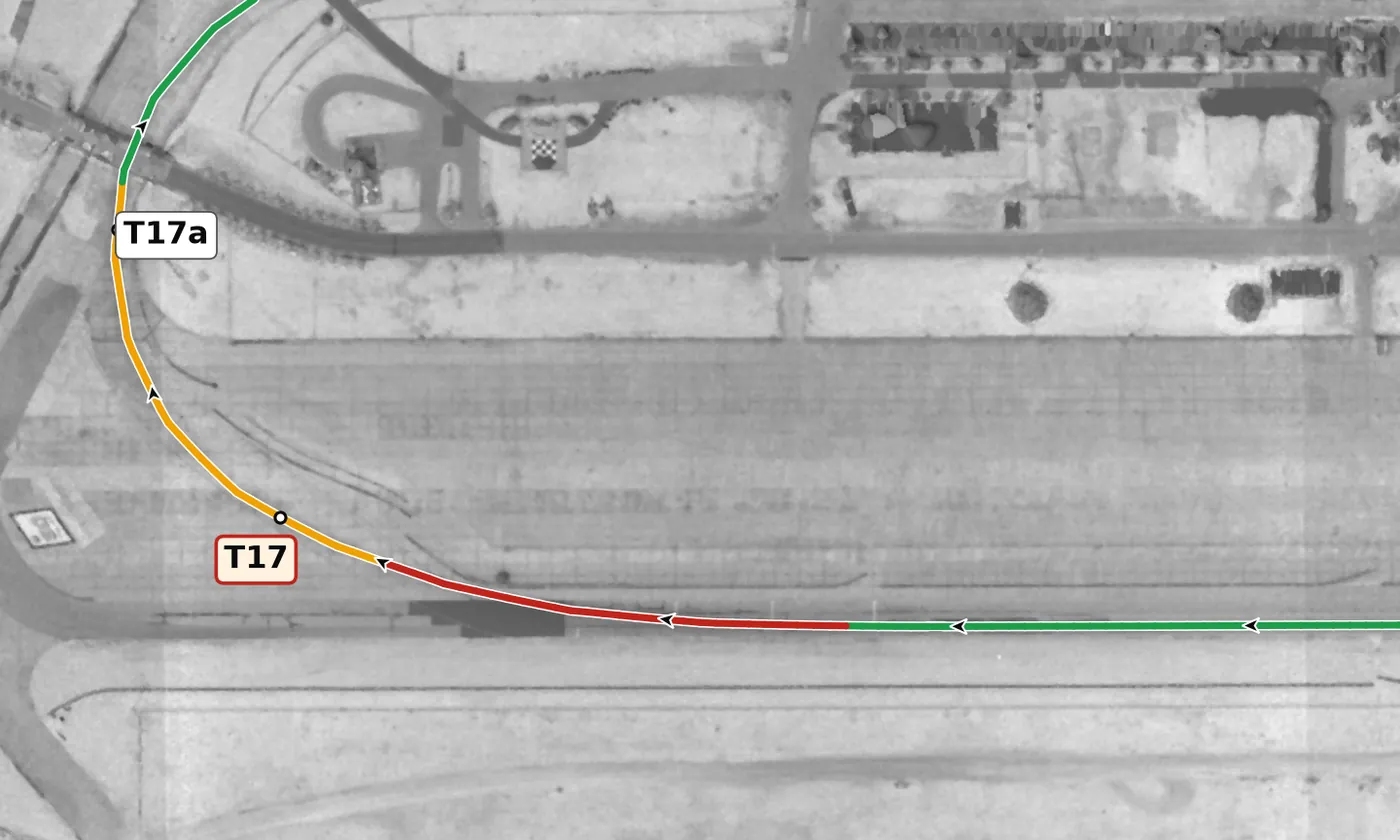
Turn 17, also known as Sunset Bend, comes at the end of the long back straight and is on the old runway concrete, where the slab joints make the car hop. Brake hard and in a straight line before the bumps, turn in for a wide, late arc on the slightly off-camber surface, and treat the exit as a straight-line problem onto the front straight. The mistake to avoid is braking and turning hard at the same time over the bumps, which can lock a wheel or unsettle the car.
From the survey: Off camber at the apex (−0.6%), on the old runway concrete.
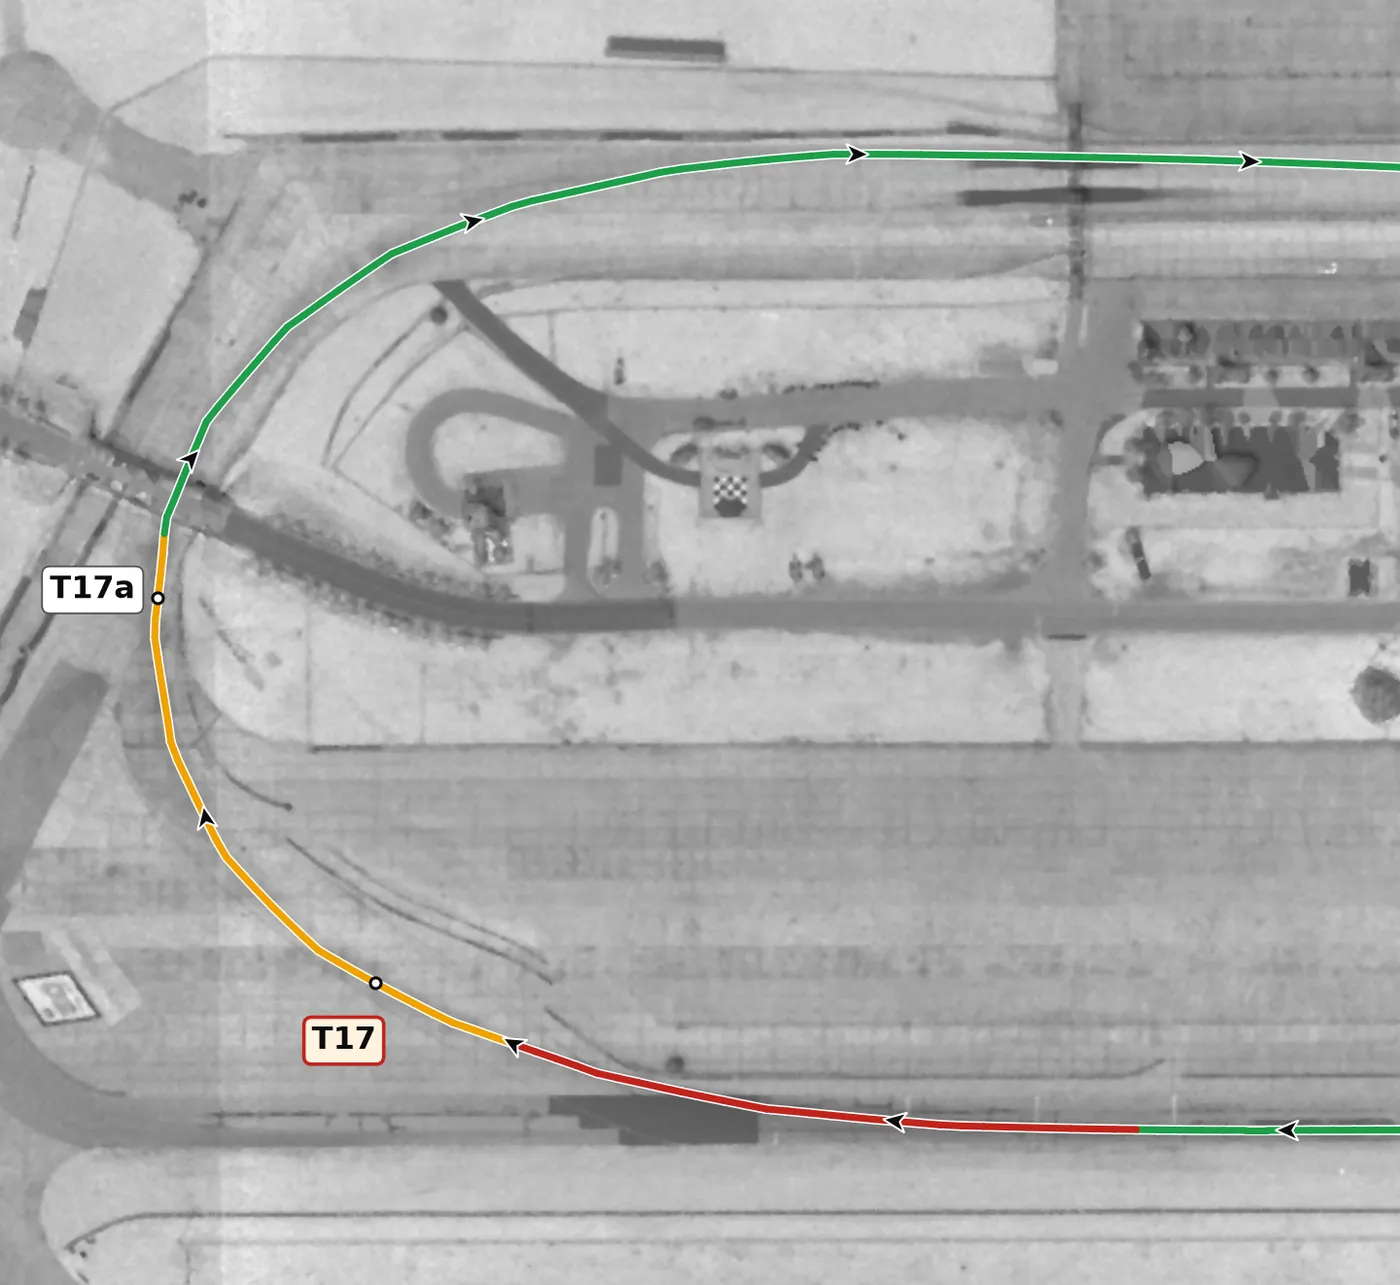
The second part of Sunset Bend is on camber and slightly uphill, so the support arrives just as you need to put the power down. Keep a smooth, single steering input, add throttle progressively and use the full width of the track on the left side of the exit onto the front straight. The mistake to avoid is going to full power with too much steering lock and running out of road on the bumpy concrete.
From the survey: On the concrete, onto the front straight.
Version history
- v1.1 · 2026-10-01 — Braking points moved later (by about 90 m at T1 and 85 m at Sunset, 50 m at the Hairpin) using data from cars at HPDE pace, checked against published brake markers. The line now goes straight from throttle to brake, with no coasting in between. Version history and feedback contributors added.
- v1.0 · 2026-10-01 — First version: estimated line, with speeds and braking from my own 1 Hz laps.
Feedback contributors
Drivers and instructors whose feedback has improved this line. Thank you.
- Mike M — braking points too early; no coasting between throttle and brake (v1.1)