Watkins Glen — Race Line
Estimated from data not in trackdays.ai. The speeds and braking points come from cars lapping at a typical quick HPDE pace, checked against published brake markers. If you have data you would like to contribute, please send it to upload@trackdays.ai to help improve our estimates. Long course, with the Boot and the Bus Stop. Turn numbers are Chin's (provisional); the Bus Stop has none.
Heads up: This is an estimate of a typical quick HPDE line, not any one car's lap. Braking points are a starting point, not a target: start a little earlier and work later in small steps. The line goes straight from throttle to brake; amber only marks where you really lift or hold part throttle. Turn numbers follow Chin's map and are provisional, and the Bus Stop's three dots carry no number. The LiDAR corner survey traced the middle of the road, so its camber figures describe the centre of the track rather than the racing line.
- Throttle
- Coast / partial
- Braking
- Apex
- T4Off-camber corner
Arrows show the direction of the lap. The grey basemap is USGS LiDAR: dark = asphalt, light = grass. Tap any map for the full-size image.
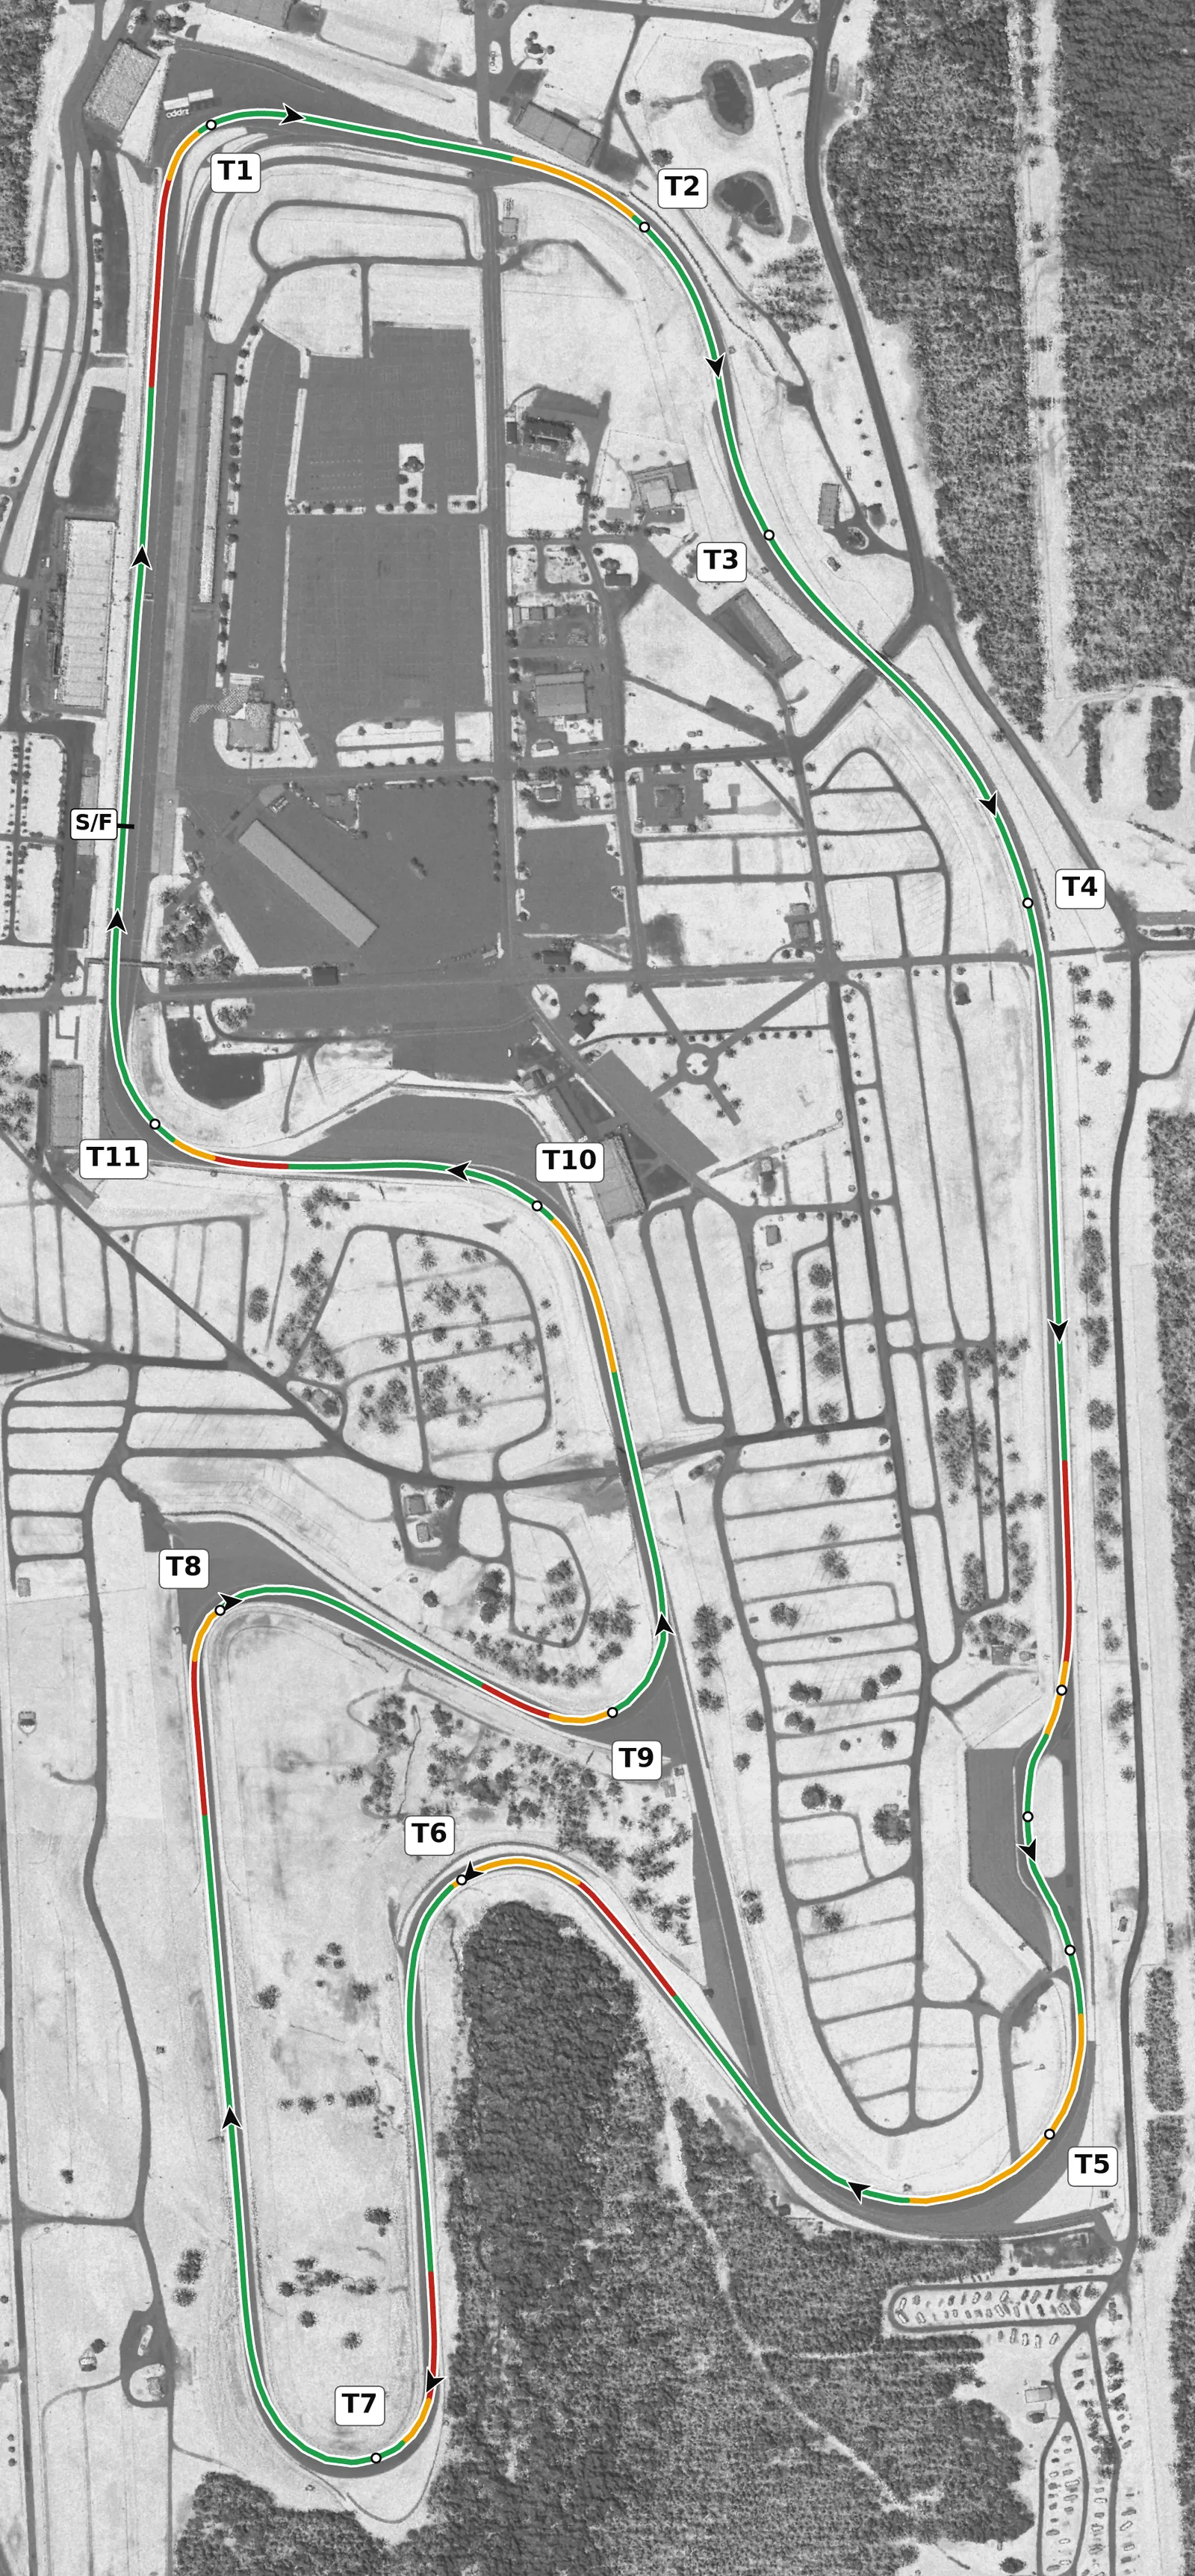
Watkins Glen is fast and heavily banked: most of its corners measure 6–10% of camber, which is why the Esses, the Outer Loop and T11 can be taken much faster than they look. Lap time comes from a clean exit from T1, which sets your speed through the Esses and down the back straight, and from patience in the long corners of the Boot; the braking zones for T1, T6 and T8 run downhill, so brake earlier than flat-ground instinct says. Barriers sit close to the track in many places, so build your speed in steps and keep your hands smooth.
Sectors
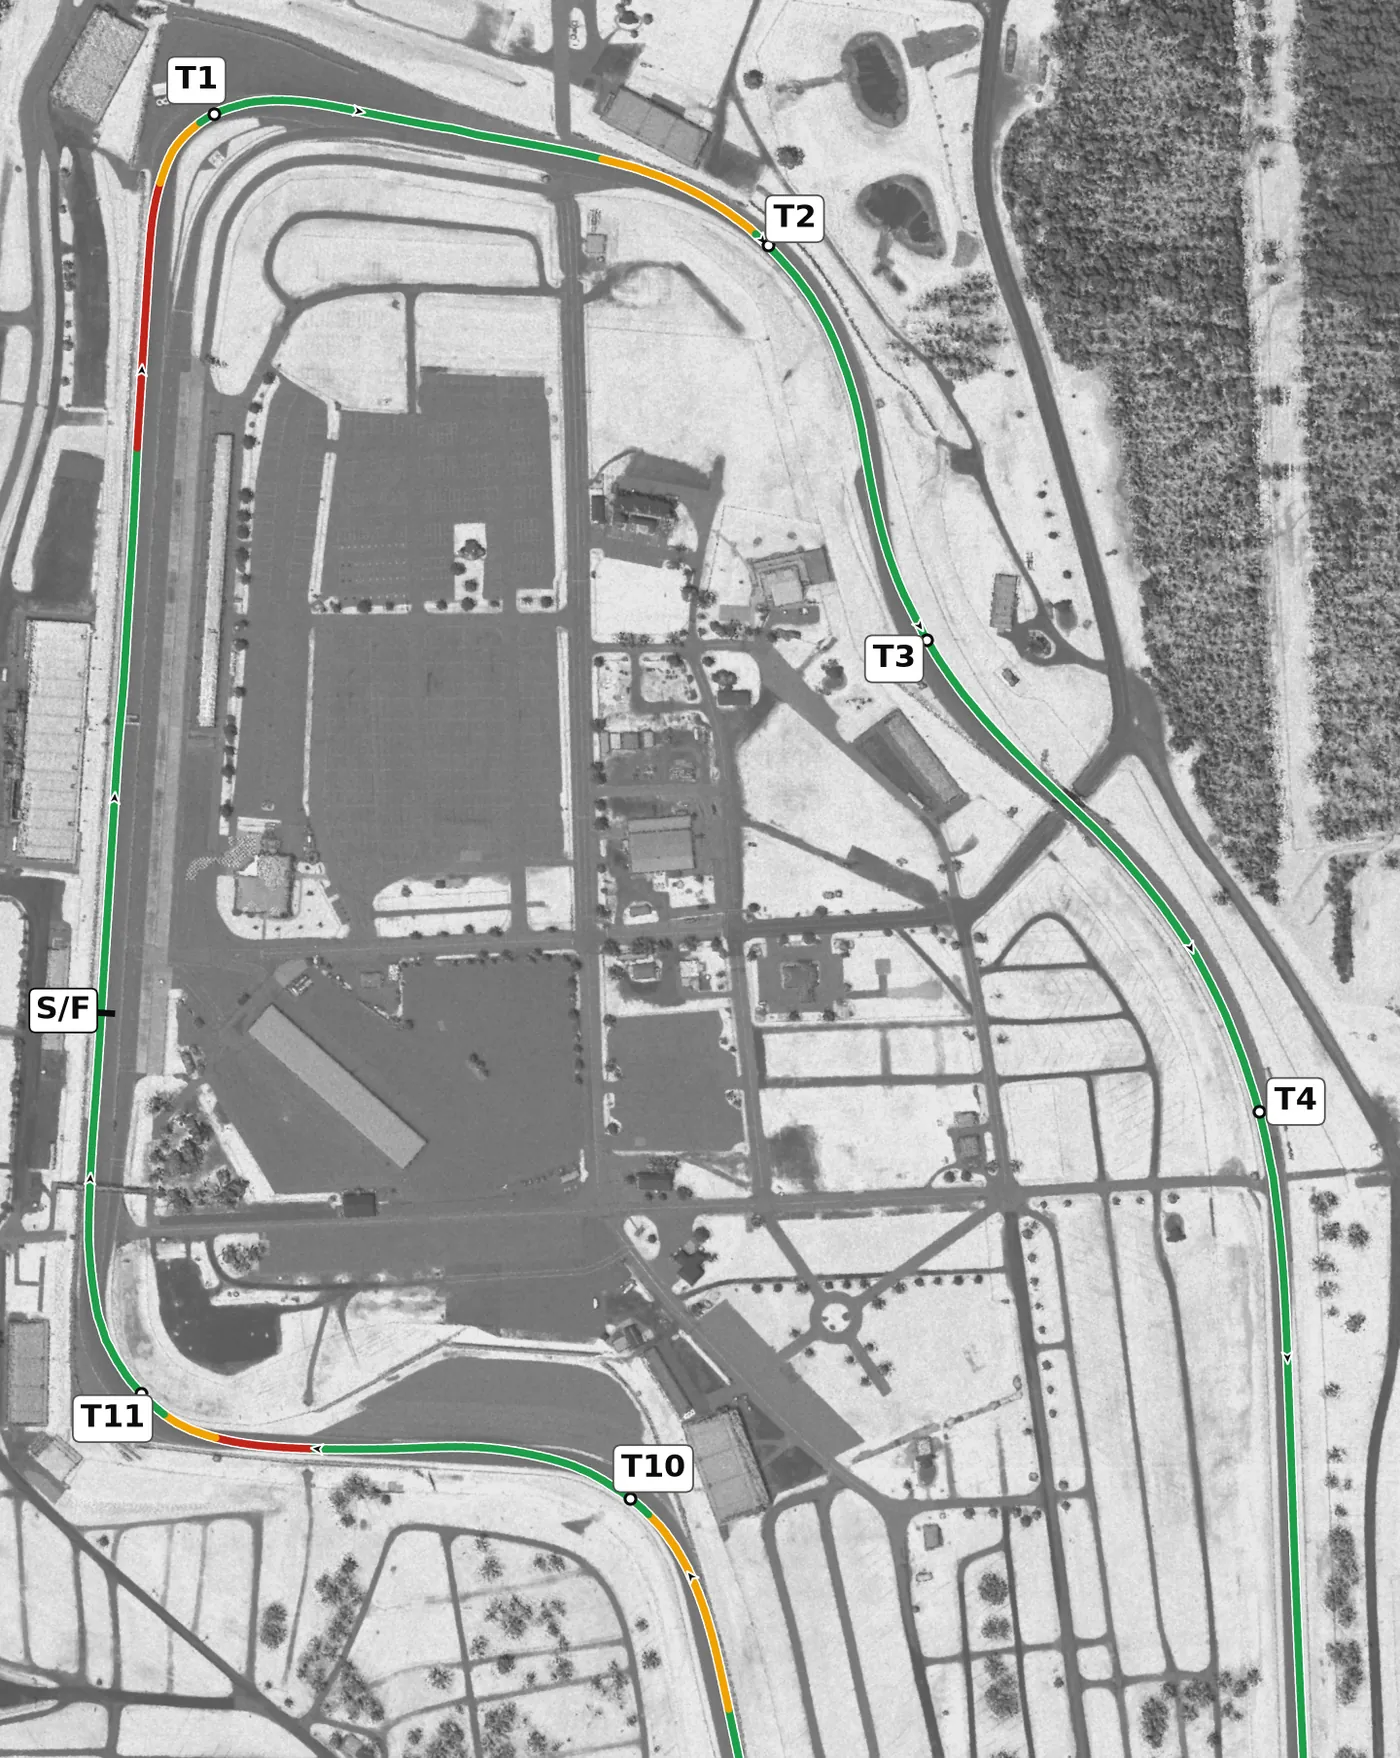
Brake early and in a straight line down the hill into T1, a banked right that keeps falling away, then turn in a touch early and take a late apex so you are on the power for the Esses. T2, T3 and T4 are fast, banked and climbing: look well ahead, keep your hands smooth, treat T2 as a lift until you know the car, and let the car run out to the left after T4 onto the back straight.
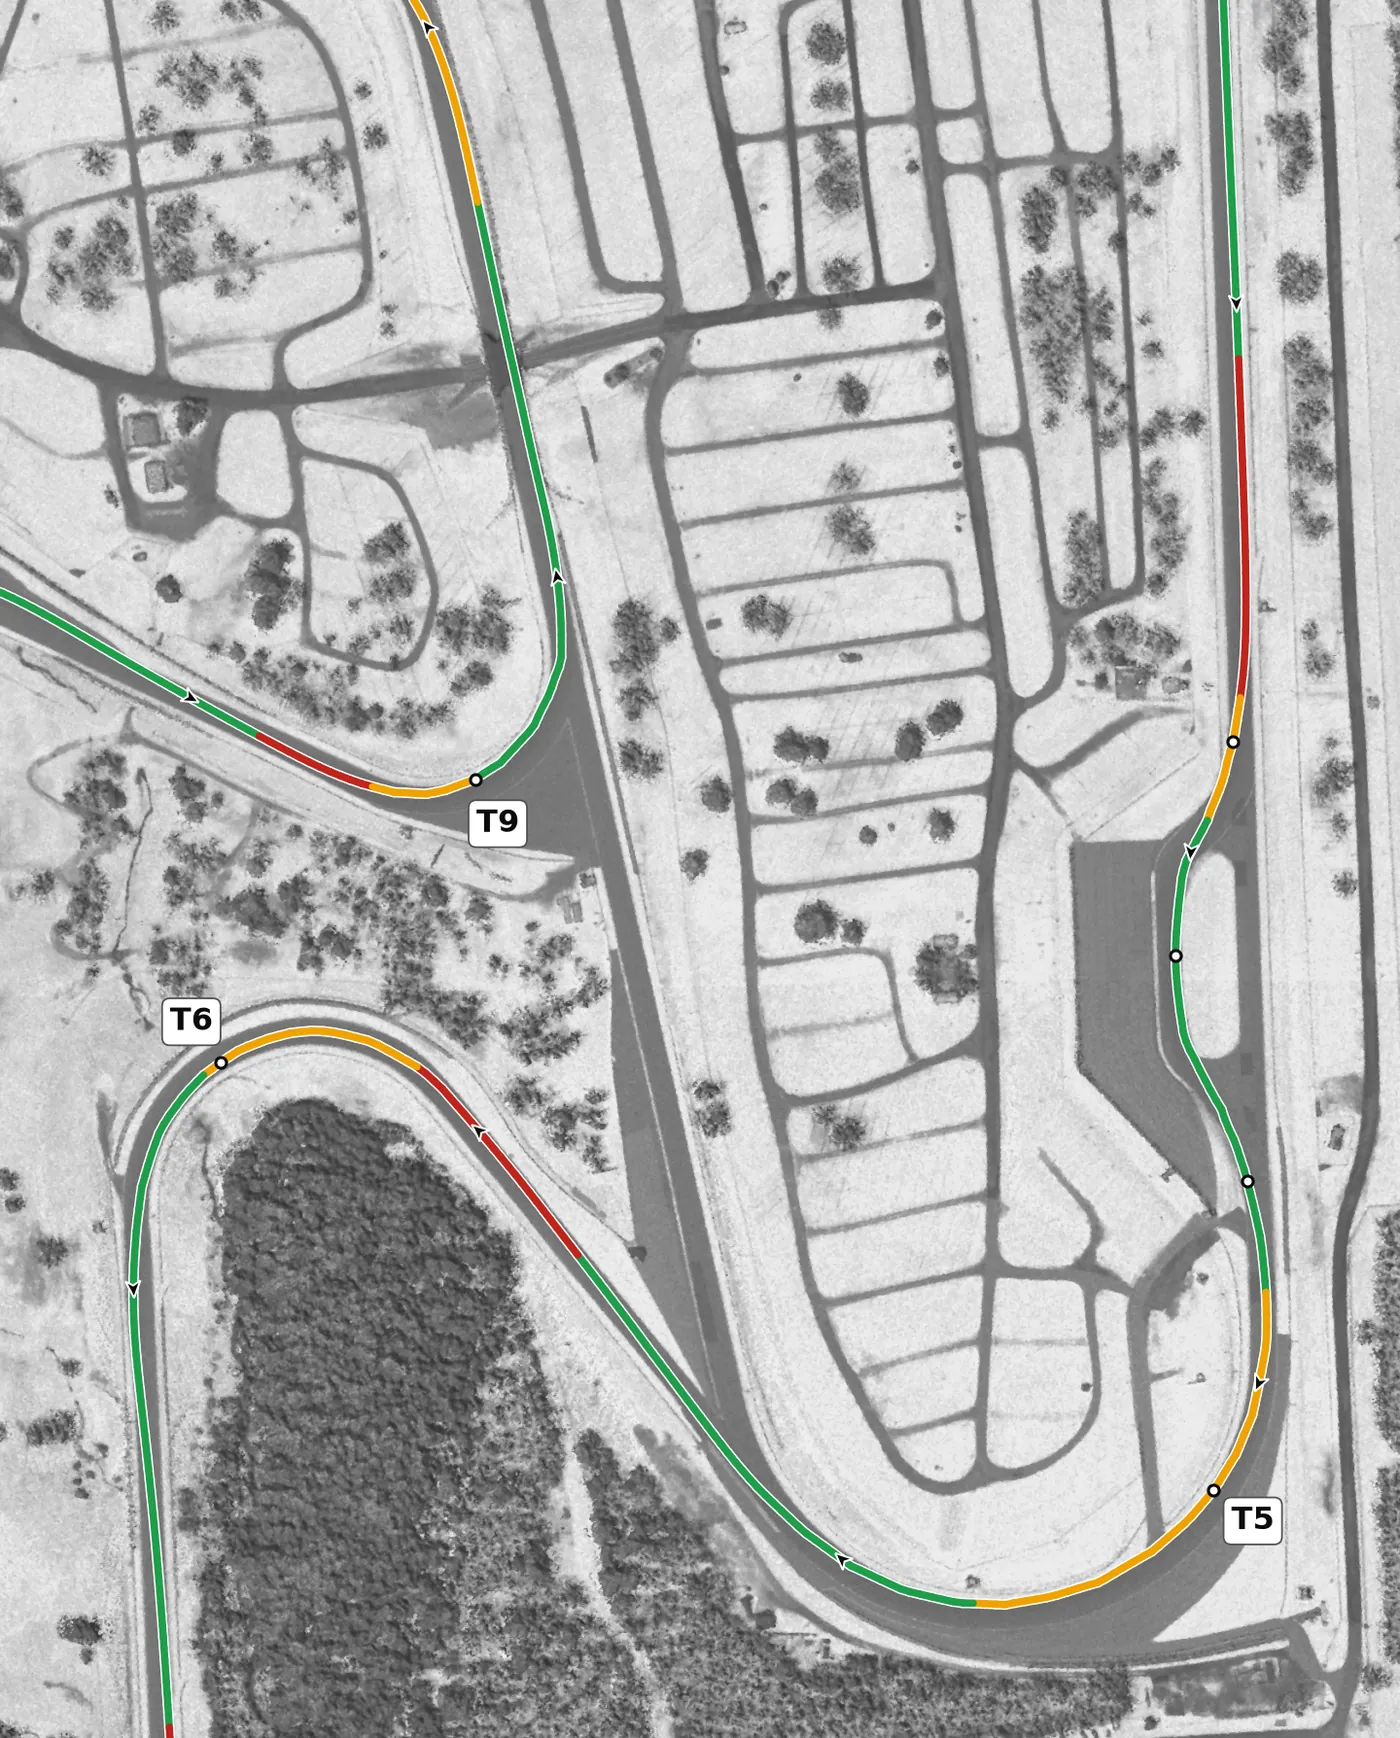
Brake hard at the end of the back straight for the Bus Stop, a right-left-right chicane on a gentle climb, and drive it with as few steering movements as you can, next to the curbs rather than over them. It feeds straight into the Outer Loop (T5), a long, heavily banked right over the top of the hill where you hug the inside and roll on the power, then the downhill Chute to the hard braking zone for T6, a blind downhill left into the Boot.
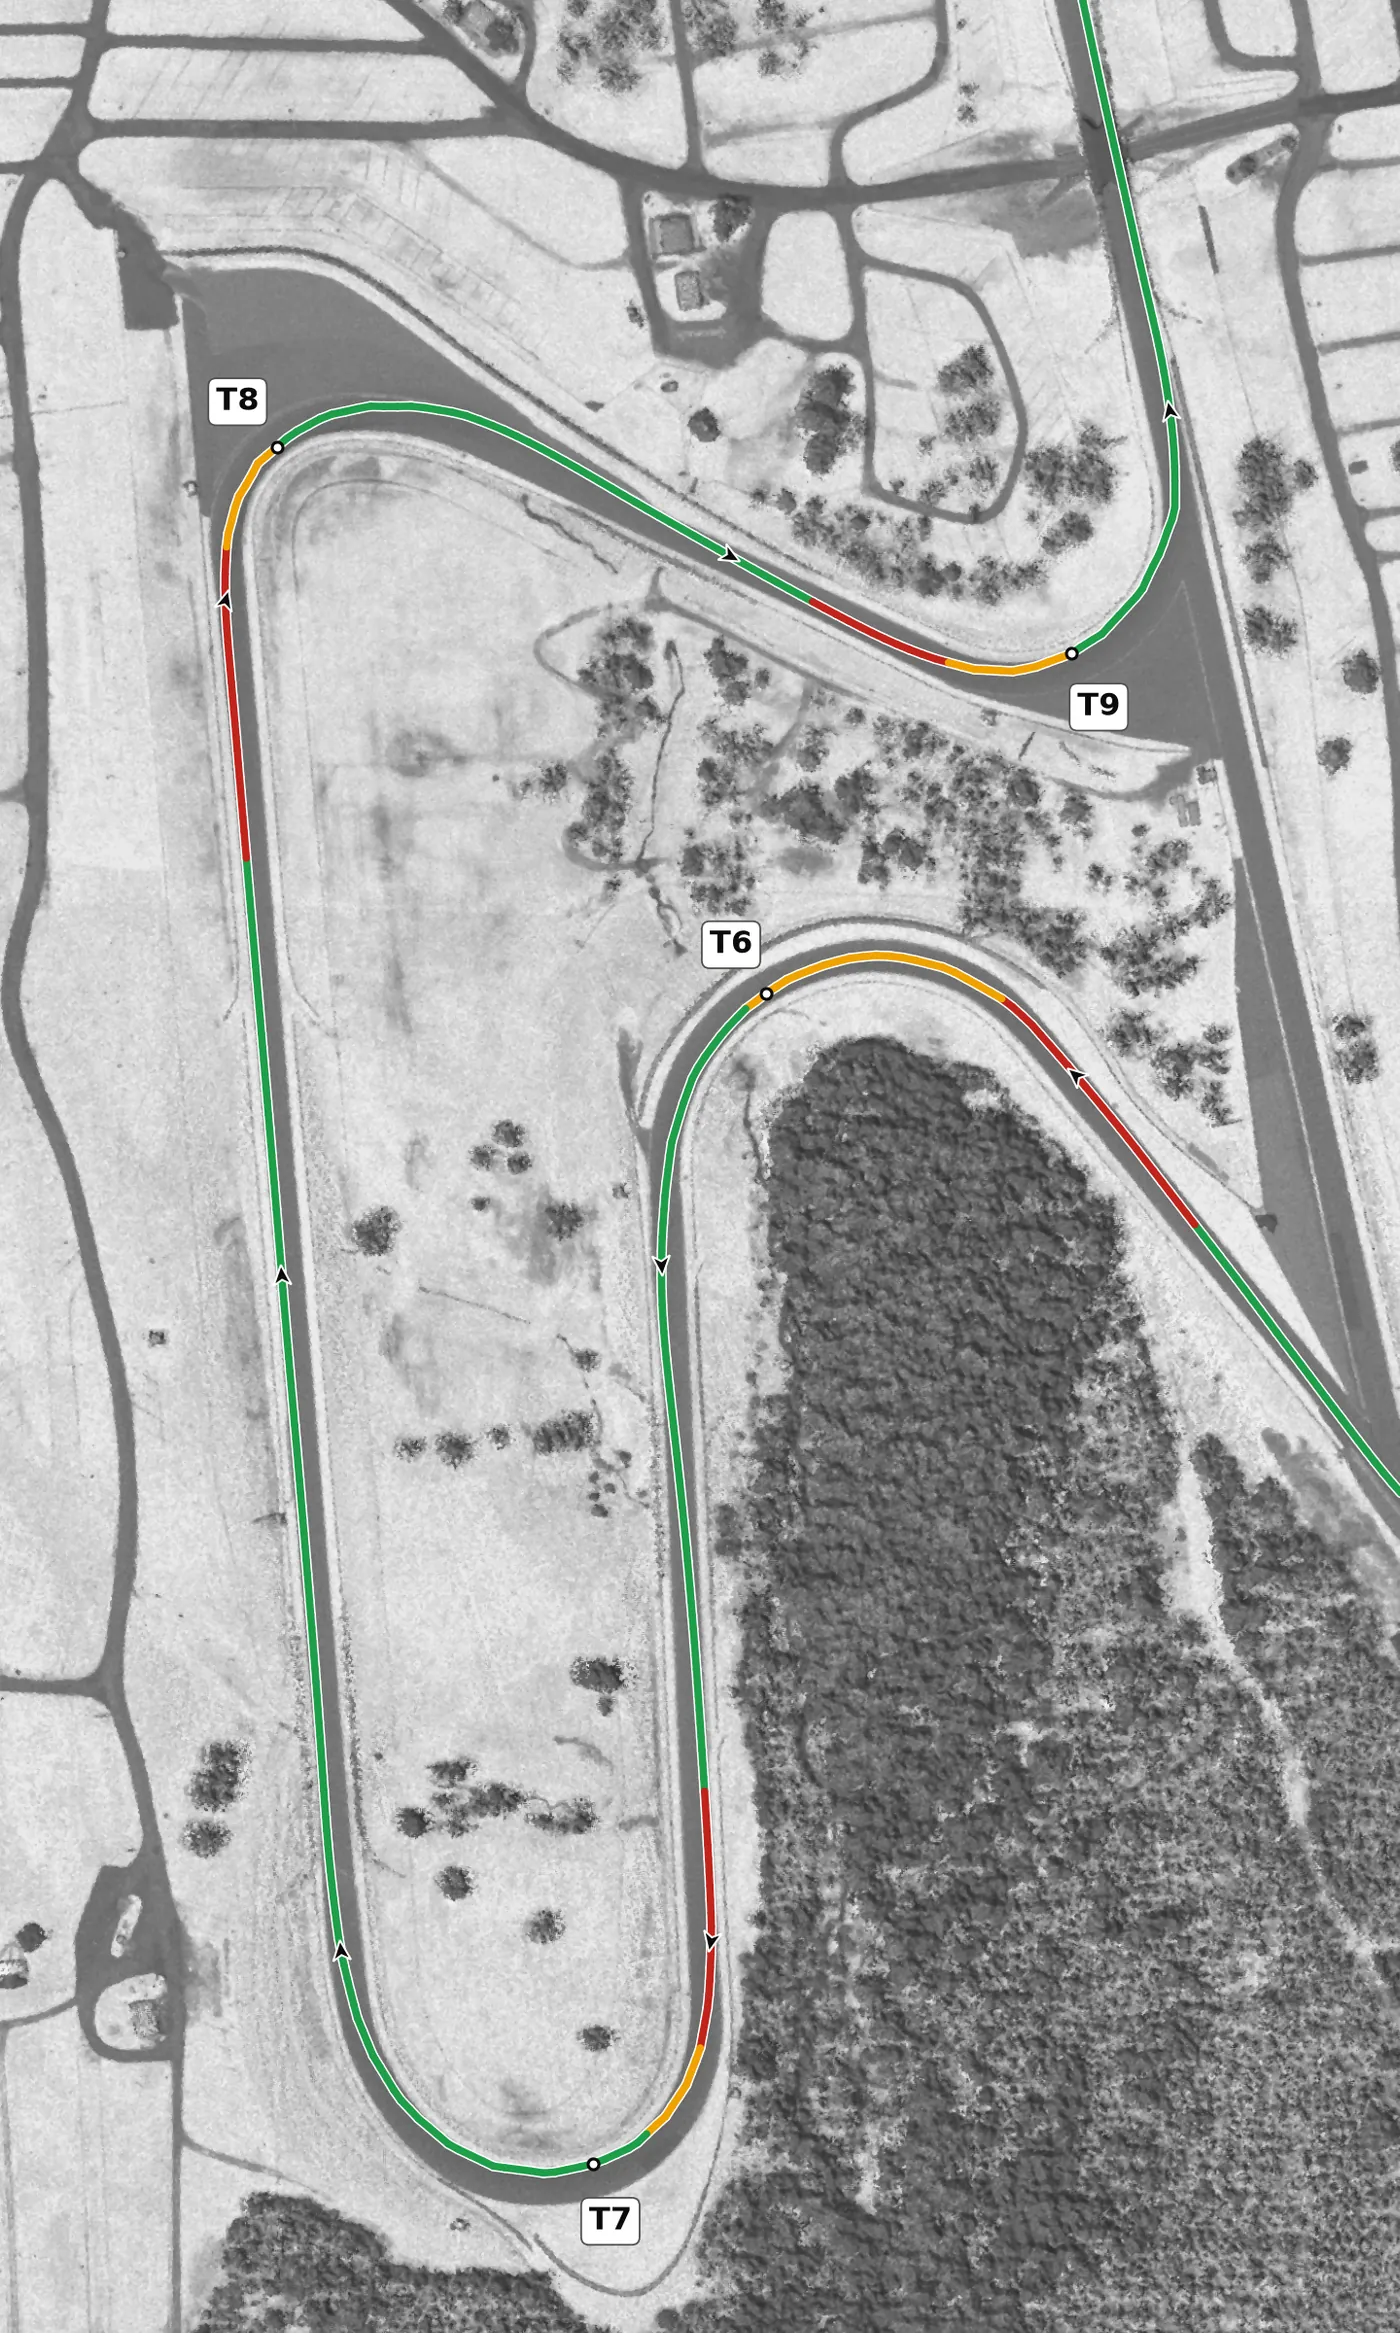
T7, the Toe, is a long uphill right at the bottom of the lap with a late apex, so be patient before you add power and let the banking hold the car. T8, the Heel, comes after a downhill, bumpy braking zone and is sharper than it looks, and T9 is a left that climbs to its apex with little room at the exit, so take late apexes in both and accelerate only once the car is straight enough.
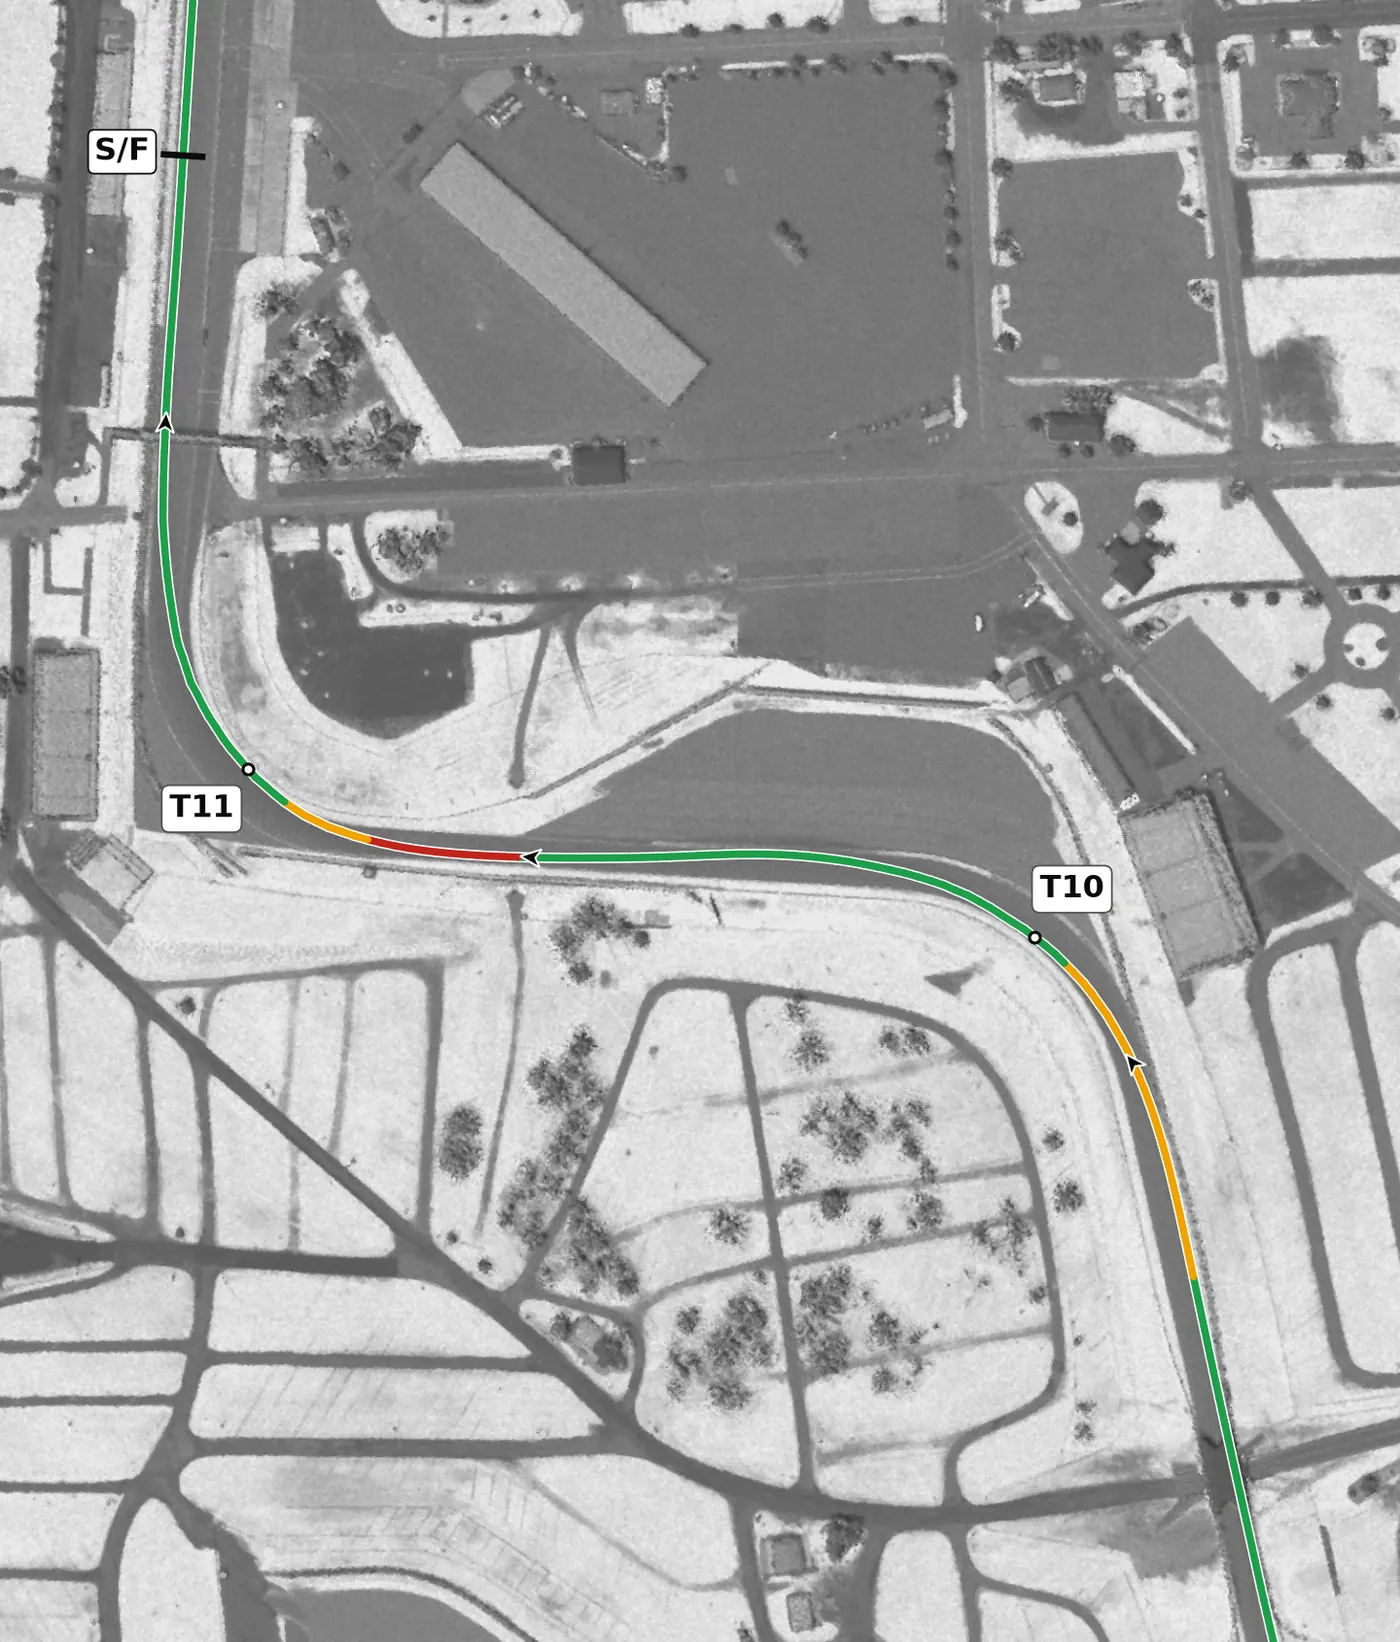
T10 is a fast, banked left that is easy to over-brake: lift or brake lightly in a straight line, turn in and use all the road on exit. T11 is a heavily banked right onto the front straight, so start with a late apex and only move your turn-in earlier as your confidence grows.
Corners
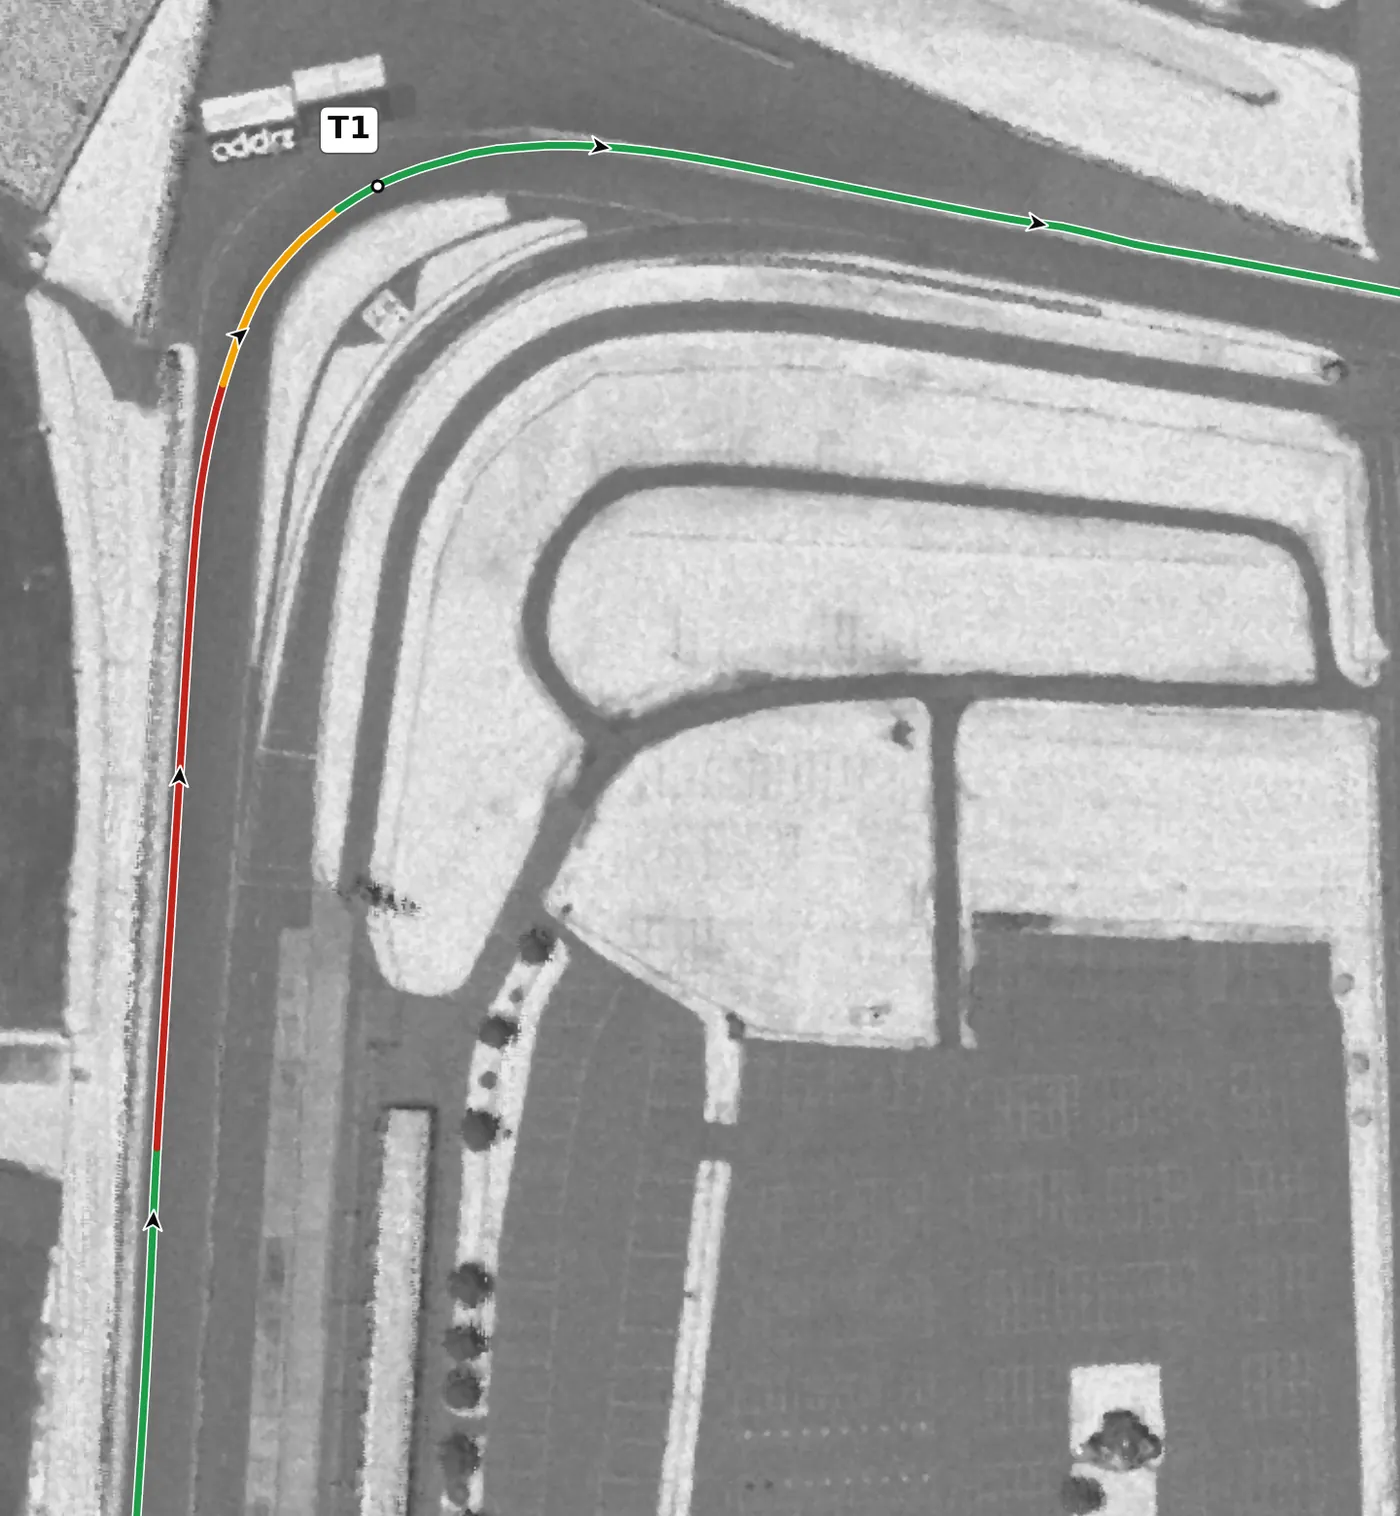
Brake earlier than you think, because the braking zone runs downhill and the corner keeps falling away, and trail the brakes lightly toward the apex. The heavy banking lets you turn in slightly early from the left and let the car settle onto a late apex, then track out to the left for T2. The mistake to avoid is turning in too early and too fast, then running out of road on a downhill exit.
From the survey: Banked +9.6% at the apex and downhill at −4.7%: it drops 8.3 m entry to exit.
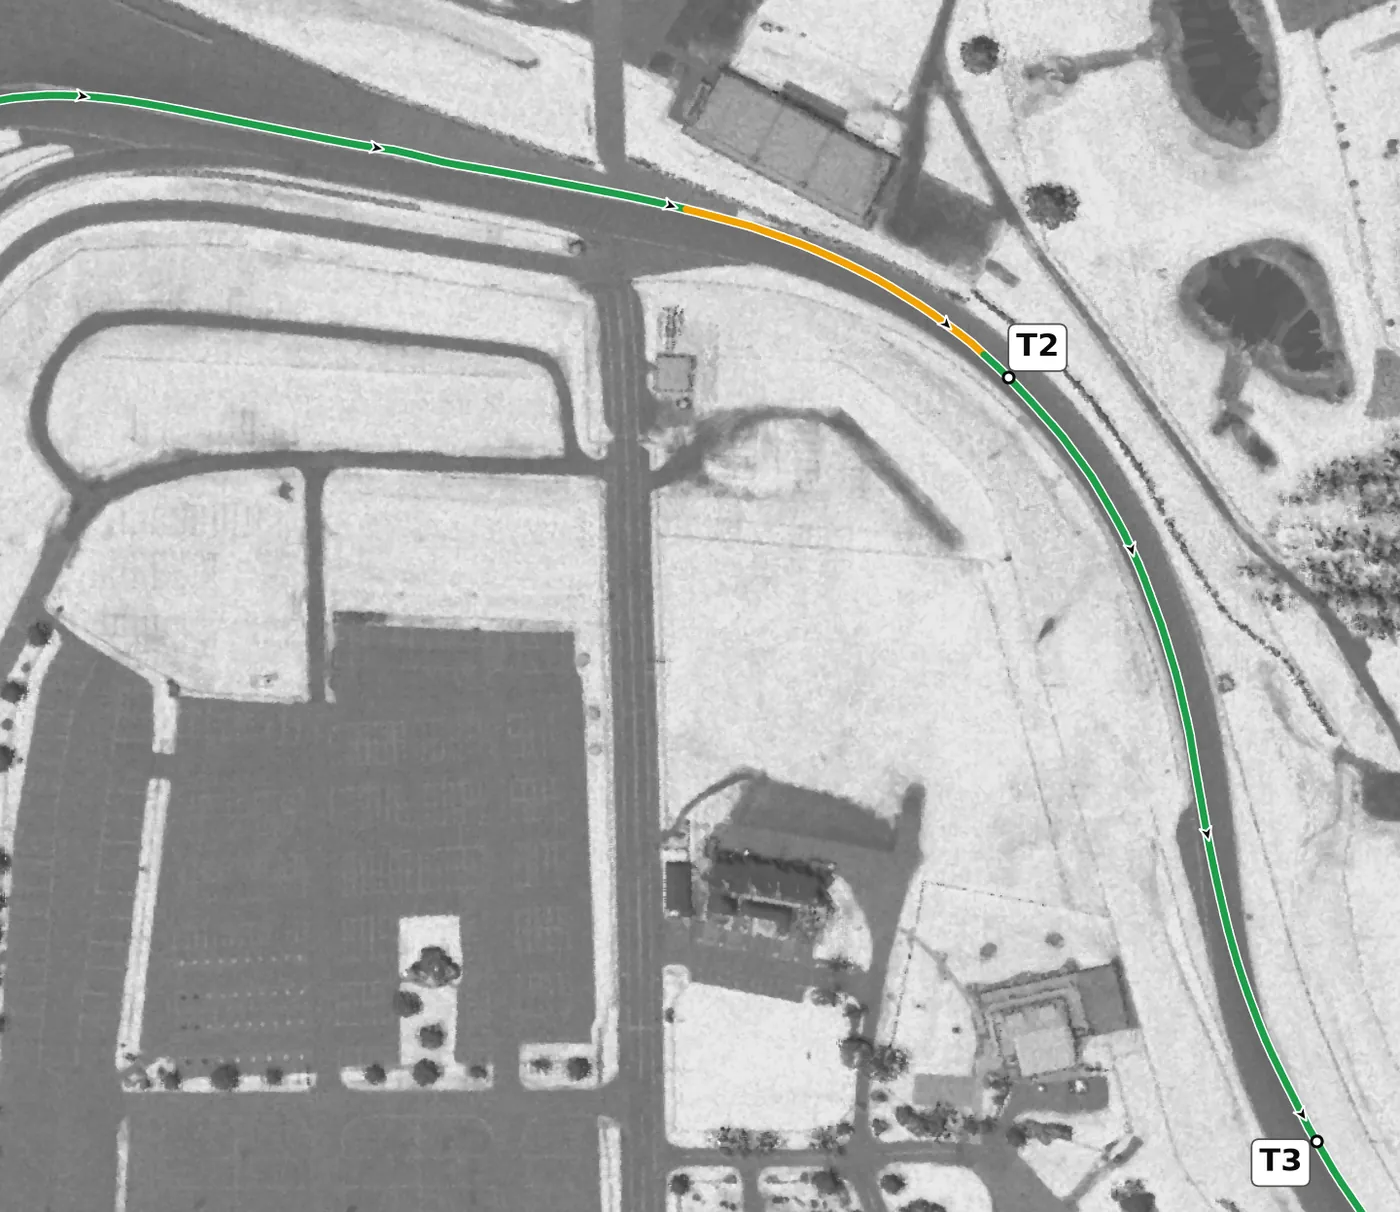
This fast right starts the Esses and is heavily banked, so in most cars it needs only a lift once you know it. Turn in from the left, take a short apex and finish on the right side of the track, because T3 turns left straight after; there is no need to track out. The mistake to avoid is running wide to the left on exit, which leaves you on the wrong side for T3.
From the survey: Banked +9.5% at the lowest point of the front half of the lap; from here it is uphill to the Bus Stop.
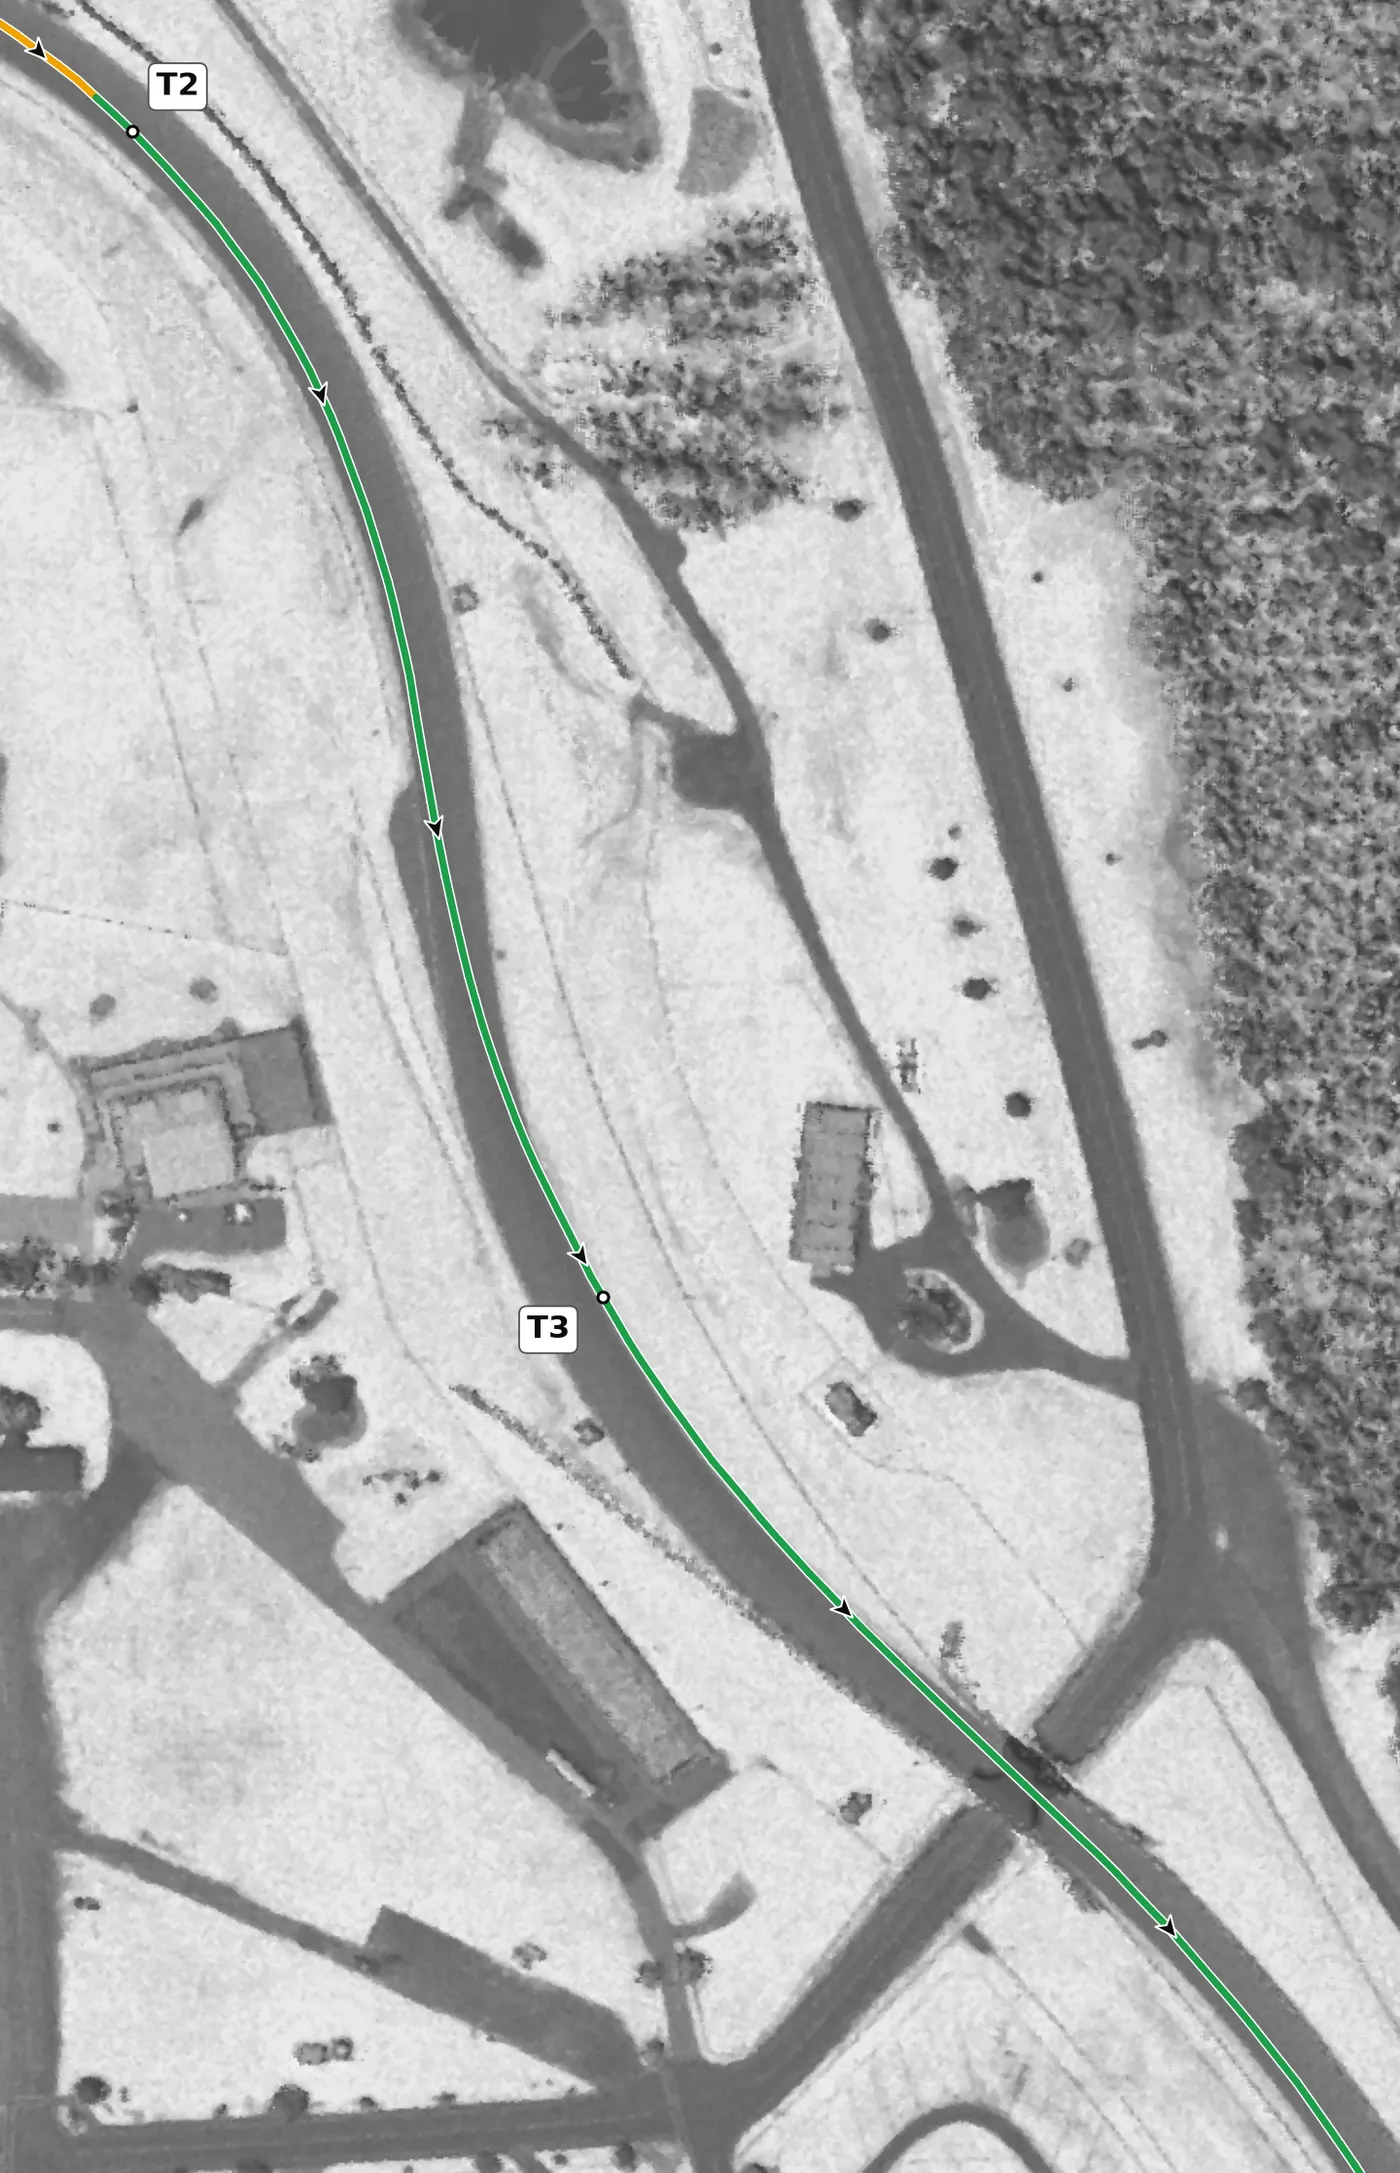
This blind left comes straight after T2 and is banked and climbing steeply, so both the hill and the camber help you. Change direction smoothly from T2, keep the throttle steady, and let the car drift out only as far as it needs before easing back to the left for T4. The mistake to avoid is a sudden steering input on the blind climb that unsettles the car.
From the survey: Banked +8.1% while climbing at +6.3%, the steepest apex grade on the lap.
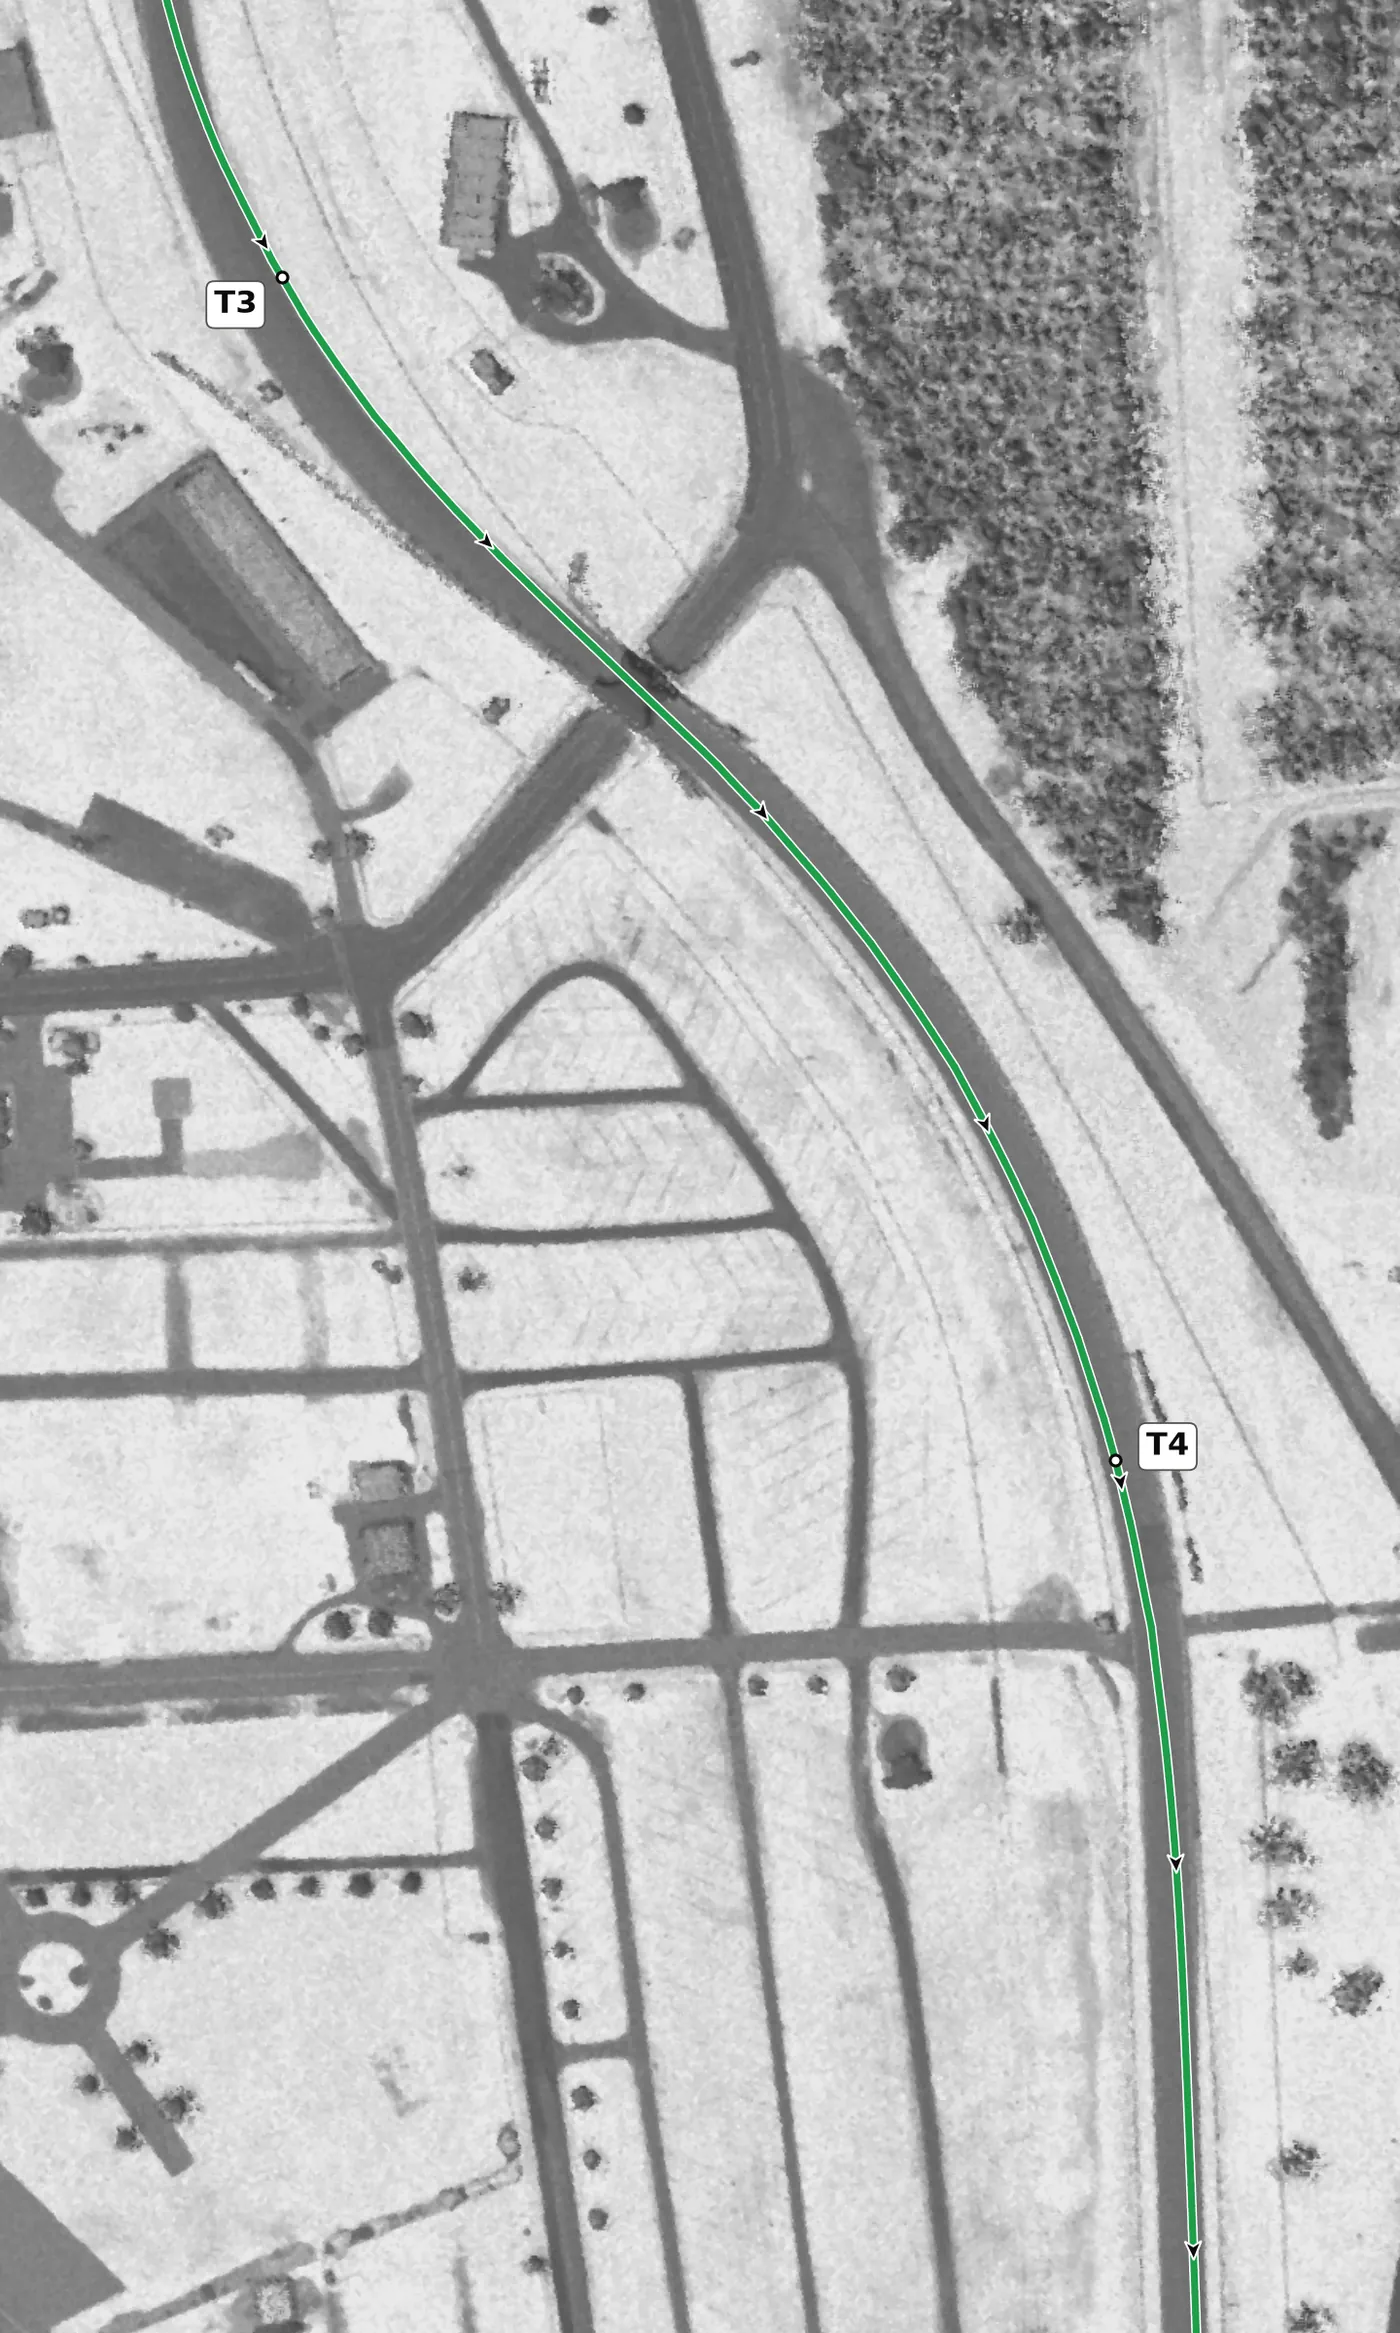
The last of the Esses is an uphill right that opens onto the back straight, so a clean exit is worth more than entry speed. Take a late apex and let the car unwind out toward the left edge rather than pinching it, remembering that the hill flattens here and gives the car less help on exit. The mistake to avoid is holding the car tight at the apex and scrubbing speed all the way down the straight.
From the survey: Banked +6.7%; the climb eases to +1.5% here.
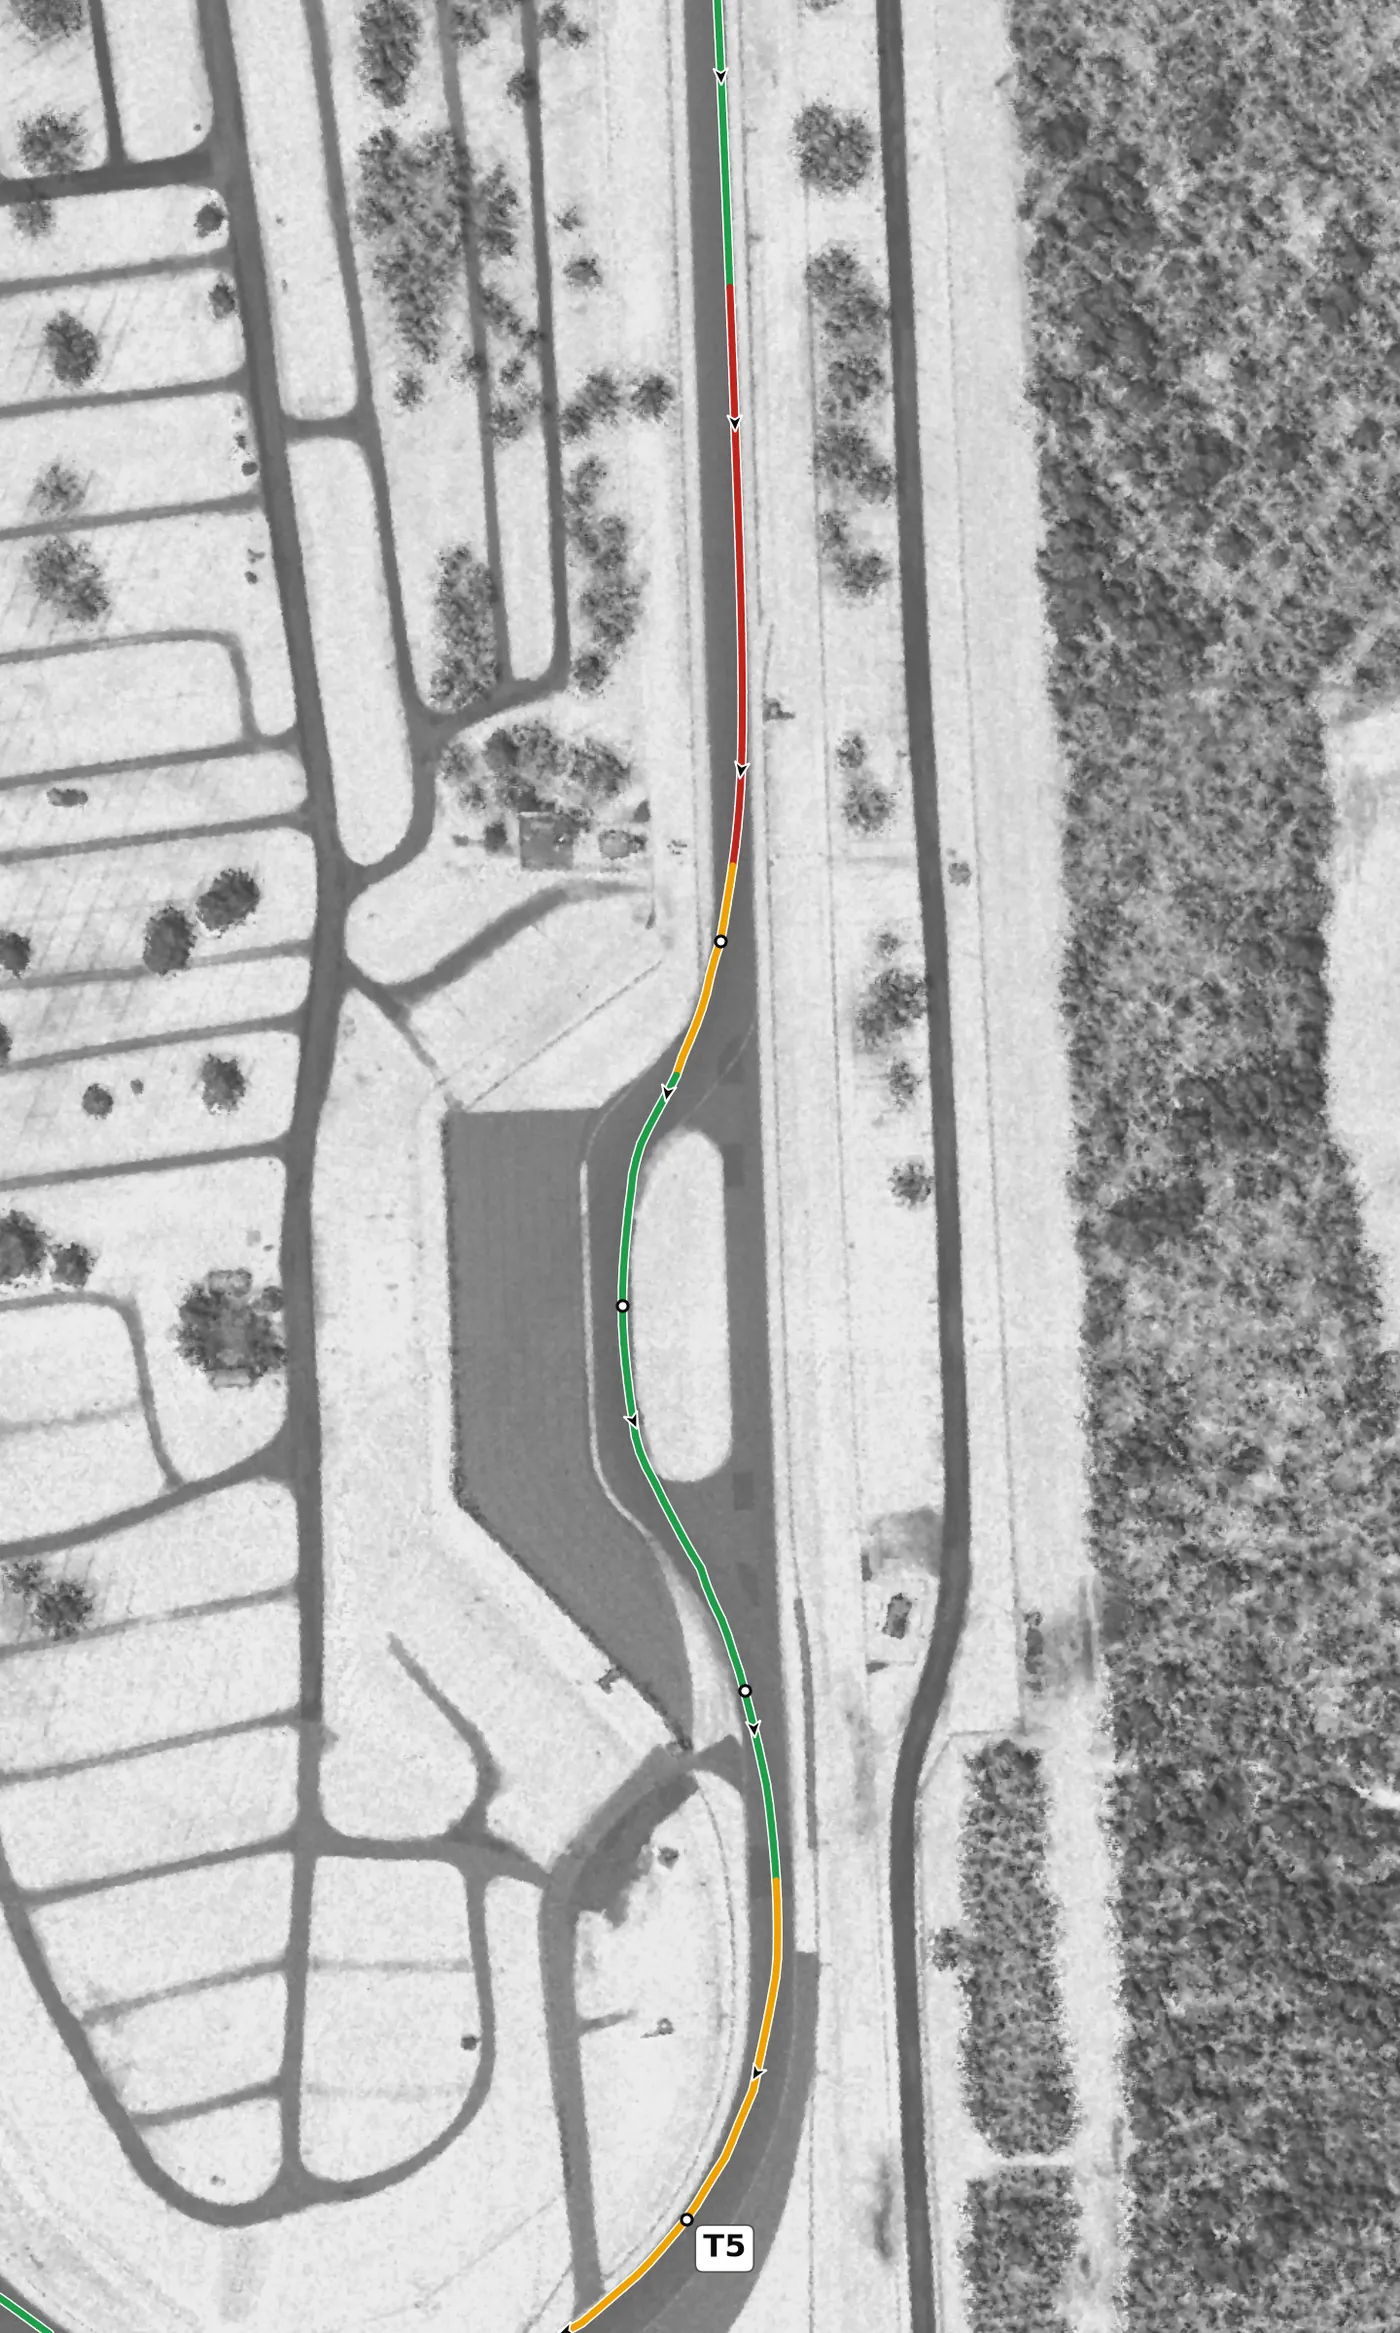
Brake hard and straight at the end of the back straight; the braking zone climbs slightly, which helps the car stop. Drive the right-left-right with as few steering movements as you can, beside the curbs rather than on them, and make the last right put you in place for the Outer Loop (T5). The mistake to avoid is attacking the first apex too fast: it is flat and unbanked and gives you no extra grip.
From the survey: Climbs about 4.5 m through the chicane; its first apex is the only unbanked one on the lap (−0.4%), and its exit is the highest point of the circuit.
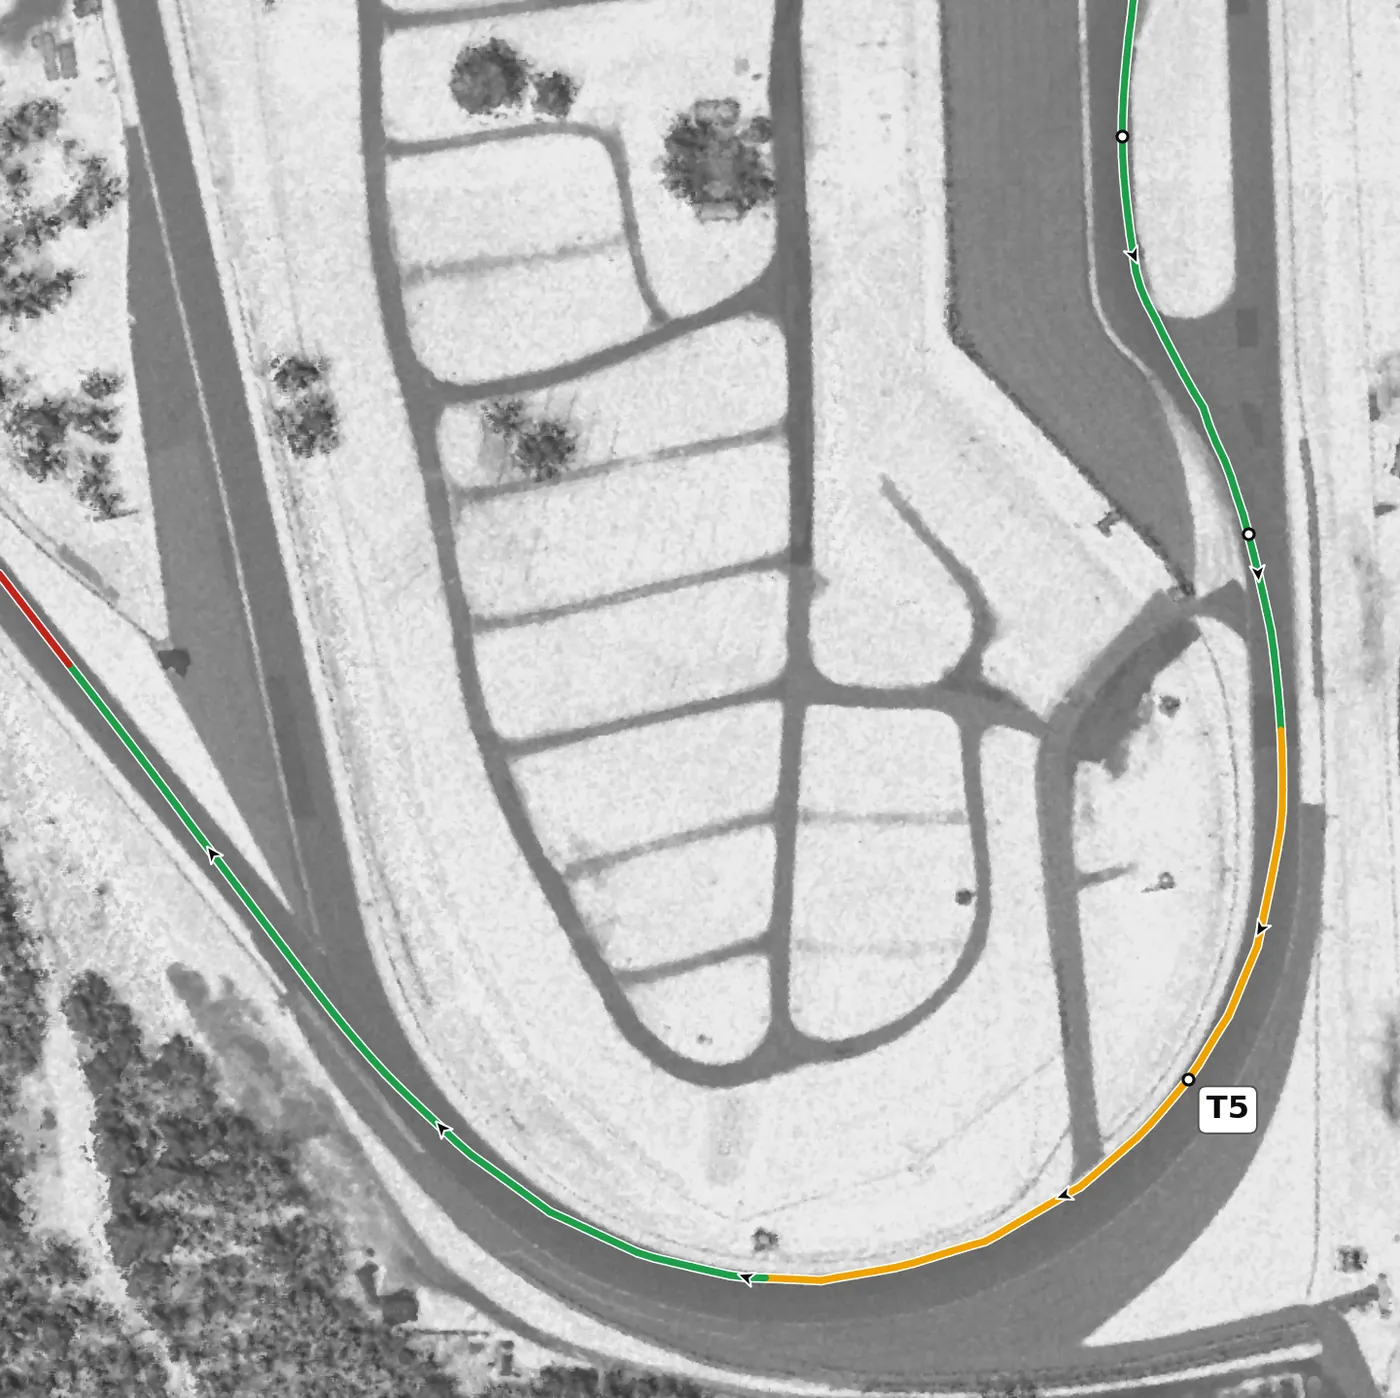
This long right comes straight out of the Bus Stop and is one of the most heavily banked corners on the lap, so stay patient, use slow hands and hug the inside rather than taking an early apex. Roll on to full power by the late apex and use the whole exit, but expect the car to go lighter as it crests and the road starts to drop toward the Chute. The mistake to avoid is adding steering or throttle abruptly over that crest.
From the survey: Banked +9.8%; it crests the top of the circuit, then falls 11.1 m from apex to exit.
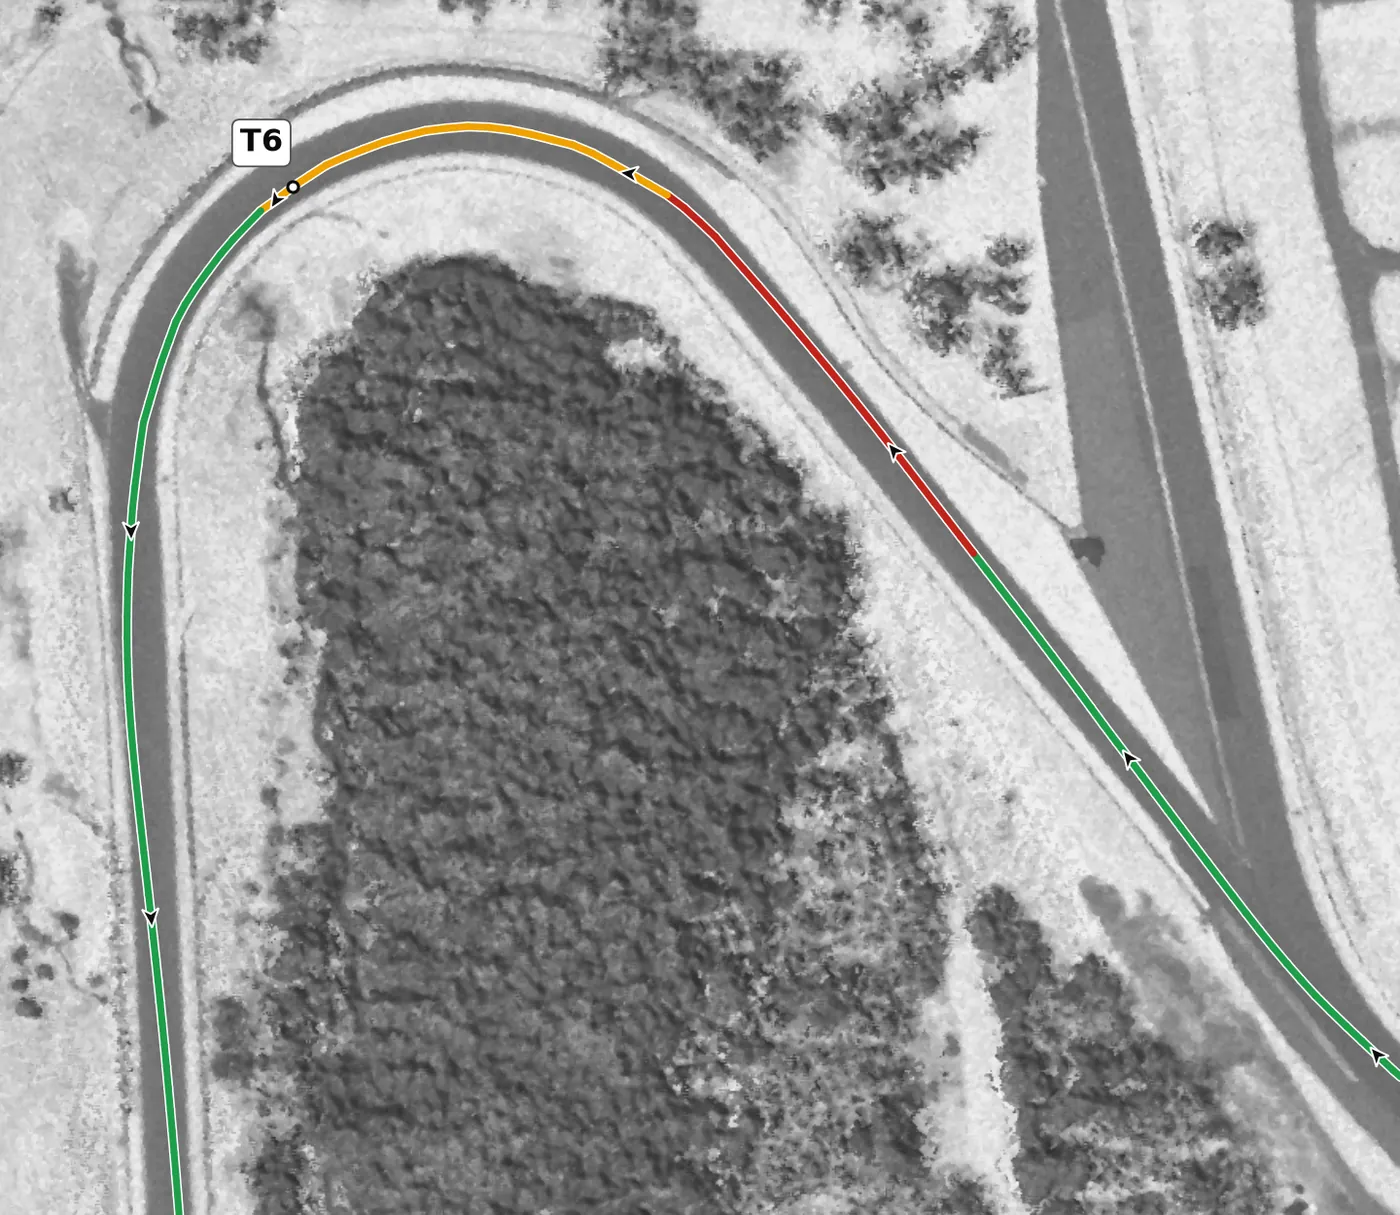
The braking zone runs steeply downhill, so brake earlier and harder than you think and finish most of it in a straight line before the blind turn-in. Trail off the brakes gently into this long left, hug the inside until you can see the exit, and then let the car run out toward the right. The mistake to avoid is a late, deep entry: the corner keeps falling away and there is no curb at the apex or exit to catch you.
From the survey: The steepest downhill apex on the lap (−6.6%), banked +8.6%, dropping 16.2 m through the corner.
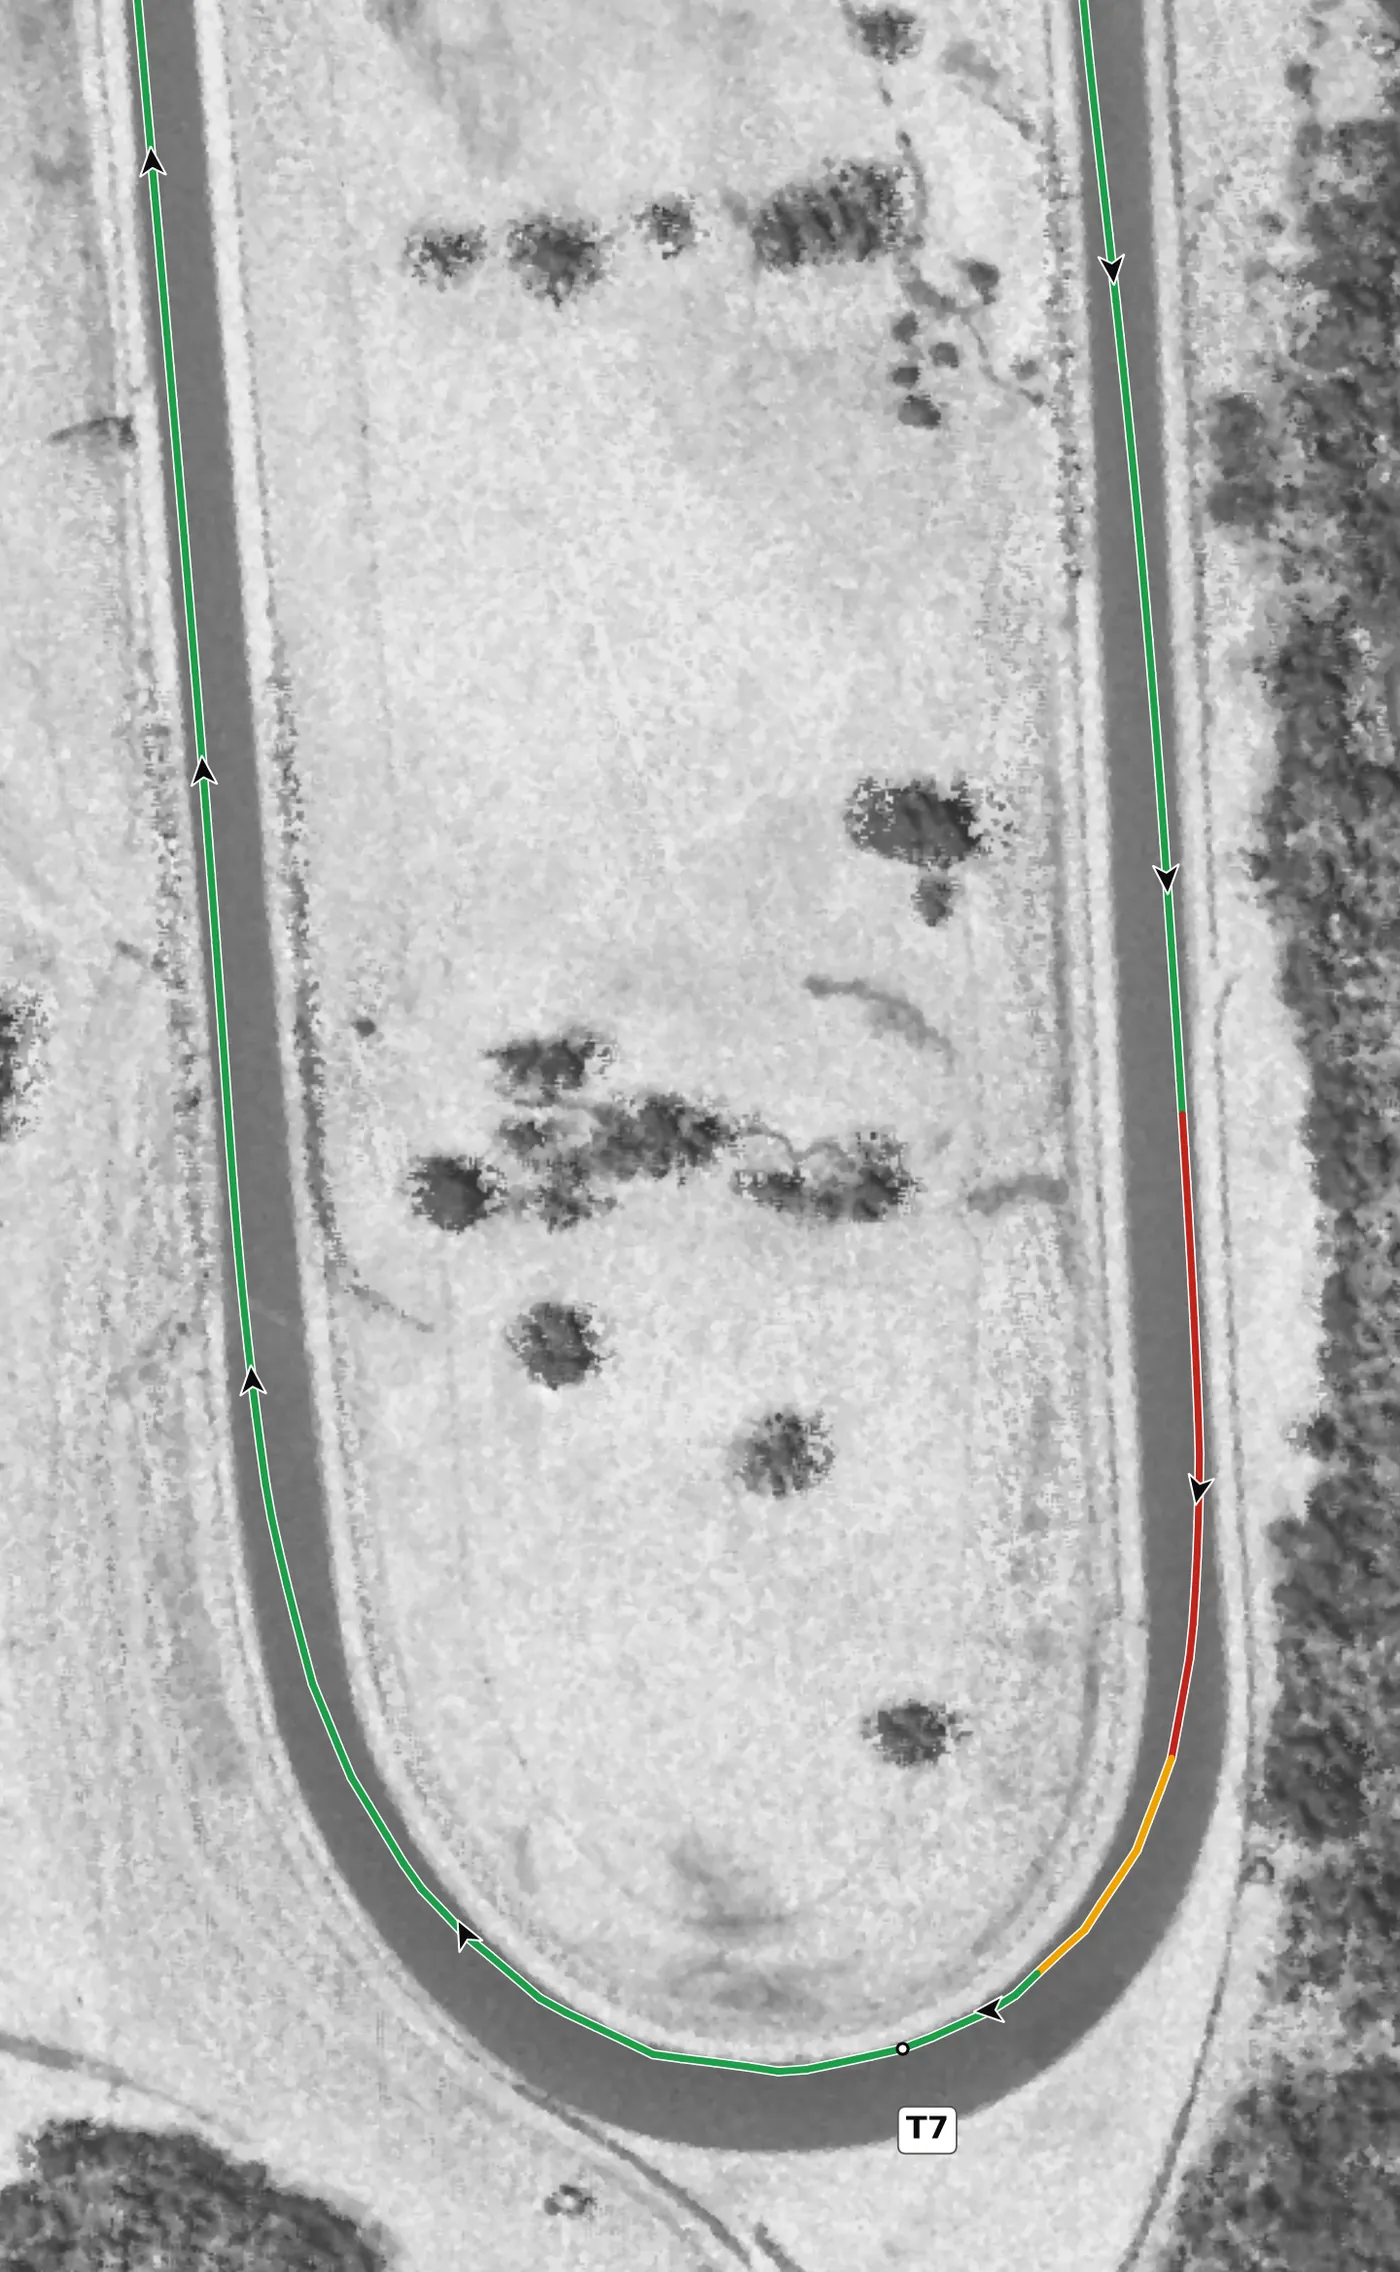
This long uphill right at the far end of the Boot is the most banked corner on the circuit, so you can turn in harder than you expect. The apex is late, so be patient through the middle, then get the power down early for the long climb out, remembering the exit can be slippery. The mistake to avoid is an early apex that has you lifting near the exit.
From the survey: The most banked apex on the lap (+10.2%), at the bottom of the lap; the exit climbs 13.1 m at +8.4%.
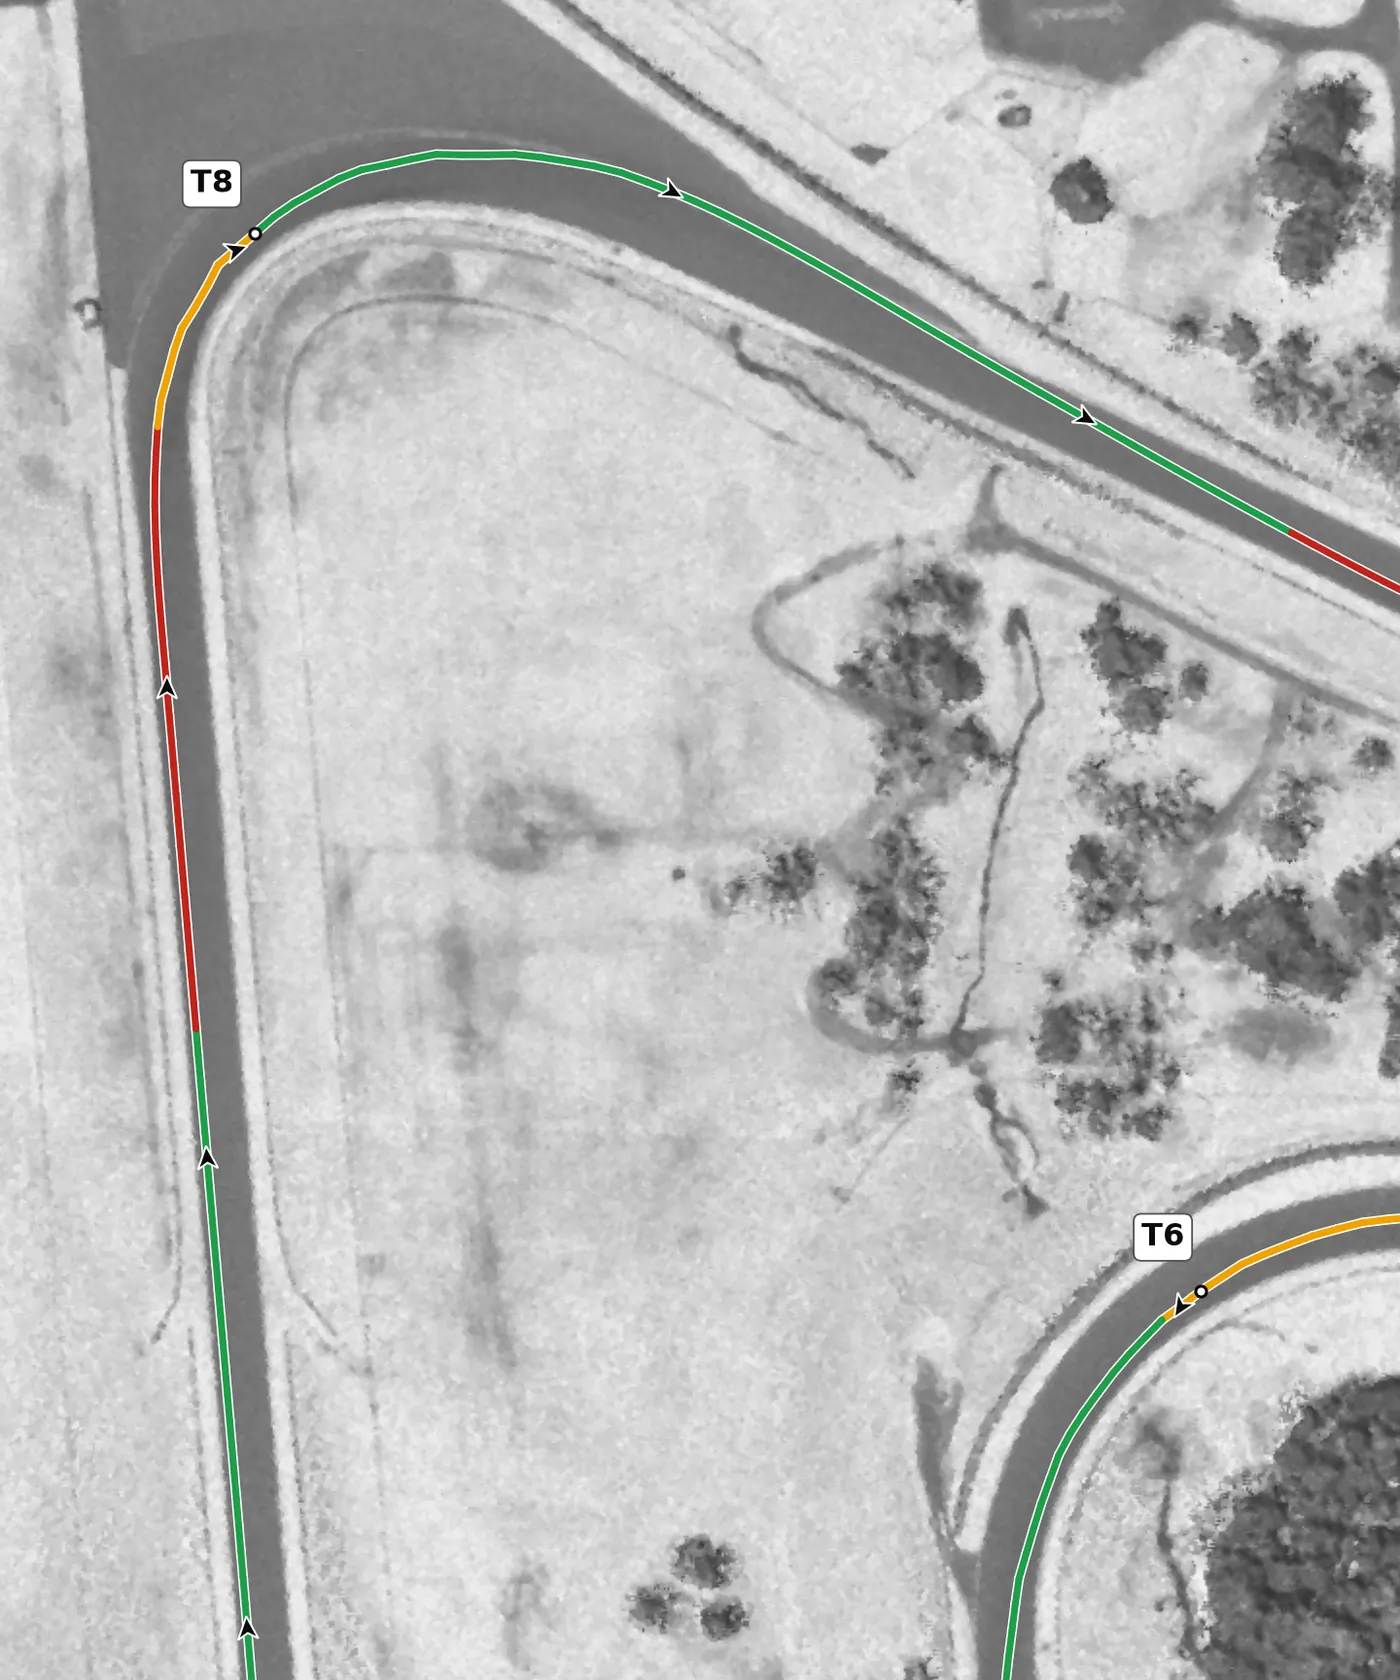
The braking zone runs downhill and is bumpy, so brake early and firmly, then ease off as you prepare to turn in. This right is sharper than it looks, so be patient for a late apex, run along the inside curb as you unwind, and then move across to the right for T9. The mistake to avoid is an early apex, which costs speed all the way to T9.
From the survey: Banked +9.1% and downhill (−2.8%), with 25 m of paved run-off on the left.
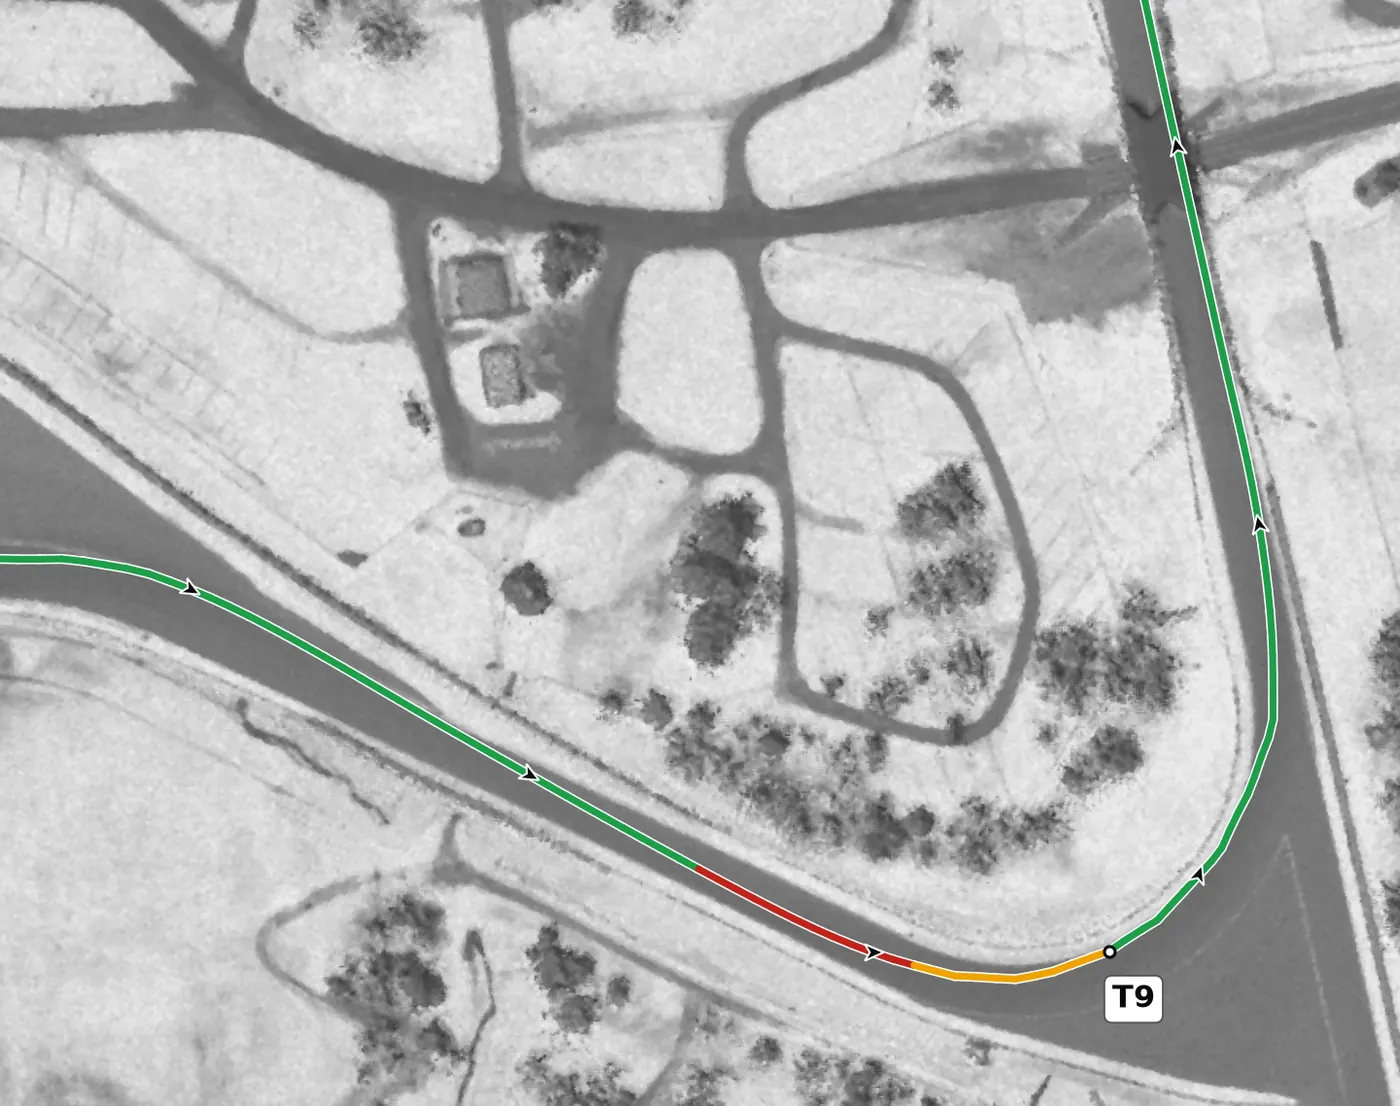
This left climbs to its apex and has much less banking than the corners before it, so get your braking done early, before the rise. Turn in patiently for a late apex, because there is very little room at the exit where it rejoins the short course. The mistake to avoid is turning in early and accelerating too hard, which runs you out of road on exit.
From the survey: Climbs 5 m into the apex at +3%; the least banked corner in the Boot (+3.7%).
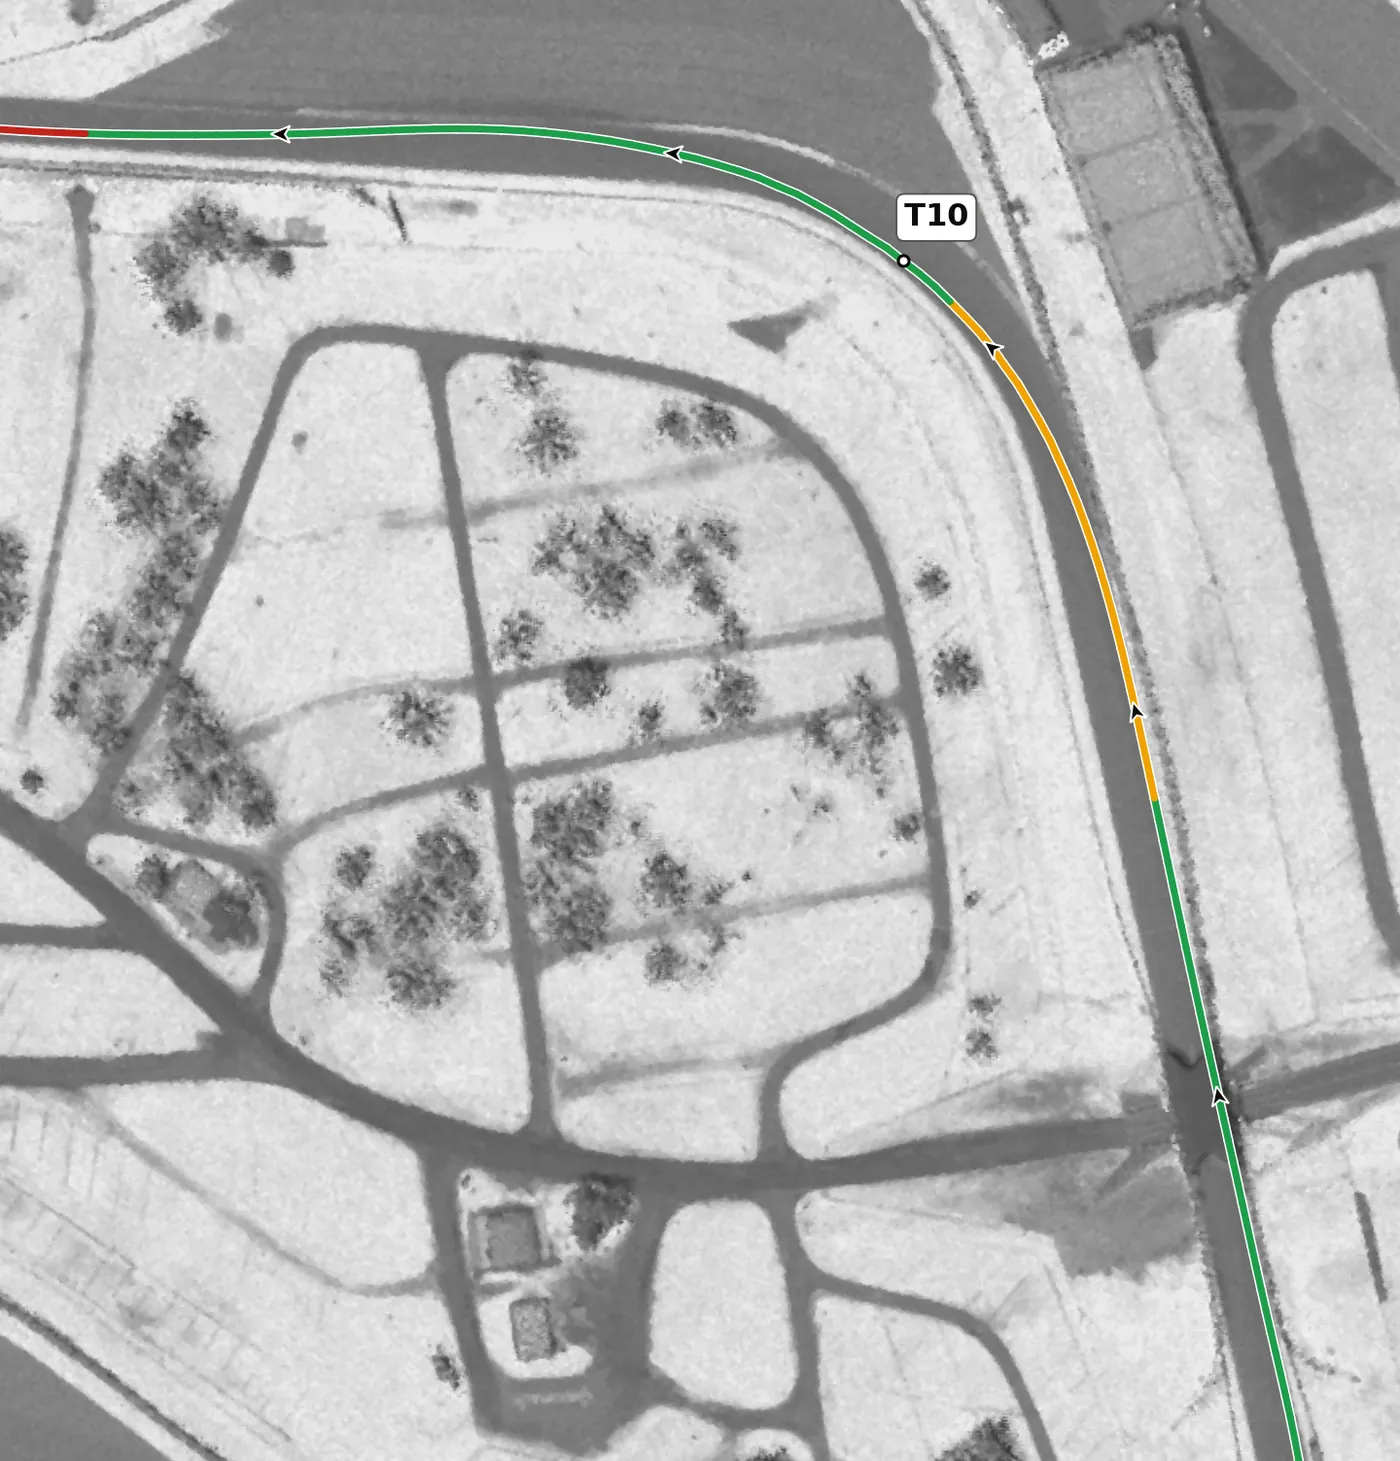
This fast left is much quicker than it looks: lift, or brake lightly in a straight line, before the turn-in, then let the banking hold the car. It is level and predictable, so commit to your line and use the whole track on exit. The mistake to avoid is braking too much or too long and then rushing the throttle.
From the survey: Banked +7.4% and almost level (+0.4%): plenty of camber and no gradient.
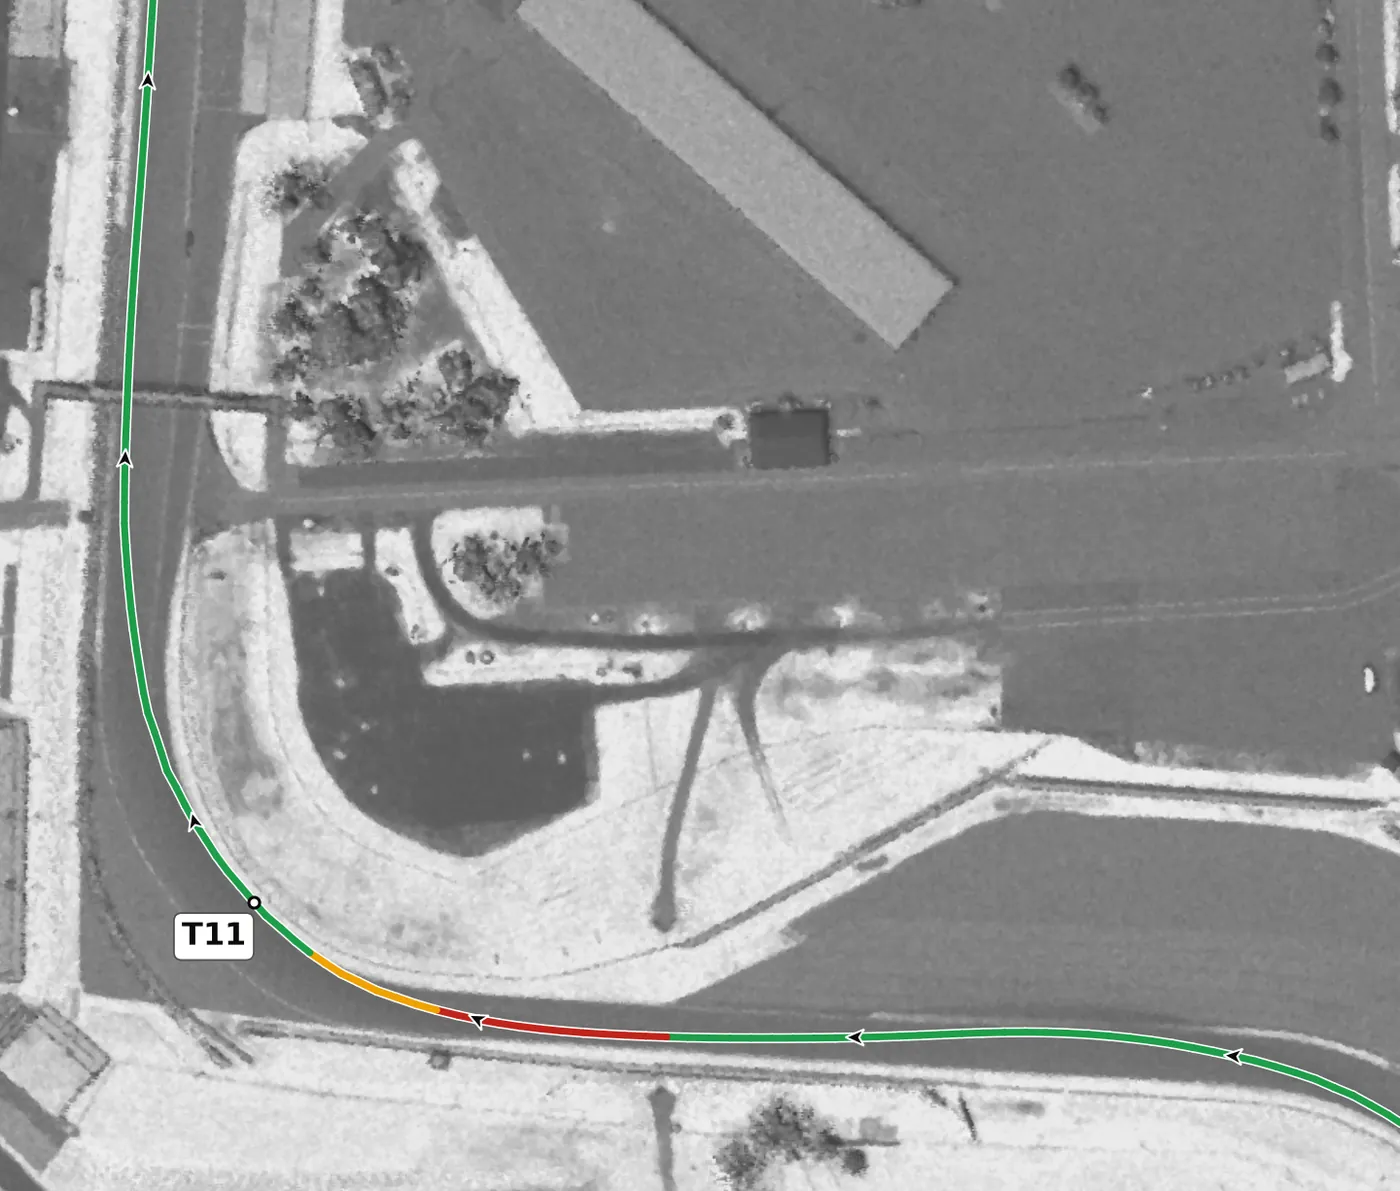
This right onto the front straight is heavily banked and much faster than it appears. Start with a late apex and move your turn-in earlier only lap by lap, keeping the steering smooth, because the banking can make the rear feel light just after turn-in. The mistake to avoid is an early apex that runs you wide on the exit onto the straight.
From the survey: Banked +10.2%, the joint-most on the lap, and gently downhill (−1.0%).
Version history
- v1.2 · 2026-10-01 — T2 and T7 are now drawn as throttle where the car is already gaining speed, instead of as a lift.
- v1.1 · 2026-10-01 — Speeds rebuilt from cars at a typical quick HPDE pace: about 35 km/h lower at the end of the straights and 10–15 km/h lower at corner minimums. Braking points were checked against published markers and moved by 15 m at most: T9 5 m and T11 10 m later, T1 5 m, the Bus Stop 10 m and T6 15 m earlier; T10 is now a lift rather than a brake. The line now goes straight from throttle to brake, with no coasting in between.
- v1.0 · 2026-10-01 — First version.
Feedback contributors
Drivers and instructors whose feedback has improved this line. Thank you.
- Mike M — no coasting between throttle and brake; braking points (v1.1)
- Brian L — corners where the car gains speed are throttle, not a lift (v1.2)